How to make snowflakes with glue gun

Snowflakes are a beautiful and delicate symbol of winter that make any space feel cozy and festive. While traditional paper snowflakes are always a classic choice, why not try making your own unique snowflakes using a glue gun? With a glue gun and a few simple materials, you can create dazzling snowflakes that will add a touch of winter wonderland to any room.
To get started, gather the materials you’ll need: a glue gun, glue sticks, wax paper, and scissors. Make sure your glue gun is plugged in and heating up, as you’ll need it to be at the right temperature before you can begin. Once your glue gun is ready, cut a piece of wax paper into a square or round shape. This will serve as the base for your snowflake.
Now it’s time to start creating your snowflake design! Using the glue gun, carefully apply the glue to the wax paper in a pattern that resembles the shape of a snowflake. You can create a simple and symmetrical snowflake, or get creative and experiment with different shapes and designs. Allow the glue to cool and harden completely before moving on to the next step.
Gather Your Materials
To make snowflakes with a glue gun, you will need a few materials. Here is a list of what you will need:
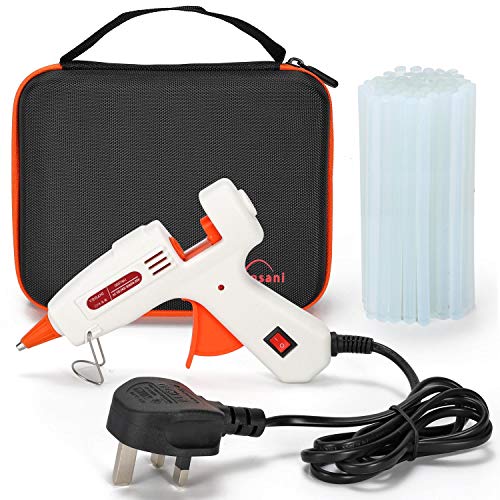
1. Glue gun
A glue gun is an essential tool for making snowflakes with glue. Make sure you have a glue gun that is in good working condition, with a supply of glue sticks.
2. Glue sticks
Glue sticks are the ammunition for your glue gun. Make sure you have enough glue sticks to complete your snowflake-making project.
3. Silicone baking mat or parchment paper
A silicone baking mat or a sheet of parchment paper will serve as your work surface. This will prevent the hot glue from sticking to your table or countertop.
4. Scissors
Scissors are necessary for cutting out the snowflake templates that you will glue over. Make sure they are sharp enough to cut through paper easily.
5. Snowflake templates or stencils
You will need snowflake templates or stencils to trace or cut out the snowflake shapes that you will be gluing over. You can find free printable snowflake templates online or create your own.
6. Optional: Glitter or other decorative materials
If you want to add some sparkle to your snowflakes, you can gather glitter or other decorative materials such as sequins or beads.
Once you have gathered all of your materials, you will be ready to start making snowflakes with a glue gun. Make sure you have a clear workspace and good ventilation, as the glue gun can produce fumes.
Preparing the Glue Gun
To create snowflakes with a glue gun, the first step is to prepare the glue gun itself. Make sure you have a glue gun and a pack of glue sticks on hand. Glue guns are readily available at most craft stores and online retailers.
Before using the glue gun, insert a glue stick into the back of the gun where indicated. Make sure to push the stick all the way in until it is secure. Plug in the glue gun and wait for it to heat up. This usually takes a few minutes.
While waiting for the glue gun to warm up, place a sheet of wax paper or a non-stick craft mat on your work surface. This will prevent the glue from sticking to your table or countertop.
Once the glue gun is hot and the glue stick has melted, test the adhesive by squeezing the trigger gently. If the glue flows smoothly and evenly, you are ready to begin creating your snowflakes. If the glue does not come out easily or seems too thick, allow the gun to heat up for a few more minutes.
Remember to use caution when working with a glue gun, as the hot glue can cause burns. Always unplug the gun when not in use and keep it out of reach of children.
Create the Snowflake Template
To make snowflakes with a glue gun, you first need to create a snowflake template. Here’s how:
- Gather your materials: You will need a piece of paper, a pencil, and a ruler.
- Draw a square: Use your ruler to draw a square on the piece of paper. The size of the square will determine the size of your snowflake, so make it as big or as small as you’d like.
- Find the center point: Use your ruler to draw two diagonal lines from each corner of the square. The lines should intersect at the center of the square, creating an “X” shape.
- Draw the snowflake shape: Starting from the center point, use your pencil to draw a snowflake shape on one side of the square. Make sure each branch of the snowflake is symmetrical and has a unique design.
- Trace the snowflake template: Once you are happy with your snowflake design, use a darker pencil or pen to trace over the lines. This will make it easier to see and cut out the template.
- Cut out the template: Carefully cut along the traced lines to create your snowflake template. Make sure to cut out the center of the snowflake as well, leaving only the branches intact.
Now that you have your snowflake template, you are ready to start making snowflakes with a glue gun. Keep the template handy, as you will use it as a guide when applying the hot glue to create your snowflake designs.
Draw Snowflake Patterns on Wax Paper
Before you start making snowflakes with a glue gun, it’s a good idea to plan out your design. One way to do this is to draw snowflake patterns on wax paper. This will give you a clear guide to follow when you start creating your snowflakes.
Materials Needed:
- Wax paper
- Marker or pen
Instructions:
1. Start by cutting a piece of wax paper to your desired size. Make sure it is large enough to accommodate the size of snowflakes you want to create.
2. Place the wax paper on a flat surface.
3. Use a marker or pen to draw snowflake patterns on the wax paper. You can find inspiration for snowflake designs online or create your own unique patterns.
4. Be sure to draw the patterns with enough space between them to allow for the glue gun to create the snowflake shape.
5. Once you have finished drawing the patterns, let the ink or marker dry completely.
Tips:
– If you make a mistake while drawing the patterns, simply wipe it away with a damp cloth and start again.
– Experiment with different snowflake designs and sizes to create a variety of unique snowflakes.
Using a wax paper guide will help you create beautiful and intricate snowflake designs with your glue gun. It provides a clear outline to follow and ensures that your snowflakes turn out just the way you want them!
| Materials Needed | Instructions | Tips |
|---|---|---|
| – Wax paper | 1. Start by cutting a piece of wax paper to your desired size. Make sure it is large enough to accommodate the size of snowflakes you want to create. | – If you make a mistake while drawing the patterns, simply wipe it away with a damp cloth and start again. |
| – Marker or pen | 2. Place the wax paper on a flat surface. | – Experiment with different snowflake designs and sizes to create a variety of unique snowflakes. |
| 3. Use a marker or pen to draw snowflake patterns on the wax paper. You can find inspiration for snowflake designs online or create your own unique patterns. | ||
| 4. Be sure to draw the patterns with enough space between them to allow for the glue gun to create the snowflake shape. | ||
| 5. Once you have finished drawing the patterns, let the ink or marker dry completely. |
Add Glue to Create the Snowflake
To create the intricate design of the snowflake, you will need a glue gun. The glue gun allows you to easily control the flow of glue and create delicate patterns.
Start by plugging in the glue gun and allowing it to heat up. Once the glue gun is hot, carefully squeeze the trigger to release a small amount of glue onto your workspace. Use the glue gun to draw lines, dots, or any other shapes you desire to create the snowflake design.
Be sure to work quickly, as the glue will dry fast. If the glue hardens before you can create the desired shape, simply heat the glue gun again to soften the glue and continue with the design.
Tips for Creating the Snowflake Design
- Experiment with different glue gun nozzle sizes to create different effects and designs.
- Work from the center of the snowflake outwards, creating symmetrical designs on each branch.
- Take your time and be patient as you work with the glue gun to create intricate and detailed designs.
- If you make a mistake, don’t worry! Simply wait for the glue to dry and carefully peel it off or use scissors to trim away any unwanted excess.
Using the Glue Gun Safely
Remember to always exercise caution when using a glue gun. The glue can reach high temperatures and cause burns if not handled properly. Here are a few safety tips:
| 1. | Keep your fingers and hands away from the nozzle to avoid burns. |
| 2. | Place the glue gun on a heat-resistant surface when not in use to prevent accidental burns or fires. |
| 3. | Unplug the glue gun after each use to avoid any accidental misuse. |
| 4. | Store the glue gun in a safe place, away from children and pets. |
By following these tips and using the glue gun safely, you can create beautiful and unique snowflake designs to decorate your home during the winter season.
Allow the Glue to Dry and Remove the Snowflake
After you have finished creating your snowflake design with the glue gun, allow it to dry completely. This may take a few hours, depending on the thickness of the glue. Patience is key here, as rushing the drying process may cause the snowflake to break or deform.
While waiting for the glue to dry, you can prepare a clean, flat surface where you can easily remove the snowflake once it is dry. Placing a sheet of parchment paper or a silicone mat on the surface can help prevent the snowflake from sticking.
Once the glue has dried completely, carefully peel the snowflake off the surface it was created on. If you find it difficult to remove, you can gently use a knife or craft tweezers to lift the edges and loosen it. Be cautious not to apply too much force, as this may cause the snowflake to break.
Once the snowflake is removed, you can trim any excess glue or loose strands using scissors or a craft knife. Take your time and be gentle to avoid damaging the delicate structure of the snowflake.
Now that your snowflake is complete and removed from the surface, you can use it to decorate various areas of your home. Hang them from the ceiling, attach them to windows, or string them together to create a beautiful winter garland.
 |
 |
 |
FAQ
What materials do I need to make snowflakes with a glue gun?
To make snowflakes with a glue gun, you will need a glue gun, glue sticks, wax paper, and scissors.
Can I use a low-temperature glue gun for making snowflakes?
Yes, you can use a low-temperature glue gun for making snowflakes. It is safer and easier to work with, especially if you are doing this craft with children.
What kind of designs can I create with a glue gun?
With a glue gun, you can create various designs for your snowflakes. You can make traditional six-pointed snowflakes, intricate lace-like designs, or even add beads and glitter to make them more festive.


Harrison Clayton
Meet Harrison Clayton, a distinguished author and home remodeling enthusiast whose expertise in the realm of renovation is second to none. With a passion for transforming houses into inviting homes, Harrison's writing at https://thehuts-eastbourne.co.uk/ brings a breath of fresh inspiration to the world of home improvement. Whether you're looking to revamp a small corner of your abode or embark on a complete home transformation, Harrison's articles provide the essential expertise and creative flair to turn your visions into reality. So, dive into the captivating world of home remodeling with Harrison Clayton and unlock the full potential of your living space with every word he writes.