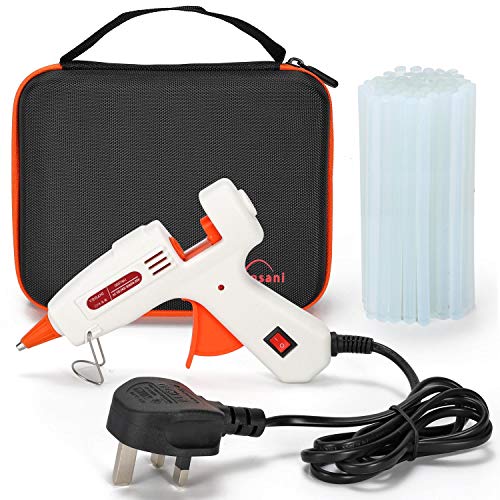
How to make glue sticks for glue gun
Glue guns are invaluable tools for anyone who enjoys crafting, DIY projects, or even simple repairs around the house. They provide a quick and reliable way to bond different materials together. However, glue sticks can sometimes be expensive or hard to find.
But what if you could make your own glue sticks? It’s easier than you might think! By following a few simple steps, you can create your own glue sticks for your glue gun using common household ingredients.
Here’s what you’ll need:
- 1 part baking soda
- 1 part cornstarch
- Water
- Food coloring (optional)
Instructions:
- Mix equal parts of baking soda and cornstarch in a bowl.
- Add water gradually, stirring continuously, until you achieve a thick paste-like consistency.
- If desired, add a few drops of food coloring to give your glue sticks a fun and vibrant color.
- Transfer the mixture into a heat-resistant container that fits your glue gun.
- Allow the mixture to dry and solidify completely, which usually takes around 24 hours.
- Once dry, insert the homemade glue stick into your glue gun and start crafting!
Remember: Homemade glue sticks might not have the exact same properties as store-bought ones, so it’s always a good idea to test them on a scrap piece of material before using them on your precious projects.
So, why spend a lot of money on glue sticks when you can easily make your own? Give it a try, unleash your creativity, and enjoy the satisfaction of making something with your own hands!
Crafting Your Own Glue Sticks
Many crafters and DIY enthusiasts prefer to make their own glue sticks for glue guns. Not only is it a budget-friendly option, but it also allows you to customize the glue sticks according to your specific needs. Here are some simple steps to help you craft your own glue sticks.
Materials You Will Need:
- Beeswax pellets
- Resin pellets
- Simple syringe or glue gun refill tube
- Essential oils (optional)
- Heat-resistant container
- Double boiler
- Stirring utensil
- Molds (silicone or metal)
Steps to Make Glue Sticks:
- Prepare your workstation by protecting it with a heat-resistant mat or parchment paper.
- Mix the beeswax pellets and resin pellets in a 1:1 ratio. The amount you need depends on how many glue sticks you want to make.
- Place the mixture in a heat-resistant container and melt it using a double boiler. Make sure the container is completely dry before adding the mixture.
- If desired, add a few drops of essential oils to the melted mixture for a pleasant scent. Stir well to evenly distribute the oils.
- Using a simple syringe or glue gun refill tube, carefully pour the melted glue mixture into the molds. Fill them to the desired size and shape.
- Allow the glue sticks to cool and harden completely. This may take a few hours depending on the size of the molds.
- Once hardened, remove the glue sticks from the molds and trim any excess edges if necessary.
- Your homemade glue sticks are now ready to be used with your glue gun!
Remember to store your homemade glue sticks in a cool, dry place to maintain their usability. Experiment with different ratios of beeswax and resin to find the consistency that works best for your projects. Enjoy the satisfaction of crafting your own customized glue sticks for all your creative needs!
Benefits of Homemade Glue Sticks
Using homemade glue sticks for your glue gun can have several benefits compared to using store-bought options. Here are some advantages of making your own glue sticks:
1. Cost-effective
One of the main benefits of making your own glue sticks is cost-effectiveness. Store-bought glue sticks can be expensive, especially if you use them frequently for your projects. By making your own glue sticks at home, you can save money by using easily accessible and affordable materials.
2. Customization
When you make your own glue sticks, you have the flexibility to customize them according to your project requirements. You can add different colors or adjust the stickiness of the glue by modifying the ingredients. This allows you to have better control over the adhesive properties of the glue, making it suitable for various materials and applications.
3. Environmentally-friendly
Homemade glue sticks are often more environmentally-friendly than store-bought options. Many store-bought glue sticks contain harmful chemicals and come in non-recyclable plastic packaging. By making your own glue sticks, you can choose to use natural and eco-friendly ingredients, reducing the negative impact on the environment.
4. Fun and educational
Making your own glue sticks can be a fun and educational activity. It provides an opportunity to learn about the adhesive properties of different ingredients and experiment with various combinations. This hands-on experience can be a great way to engage children in a creative and educational project.
| Benefits |
|---|
| Cost-effective |
| Customization |
| Environmentally-friendly |
| Fun and educational |
Materials and Tools You’ll Need
Before you can start making your own glue sticks for a glue gun, there are a few materials and tools you’ll need to gather. Here’s a list of everything you’ll need:
| Materials | Tools |
|---|---|
| Wax or beeswax | Double boiler or microwave |
| Resin or resin pellets | Stirring stick |
| Pigment or colorant (optional) | Measuring cups |
| Paper or silicone molds | Heat-resistant gloves |
| Essential oil (optional) | Glue gun |
Having all of these materials and tools on hand will ensure that you’re prepared to make your own glue sticks easily and efficiently. Make sure to gather everything before you begin the process.
Step-by-Step Guide to Making Glue Sticks
Step 1: Gather the necessary ingredients and materials. You will need a glue gun, glue pellets or sticks, a heat-resistant container, a silicone mold or tube, and a stirring tool.
Step 2: Prepare your workspace by ensuring it is clean and free of any debris. This will help prevent any contaminants from getting into your homemade glue sticks.
Step 3: Place the glue pellets or sticks into the heat-resistant container. The amount of glue you use will depend on the size of your mold or tube, so adjust accordingly.
Step 4: Heat up your glue gun according to the manufacturer’s instructions. Make sure it reaches the desired temperature for melting the glue.
Step 5: Carefully pour the hot melted glue into the silicone mold or tube. Be cautious not to overflow or spill any glue outside of the mold or tube.
Step 6: Use the stirring tool to remove any air bubbles from the melted glue. This will help ensure that your homemade glue sticks are solid and free of any imperfections.
Step 7: Allow the glue to cool and solidify completely. This may take a few hours, so be patient and avoid disturbing the mold or tube during this time.
Step 8: Once the glue has hardened, gently remove the homemade glue sticks from the mold or tube. They should easily slide out if the mold or tube was properly prepared.
Step 9: Your homemade glue sticks are now ready to be used in your glue gun! Insert the glue stick into the gun, heat it up, and start gluing.
Step 10: Store any unused homemade glue sticks in a cool, dry place to prevent them from melting or losing their adhesive properties.
Remember to always exercise caution when working with hot glue guns, as they can cause burns. Follow the manufacturer’s instructions and use protective equipment if necessary.
FAQ
Where can I buy glue pellets or sticks?
You can buy glue pellets or sticks at craft stores, online marketplaces like Amazon, or at some hardware stores.


Harrison Clayton
Meet Harrison Clayton, a distinguished author and home remodeling enthusiast whose expertise in the realm of renovation is second to none. With a passion for transforming houses into inviting homes, Harrison's writing at https://thehuts-eastbourne.co.uk/ brings a breath of fresh inspiration to the world of home improvement. Whether you're looking to revamp a small corner of your abode or embark on a complete home transformation, Harrison's articles provide the essential expertise and creative flair to turn your visions into reality. So, dive into the captivating world of home remodeling with Harrison Clayton and unlock the full potential of your living space with every word he writes.