How to make glue gun stick at home easily

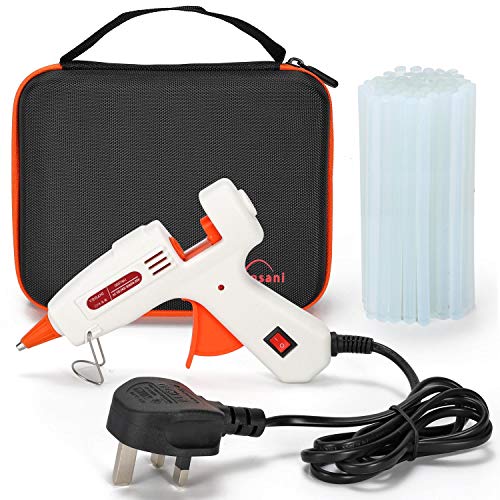
Glue guns are an essential tool for any DIY enthusiast or crafts lover. They are handy for a wide range of projects, from simple repairs to intricate creations. However, one common frustration that many people face is when glue gun sticks don’t adhere properly. Luckily, there is a simple and easy solution to this problem: making your own glue gun stick at home!
Firstly, it’s important to understand the basic ingredients that make up a glue gun stick. The main component is a thermoplastic adhesive, which becomes soft and sticky when heated. Commercial glue sticks often contain additives such as resins and waxes to improve adhesion and flexibility. By making your own glue gun stick, you have the flexibility to customize the formula to your specific needs.
To start, you’ll need a few basic ingredients: a thermoplastic material, such as PVC or EVA, a heat source, and a mold. The thermoplastic can be sourced from various household items, such as old plastic containers or even recycled plastic materials. Simply cut the thermoplastic into small pieces and place them into a heat-resistant container.
Next, you’ll need to melt the thermoplastic using a heat source. This can be done using a stove, microwave, or even a hairdryer. Keep in mind that the temperature should be adjusted according to the type of thermoplastic material you are using. It’s important to exercise caution and ensure proper ventilation when working with heat sources.
Once the thermoplastic has melted into a smooth, liquid state, carefully pour it into a mold. The mold can be an empty glue stick container or any other suitable shape that will allow the glue stick to solidify in the desired form. Allow the mold to cool and the glue stick to solidify completely before removing it from the mold.

And there you have it – your very own homemade glue gun stick! This DIY solution not only saves you money but also allows you to experiment with different types of thermoplastics and customize the formula to your specific needs. With a bit of practice and experimentation, you’ll be able to create glue gun sticks that provide excellent adhesion and meet all your crafting needs.
How to create homemade glue gun adhesive easily
Glue guns are a convenient tool for various projects, but sometimes it can be frustrating when you run out of glue sticks. Luckily, you can create your own homemade glue gun adhesive using simple ingredients. With a few easy steps, you’ll have a reliable adhesive to use with your glue gun.
To create homemade glue gun adhesive, you will need the following supplies:
| Ingredients: | Amount: |
| Paraffin wax | 2 parts |
| Resin pellets | 1 part |
Here’s how to make the adhesive:
- Melt the paraffin wax in a double boiler or a microwave-safe container. Stir until completely melted.
- Add the resin pellets to the melted wax and stir until they are fully combined.
- Continue heating the mixture until it reaches a uniform consistency.
- Remove the mixture from heat and let it cool for a few minutes.
- Pour the mixture into an empty glue stick container or any other container that is suitable for your glue gun.
- Allow the adhesive to cool and solidify completely before using it with your glue gun.
Now you have created your own homemade glue gun adhesive. It’s important to note that the ratio of paraffin wax to resin pellets can be adjusted according to your preferences. Experiment with different ratios to achieve the desired consistency and strength for your projects.

Remember to handle the hot wax and resin mixture with care, as it can cause burns. Use protective gloves and work in a well-ventilated area.
With your homemade glue gun adhesive, you’ll be able to tackle all your crafting and DIY projects without worrying about running out of glue sticks. Enjoy your adhesive creation and happy crafting!
Safety Precautions for Making Glue Gun Adhesive at Home
Handling the Glue Gun:
When using a glue gun to make adhesive at home, it is essential to follow proper safety precautions to prevent accidents or injuries. First and foremost, always handle the glue gun with caution and care. The glue gun can reach high temperatures and can cause burns, so it is advisable to wear protective gloves while using it. Additionally, never touch the nozzle or the melted glue as it can cause severe burns.
Working in a Well-Ventilated Area:

Another important safety precaution is to work in a well-ventilated area. The glue gun can produce fumes that may be harmful if inhaled in large quantities. Therefore, ensure that the room is well-ventilated or use a fan or open windows to improve air circulation while working with a glue gun.
Protective Clothing and Eyewear:
Wearing appropriate protective clothing and eyewear is crucial when making glue gun adhesive at home. The glue may splatter or drip, and wearing long sleeves and pants can prevent the glue from coming into direct contact with the skin. Additionally, safety glasses or goggles should be worn to protect the eyes from any potential glue splashes.
Storing the Glue Gun Safely:
When not in use, it is important to store the glue gun safely. Always unplug the glue gun after use and allow it to cool down before storing it. Store the glue gun in a safe place where it cannot be accessed by children or pets to prevent any accidents.

Proper Disposal of Glue Gun Adhesive:
Dispose of any leftover glue gun adhesive properly. Allow the adhesive to cool completely before disposing of it in the trash. Do not attempt to dispose of hot or melted adhesive as it may cause fire hazards. Always check with your local waste disposal guidelines for the proper way to dispose of glue gun adhesive.
Following these safety precautions will ensure a safe and enjoyable experience when making glue gun adhesive at home.
Materials needed for creating homemade glue gun adhesive
Creating your own glue gun adhesive at home is a simple and cost-effective way to solve your crafting needs. The following materials are needed:
1. Glue sticks:

The main ingredient for making glue gun adhesive is glue sticks. These sticks are commonly made from a combination of resin, wax, and other additives to provide a strong adhesive bond. They are available in various sizes and colors.
2. Glue gun:
A glue gun is required to heat and dispense the glue sticks. There are different types of glue guns available, such as low-temperature and high-temperature ones. Choose the one that suits your project requirements.
3. Heat source:
To melt the glue sticks and make them adhesive, you will need a heat source. Most glue guns come with a built-in heating mechanism, but some may require an external heat source, such as a stove or heat gun.

4. Glue gun stand or holder:
A glue gun stand or holder is necessary to hold the glue gun when not in use or while heating the glue sticks. It ensures safety and stability during the crafting process.
5. Protective gear:
Working with hot glue can be potentially dangerous, so it is essential to wear protective gear. Gloves and safety goggles can prevent burns and injuries.
6. Crafting materials:

Depending on your project, you might need additional crafting materials such as fabric, paper, wood, or other materials to apply the adhesive to.
By gathering these materials, you can create your own homemade glue gun adhesive and enjoy the convenience of a glue gun for various crafting projects.
Step-by-step guide on making glue gun adhesive at home
Glue guns are handy tools for various crafting projects, and having adhesive sticks ready is essential. If you run out of glue gun sticks or simply want to save costs, you can make your own adhesive at home. Follow this step-by-step guide to create your homemade glue gun adhesive.
Ingredients and tools:
Before you start, gather the following ingredients and tools:
- A non-stick cooking pan
- An old glue stick
- An adhesive, such as E6000 or hot glue stick
- A heat source, like a stove or hot plate
- A heat-resistant container
- A spatula or stirrer
Step 1: Melt the old glue stick
Begin by melting the old glue stick in the non-stick cooking pan. Make sure to cut the glue stick into small pieces to ensure even melting. Place the pan on a heat source and set it to low to moderate heat.
Step 2: Add the adhesive
Once the old glue stick has melted completely, add the adhesive of your choice to the pan. The amount will depend on how much adhesive you want to make. Stir the mixture gently to combine the melted glue stick and adhesive thoroughly.
Step 3: Transfer the mixture
Transfer the adhesive mixture into a heat-resistant container. Make sure the container is clean and dry before pouring in the mixture. Use a spatula or stirrer to scrape any remaining adhesive from the pan.
Step 4: Let it cool
Allow the adhesive mixture to cool and solidify completely. This may take around 1-2 hours, depending on the temperature of your environment. Avoid touching or disturbing the mixture while it is cooling.
Step 5: Test and use
Once the adhesive has solidified, test its consistency by applying a small amount to a test surface. If the adhesive is too hard, you can slightly reheat it and add a small amount of melted glue stick to soften it. If it is too soft, you can add more of the adhesive you used initially.
Now that your homemade glue gun adhesive is ready, you can use it for various crafting projects. Remember to store any leftover adhesive in a cool, dry place for future use.
Making your own glue gun adhesive at home is an excellent way to save money and ensure that you always have a supply for your crafting needs. Give this step-by-step guide a try and enjoy the benefits of homemade adhesive!
Tips for using homemade glue gun adhesive effectively
Using homemade glue gun adhesive can be a cost-effective and convenient solution for your crafting and DIY projects. However, to ensure reliable results, it’s essential to follow some tips for using the adhesive effectively.
1. Choose the right glue recipe
There are different recipes available for homemade glue gun adhesive. It’s important to choose a recipe that suits your specific project and materials. Take into consideration factors such as the type of materials you are working with and the strength requirements of your project.
2. Prepare the surface
Prior to applying the adhesive, make sure the surface is clean and free from dust and debris. Any contaminants on the surface can affect the bonding ability of the glue. Use a mild cleaner or rubbing alcohol to remove any dirt or grease.
3. Heat the glue gun to the optimal temperature
Each glue recipe may have a different optimal temperature range for melting and applying. Heat your glue gun according to the instructions provided with your specific adhesive recipe. Ensure the glue is melted consistently and flows smoothly through the gun.
4. Apply the adhesive evenly
When applying the glue, make sure to create an even and smooth layer. Uneven application can result in weak bond strength. Use steady and controlled movements to ensure the adhesive covers the intended area evenly.
5. Allow sufficient drying time
Homemade glue gun adhesive may require more drying time compared to commercial adhesives. Follow the instructions provided with the adhesive recipe to determine the proper drying time. Avoid disturbing or moving the bonded materials until the adhesive has fully cured.
6. Store the adhesive properly
If you have leftover adhesive, store it properly to maintain its effectiveness. Most homemade glue gun adhesives can be stored in an airtight container at room temperature. Avoid exposing the adhesive to extreme temperatures or moisture.
By following these tips, your homemade glue gun adhesive can provide a reliable and effective solution for your craft and DIY projects. Experiment with different glue recipes and techniques to find the best adhesive for your specific needs.
FAQ
What materials do I need to make glue gun sticks at home?
To make glue gun sticks at home, you will need the following materials: paraffin wax, resin, a double boiler, a mould, a stirring tool, and a thermometer.
Can I substitute paraffin wax with another type of wax?
Yes, you can substitute paraffin wax with beeswax or soy wax if you prefer. The process will be similar, but the melting points may vary, so you will need to adjust accordingly.
What is the ratio of paraffin wax to resin in making glue gun sticks?
The ratio of paraffin wax to resin in making glue gun sticks is typically 4:1. This means that for every 4 parts of paraffin wax, you will add 1 part of resin. However, you can adjust this ratio to achieve the desired consistency and stickiness of the glue.


Harrison Clayton
Meet Harrison Clayton, a distinguished author and home remodeling enthusiast whose expertise in the realm of renovation is second to none. With a passion for transforming houses into inviting homes, Harrison's writing at https://thehuts-eastbourne.co.uk/ brings a breath of fresh inspiration to the world of home improvement. Whether you're looking to revamp a small corner of your abode or embark on a complete home transformation, Harrison's articles provide the essential expertise and creative flair to turn your visions into reality. So, dive into the captivating world of home remodeling with Harrison Clayton and unlock the full potential of your living space with every word he writes.