How to make fake nails with hot glue gun

Do you love the look of long, glamorous nails, but don’t want to spend a fortune at the salon? Well, you’re in luck! With just a hot glue gun and a few simple materials, you can create your own stylish fake nails right at home. Not only is this DIY method budget-friendly, but it also allows you to customize your nails to suit your personal style.
Step 1: Gather Your Materials
Before you get started, make sure you have all the necessary materials on hand. You will need a hot glue gun, hot glue sticks, nail glue or adhesive tabs, nail clippers, a nail file, and nail polish. Additionally, you may want to have some nail art decorations, such as gems or glitter, to add a touch of sparkle to your fake nails.
Step 2: Create the Nail Shape
Once you have your materials ready, it’s time to create the nail shape. Start by plugging in your hot glue gun and letting it heat up. Then, take the hot glue gun and squeeze out a thin strip of hot glue onto a smooth, non-stick surface, such as a silicone mat or a piece of parchment paper. Use your nail clippers to cut the strip of hot glue to your desired length. Next, shape the strip into the desired nail shape, whether it’s square, round, or pointed. Be careful not to burn yourself in the process!

Step 3: Attach the Fake Nails
Now that you have your nail shape, it’s time to attach the fake nails to your natural nails. Apply a small amount of nail glue or adhesive tab to the back of the hot glue nail and press it firmly onto your natural nail. Hold it in place for a few seconds to allow the glue to set. Repeat this step for each nail until all of your fingertips are adorned with beautiful fake nails.
Step 4: Finishing Touches
Once the fake nails are securely attached, it’s time to add the finishing touches. Use a nail file to shape and smooth the edges of the fake nails, making them blend seamlessly with your natural nails. Then, apply a coat of nail polish in your favorite color to give your fake nails a polished, professional look. If you want to get creative, you can also add nail art decorations, such as gems or glitter, to make your fake nails truly stand out.
With just a hot glue gun and a little creativity, you can easily make your own fake nails at home. Not only will this save you money, but it will also allow you to experiment with different nail shapes, colors, and designs. So why wait? Give it a try and show off your stunning DIY nails!

Preparing Materials for DIY Fake Nails
Before you can start creating your own fake nails using a hot glue gun, it’s important to gather all the necessary materials. Here is a list of items you will need:
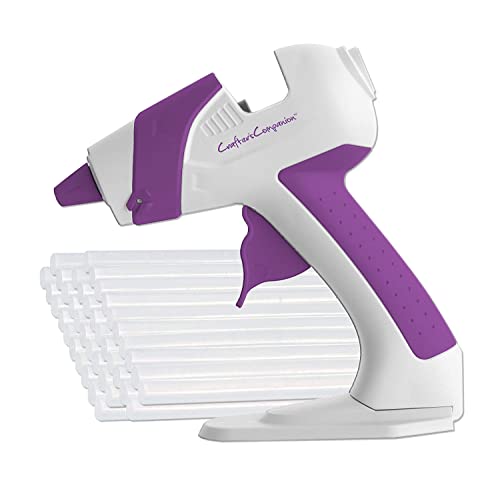
1. Hot glue gun: The most crucial tool for this DIY project is a hot glue gun. Make sure it is in working condition and has hot glue sticks.
2. Nail tips: You will need nail tips in your desired shape and size. These can be easily found at any beauty supply store or online.
3. Nail file and buffer: To ensure your fake nails fit well and look natural, you will need a nail file and a buffer. These help in shaping and smoothing the nail tips.
4. Cuticle pusher: This tool is used to gently push back the cuticles and create a clean surface for applying the fake nails.

5. Nail glue: Although the hot glue gun will be the primary adhesive for your fake nails, it’s good to keep nail glue as a backup or for extra durability.
6. Acrylic paint (optional): If you want to add a pop of color or design to your fake nails, acrylic paint can be used for decoration.
7. Nail polish and top coat (optional): If you prefer a glossy finish, you can apply nail polish and a top coat to your finished fake nails.
Once you have gathered all these materials, you’re ready to move on to the next steps of creating your own DIY fake nails using a hot glue gun. Remember to take your time and be careful while handling the hot glue gun to avoid any accidents or burns.
What You Will Need:
To make fake nails with a hot glue gun, you will need:

- A hot glue gun
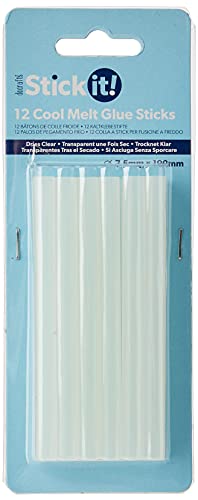
- Clear hot glue sticks
- A nail file
- A flat surface
- Nail glue or adhesive tabs
- Nail polish and/or nail decorations
- A nail brush or toothbrush
- Acetone or nail polish remover
- Cotton balls or pads
Make sure you have all of these materials ready before you begin creating your fake nails.
Gathering Your Materials
Before you start making fake nails with a hot glue gun, you’ll need to gather a few essential materials. Here’s what you’ll need:
1. Hot Glue Gun
The main tool you’ll need for this DIY project is a hot glue gun. Make sure you have a glue gun that can reach high temperatures and has a precision tip for more accurate application. You can find hot glue guns at most craft stores or online.
2. Glue Sticks
Along with the hot glue gun, you’ll need some glue sticks. Choose glue sticks that are compatible with your hot glue gun and are designed for bonding materials like plastic or metal. It’s important to use high-quality glue sticks to ensure durability and longevity.
3. Nail Forms or Tips
If you want your fake nails to have a natural shape, you’ll need nail forms or tips. Nail forms are adhesive stickers that you can apply to your fingers to create a mold for the fake nail. Nail tips are pre-shaped artificial nails that you can attach to your natural nails.

4. Nail File and Buffer
To shape and smooth your fake nails, you’ll need a nail file and buffer. Choose a nail file that has a coarse grit for shaping and a fine grit for smoothing. A buffer will help to remove any rough edges and give your fake nails a polished finish.
5. Acrylic Paint and Brushes
If you want to add some color or design to your fake nails, you’ll need acrylic paint and brushes. Acrylic paint is durable and long-lasting, making it ideal for creating intricate nail art. Choose a variety of colors and different brush sizes to unleash your creativity.
6. Sealing Top Coat
To protect and seal your finished fake nails, you’ll need a sealing top coat. Look for a top coat that is specifically designed for use on artificial nails. A sealing top coat will prolong the life of your fake nails and keep them looking fresh.
Once you have gathered all these materials, you’ll be ready to start making your own fake nails using a hot glue gun.
Creating the Base of Fake Nails
To start creating your own fake nails using a hot glue gun, you need to first create a base for the nails. The base will serve as the foundation for the fake nails and provide a smooth surface for the glue to adhere to.

Here’s how you can create the base:
- Clean your natural nails by removing any old nail polish and trimming them to your desired length.
- Buff the surface of your nails to remove any rough edges and create a smooth surface.
- Apply a thin layer of nail primer or base coat to your nails. This will help the glue adhere better and protect your natural nails.
- Take a hot glue gun and make sure it is fully heated up.
- Dispense a small dollop of hot glue onto a non-stick surface, such as a silicone mat or parchment paper.
- Using a nail tip as a guide, quickly shape the hot glue into the desired nail shape and size. You can use a toothpick or a small spatula to help shape the glue.
- Repeat this process for each nail, making sure to leave a small gap between each fake nail to mimic the look of natural nails.
- Allow the hot glue to cool and harden completely before moving on to the next step.
Once the base of the fake nails is created, you can proceed to decorate and customize them according to your preferences. Remember to be careful when handling the hot glue gun to avoid any burns or injuries.
Measuring and Cutting the Nails
Before you can start making fake nails with a hot glue gun, it’s important to measure and cut the nails to your desired length. This will ensure that the fake nails fit your natural nails perfectly and look natural once applied.
Start by carefully measuring the length of your natural nails using a ruler. Take note of the measurements so that you can replicate them with the fake nails.
Once you have your measurements, use a sharp pair of nail clippers to cut the fake nails to the desired length. It’s always better to start with longer nails as you can always trim them down further if needed.

When cutting the fake nails, make sure to use smooth and even motions to avoid any jagged edges. You can also use a nail file to gently shape the tips of the fake nails and create a more natural-looking finish.
Remember to take your time during this step and be cautious when handling the sharp nail clippers. It’s also a good idea to dry fit each fake nail to your natural nail before applying any glue to ensure a perfect fit.
Once you have measured and cut all the fake nails, you are ready to move on to the next step of the process.
Filing and Shaping the Nails
Once you have applied the fake nails made with a hot glue gun, it’s time to file and shape them to your desired look. Here are some steps to follow:
1. Gather your tools
Before you start filing and shaping, make sure you have the necessary tools. You will need a nail file, a buffer, and a cuticle stick. These tools will help you achieve the desired shape and smoothness of your fake nails.
2. Start filing
Begin by gently filing the tips of your fake nails to your preferred length. If the nails are too long, you can shorten them using a nail clipper before filing. File in one direction only, moving from the sides towards the center. This will prevent any damage to the nails.
Pro tip: If you want a rounded shape, file the corners of your fake nails in a curved motion. For a square shape, file straight across the tips. Experiment with different shapes to find what suits you best.
3. Shape the sides
Next, use the nail file to shape the sides of your fake nails. Hold the file at a slight angle and gently file the sides to create the desired shape. Be careful not to file too much, as this can weaken the nails.
4. Smooth the nails
Once you have achieved the desired shape, use a buffer to smooth out any rough edges or bumps on the surface of the nails. Move the buffer in a gentle circular motion over the entire nail surface. This will give your nails a polished and professional look.
5. Push back the cuticles
Finally, use a cuticle stick to push back your cuticles gently. This will help create a clean and neat appearance for your nails. Be careful not to push too hard, as this can damage the cuticles.
Congratulations! You have successfully filed and shaped your fake nails made with a hot glue gun. Your nails are now ready to be painted and decorated to complete your desired look.
Attaching the Nails
Once you have prepared your fake nails using the hot glue gun method, it’s time to attach them to your natural nails. Follow the steps below to achieve a perfect application:
Step 1: Clean your nails
Before attaching the fake nails, make sure your natural nails are clean and free of any polish or oils. Use a nail polish remover to remove any existing polish, and wash your hands thoroughly with soap and water.
Step 2: Determine the nail sizes
Sort through the fake nails you have made and find the ones that best fit your natural nails. It’s important to choose the right size to ensure a comfortable and secure fit.
Step 3: Apply glue to the fake nails
Using the hot glue gun, apply a small dot of glue to the back of each fake nail. Be careful not to use too much glue as it may cause the nail to lift or appear bulky. Less is more in this case.
Step 4: Position the fake nails
Starting with your dominant hand, carefully place each fake nail onto the corresponding natural nail. Press down gently but firmly to ensure a good bond. Repeat this process for all nails on both hands.
Step 5: Allow the glue to dry
Give the glue some time to dry completely. This will ensure that your fake nails stay in place and last longer. Avoid touching or applying any pressure to the nails until the glue has fully dried.
Step 6: Trim and shape the nails
If needed, trim and shape your fake nails using a nail file or clippers to achieve your desired length and shape. Take your time and be careful not to damage your natural nails.
By following these steps, you can attach your homemade fake nails with a hot glue gun and achieve a beautiful manicure without the need for professional salon services.
| Related Images |
 |
FAQ
What materials do I need to make fake nails with a hot glue gun?
To make fake nails with a hot glue gun, you will need a hot glue gun, glue sticks, a nail file, nail polish, nail art decorations (optional), and a pair of scissors.
Can I use any type of glue stick with a hot glue gun to make fake nails?
No, it is important to use glue sticks specifically designed for hot glue guns. Other types of glue sticks may not melt correctly or adhere properly to your nails.
How do I make fake nails that fit perfectly on my own nails?
To make fake nails that fit perfectly on your own nails, you can start by measuring your own nails and cutting the glue sticks into the desired length. You can also file the edges of the fake nails to adjust the shape and size until they match your natural nails.
Can I paint the fake nails made with a hot glue gun?
Yes, you can paint the fake nails made with a hot glue gun. After shaping and filing the fake nails, you can apply a base coat of nail polish, followed by your desired color. You can also add nail art decorations if you like.
How long do the fake nails made with a hot glue gun last?
The durability of the fake nails made with a hot glue gun may vary depending on factors such as the quality of the glue sticks used and the daily activities you engage in. Generally, they are not as long-lasting as professionally done acrylic or gel nails, but they can last for a few days to a week with proper care.
Meet Harrison Clayton, a distinguished author and home remodeling enthusiast whose expertise in the realm of renovation is second to none. With a passion for transforming houses into inviting homes, Harrison's writing at https://thehuts-eastbourne.co.uk/ brings a breath of fresh inspiration to the world of home improvement. Whether you're looking to revamp a small corner of your abode or embark on a complete home transformation, Harrison's articles provide the essential expertise and creative flair to turn your visions into reality. So, dive into the captivating world of home remodeling with Harrison Clayton and unlock the full potential of your living space with every word he writes.