How to make coloured glue gun

Are you tired of using a plain, ordinary glue gun for your craft projects? Do you want to add a pop of colour and personality to your creative endeavors? Well, look no further! In this article, we will show you how to make your very own coloured glue gun.
Using a coloured glue gun can not only enhance the visual appeal of your crafts but also allow you to customize your projects to match your personal style and aesthetic. Whether you are working on a scrapbooking project, creating handmade cards, or designing unique home decor items, a coloured glue gun can add that extra touch of creativity.
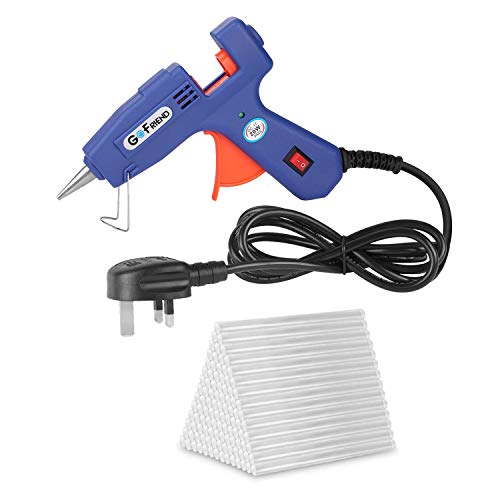
To make a coloured glue gun, you will need a few easy-to-find materials. First, you will need a regular glue gun. You can use an old glue gun that you already have or purchase a new one specifically for this project. Additionally, you will need coloured glue sticks in the hues of your choice. These can be found at any craft store or ordered online.
Once you have gathered all the necessary materials, the process of making a coloured glue gun is simple and straightforward. All you have to do is insert the coloured glue stick into the glue gun, just like you would with a regular glue stick. Allow a few minutes for the glue stick to melt completely, and you are ready to unleash your creative potential with your newly coloured glue gun!
Learn to DIY Coloured Glue Gun
If you’re tired of using the same old clear glue sticks in your glue gun, why not try making your own coloured glue sticks? Not only will it add a fun touch to your crafts, but it’s also a great way to personalize your glue gun.

To make coloured glue sticks, you’ll need a few simple materials:
1. Clear glue sticks
2. Coloured crayons (the colour of your choice)
3. Glue gun
4. Microwave-safe container

5. Spoon or stirrer
Here’s how to make coloured glue sticks:
- Start by unwrapping your clear glue sticks and breaking them into smaller pieces. This will make them easier to melt and mix with the crayons.
- Choose the colour crayon you want to use and peel off the paper wrapper. Break the crayon into smaller pieces.
- Place the clear glue stick pieces and the crayon pieces into a microwave-safe container. Make sure the container is large enough to hold all the ingredients.
- Place the container in the microwave and heat it in short intervals, stirring in between each interval. This will help melt the glue and crayon evenly.
- Continue heating and stirring until the glue and crayon are completely melted and well-mixed. Be careful not to overheat the mixture as it could become too runny.
- Once the mixture is smooth and well-combined, carefully pour it into empty glue stick cartridges.
- Allow the glue sticks to cool and solidify before using them in your glue gun.
Now you have your own homemade coloured glue sticks! Simply insert one into your glue gun, heat it up, and start creating colourful crafts and projects.
Remember to always exercise caution when using your glue gun and handling hot materials. Enjoy your newly DIY coloured glue gun and have fun with your colourful creations!
About Coloured Glue Gun
A coloured glue gun is a fun and creative tool that allows you to add a pop of color to your craft projects. Whether you are working on scrapbooking, cardmaking, or any other DIY project, a coloured glue gun can be a great addition to your crafting supplies.

What is a Coloured Glue Gun?
A coloured glue gun is a variation of a regular glue gun that is designed specifically to dispense colored glue. It uses the same basic principles as a regular glue gun, but the glue sticks come in a variety of vibrant colors.
The gun typically has a continuous heating element that keeps the glue sticks melted and ready to use. When you squeeze the trigger, the melted colored glue is dispensed through a nozzle, allowing you to apply it to your project. The glue quickly cools and hardens, providing a strong and durable bond.
Benefits of Using a Coloured Glue Gun
There are several benefits to using a coloured glue gun:
- Creativity: The ability to dispense colored glue opens up endless possibilities for creative projects. You can use it to add decorative accents, create unique designs, or even write words or draw pictures with the glue.
- Eye-Catching: Colored glue can instantly make your projects stand out. Whether you want to add a pop of color or create a bold statement, a coloured glue gun can help you achieve the desired effect.
- Easy to Use: Just like a regular glue gun, a coloured glue gun is easy to use. Simply load the colored glue stick, wait for it to melt, and start applying it to your project. The glue dries quickly, allowing you to continue working without interruptions.
- Wide Range of Colors: Coloured glue sticks are available in a wide range of colors, including neon, metallic, and pastel shades. This gives you the freedom to choose the colors that best match your project or let your creativity run wild by mixing and matching different colors.
In conclusion, a coloured glue gun is a versatile and fun tool that can enhance your crafting experience. Whether you are a beginner or an experienced crafter, adding a coloured glue gun to your supplies can open up a world of creative possibilities.
Materials Required for DIY Coloured Glue Gun
To make a coloured glue gun, you will need the following materials:

- A glue gun
- Coloured glue sticks
- A heat-resistant work surface
- A well-ventilated area
- Protective gloves
- Paper towels
- A scrap piece of cardboard or plastic
- A popsicle stick or disposable spoon
Glue Gun
The first thing you will need is a glue gun. You can use any type of glue gun for this project. Make sure it is clean and in good working condition.
Coloured Glue Sticks
The main material you will need is coloured glue sticks. These can be found at craft stores or online. Choose colours that you like and that will work well for your project. You can use one colour or multiple colours, depending on the design you want to create.
It’s important to note that the coloured glue sticks may stain your glue gun, so it’s recommended to use a glue gun that you don’t mind getting coloured.
Heat-Resistant Work Surface
When working with a glue gun, it’s essential to have a heat-resistant work surface. This can be a silicone mat or a piece of cardboard that can withstand the heat from the glue gun.
Well-Ventilated Area
Working with a glue gun can release fumes, so it’s important to work in a well-ventilated area. Open a window or work near a fan to ensure proper ventilation.

Protective Gloves
Wearing protective gloves is recommended to protect your hands from hot glue and any potential burns or accidents. Choose gloves that are heat-resistant and provide a good grip.
Paper Towels
Having paper towels nearby is handy for cleaning up any spills or messes that may occur during the project. Glue guns can be messy, so it’s good to be prepared.
Scrap Piece of Cardboard or Plastic
A scrap piece of cardboard or plastic can be used as a palette to mix the coloured glue sticks. This will prevent the glue gun from getting coloured directly and make it easier to control the colours.
Popsicle Stick or Disposable Spoon
A popsicle stick or disposable spoon can be used to mix the coloured glue sticks. This will help distribute the colours evenly and create the desired effect.
Step-by-Step Guide to Make Coloured Glue Gun
Do you want to add a dash of color to your glue gun? With a few simple steps, you can create a fun and vibrant glue gun that will make all your crafting projects more exciting. Follow this step-by-step guide to make your own coloured glue gun.

Materials You’ll Need:
- A glue gun
- Coloured glue sticks
- Protective gloves
- Goggles
- Heat-resistant surface
Step 1: Prepare Your Work Area
Find a well-ventilated area to work in and cover your work surface with a heat-resistant mat or aluminium foil. This will protect your workspace from any accidental glue spills.
Step 2: Put on Safety Gear
Before you start, put on protective gloves and goggles to ensure your safety. The melted glue can be hot, so it’s important to protect your hands and eyes.
Step 3: Heat up Your Glue Gun
Plug in your glue gun and allow it to heat up. Read the manufacturer’s instructions for the recommended heating time.
Step 4: Insert the Coloured Glue Stick
Once your glue gun is heated, insert a coloured glue stick into the glue gun’s chamber. Push it all the way in until it is secure.
Step 5: Wait for the Coloured Glue to Melt
Allow the coloured glue stick to melt completely in the glue gun. This may take a few minutes, depending on the temperature of your glue gun.

Step 6: Start Crafting!
Once the coloured glue has melted, you’re ready to start creating! Squeeze the trigger of the glue gun to apply the coloured glue onto your desired surface. Let your creativity flow and have fun with your new coloured glue gun.
| 1. | Always use caution when working with hot glue. The melted glue can cause burns. |
| 2. | Experiment with different colours and designs to create unique projects. |
| 3. | Remember to unplug and let your glue gun cool down before storing it. |
Customization Ideas for Coloured Glue Gun
Personalizing and customizing your coloured glue gun can add a touch of creativity and individuality to your crafting experience. Here are some ideas to inspire you:
1. Decorative Wraps: Use colourful washi tape or decorative adhesive tape to create unique patterns and designs on the body of your glue gun. Simply wrap the tape around the handle, barrel, and any other areas you want to customize.
2. Paint or Spray Paint: Apply acrylic paint or spray paint in your favourite colours to transform the appearance of your glue gun. Make sure to use painters tape to cover any areas you don’t want to paint. You can also add multiple coats or create gradient effects.
3. Rhinestones and Gems: Add a touch of glamour to your glue gun by embellishing it with rhinestones, gems, or sequins. Use a strong adhesive to securely attach them to the surface of the glue gun. You can create patterns or cover the entire body for a dazzling effect.
4. Fabric or Ribbon: Cut out small pieces of fabric or ribbon in your desired designs and attach them using a strong adhesive. This adds texture and a unique look to your glue gun. You can create bows, stripes, or even a patchwork effect.
5. Stickers and Decals: Decorate your glue gun with stickers or decals of your choice. You can find a variety of designs, patterns, and themes to suit your style. Make sure to clean and dry the surface before applying the stickers for better adhesion.
6. Personalized Labels: Create custom labels using printable sticker paper or adhesive vinyl. Write your name, logo, or any other text using a marker or print them out using a printer. Cut them out and adhere them to your glue gun for a personalized touch.
Remember: Ensure that any decorations you add to your glue gun do not obstruct the nozzle or any vents. Additionally, make sure the decorations do not interfere with the functionality and safety of the glue gun.
Have fun experimenting with these customization ideas and transform your coloured glue gun into a unique and eye-catching tool for your crafting projects!
FAQ
What materials do I need to make a coloured glue gun?
To make a coloured glue gun, you will need a glue gun, coloured glue sticks, and a power source (such as an electrical outlet or batteries).
Where can I find coloured glue sticks?
Coloured glue sticks can be found at most craft stores, online retailers, and sometimes even in the craft section of larger supermarkets. You can also try searching for them on websites like Amazon or eBay.


Meet Harrison Clayton, a distinguished author and home remodeling enthusiast whose expertise in the realm of renovation is second to none. With a passion for transforming houses into inviting homes, Harrison's writing at https://thehuts-eastbourne.co.uk/ brings a breath of fresh inspiration to the world of home improvement. Whether you're looking to revamp a small corner of your abode or embark on a complete home transformation, Harrison's articles provide the essential expertise and creative flair to turn your visions into reality. So, dive into the captivating world of home remodeling with Harrison Clayton and unlock the full potential of your living space with every word he writes.