How to make a wax seal with a glue gun

Are you looking for a unique and creative way to add a personal touch to your letters, invitations or gifts? Look no further than making your own wax seals! Traditionally, wax seals were made by melting wax and pressing a seal into it. This process can be quite messy and time-consuming. However, with a glue gun, you can easily create beautiful and professional-looking wax seals in no time. In this article, we will guide you step by step on how to make a wax seal with a glue gun.
To start, you will need the following materials:
- A glue gun
- Wax sticks in the color of your choice
- A wax seal stamp
- A heat-resistant surface
- A candle or lighter
Step 1: Preparing the Wax
First, insert a wax stick into the glue gun and plug it in, allowing it to heat up. While you are waiting, prepare a heat-resistant surface where you can work.
Step 2: Melting the Wax

Once the glue gun is heated, hold it at a slight angle above your heat-resistant surface and squeeze the trigger to release the melted wax. Move the gun in a circular motion to create a circle of melted wax with a diameter slightly larger than your wax seal stamp.
Step 3: Creating the Wax Seal
Quickly press the wax seal stamp into the center of the melted wax, applying firm and even pressure. Hold the stamp in place for a few seconds to allow the wax to cool and harden.
Step 4: Finishing Touches
Carefully lift the wax seal stamp from the hardened wax, revealing your custom wax seal. If desired, you can trim any excess wax around the edges with a craft knife or scissors.

And there you have it – your very own wax seal made with a glue gun! These wax seals can be used to add a touch of elegance to envelopes, wedding invitations, certificates, and more. Get creative with different colors of wax and seal designs to make each one unique. Start making your own wax seals and impress everyone with your personalized touch!
What is a wax seal
A wax seal is a decorative seal made from melted wax that is used to close envelopes, packages, or documents. It is traditionally made using a wax stick and a seal stamp.
The wax stick is melted over a flame or a wax warmer until it is in a liquid state. The melted wax is then dripped onto the designated area, usually the flap of an envelope or the edge of a document, and a seal stamp is pressed onto the hot wax. The seal stamp often has a personalized design or a symbol that represents the sender’s identity or organization.
Once the wax has cooled and hardened, it creates a secure and elegant seal that cannot be easily tampered with. Wax seals are commonly associated with formal correspondence, such as wedding invitations, certificates, or business documents. They add a touch of sophistication and old-world charm to any mail or package.
|
|
Example of a wax seal |


History of wax seals
Wax seals have been used for centuries as a way to authenticate documents and add a touch of elegance to correspondence. The practice of using wax seals dates back to ancient civilizations such as the Egyptians, Mesopotamians, and Greeks.
In ancient Egypt, wax seals were used to record important documents and to secure the tombs of pharaohs. The seals were made using a mixture of beeswax and resin, which was then pressed onto the document or object to create a seal. These seals often featured intricate designs and symbols that represented the authority or status of the sender.
In medieval Europe, wax seals became widespread and were used by nobles, kings, and religious leaders to authenticate official documents and correspondences. The seal was typically made using beeswax and a special metal stamp called a seal matrix. The seal matrix was engraved with the individual’s coat of arms or personal insignia and was used to press the seal onto the wax.
Wax seals were also used by secret societies such as the Freemasons, who used them to authenticate their rituals and documents. These seals often featured symbols and emblems associated with the society’s teachings and beliefs.

With the advent of modern technology and the decline of handwritten letters, the use of wax seals declined. However, they have experienced a revival in recent years as a decorative and sentimental way to add a personal touch to invitations, cards, and gifts.
- Wax seals add a touch of nostalgia and charm to any correspondence.
- They can be customized with various designs and colors.
- Wax seals are an eco-friendly alternative to adhesive seals.
- They can be easily made using a glue gun.
- Wax seals are a popular choice for weddings, special occasions, and crafting projects.
The history of wax seals is rich and fascinating, providing a glimpse into the traditions and practices of our ancestors. Whether used for official purposes or personal expression, wax seals continue to captivate and inspire today.
Materials needed
In order to make a wax seal with a glue gun, you will need the following materials:
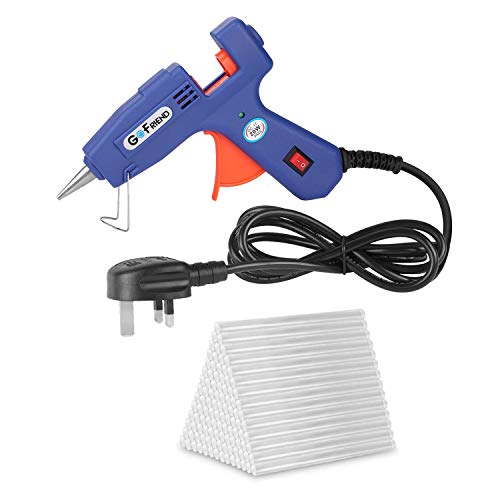
1. Glue gun
A glue gun is the main tool you will need for this project. Make sure to use a low-temperature glue gun to prevent any accidents or burns.
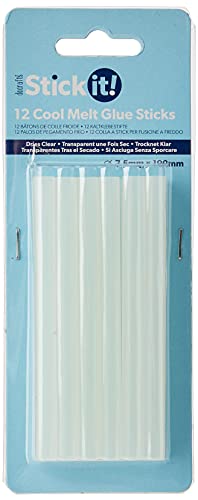
2. Wax sticks
Wax sticks are the material that will create the seal. You can find wax sticks in various colors and finishes, such as traditional wax colors like red, gold, or silver.

3. Wax seal stamp
A wax seal stamp is a metal or wooden stamp that is engraved with a design or a monogram. This will give your wax seal a personalized touch. Choose a stamp that reflects your style or the occasion.
4. Heat-resistant surface
You will need a heat-resistant surface to place your glue gun and wax seal stamp on. This can be a silicone mat or a ceramic tile. Make sure it is clean and free of any dust or debris.
5. Optional: Sealing wax spoon
A sealing wax spoon can be used to melt the wax sticks. It usually has a long handle and a spoon-shaped end. While it is not necessary to have a spoon, it can make the process more precise and easier.
Once you have gathered all the necessary materials, you will be ready to create beautiful wax seals with your glue gun.
Glue gun
A glue gun is a tool that uses a heated adhesive to connect materials together. It is commonly used in various DIY projects, crafts, and home repairs. The glue gun consists of a glue stick that is loaded into a chamber within the gun. When the glue stick is inserted and the trigger is pressed, the heated glue is dispensed through the nozzle.

Glue guns are available in different sizes and types, such as low-temperature and high-temperature glue guns. Low-temperature glue guns are suitable for delicate materials, while high-temperature glue guns are more powerful and can bond a wider range of materials.
Using a glue gun is relatively simple. Here are the basic steps:
| Step | Description |
|---|---|
| 1 | Insert a glue stick into the chamber of the glue gun. |
| 2 | Plug in the glue gun and wait for it to heat up. The exact heating time will depend on the type of glue gun. |
| 3 | Press the trigger gently to dispense a small amount of glue. If needed, you can adjust the amount of glue by varying the pressure on the trigger. |
| 4 | Apply the glue to the desired surface, pressing the materials together firmly. |
| 5 | Allow the glue to dry and set according to the manufacturer’s instructions. |
| 6 | Once finished, unplug the glue gun and allow it to cool down before storing it. |
When using a glue gun, it is important to be cautious and avoid touching the hot glue. Additionally, make sure to work in a well-ventilated area as the glue may emit fumes. With proper care and practice, a glue gun can be a versatile tool for various creative and practical applications.
Wax Sticks
When it comes to creating a wax seal with a glue gun, wax sticks are an essential component you’ll need. These sticks are specially designed for use with glue guns and are made from a combination of wax and resin. This unique blend ensures that the wax sticks are pliable when heated and provide a strong and durable seal after cooling.
Choosing the Right Wax Sticks
When selecting wax sticks for your glue gun, it’s important to consider the color and size that best suits your project. Wax sticks are available in a variety of colors, including traditional shades such as red, gold, and silver, as well as more contemporary options like pastels and metallics. Choose a color that complements your design and adds a touch of elegance to your finished product.

In addition to color, wax sticks also come in different sizes. The size you choose depends on the size of your glue gun and the desired size of your wax seal. Most wax sticks have a standard diameter of around 0.44 inches (11mm), but lengths may vary. It’s recommended to use shorter sticks for smaller projects and longer sticks for larger ones, as it will make the process easier and more efficient.
Using Wax Sticks with a Glue Gun
Using wax sticks with a glue gun is a straightforward process. Begin by loading the wax stick into the glue gun, making sure it fits securely in the glue gun’s chamber. Plug in the glue gun and allow it to heat up, usually for about 5 minutes or according to the manufacturer’s instructions. Once the wax stick has melted and is ready to use, carefully squeeze the trigger to release the wax onto your desired surface.
When applying the wax, it’s important to create a pool of wax that is slightly larger than your seal. This will ensure that the seal is completely covered and properly formed. While the wax is still hot and pliable, press your desired seal into the wax firmly, holding it in place for a few seconds to achieve a clean and crisp impression.
After pressing the seal, allow the wax to cool and harden for a few minutes before removing the seal. Once the wax has hardened, you can admire your beautiful wax seal creation!
Note: Always exercise caution when working with hot wax and a glue gun to prevent burns. Make sure to follow the instructions and safety guidelines provided by the glue gun manufacturer.
Step-by-step instructions
Follow the instructions below to make a wax seal with a glue gun:
|
Step 1: Gather all the materials you will need:
|
|
|
Step 2: Insert a sealing wax stick into the glue gun and wait for it to heat up. |
|
|
Step 3: Hold the glue gun at a downward angle and squeeze the trigger to let the melted wax flow onto the surface. |
|
|
Step 4: Quickly press the sealing wax stamp into the melted wax before it cools down. |
|
|
Step 5: Hold the stamp in place for a few seconds, then carefully lift it off to reveal the wax seal. |
|
|
Step 6: If desired, trim any excess wax around the seal with scissors. |
|
|
Step 7: Your wax seal is now complete! Use it to decorate letters, invitations, envelopes, or any other creative project. |
|


Preparation
To make a wax seal with a glue gun, you’ll need a few essential supplies:
- Glue gun: Make sure you have a low-temperature glue gun to prevent the wax from overheating and melting.
- Wax sticks: Choose wax sticks that are specifically designed for making glue gun wax seals. These sticks have a low melting point, allowing them to be used with a glue gun.
- Sealing stamp: Find a sealing stamp with a design that you like. It can be a traditional symbol or a personalized stamp with your initials or logo.
- Heat-resistant surface: Place a heat-resistant surface, like a silicone mat or a wooden block, on your work area. This will protect your table or desk from any hot wax drips.
- Lighter or matches: You’ll need a flame source to melt the wax. A lighter or matches will work perfectly.
- Cotton swabs or small brush: Keep some cotton swabs or a small brush nearby to clean any excess wax from the stamp.
Make sure to gather all these supplies before starting the process to ensure a smooth and efficient wax seal creation.
Heating the glue gun
Before you begin making a wax seal with a glue gun, the first step is to heat the glue gun. Make sure you have a glue gun that is specifically designed for wax sealing. These glue guns typically have a narrow nozzle and operate at a higher temperature to melt the sealing wax.
Plug in the glue gun and allow it to heat up for a few minutes. Most glue guns have an indicator light that will turn on when the gun is fully heated and ready to use. While waiting for the glue gun to heat up, prepare your wax seal by attaching it to a handle or stamp. The seal should be clean and free of any debris or dust.
Caution: It is important to handle the glue gun with caution as the tip can become extremely hot. Always use the glue gun on a heat-resistant surface and keep it away from flammable materials.
Once the glue gun is heated and ready, insert a sealing wax stick into the back of the gun. Push it all the way in until it reaches the heating element. The wax stick will start melting and you can begin to use the glue gun to create your wax seal.
Note: The melting time may vary depending on the type and brand of sealing wax you are using. It is recommended to follow the manufacturer’s instructions for the specific sealing wax you have purchased.
With the glue gun in your hand, squeeze the trigger gently to release a small amount of melted wax onto the desired surface. Move the glue gun in a circular motion to create a seal of the desired size. Be careful not to apply too much pressure as it may cause the wax to spread unevenly.
Tip: Practice on a scrap piece of paper or cardboard before applying the wax seal to your final project to get a feel for the glue gun and achieve the desired result.
FAQ
What materials do I need to make a wax seal with a glue gun?
To make a wax seal with a glue gun, you will need a glue gun, a glue stick, a wax seal stamp, and some wax beads or sticks in your desired color.
Can I use a regular glue gun for making a wax seal?
Yes, you can use a regular glue gun to make a wax seal. Just make sure to use a low-temperature glue gun to avoid burning the wax. You will also need to use glue sticks specifically made for wax seals, as regular glue sticks may not work properly.
How do I make a wax seal with a glue gun?
To make a wax seal with a glue gun, first, heat up the glue gun and insert a wax seal glue stick. Wait for the glue to melt fully. Then, place a wax bead or stick into the melting wax and stir it until it is completely melted. Next, quickly pour the melted wax onto the desired surface and press the wax seal stamp firmly into the wax. Hold it in place for a few seconds to allow the wax to harden. Finally, carefully remove the stamp to reveal your wax seal.
Can I use different colors of wax to make a wax seal with a glue gun?
Yes, you can use different colors of wax to make a wax seal with a glue gun. Simply melt the wax of your desired color along with the glue stick in the glue gun and follow the same steps as mentioned earlier. This way, you can create beautiful and customized wax seals in various colors.


Meet Harrison Clayton, a distinguished author and home remodeling enthusiast whose expertise in the realm of renovation is second to none. With a passion for transforming houses into inviting homes, Harrison's writing at https://thehuts-eastbourne.co.uk/ brings a breath of fresh inspiration to the world of home improvement. Whether you're looking to revamp a small corner of your abode or embark on a complete home transformation, Harrison's articles provide the essential expertise and creative flair to turn your visions into reality. So, dive into the captivating world of home remodeling with Harrison Clayton and unlock the full potential of your living space with every word he writes.