How to glue gun cables
In today’s digital age, cables are an essential part of our everyday lives. Whether it’s charging our phones, connecting our computers, or powering our home appliances, cables are needed to keep everything running smoothly. However, over time, these cables can become worn out or damaged, leading to frustration and inconvenience. But fear not! There is a simple and effective solution – glue gunning cables.
Glue gunning cables is a quick and easy method of repairing damaged cables, providing them with a new lease of life. The process involves using a glue gun to apply a layer of adhesive to the damaged area, creating a protective barrier that prevents further fraying or splitting. Not only does this save you money on buying new cables, but it also helps to reduce electronic waste, making it an eco-friendly choice.
So, how exactly do you glue gun cables? Firstly, gather the necessary materials: a glue gun, glue sticks, and the cable that needs repairing. Make sure the glue gun is heated up and ready to use. Clean the damaged area of the cable, removing any dirt or debris that may interfere with the adhesion process. Then, apply a thin layer of glue to the damaged area, making sure to cover the entire length and width of the affected section.
Next, give the glue time to dry and harden. This typically takes around 30 minutes, but it’s best to check the manufacturer’s instructions for accurate drying times. Once the glue has dried, test the repaired cable by gently flexing it or plugging it into a device. If the cable holds up and functions properly, congratulations – you’ve successfully glue gunned your cable!
In conclusion, glue gunning cables is a cost-effective and eco-friendly solution for fixing damaged cables. With just a few simple steps, you can repair your cables and extend their lifespan. So, the next time you find yourself with a frayed or split cable, don’t throw it away – grab your glue gun and get to work!

Step-by-Step Guide on How to Glue Gun Cables
Glue gun cables can be a quick and effective solution for securing and organizing your cables. Whether you are working on a DIY project or simply need to fix loose cables around your home or office, using a glue gun can provide a reliable and durable solution. Here’s a step-by-step guide on how to glue gun cables:
Step 1: Gather the necessary materials
Before you start gluing, gather all the materials you will need. This includes a glue gun, glue sticks, cable ties, and the cables you want to secure. Make sure you have enough glue sticks to complete the project.
Step 2: Prepare the glue gun
Plug in the glue gun and allow it to heat up for a few minutes until the glue is melted and ready to use. Check the manufacturer’s instructions for specific heating times and temperature settings.
Step 3: Arrange the cables
Before gluing, arrange the cables in the desired position and ensure they are properly aligned. This will make it easier to secure them with the glue gun.
Step 4: Apply glue
Using the glue gun, apply a small amount of glue onto one end of the cables. Be careful not to use too much glue as it can create a messy appearance. Apply the glue evenly to ensure a secure bond.

Step 5: Secure with cable ties
While the glue is still hot, wrap a cable tie around the cables to hold them together. Tighten the cable tie to ensure a firm grip, but be careful not to overtighten as it can damage the cables.
Step 6: Repeat as necessary
Continue applying glue and securing with cable ties along the length of the cables. Repeat this process as necessary, depending on the length and number of cables you need to secure.
Step 7: Allow the glue to dry
Once you have finished gluing and securing all the cables, allow the glue to dry completely. This usually takes a few minutes, but it’s important to not disturb the cables during this time to ensure a strong and secure bond.
Following these step-by-step instructions will help you effectively glue gun cables and achieve a clean and organized cable management solution. Remember to always exercise caution when handling the glue gun to avoid burns or other accidents. Happy gluing!
Preparation for Gluing Gun Cables
Before you start gluing gun cables, it is important to properly prepare the materials and work area to ensure successful and safe application. Follow these steps:

1. Gather the necessary materials:
– Glue gun and glue sticks
– Electrical cables
– Wire cutters and strippers
– Heat shrink tubing

– Heat gun or lighter
– Insulating tape
– Work gloves and safety goggles
2. Read the instructions:
Make sure you thoroughly read and understand the instructions provided with your glue gun and any other materials you will be using. This will help you ensure you are using them correctly and safely.

3. Prepare the work area:
– Choose a well-ventilated area to work in, as the glue gun may emit fumes.
– Lay down a protective covering, such as a plastic sheet or newspaper, to catch any drips or spills.
– Ensure you have a stable and clutter-free work surface.
4. Inspect the cables:

Before gluing gun cables, examine them for any damage, such as cuts or frayed wires. If you notice any issues, it is important to replace the cables to avoid any potential electrical hazards.
5. Measure and cut:
– Measure the length of cable you need and carefully cut it using wire cutters.
– Strip about half an inch of the outer insulation from each end of the cable using wire strippers. This will expose the inner wires for proper connection.
6. Protect the connection:

After gluing gun cables together, it is important to protect the connection to prevent any possible short circuits. Slide heat shrink tubing over each end of the connection and use a heat gun or lighter to shrink it securely in place. Alternatively, you can use insulating tape to cover the connection.
By following these preparation steps, you will be ready to successfully glue gun cables together. Take your time to ensure all materials are properly prepared, and always prioritize safety throughout the process.
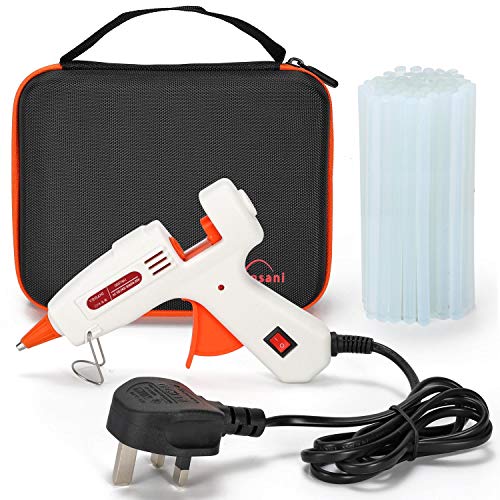
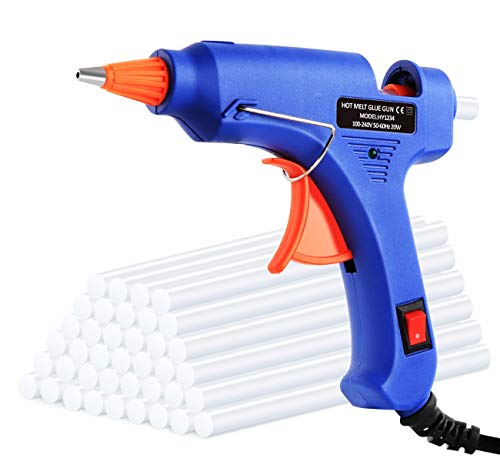
Choosing the Right Glue Gun and Glue Sticks
When it comes to gluing gun cables, using the right type of glue gun and glue sticks is essential for achieving a strong and durable bond. Here are some factors to consider when choosing the right glue gun and glue sticks for your project:
1. Temperature: Glue guns come in different temperature ranges, including low, high, and dual temperature options. Consider the materials you will be gluing and choose a glue gun that can accommodate the required temperature. Low-temperature glue guns are suitable for more delicate materials, while high-temperature glue guns are better for heavy-duty applications.
2. Wattage: Glue guns with higher wattage generally heat up faster and provide a stronger bond. If you are working on a time-sensitive project or need a strong bond, opt for a glue gun with a higher wattage.
3. Size: Glue guns come in a variety of sizes, from mini glue guns to full-size models. The size you choose will depend on the scope of your project and personal preference. Mini glue guns are more portable and suitable for small-scale projects, while full-size glue guns are better for larger projects or continuous use.
4. Trigger Type: Glue guns can have either a manual trigger or a finger trigger. A manual trigger requires continuous pressure to dispense the glue, while a finger trigger allows for a more controlled and continuous flow of glue. Consider the level of precision and comfort you need when choosing the trigger type.
5. Glue Stick Diameter: Glue sticks come in various diameters, including 7mm, 11mm, and 12mm. Ensure that you choose glue sticks that are compatible with the glue gun you have or plan to purchase. Using the wrong diameter can result in poor glue flow or clogging.
| Glue Gun Type | Temperature Range | Wattage | Trigger Type |
|---|---|---|---|
| Low-Temperature Glue Gun | 250°F (120°C) | 10-20W | Manual |
| High-Temperature Glue Gun | 380°F (193°C) | 20-70W | Manual or Finger |
| Dual-Temperature Glue Gun | 250°F (120°C) and 380°F (193°C) | 40-100W | Manual or Finger |
Remember to always follow the manufacturer’s instructions when using a glue gun and glue sticks to ensure safety and optimal performance. By choosing the right glue gun and glue sticks for your specific needs, you can achieve a secure and long-lasting bond when gluing gun cables.
Steps to Glue Gun Cables
Gluing gun cables is a simple process that can help secure and organize your cables. Follow these steps to properly glue gun your cables:
Step 1: Gather Supplies
Before you begin, make sure you have all the necessary supplies. You will need a glue gun, glue sticks, cable clips, and, of course, the cables you want to glue gun.
Step 2: Clean the Cables
Before gluing, ensure that the cables are clean and free from any dirt or dust. This will help the glue adhere better to the cables.
Step 3: Arrange the Cables
Start by arranging the cables in the desired position. This will help you determine where the cable clips should be placed.
Step 4: Apply Glue
Heat up your glue gun and apply a small amount of glue onto the back of a cable clip. Press the clip onto the desired location, making sure it firmly holds the cables in place. Repeat this step for all the cable clips.
Step 5: Allow to Dry
After applying the glue, allow it to dry completely. This will ensure that the cables are securely held in place.
Step 6: Test and Adjust
Once the glue is dry, test the cables to make sure they are secure. If any cables feel loose, don’t hesitate to add more glue or readjust the cable clips.
Step 7: Enjoy Tidy Cables
Once the glue is fully dry and the cables are secure, you can enjoy the satisfaction of having tidy, organized cables. No more tangled mess!
Gluing gun cables is a quick and effective way to keep your cables in order. Follow these steps, and you’ll have neat and organized cables in no time!
Tips and Safety Precautions for Gluing Gun Cables
When it comes to gluing gun cables, it’s important to take the necessary precautions to ensure a safe and effective result. Here are some tips and safety measures to keep in mind:
1. Choose the Right Glue
Not all glues are suitable for gluing gun cables, so it’s essential to choose the right adhesive for the job. Look for a glue that is specifically designed for bonding cables and wires. Make sure to read the product instructions and follow them carefully.
2. Clean the Surfaces
Before applying the glue, it’s crucial to clean the surfaces that will be bonded. Use a mild detergent or rubbing alcohol to remove any dirt, grease, or residues. This will ensure a strong and long-lasting bond between the cables.
Always wear protective gloves and goggles when handling cleaning solutions to prevent skin irritation or eye damage.
3. Apply the Glue Properly
When applying the glue, make sure to use a small, even amount. Avoid excessive glue that can cause a messy and unprofessional look. Be careful not to apply too close to the cable ends as it might interfere with the connections.
Apply the glue in a well-ventilated area to avoid inhaling fumes. If necessary, use a mask or respirator to protect yourself from any potential harmful vapors.
4. Allow Sufficient Curing Time
After gluing the cables, it’s important to allow sufficient curing time for the adhesive to set. Follow the recommended curing time mentioned in the glue’s instructions. Avoid moving or stressing the cables until the glue has fully cured.
Keep in mind that some glues may require additional time to fully bond, especially in colder temperatures. Take the necessary precautions to protect the cables during the curing process.
5. Test the Connection
Once the glue has fully cured, it’s crucial to test the connection to ensure it is secure and functioning properly. Gently tug on the cables to check for any signs of weakness or detachment. If the connection seems loose or unstable, reapply the glue or seek professional assistance.
Remember to always prioritize safety when gluing gun cables. Follow these tips and precautions to ensure a successful and secure bond between the cables, ultimately preventing any potential hazards or issues.
FAQ
What materials do I need to glue gun cables?
To glue gun cables, you will need a glue gun, glue sticks, cable straps or ties, and a clean cloth or alcohol wipes to clean the surface before gluing.
Can I use a regular glue gun to glue gun cables?
Yes, you can use a regular glue gun to glue gun cables. However, it is recommended to use a low-temperature glue gun to prevent overheating and damaging the cables.
Is it safe to glue gun cables myself?
Glue gunning cables yourself can be safe if done properly. However, it is important to take necessary precautions such as unplugging the cables before gluing, using low-temperature glue, and ensuring that the glue does not come in contact with live wires.


Harrison Clayton
Meet Harrison Clayton, a distinguished author and home remodeling enthusiast whose expertise in the realm of renovation is second to none. With a passion for transforming houses into inviting homes, Harrison's writing at https://thehuts-eastbourne.co.uk/ brings a breath of fresh inspiration to the world of home improvement. Whether you're looking to revamp a small corner of your abode or embark on a complete home transformation, Harrison's articles provide the essential expertise and creative flair to turn your visions into reality. So, dive into the captivating world of home remodeling with Harrison Clayton and unlock the full potential of your living space with every word he writes.