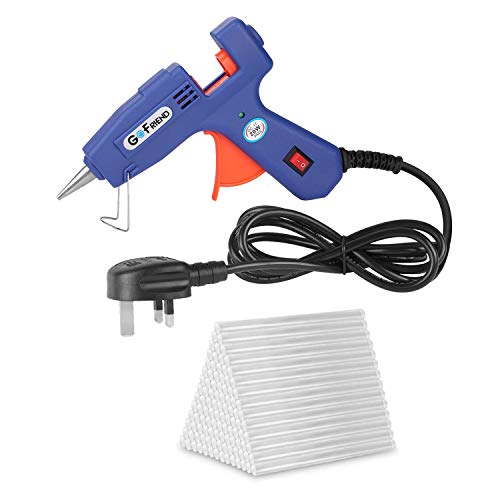
How to clear a blocked glue gun


A glue gun is a handy tool for various craft projects and repairs, but sometimes it can get blocked and become frustrating to use. A blocked glue gun can result in uneven glue flow, clogged nozzle, or even a completely stuck trigger.
To clear a blocked glue gun, you will need some simple tools and a few minutes of your time. The first step is to unplug the glue gun and allow it to cool down. Never attempt to clear a blocked glue gun while it is hot, as it can cause burns or damage to the gun.
Once the glue gun has cooled down, inspect the nozzle for any visible blockages. You can use a pair of tweezers or a toothpick to gently remove any hardened glue or debris that may be obstructing the flow. Be careful not to push the blockage further into the gun, as this can make the problem worse.
If the blockage persists, you can try heating the glue gun again for a short period of time to soften the glue. This may help to loosen the blockage and make it easier to remove. However, be cautious not to overheat the gun or leave it unattended.

If the above methods do not work, you can use a hot water bath to remove the blockage. Fill a container with hot water and submerge the nozzle of the glue gun for a few minutes. The heat from the water can help to dissolve the hardened glue and clear the blockage. Once the glue has softened, you can use a toothpick or a small tool to remove any remaining debris.
Remember to always exercise caution when handling a glue gun, and follow the manufacturer’s instructions for safe use and maintenance. By taking the time to clear a blocked glue gun, you can ensure that it continues to work efficiently and provide you with reliable adhesive power for your projects.
Common reasons for a blocked glue gun
A glue gun is a useful tool for a wide range of crafting and home improvement projects. However, it can become blocked for several reasons, which can be frustrating and hinder your progress. Understanding the common causes of a blocked glue gun can help you troubleshoot the issue and get back to your project quickly.
1. Incorrect glue stick size
Using the wrong size of glue stick is a common reason for a glue gun blockage. Glue sticks come in various diameters, such as 7mm, 11mm, and 12mm. If you use a glue stick that is too large or too small for your glue gun, it can cause blockages. Always check the size compatibility of the glue sticks with your glue gun before using them.
2. Poor glue stick quality
The quality of the glue sticks you use can also contribute to blockages. Low-quality glue sticks may contain impurities or inconsistencies in their composition, which can cause blockages. Always opt for high-quality glue sticks from reputable brands to minimize the risk of blockages.
3. Accumulated residue
Over time, glue residue can accumulate in the nozzle and the internal components of the glue gun, leading to blockages. It is essential to regularly clean your glue gun to prevent this buildup. Follow the manufacturer’s instructions for cleaning or use a small brush to remove any hardened glue residue.
4. Clogged nozzle
The nozzle of the glue gun is a critical component that controls the flow of adhesive. If the nozzle becomes clogged with hardened glue, it can block the output. Ensure that the nozzle is clean and clear before using the glue gun. If it is clogged, you can try using a pin or a thin, pointed object to remove the blockage carefully.
5. Incorrect temperature settings
Glue guns have different temperature settings for different types of glue sticks. Using the incorrect temperature setting for your glue sticks can cause blockages. Refer to the instructions provided with your glue gun to determine the suitable temperature for the glue sticks you are using.
6. Storing the glue gun incorrectly
Improper storage of the glue gun can also lead to blockages. If the glue gun is stored horizontally or with glue residue left inside, it can harden and result in blockages. Always store the glue gun upright and ensure that it is clean before putting it away.
By understanding the common reasons for a blocked glue gun, you can take the necessary measures to prevent and resolve blockages. Regular cleaning, using the correct glue stick size and quality, and following the manufacturer’s instructions are essential for maintaining a functional glue gun.
Troubleshooting steps for a blocked glue gun
If you’re experiencing a blockage with your glue gun, follow these troubleshooting steps to resolve the issue:
| Step | Description |
|---|---|
| Step 1 | Unplug the glue gun from the power source. |
| Step 2 | Allow the glue gun to cool down completely before attempting to unclog it. |
| Step 3 | Inspect the nozzle of the glue gun for any visible blockage or residue. |
| Step 4 | Use a clean, dry cloth or a small brush to remove any debris or dried glue from the nozzle. |
| Step 5 | If the blockage persists, use a needle or a toothpick to gently clear any remaining obstruction. |
| Step 6 | Plug in the glue gun and allow it to heat up for a few minutes. |
| Step 7 | Test the glue gun by squeezing the trigger to ensure that the glue flows smoothly without any blockages. |
| Step 8 | If the blockage still persists, repeat the previous steps or consult the manufacturer for further assistance. |
By following these troubleshooting steps, you should be able to clear any blockages and get your glue gun working again.
Tips for preventing glue gun blockages
1. Use the right glue sticks: Make sure you are using the correct size and type of glue sticks for your glue gun. Using the wrong size or type can lead to blockages.
2. Keep the glue gun clean: Regularly clean the nozzle and chamber of your glue gun to remove any buildup or dried glue that could cause blockages.
3. Avoid low-quality glue sticks: Low-quality glue sticks can contain impurities or have inconsistent melting points, which can contribute to blockages. Invest in high-quality glue sticks to avoid this issue.
4. Store your glue gun properly: When not in use, store your glue gun in a clean and dry place. Avoid leaving it in extreme temperatures or dusty environments, as these can contribute to blockages.
5. Use the glue gun regularly: If you don’t use your glue gun for an extended period of time, the glue inside the gun can harden and cause blockages. It’s best to use your glue gun regularly to prevent this from happening.
6. Keep the glue gun upright: When using the glue gun, make sure to keep it upright to prevent the glue from dripping back into the nozzle and causing blockages. If you need to set the gun down, use a glue gun stand or lay it on a non-porous surface.
7. Use caution when inserting glue sticks: When inserting a new glue stick, make sure it is aligned properly with the glue gun’s feeding mechanism to prevent blockages. If the glue stick is not inserted correctly, it can cause blockages or jams.
8. Do not overheat the glue gun: Overheating the glue gun can cause the glue to become too thin and runny, leading to blockages. Follow the manufacturer’s instructions for temperature settings and avoid exceeding the recommended heat level.
By following these tips, you can help prevent blockages in your glue gun and ensure smooth and efficient operation.
Recommended tools for clearing a blocked glue gun
When dealing with a blocked glue gun, it’s important to have the right tools on hand to effectively clear the blockage. Below are some recommended tools that can help you get your glue gun unclogged quickly and easily.
1. Needle or pin:
Using a needle or pin can be a handy tool for clearing the nozzle of the glue gun. Gently insert the needle or pin into the nozzle and carefully push out any clogs or obstructions. Be cautious not to apply too much pressure, as this may damage the glue gun.
2. Cleaning tool:
A specific cleaning tool designed for glue guns can also be an effective way to clear blockages. These tools often come with a long, thin wire that can be inserted into the nozzle to break up and remove any clogs. Follow the instructions provided with the cleaning tool for best results.
Remember to always unplug the glue gun and allow it to cool down before attempting to clear any blockages. Safety should be your top priority when handling a glue gun. If the blockage persists or you are unsure about clearing it yourself, it is advisable to seek professional assistance.
Using a cleaning rod to clear a glue gun
If your glue gun is blocked, using a cleaning rod can help clear the clog and get your tool back to working order. Follow these steps to safely clear a blocked glue gun:
1. Unplug the glue gun: Before attempting any maintenance or cleaning, always unplug the glue gun from the power source to avoid any accidents.
2. Let the glue gun cool down: Allow the glue gun to cool down completely before attempting to clear the blockage. This will help prevent any burns and ensure your safety.
3. Prepare a cleaning rod: Get a suitable cleaning rod, such as a thin wire or a wooden skewer. Make sure the rod is long enough to reach the blockage without damaging the glue gun.
4. Insert the cleaning rod: Gently insert the cleaning rod into the glue gun’s nozzle or chamber where the blockage is located. Be careful not to force it in too much, as this can damage the gun.
5. Wiggle the cleaning rod: Once inserted, gently wiggle the cleaning rod back and forth to dislodge the blockage. Avoid using excessive force as this can break the rod or damage the glue gun further.
6. Remove the cleaning rod: Slowly withdraw the cleaning rod from the glue gun, making sure to clear any debris that may have accumulated on it. Carefully inspect the rod for any remaining blockage.
7. Test the glue gun: Plug in the glue gun and allow it to heat up. Test it by squeezing the trigger to see if the glue flows freely. If the blockage persists, repeat the process or consider consulting a professional.
Note: If the blockage is excessive or the glue gun is consistently experiencing clogs, it may be due to poor-quality glue sticks or a faulty glue gun. Consider using higher-quality glue sticks and, if necessary, investing in a more reliable glue gun.
Using alcohol to clear a glue gun
If your glue gun is blocked and not dispensing glue properly, one effective method to clear it is by using alcohol. Here’s how you can do it:
- Turn off and unplug the glue gun to ensure your safety.
- Allow the glue gun to cool down completely before attempting to clear the blockage.
- Get a small container and fill it with rubbing alcohol.
- Dip the tip of the glue gun nozzle into the rubbing alcohol, ensuring that it is fully submerged.
- Let the glue gun sit in the alcohol for a few minutes, allowing the alcohol to penetrate and dissolve any dried glue.
- After soaking, take a clean cloth or a paper towel and gently wipe away any excess glue or residue that may be remaining on the nozzle.
- Once you have cleaned the nozzle, plug in the glue gun and turn it on to heat up.
- Squeeze the trigger to check if the glue is dispensing properly. If not, repeat the soaking process for a bit longer.
- Once the glue gun is cleared and dispensing glue smoothly, you can start using it for your projects again.
Remember to always exercise caution and follow the manufacturer’s instructions when using a glue gun. By using alcohol to clear a blocked glue gun, you can extend its lifespan and ensure that it continues to function optimally.
Alternative methods to clear a blocked glue gun
If you find that your glue gun is blocked and the traditional methods aren’t working, there are a few alternative solutions you can try to unclog it.
1. Use a wire
One method to clear a blocked glue gun is by using a wire. Take a thin wire, such as a paper clip or a floral wire, and gently insert it into the nozzle of the glue gun. Move the wire around to dislodge any dried glue that may be blocking the flow. Be careful not to push too hard or you may damage the gun.
2. Heat up the glue gun
If the blockage is caused by glue that has hardened inside the gun, try heating up the glue gun. Plug in the glue gun and let it heat up for a few minutes. The heat will soften the dried glue, making it easier to remove. Once the glue has softened, use a tool, such as tweezers or a toothpick, to scrape out the blockage.
Note: Be cautious when using heat to clear a blocked glue gun, as it can become very hot. Use protective gloves and handle the gun with care.
If these alternatives methods don’t work, it may be time to consider purchasing a new glue gun or taking it to a professional for repair.
Remember, regular maintenance and cleaning of your glue gun can help prevent blockages from occurring in the first place. Clean the nozzle and any other removable parts after each use to ensure smooth and consistent glue flow.
FAQ
What should I do if my glue gun gets blocked?
If your glue gun gets blocked, the first thing you should do is unplug it from the power source to ensure your safety. Then, wait for the glue gun to cool down before attempting to clear the blockage. Once it has cooled down, you can use a small tool, such as a toothpick or a needle, to remove any hardened glue or debris from the nozzle.
Why does my glue gun keep getting blocked?
There are several reasons why your glue gun may be getting blocked. One common reason is the use of low-quality glue sticks that contain impurities. These impurities can clog the nozzle of the glue gun and prevent the glue from flowing smoothly. Another reason could be that you are not using the glue gun frequently enough, causing the glue to harden and block the nozzle over time.
Can I use any tool to clear the blockage in my glue gun?
While it is possible to use various tools to clear the blockage in your glue gun, it is recommended to use a small tool that will not damage the nozzle. Toothpicks and needles are commonly used to remove hardened glue or debris from the nozzle. However, it is important to be gentle and avoid using sharp or metal objects that could scratch or damage the nozzle.


Meet Harrison Clayton, a distinguished author and home remodeling enthusiast whose expertise in the realm of renovation is second to none. With a passion for transforming houses into inviting homes, Harrison's writing at https://thehuts-eastbourne.co.uk/ brings a breath of fresh inspiration to the world of home improvement. Whether you're looking to revamp a small corner of your abode or embark on a complete home transformation, Harrison's articles provide the essential expertise and creative flair to turn your visions into reality. So, dive into the captivating world of home remodeling with Harrison Clayton and unlock the full potential of your living space with every word he writes.