How to back cross stitch hoop glue gun
Back cross stitching is a popular technique that adds a professional touch to your embroidery projects. When it comes to displaying your cross stitch masterpiece, using a hoop can give it a polished look. In this tutorial, we will show you how to back cross stitch hoop using a glue gun.
To begin, you will need a few supplies: a wooden embroidery hoop, cross stitch fabric, a cross stitch pattern of your choice, embroidery floss in various colors, a needle, and a glue gun. Make sure to choose a hoop that is slightly larger than the design you want to display.
Start by placing the fabric in the hoop, making sure it is stretched tight and even. Tightening the screw on the hoop will help secure the fabric in place. Next, place the pattern on top of the fabric and secure it with tape or pins. This will serve as your guide for the cross stitch design.
Thread your needle with the embroidery floss and begin stitching according to the pattern. Use the backstitch, one of the most basic cross stitch techniques, to create smooth and even lines. As you work, make sure to secure the ends of the floss by weaving them through the stitches on the back of the fabric.
Once you have completed your cross stitch design, it’s time to back cross stitch hoop to give it a finished look. Using a glue gun, apply a thin line of glue along the inner edge of the hoop. Carefully press the fabric onto the glue, making sure it is centered and taut. Be sure to work quickly, as the glue can dry fast.
Once the glue has dried, trim any excess fabric from the back of the hoop. This will give your finished piece a clean and professional appearance. Now your back cross stitch hoop is ready to be displayed or given as a thoughtful gift!
In conclusion, using a glue gun to back cross stitch hoop is a simple and effective way to add a polished finish to your cross stitch projects. With a few basic supplies and a little patience, you can create beautiful and professional-looking pieces that will be cherished for years to come.
Choosing the Right Back Cross Stitch Hoop
When it comes to cross stitching, choosing the right hoop is crucial for achieving beautiful and professional-looking results. The hoop not only holds the fabric taut but also helps create a smooth surface for your stitches. Here are some factors to consider when selecting a back cross stitch hoop:
1. Size
The size of the hoop you choose should depend on the size of your cross stitch project. If your project is small, a smaller hoop will be more suitable, as it will provide better tension and precision. However, for larger projects, it is recommended to use a bigger hoop to accommodate the fabric properly.
2. Material
Hoops are available in different materials, such as wood and plastic. Wooden hoops are more traditional and provide a sturdy grip on the fabric. They are usually preferred by experienced stitchers. Plastic hoops, on the other hand, are lightweight and easier to handle, making them suitable for beginners or those with limited dexterity.
3. Adjustable vs. Non-adjustable
Consider whether you want an adjustable or non-adjustable hoop. Adjustable hoops come with a screw or a clamp mechanism that allows you to adjust the tension according to your preference. They are great if you like to switch between different projects or fabrics. Non-adjustable hoops have a fixed tension and are more suitable for projects that require consistent tension throughout.
4. Grip
Look for a hoop that provides a secure grip on the fabric. Hoops with inner rubber or silicone rings offer better grip and prevent the fabric from slipping. This can be especially beneficial when working with slippery or delicate fabrics.
5. Shape
Consider the shape of the hoop you prefer. Round hoops are the most common and versatile, but oval or square-shaped hoops can be useful for specific projects or if you prefer a different aesthetic.
By considering these factors and experimenting with different hoops, you can find the perfect back cross stitch hoop that suits your needs and enhances your stitching experience. Happy stitching!
Considerations for selecting the perfect hoop for your project
When it comes to cross stitching, selecting the right hoop is essential for not only keeping your fabric taut but also ensuring a successful and enjoyable stitching experience. Here are some considerations to keep in mind when choosing a hoop for your project:
Size
The size of the hoop you choose will depend on the size of your design and the amount of fabric you want to work with. A smaller hoop is suitable for smaller designs, while a larger hoop is more appropriate for larger designs or projects that require a larger amount of fabric to be secured.
Material
Hoops can be made of wood, plastic, or metal. Each material has its own unique qualities. Wood is often favored for its durability and traditional aesthetic. Plastic hoops tend to be lightweight and great for travel. Metal hoops, such as brass or stainless steel, are known for their strength and stability. Consider your personal preferences and the needs of your project when selecting a hoop material.
Tension
The tension of the hoop is important for keeping your fabric taut and preventing wrinkles. Some hoops have a screw mechanism that allows you to easily adjust the tension, while others have a spring mechanism for quick and effortless tightening. Choose a hoop with a tensioning system that you find comfortable to use and provides consistent tension throughout your stitching.
Quality
Investing in a high-quality hoop can make a significant difference in the success and enjoyment of your cross stitching project. Look for hoops that are well-made, smooth, and sturdy. Avoid hoops with rough edges or any defects that could snag or damage your fabric.
By considering these factors and selecting the perfect hoop for your project, you’ll be well on your way to creating beautiful cross stitch pieces with ease and confidence. Happy stitching!
Preparing the Fabric for Back Cross Stitch
Before you can begin your back cross stitch project, it’s important to properly prepare your fabric. Follow these steps to ensure that your fabric is ready for stitching:
- Start by washing and ironing your fabric to remove any wrinkles or dirt. This will ensure a smooth and clean surface for stitching.
- Measure and cut your fabric to the desired size, leaving some extra space around the edges for framing or finishing.
- If your fabric is prone to fraying, it’s a good idea to secure the edges with a seam sealant or by folding and stitching along the edges.
- If you’re using a hoop to hold your fabric in place, position your fabric over the hoop and tighten the hoop to secure it. Make sure the fabric is stretched evenly and taut across the hoop.
- Consider using a fabric marker or pencil to mark the center of your fabric, as this can help with aligning your stitches and creating symmetrical designs.
- If you’re working with a particularly delicate fabric, such as linen or silk, you may want to use a backing fabric or interfacing to add stability and prevent distortion during stitching.
By taking the time to properly prepare your fabric, you’ll create a solid foundation for your back cross stitch project. This will help ensure that your stitches are even and your finished piece looks professional and polished.
Steps to ensure a smooth and wrinkle-free surface
When working on a back cross stitch hoop project and using a glue gun, it is important to take certain steps to ensure that the surface of your fabric remains smooth and wrinkle-free. Here are some tips to help you achieve a professional-looking result:
1. Prepare your work area
Clear a clean and flat surface to work on. Make sure there are no dust or debris that could interfere with the bonding of the fabric and the glue. It’s also a good idea to lay down a clean towel or cloth to protect the surface from any excess glue or potential stains.
2. Secure the fabric in the hoop
Before starting the gluing process, make sure your fabric is properly stretched and secured in the embroidery hoop. This will help prevent any sagging or puckering of the fabric during the gluing process.
3. Apply glue in small sections
Working in small sections at a time will help you have more control over the glue application. Apply a thin line of glue along the edge of the fabric and quickly press it onto the inner side of the hoop. Working quickly will prevent the glue from drying before you can secure the fabric.
4. Smooth out any wrinkles or bubbles
After applying the glue, use your fingers or a smooth, blunt object like a popsicle stick to gently smooth out any wrinkles or bubbles that may have formed. Pay special attention to the edges of the fabric to ensure a clean and tight fit against the hoop.
5. Let the glue dry completely
Allow the glue to dry completely before moving or handling the fabric. This will ensure a strong bond and prevent any potential shifting or loosening of the fabric. The drying time may vary depending on the type of glue used, so refer to the manufacturer’s instructions.
6. Trim any excess fabric
Once the glue has dried, carefully trim any excess fabric extending beyond the hoop’s edge. This will give your project a neat and finished look.
By following these steps, you can create a beautiful and smooth surface for your back cross stitch hoop project. Take your time and be patient, and you’ll be rewarded with a professional-looking result.
| Tip | Caution | Note |
|---|---|---|
| Work in a well-ventilated area to avoid inhaling glue fumes. | Be careful when handling the glue gun to avoid burns. | Experiment with different glue brands to find the one that works best for your project. |
Using a Glue Gun for Back Cross Stitch
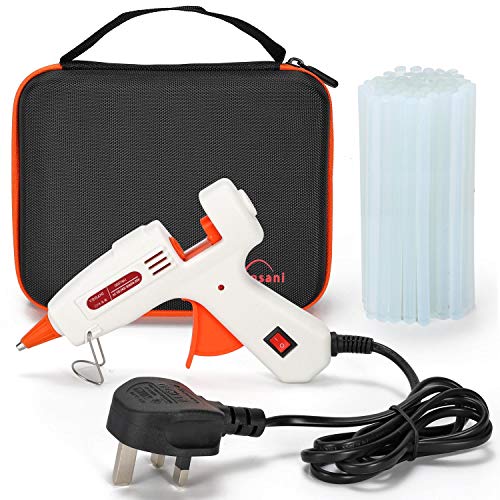
Back cross stitching is a popular embroidery technique that adds texture and depth to your designs. When working on a project with a cross stitch hoop, using a glue gun can be a useful tool to secure your fabric in place. Here are some steps to help you get started:
Materials Needed:
- A cross stitch hoop
- Fabric for cross stitching
- A glue gun
- Hot glue sticks
Instructions:
Step 1: Before starting your back cross stitching project, make sure your fabric is clean, ironed, and cut to the appropriate size for your hoop.
Step 2: Place your fabric over the inner ring of the cross stitch hoop. Make sure the fabric is centered and taut.
Step 3: Carefully apply a small amount of hot glue along the inner ring of the hoop. Be sure to work quickly before the glue cools and hardens.
Step 4: Press the fabric firmly onto the hot glue, ensuring it adheres securely to the hoop. Smooth out any wrinkles or bubbles as you go.
Step 5: Continue applying hot glue and pressing the fabric in sections until the entire hoop is secured. Take your time and be careful not to burn yourself with the hot glue.
Step 6: Once the fabric is completely glued to the hoop, trim any excess fabric with scissors. Leave a small margin around the hoop to prevent the stitches from going too close to the edge.
Step 7: Your fabric is now ready for back cross stitching! Thread your needle with the desired embroidery floss and begin your project as usual.
Using a glue gun for back cross stitching can help keep your fabric taut and prevent it from slipping or loosening as you work. It’s important to use caution when working with hot glue to avoid burns or injuries. With practice and proper technique, you’ll be able to create beautiful cross stitch projects with a secure fabric foundation.
Exploring the advantages and techniques of using a glue gun
Glue guns are versatile tools that can be used for a wide range of crafts and projects. From woodworking to fabric crafts, a glue gun can quickly and securely bond materials together. Here are some advantages and techniques to consider when using a glue gun.
Advantages of using a glue gun:
- Quick and easy: Glue guns heat up within minutes, allowing you to start your project without any delays. The glue dispenses smoothly and dries quickly, saving you time.
- Strong bond: Glue guns create a strong and durable bond between materials. This makes them ideal for projects that require a long-lasting hold.
- Versatile: Glue guns can be used on a variety of materials, including wood, fabric, plastic, and metal. This versatility makes them a popular choice among crafters and DIY enthusiasts.
- Precise application: The glue gun’s nozzle allows for precise application, ensuring that the glue is applied exactly where you need it. This is especially useful when working with intricate or delicate projects.
Techniques for using a glue gun:
- Clean surfaces: Before using a glue gun, make sure the surfaces you are bonding are clean and free from dust or debris. This will ensure a strong and secure bond.
- Test first: It’s always a good idea to test the glue on a scrap piece of material before applying it to your project. This will give you an idea of how much glue to use and how quickly it dries.
- Apply the right amount of glue: Using too much or too little glue can affect the strength of the bond. Start with a small amount of glue, and add more if necessary.
- Work quickly: Glue guns dry fast, so it’s important to work quickly and efficiently. Plan out your steps beforehand to ensure a smooth process.
- Stay safe: Glue guns can get very hot, so it’s important to handle them with care. Use heat-resistant gloves if needed, and always unplug the gun when not in use.
By understanding the advantages and techniques of using a glue gun, you can unleash your creativity and complete your projects with ease and efficiency. Whether you’re a beginner or an experienced crafter, a glue gun is a valuable tool to have in your arsenal.
Starting Your Back Cross Stitch Project
Back cross stitch is a popular embroidery technique that can be used to create beautiful designs on fabric. Whether you’re a beginner or an experienced cross stitcher, starting a new project requires some preparation and planning. Here are some steps to help you get started:
Gather Your Materials
Before you begin your back cross stitch project, make sure you have all the necessary materials. This includes a cross stitch hoop, fabric, embroidery floss, scissors, and a needle. You may also need a glue gun if you plan to secure the fabric to the hoop.
Prepare Your Fabric and Hoop
Begin by cutting your fabric to the desired size for your project. Then, place the fabric in the cross stitch hoop and tighten the hoop to secure the fabric. If you’re using a glue gun, apply a small amount of glue along the inner ring of the hoop and press the fabric onto it. This will help keep the fabric taut and prevent it from moving while you stitch.
Once your fabric is secured in the hoop, make sure it is centered and positioned correctly. Adjust the fabric as needed before starting your project.
Choose Your Design and Start Stitching
Next, choose a cross stitch pattern or design that you want to create. There are many resources available online where you can find free or paid patterns. Once you have your design, thread your needle with the desired embroidery floss color and start stitching.
When starting your back cross stitch project, it’s important to begin from the center of your design and work your way outwards. This will help ensure that your design is symmetrical and centered on your fabric.
Follow the pattern instructions and stitch each cross in the designated color. You can use a backstitch or running stitch to outline the different areas of your design. Take your time and enjoy the process of creating your cross stitch masterpiece.
When you’re finished stitching, secure any loose ends by knotting the floss on the backside of your fabric. Trim any excess floss with scissors.
Remember, practice makes perfect with cross stitch, so don’t be discouraged if your first project isn’t perfect. With time and experience, your stitching skills will improve, and you’ll be able to tackle more advanced projects.
FAQ
What is back cross stitch hoop glue gun?
Back cross stitch hoop glue gun is a tool that is used in cross stitching to secure the fabric onto the hoop. It helps to keep the fabric taut and prevents it from moving while you stitch.
How do I use a back cross stitch hoop glue gun?
To use a back cross stitch hoop glue gun, first, make sure the fabric is centered and taut in the hoop. Then, apply a small amount of glue onto the inner rim of the hoop. Press the fabric onto the glue, starting at one side and working your way around to the other side. Make sure the fabric is smooth and free of wrinkles. Allow the glue to dry completely before starting to stitch.
Can I use any glue gun for back cross stitch hoop?
It is recommended to use a low-temperature glue gun for back cross stitch hoop. High-temperature glue guns may melt or damage the fabric. Low-temperature glue guns are safer to use and provide enough adhesive strength to secure the fabric onto the hoop. Always test the glue on a small piece of fabric before applying it to your project to ensure that it does not cause any damage.


Harrison Clayton
Meet Harrison Clayton, a distinguished author and home remodeling enthusiast whose expertise in the realm of renovation is second to none. With a passion for transforming houses into inviting homes, Harrison's writing at https://thehuts-eastbourne.co.uk/ brings a breath of fresh inspiration to the world of home improvement. Whether you're looking to revamp a small corner of your abode or embark on a complete home transformation, Harrison's articles provide the essential expertise and creative flair to turn your visions into reality. So, dive into the captivating world of home remodeling with Harrison Clayton and unlock the full potential of your living space with every word he writes.