Does glue gun stick to wall

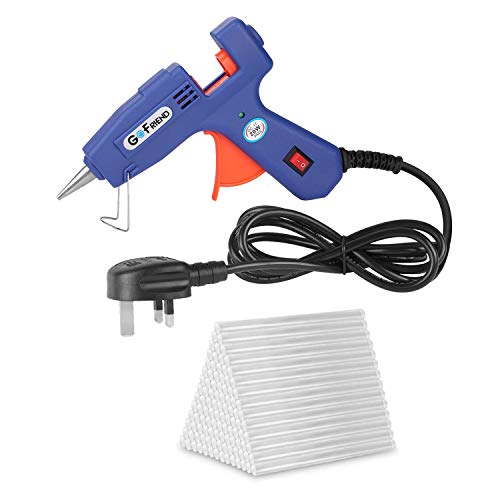
Glue guns are versatile tools that are commonly used for various art and craft projects. They are known for their ability to quickly bond different materials together, creating a strong and durable bond. But, have you ever wondered if a glue gun stick can be used to attach items to a wall?
The answer to this question is both yes and no. It primarily depends on the type of glue stick being used and the surface of the wall. Glue sticks come in different formulations, and some are specifically designed to adhere to certain surfaces, such as wood, fabric, metal, or plastic. However, most standard glue sticks are not suitable for bonding items to walls.
The main reason why glue sticks may not stick effectively to walls is that walls typically have a smooth and non-porous surface, such as painted or wallpapered surfaces. Glue sticks, especially those made for general purpose bonding, are not designed to stick to such surfaces. They are more suitable for porous materials, such as fabric or wood, where the adhesive can penetrate and create a strong bond.
If you want to attach items to a wall, it is recommended to use a more appropriate method, such as using adhesive hooks, picture hanging strips, or nails and screws. These methods are specifically designed for wall applications and provide a secure hold without damaging the surface. Remember to always check the manufacturer’s instructions and recommendations before applying any adhesive or hanging items on a wall.
Does a Glue Gun Adhere to the Wall?
When it comes to adhesion, glue guns are typically not designed to stick to walls. Glue guns are designed to bond materials together, such as fabrics, plastics, and wood, with the help of hot-melt adhesive sticks. However, the adhesive from a glue gun may not provide a strong bond when applied directly to a wall surface.
If you are looking to attach something to a wall using a glue gun, it is important to consider the material of the wall and the weight of the item you are trying to adhere. For lightweight items, such as small decorations or lightweight frames, a glue gun adhesive may be sufficient. However, for heavier items or items that need a stronger bond, it is recommended to use alternative methods such as screws, nails, or wall hooks.
It is worth noting that the adhesive from a glue gun can leave residue on the wall surface. This residue may be difficult to remove and could potentially damage the wall if not handled properly. Therefore, it is always a good idea to test the adhesive on a small, inconspicuous area of the wall before applying it to a larger surface.
If you do decide to use a glue gun adhesive on a wall, here are some tips to ensure proper adhesion:
- Clean the wall surface thoroughly to remove any dust, dirt, or grease.
- Apply the adhesive in small, even dots or lines to distribute the weight evenly.
- Press the item firmly against the wall and hold it in place for a few seconds to allow the adhesive to cool and set.
- Avoid applying excessive force or weight on the bonded item until the adhesive has fully cured.
Ultimately, while a glue gun can be a versatile tool for various projects, it may not be the best option for sticking items directly to a wall. Considering alternative methods and materials specifically designed for wall adhesion will often yield better results.
The Stickiness Factor: Glue Gun Basics
Glue guns are versatile tools that can be used for a variety of crafts and DIY projects. Whether you’re a seasoned crafter or a beginner, understanding the basics of glue guns is essential for successful projects. One important factor to consider is the stickiness of the glue gun.

Glue guns use a special type of adhesive called hot glue, which is melted in the gun and then applied to surfaces. The hot glue is initially in a liquid state but quickly hardens and becomes sticky as it cools. The stickiness of the glue gun depends on various factors, including the temperature at which it is set and the type of glue used.
When using a glue gun, it’s important to choose the right temperature setting for your project. Low-temperature glue guns are ideal for delicate materials such as fabric, foam, and ribbon. The lower temperature reduces the risk of damaging these materials while still providing enough stickiness to hold them together. High-temperature glue guns are better suited for more robust materials like wood, metal, and plastic. The higher temperature ensures a stronger bond and better stickiness.
In addition to temperature, the type of glue used also affects the stickiness of the glue gun. There are various types of hot glue sticks available, including clear, colored, and specialty glues. Clear glue sticks are perfect for projects where the adhesive should be invisible, while colored glue sticks add a fun and creative touch. Specialty glues, such as glitter or glow-in-the-dark glue sticks, provide unique stickiness properties for special projects.
It’s important to note that while glue guns provide excellent stickiness, they may not be suitable for all surfaces. The stickiness of hot glue may vary depending on the material it is applied to. Smooth surfaces like glass or metal may not provide enough texture for the glue to adhere properly. In such cases, it’s recommended to use additional methods such as roughening the surface or using a different type of adhesive.
In conclusion, the stickiness factor of glue guns plays a crucial role in the success of your projects. Understanding the basics, such as temperature settings and glue types, will help you achieve the desired stickiness for your crafts and DIY endeavors. Remember to always test the stickiness of the hot glue on a small area before applying it to the entire surface to ensure a secure bond.

Surface Matters: Wall Material Compatibility
When it comes to using a glue gun on your walls, it is important to consider the compatibility of the wall material with the adhesive. Not all wall materials are suitable for glue gun applications, and using the wrong adhesive can lead to damage or ineffective adhesion.
Here is a table outlining the compatibility of common wall materials with glue guns:
| Wall Material | Glue Gun Compatibility |
|---|---|
| Drywall | Compatible |
| Plaster | Compatible |
| Wood | Compatible |
| Tile | Compatible |
| Glass | Compatible |
| Metal | Compatible |
| Brick | Compatible |
| Concrete | Compatible |
| Plastic | Compatible |
It is important to note that the compatibility of the glue gun also depends on the temperature it operates at. Some glue guns have higher temperature settings that may not be suitable for certain wall materials, such as plastic. Always check the temperature and any specific instructions provided by the glue gun manufacturer for the best results.
In conclusion, while glue guns can be used on a variety of wall materials, it is crucial to consider the compatibility of the adhesive and the temperature settings of the glue gun. By choosing the right adhesive and following the manufacturer’s guidelines, you can safely and effectively use a glue gun on your walls.
Securing the Bond: Proper Wall Preparation
Before using a glue gun to stick something to a wall, it is essential to properly prepare the surface. A well-prepared wall ensures a stronger bond and prevents objects from falling off. Here are some steps to follow for successful wall preparation:

- Clean the wall: Remove any dust, dirt, or grease from the wall surface using a mild detergent and water. Wipe the wall with a clean cloth or sponge and allow it to dry completely.
- Smooth the wall: Inspect the wall for any rough or uneven areas. Use sandpaper or a sanding block to smooth out these imperfections. This step eliminates obstacles that can interfere with the adhesive bond.
- Prime the wall (optional): Applying a primer can enhance the adhesive bond, especially on porous surfaces such as drywall or unpainted surfaces. Use a paintbrush or roller to apply a thin, even coat of primer. Allow it to dry according to the manufacturer’s instructions.
- Choose the right adhesive: Ensure that the glue gun adhesive is suitable for the wall material and the weight of the object being attached. Consult the glue gun manufacturer’s guidelines for the correct adhesive selection.
- Apply the adhesive: Load the selected adhesive into the glue gun and wait for it to heat up. Apply the adhesive in small, even dots or lines on the back of the object to be attached. Avoid applying too much adhesive, as it may become visible or cause a messy appearance.
- Attach the object: Press the object firmly onto the prepared wall surface. Apply steady pressure for a few seconds to ensure a secure bond. Avoid any movements or disturbances until the adhesive has fully cured.
- Allow for curing time: The adhesive bond needs time to develop fully. Refer to the adhesive manufacturer’s instructions for the recommended curing time. Avoid placing excessive weight or stress on the attached object until the adhesive has fully cured.
By following these steps, you can ensure that the glue gun adhesive sticks securely to the wall. Proper wall preparation is crucial for a reliable and long-lasting bond.
Removal Methods: Peeling off the Glue
If you’re looking to remove glue that has been stuck to your wall using a glue gun, there are a few methods you can try. One of the simplest ways to remove the glue is by peeling it off the wall.
Before attempting to peel off the glue, make sure to wear protective gloves to avoid any potential injuries. Here are the steps you can follow:
Step 1: Heat the Glue
Using a hairdryer, heat the glue on the wall for a few minutes. The heat will soften the glue and make it easier to peel off.

Step 2: Start Peeling
Once the glue has been heated, use a plastic scraper or your fingernail to gently lift and peel off the glue from the wall. Start at one corner and slowly work your way across until all the glue has been removed.
Step 3: Remove Residue
After peeling off the glue, you may notice some residue left on the wall. To remove this, you can use a mild adhesive remover or rubbing alcohol. Apply a small amount to a clean cloth or cotton ball and gently rub the residue until it comes off.
Step 4: Clean the Wall

Once all the glue and residue have been removed, clean the wall with a mild detergent and warm water. Use a sponge or cloth to scrub away any remaining traces of glue or adhesive remover.
Keep in mind that the success of peeling off the glue will depend on the type of wall surface and the adhesive used. If the glue is stubborn and doesn’t come off easily, you may need to try other removal methods or seek professional help to avoid damaging the wall.
Alternative Solutions: Mounting without Glue Guns
If you don’t have a glue gun or prefer not to use one, there are alternative solutions for mounting objects on walls. These solutions not only allow you to avoid the use of glue guns but also offer different methods for securely attaching items to your walls.
1. Command Strips
Command Strips are a popular alternative to glue guns when it comes to mounting lightweight items on walls. These adhesive strips are designed to hold firmly but can be easily removed without leaving any damage or residue on the wall. Simply attach one side of the strip to the wall and the other side to your item, then press firmly to ensure a secure bond. Command Strips come in various sizes and weight capacity options, making them suitable for different applications.
2. Picture Hanging Hooks
If you’re looking to hang pictures or frames on your walls, picture hanging hooks can be an effective alternative to glue guns. These hooks come in different designs, including adhesive hooks that can be easily attached to the wall without the need for any tools. Simply follow the instructions provided with the hook to ensure proper installation. Picture hanging hooks offer a reliable and flexible solution for displaying artwork and photographs.
It’s important to note that the suitability of these alternative solutions may vary depending on the weight and surface of the item you’re trying to mount. Always read and follow the instructions provided by the manufacturer for best results.
By exploring these alternative solutions, you can find a method that works best for your specific mounting needs, even without the use of a glue gun. Whether you choose Command Strips or picture hanging hooks, you can achieve a secure and damage-free mounting solution for your walls.
FAQ
Can I use a glue gun to stick things to the wall?
Yes, a glue gun can be used to stick lightweight objects to a wall. However, it may not hold heavy objects or adhere well to certain surfaces.
Is it safe to use a glue gun on painted walls?
Using a glue gun on painted walls can potentially damage the paint. It is advisable to test a small area before applying glue to the entire wall to ensure it does not peel off the paint.
How long does the glue from a glue gun last on the wall?
The longevity of glue from a glue gun on the wall depends on various factors such as the type of glue used, the weight of the object being stuck, and the condition of the wall surface. Generally, glue from a glue gun can last for an extended period, but it may eventually lose its adhesion over time.

How long does the dbs last for

Meet Harrison Clayton, a distinguished author and home remodeling enthusiast whose expertise in the realm of renovation is second to none. With a passion for transforming houses into inviting homes, Harrison's writing at https://thehuts-eastbourne.co.uk/ brings a breath of fresh inspiration to the world of home improvement. Whether you're looking to revamp a small corner of your abode or embark on a complete home transformation, Harrison's articles provide the essential expertise and creative flair to turn your visions into reality. So, dive into the captivating world of home remodeling with Harrison Clayton and unlock the full potential of your living space with every word he writes.