What You Need to Know About Drilling Holes in Plexiglass

Drilling holes in plexiglass can be a delicate task, as this transparent material is prone to cracking and shattering if not handled properly. Whether you are working on a DIY project or a professional job, it’s important to have the right tools and techniques to ensure success.
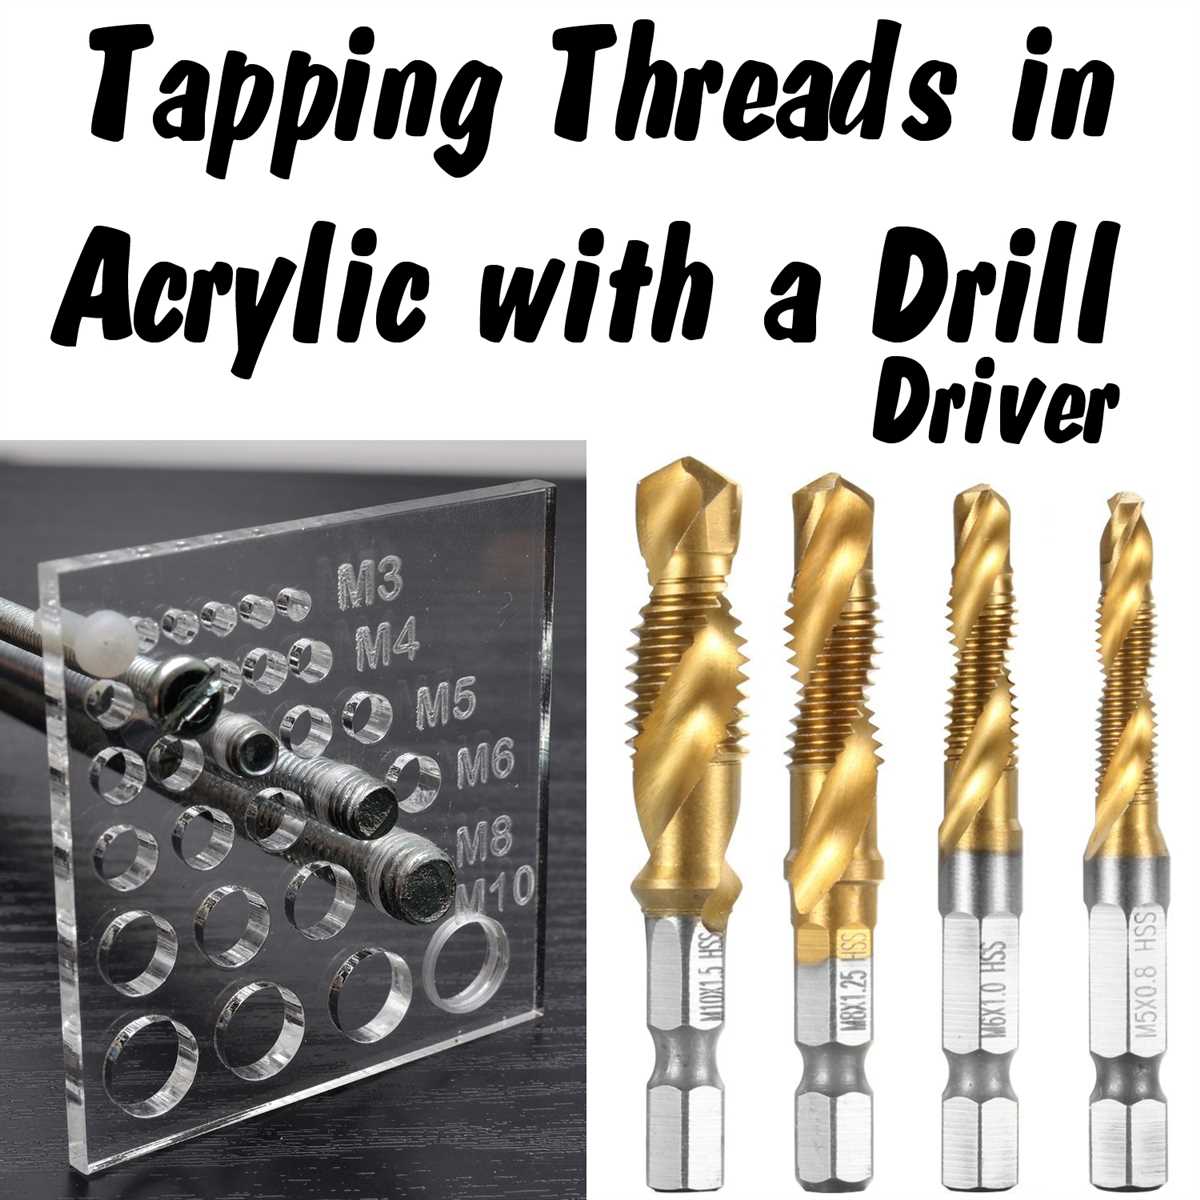
The first thing to consider when drilling holes in plexiglass is the type of drill bit to use. It’s recommended to use a drill bit specifically designed for drilling acrylic or plexiglass. These drill bits typically have a sharp, pointed tip and flutes that help to remove the material as you drill. Using a standard drill bit can result in chipping or cracking of the plexiglass.
Another important factor to consider is the speed at which you drill. Plexiglass is a thermoplastic, which means it becomes soft and pliable when heated. To avoid melting the plexiglass, it’s important to drill at a slow speed. This will help to prevent overheating and ensure clean, precise holes.
Tip: It’s a good idea to practice drilling on a scrap piece of plexiglass before working on your actual project. This will give you a chance to test different drill speeds and techniques, and help you gain confidence before drilling into your final material.
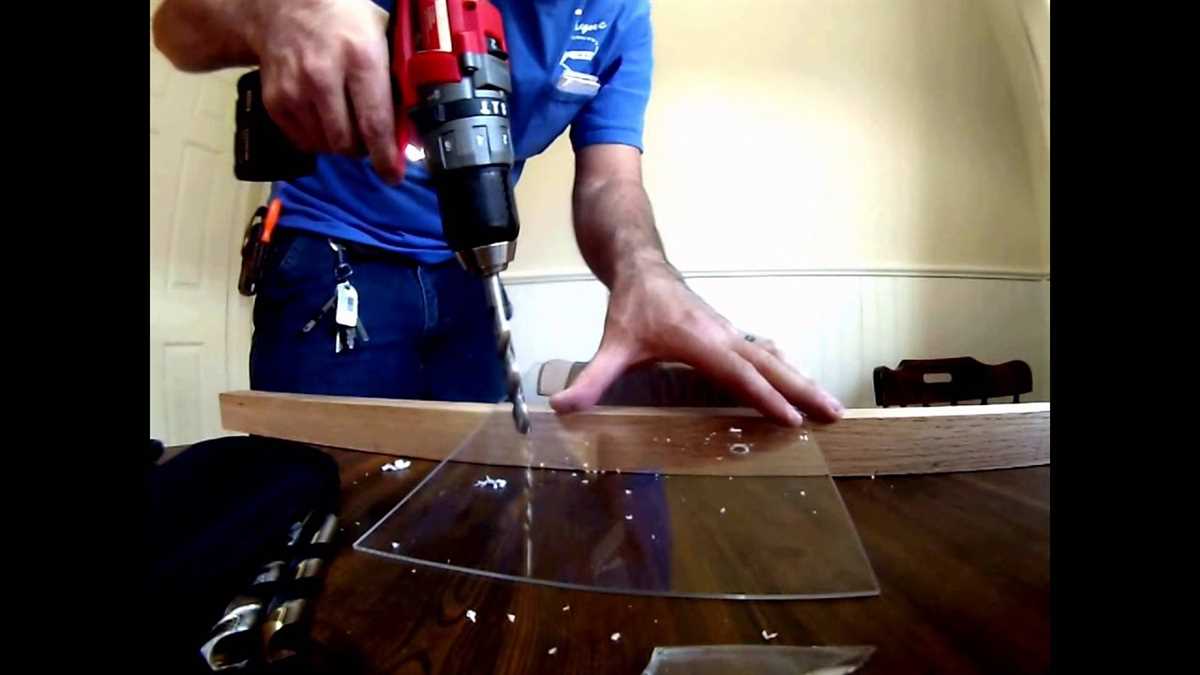
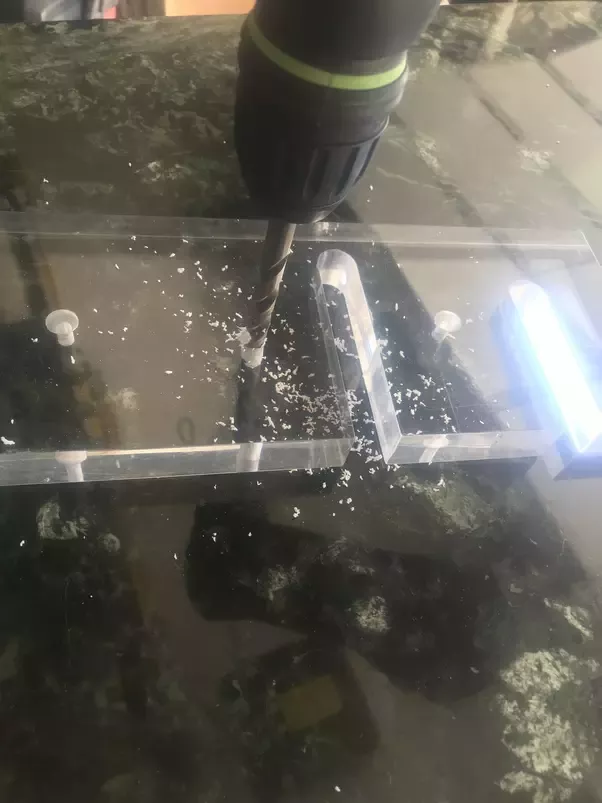
When drilling holes in plexiglass, it’s also important to use the right technique. Start by marking the location of the hole with a pencil or marker. Then, make a small indent using a center punch or nail. This will help to prevent the drill bit from slipping and damaging the plexiglass. Next, apply light pressure as you drill, letting the drill bit do the work. Be sure to keep the drill straight and steady, and avoid applying too much force, as this can cause the plexiglass to crack.
Remember, with the right tools, techniques, and a little practice, drilling holes in plexiglass can be a successful and rewarding task. Just take your time, follow these tips, and you’ll be well on your way to creating clean, precise holes in plexiglass for your next project.

Understanding Plexiglass
What is Plexiglass?
Plexiglass, also known as acrylic glass or acrylic, is a transparent thermoplastic material that is lightweight and shatter-resistant. It is commonly used as an alternative to glass due to its durability and versatility.
Properties of Plexiglass
- Transparency: Plexiglass is known for its high transparency, allowing for clear visibility through the material.
- Durability: It is more impact-resistant than glass, making it less likely to break or shatter.
- Weather Resistance: Plexiglass is resistant to UV radiation and weathering, making it suitable for outdoor applications.
- Lightweight: It is lighter than glass, which makes it easier to handle and install.
- Easy to Fabricate: Plexiglass can be easily cut, drilled, and shaped to meet specific requirements.
Applications of Plexiglass
Plexiglass has a wide range of applications in various industries. Some common uses include:
- Windows and skylights
- Signage and displays
- Protective barriers
- Light fixtures and lamps
- Furniture and home decor
How is Plexiglass Drilled?
Drilling holes in plexiglass requires special attention to prevent cracking or chipping of the material. It is important to use the correct drill bit and drilling technique to ensure a clean and accurate hole. For more information on drilling holes in plexiglass, refer to our article “What You Need to Know About Drilling Holes in Plexiglass”.

Maintenance and Care
To maintain the clarity and appearance of plexiglass, it is essential to clean it regularly using a mild soap solution and a soft cloth. Avoid using abrasive cleaners or rough materials, as they can scratch the surface of the material.
| Do | Don’t |
|---|---|
| Use a mild soap solution | Use abrasive cleaners |
| Use a soft cloth or sponge | Use rough materials |
| Gently wipe the surface | Scrub vigorously |
| Rinse with clean water | Leave soap residue |
| Dry with a soft towel | Leave it wet |
Importance of Drilling Holes
Drilling holes in plexiglass is an essential skill that is often required in various DIY and professional projects. These holes serve multiple purposes and understanding their importance is crucial for working with plexiglass effectively.
1. Installation and Assembly
One of the primary reasons for drilling holes in plexiglass is for installation and assembly purposes. Whether you are mounting plexiglass sheets or attaching it to other materials, holes allow for easy attachment and secure fixation.
By drilling holes in strategic locations, you can ensure that the plexiglass is aligned properly and securely fastened to the desired object. This is particularly important in projects such as signage, display cases, or protective barriers.

2. Ventilation and Accessibility
Holes in plexiglass are also essential for providing ventilation and accessibility. In applications such as enclosures or protective covers, drilling holes allows air to circulate and prevent the buildup of heat or moisture. It also enables access to components or objects housed within the plexiglass structure.
For example, in electronics enclosures, holes are often drilled to allow for the passage of cables, wires, or ventilation fans. These holes not only improve the functionality of the enclosure but also help maintain the desired operating conditions for the enclosed components.
3. Precision and Aesthetic Enhancement
Drilling holes in plexiglass can also serve aesthetic purposes. By carefully drilling holes in stylish patterns or designs, you can enhance the overall appearance of the material. This is commonly seen in decorative plexiglass items such as lighting fixtures, architectural features, or artistic displays.

Furthermore, precision is crucial when drilling holes in plexiglass to ensure a clean and professional finish. Using the right tools and techniques allows for accurate hole placement and prevents cracking or chipping of the material.
4. Functionality and Customization
Lastly, drilling holes in plexiglass can significantly improve the functionality and customization options of the material. Whether it’s adding hooks, fittings, or mounting brackets, holes provide the means to attach additional accessories or modify the plexiglass to suit specific needs.
This is particularly applicable in applications such as shelving units, storage organizers, or product displays where customization and adaptability are essential.
Overall, drilling holes in plexiglass is essential for a wide range of purposes, including installation, ventilation, aesthetics, functionality, and customization. By understanding the importance of holes and utilizing proper techniques, you can effectively work with plexiglass and achieve desired outcomes in your projects.
Choosing the Right Drill Bit
When it comes to drilling holes in plexiglass, it is important to use the right drill bit to prevent cracking or shattering of the material. Here are some factors to consider when choosing a drill bit:

- Material: Plexiglass is a type of acrylic plastic, so you need to use a drill bit specifically designed for drilling through acrylic materials. Regular drill bits for metal or wood will not work properly and may cause damage.
- Diameter: The diameter of the drill bit should be chosen based on the size of the hole you want to create. It is important to select a drill bit that is slightly larger than the hole size you need, as this will reduce the risk of cracking.
- Point Angle: The point angle of the drill bit refers to the angle at which the tip of the bit is ground. For plexiglass, it is recommended to use a drill bit with a point angle of 60 degrees. This angle helps to reduce the amount of friction and heat generated during drilling.
- Coating: Some drill bits come with a coating that can help reduce the friction and heat generated during drilling. Look for drill bits that have a coating specifically designed for drilling through acrylic materials.
It is also important to note that when using a drill bit on plexiglass, you should go at a slow speed and apply gentle pressure. High speeds and excessive pressure can cause the material to crack or shatter. Always drill a small pilot hole before drilling the final hole to help prevent any potential damage.
Considerations for Plexiglass
- Plexiglass is a brittle material, so drilling holes in it requires careful handling to prevent cracking or breaking.
- It is important to use the correct drill bit for plexiglass to avoid damage. A standard twist drill bit can cause the material to crack. Instead, use a specially designed plexiglass drill bit, also known as an acrylic drill bit.
- When drilling holes in plexiglass, it is crucial to use a slow drill speed to prevent heat buildup. High RPMs can cause the plexiglass to melt or shatter. Opt for a drill speed of 3,000 RPM or lower.
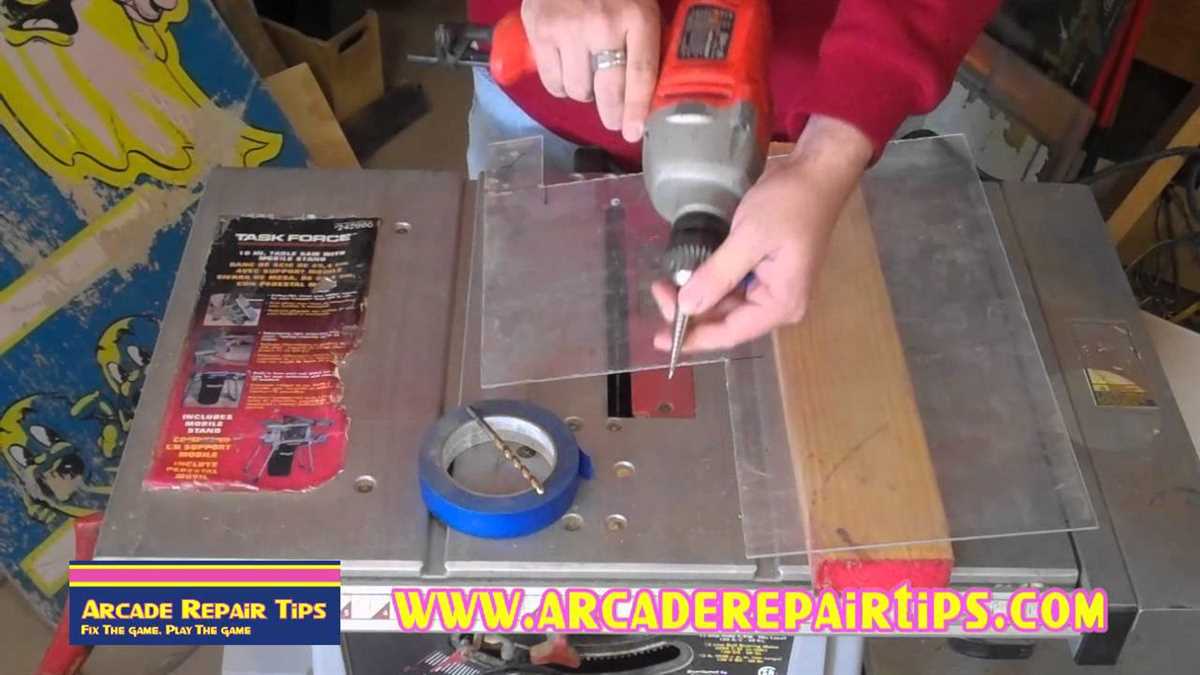
- Before drilling, ensure that the plexiglass is securely clamped to prevent any movement or vibrations that could lead to cracking. Use clamps or a vise to hold the material firmly in place.
- When drilling, start with a small pilot hole to create a guide for the larger drill bit. This will help prevent the plexiglass from cracking or splintering.
- Avoid applying excessive pressure while drilling. Let the drill bit do the work and allow it to move through the material smoothly.
- It is recommended to place a piece of scrap wood underneath the plexiglass while drilling to prevent chipping or splintering at the exit point. The wood will act as a support and provide a clean finish.
- Always wear safety glasses and gloves when working with plexiglass to protect your eyes and hands from any flying debris.
- After drilling the holes, carefully clean the plexiglass to remove any remaining debris or shards. A soft cloth or sponge dampened with water or a mild cleaner can be used to wipe down the surface.
- If you are unsure about drilling holes in plexiglass or have complex drilling needs, it is recommended to seek professional assistance to ensure the best results and minimal risk of damage.
Recommended Drill Bit Types
- Standard Twist Bit: A standard twist bit is the most common type of drill bit used for drilling holes in plexiglass. It has a sharp point and flutes along the length of the bit to help remove material as you drill.
- Brad Point Bit: A brad point bit is another popular choice for drilling plexiglass. It has a sharp point and flutes, but also features a center point that helps to guide the bit and prevent it from wandering as you drill.
- Step Bit: A step bit, also known as a unibit, is a specialized drill bit that is often used for drilling holes of varying sizes in plexiglass. It has a stepped design with multiple cutting edges that allow you to drill different diameter holes without changing the bit.
- Countersink Bit: A countersink bit is used to create a conical recess at the surface of the plexiglass, typically to allow a screw head to sit flush with the surface. It can also be used to create a chamfered edge around a hole for aesthetic purposes.
- Forstner Bit: A Forstner bit is a specialty drill bit that is often used when drilling larger diameter holes in plexiglass. It has a flat bottom and sharp cutting edges around the periphery, which allows you to create precise, clean holes.
Preparing the Plexiglass
Before drilling holes in plexiglass, it is important to properly prepare the material to ensure clean and precise results. Here are the steps to follow:
- Measure and mark: Use a measuring tape and a pencil to mark the exact location of the hole(s) on the plexiglass. Double-check the measurements to avoid any mistakes.
- Secure the plexiglass: Place the plexiglass on a stable work surface and secure it with clamps or a vice grip. This will prevent any movement or vibrations while drilling.
- Choose the right drill bit: Select a drill bit specifically designed for plexiglass or acrylic materials. Avoid using regular drill bits as they may cause the plexiglass to crack or shatter.
- Apply masking tape: To further protect the plexiglass from cracking or chipping, apply a strip of masking tape over the marked area. The tape acts as a barrier and reduces the chances of damage during drilling.
- Set the drill speed: Plexiglass is a relatively soft material, so it is important to set the drill speed to a low setting. High speeds can cause the plexiglass to melt or chip. Start with a low speed and gradually increase if necessary.
- Drill pilot holes: To create a guide for the drill bit, start by drilling small pilot holes on the marked spots. This will help prevent the drill bit from slipping and ensure more accurate drilling.
- Drill the final holes: Once the pilot holes are created, use the correct drill bit size to make the final holes. Apply gentle and steady pressure while drilling, allowing the drill bit to do the work without forcing it too much.
- Remove the masking tape: After drilling the holes, carefully peel off the masking tape to reveal clean and undamaged surfaces.
By following these steps, you can properly prepare the plexiglass before drilling holes, reducing the risk of cracks or damage and achieving the desired results.
Measuring and Marking
Before you start drilling holes in plexiglass, it is crucial to measure and mark the spots where you want the holes to be. This will ensure precise and accurate results.
Tools you may need:
- Measuring tape or ruler
- Pencil or marker
- Square or angle tool
Step 1: Use a measuring tape or ruler to determine the exact locations where you want the holes to be. Take into consideration the dimensions of the object you are attaching or the purpose of the hole.
Step 2: Use a square or angle tool to ensure that the marks are perpendicular or at the desired angle. This will help you achieve a professional and clean look.
Step 3: Use a pencil or marker to make small, light marks on the plexiglass. Avoid pressing too hard, as it may leave permanent marks or damage the material.
Step 4: Double-check your measurements and marks before proceeding to the drilling stage. This will help prevent any errors or mistakes.
Tips:
- Make sure to measure and mark both sides of the plexiglass if you are drilling through it. This will help guide the drill bit and prevent any cracking or damage.
- Consider using masking tape on the surface of the plexiglass where you will be drilling. This can help prevent any chipping or cracking.
Example:
| Measurement | Marking |
|---|---|
| 1 inch |  |
| 2 inches | |
| 3 inches | |
Securing the Plexiglass
Once you have drilled the holes in your Plexiglass, it’s important to make sure it is properly secured in place. There are a few different methods you can use to achieve this:
1. Using screws
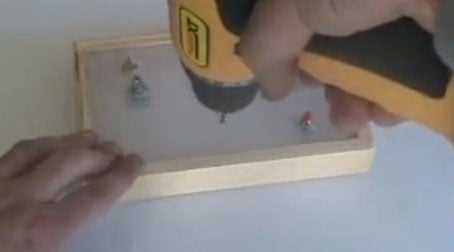
One of the most common ways to secure Plexiglass is by using screws. Make sure to choose screws that are appropriate for the thickness of your Plexiglass, as using screws that are too long could cause the Plexiglass to crack or break. To prevent the Plexiglass from cracking, it’s a good idea to drill pilot holes before inserting the screws. This will help guide the screws into place and reduce the risk of damage.
2. Using adhesive
Another method for securing Plexiglass is by using adhesive. There are special adhesives available that are specifically designed for bonding Plexiglass. These adhesives are often clear and provide a strong bond. Before applying the adhesive, make sure the surfaces are clean and free of any dust or debris. Apply the adhesive evenly to both surfaces, then press them together and hold in place until the adhesive has cured.
3. Using clamps
If you only need to temporarily secure the Plexiglass, such as during the drilling process, you can use clamps to hold it in place. Simply position the Plexiglass where you want it and use clamps to hold it securely in place. This method allows for easy removal and repositioning of the Plexiglass as needed.
4. Using brackets
In some cases, you may want to use brackets to secure the Plexiglass. Brackets can provide additional support and stability, particularly for larger pieces of Plexiglass. Make sure to choose brackets that are appropriate for the thickness of your Plexiglass, and use screws or adhesive to attach the brackets to the Plexiglass and the desired surface.
By properly securing your Plexiglass, you can ensure that it stays in place and doesn’t shift or break. Choose the method that works best for your specific project and always follow safety precautions when working with Plexiglass.
Drilling Techniques
When drilling holes in plexiglass, it’s important to use the right technique to prevent cracking or splintering. Here are some drilling techniques that can help you achieve clean and precise holes:
1. Use a drill bit designed for plexiglass
Using a regular drill bit can cause the plexiglass to crack or shatter. To prevent this, use a drill bit specifically designed for plexiglass. These drill bits have a sharper point and flatter angle, allowing them to cut through the material without causing damage.
2. Start with a small pilot hole
Before drilling the final hole, it’s best to start with a small pilot hole. This helps to guide the drill bit and reduces the risk of the plexiglass cracking. Use a drill bit that is slightly smaller than the desired hole size for the pilot hole.
3. Apply steady pressure

When drilling the final hole, apply steady pressure to the drill. Avoid using excessive force, as this can increase the risk of the plexiglass cracking. Let the drill bit do the work and allow it to cut through the material at its own pace.
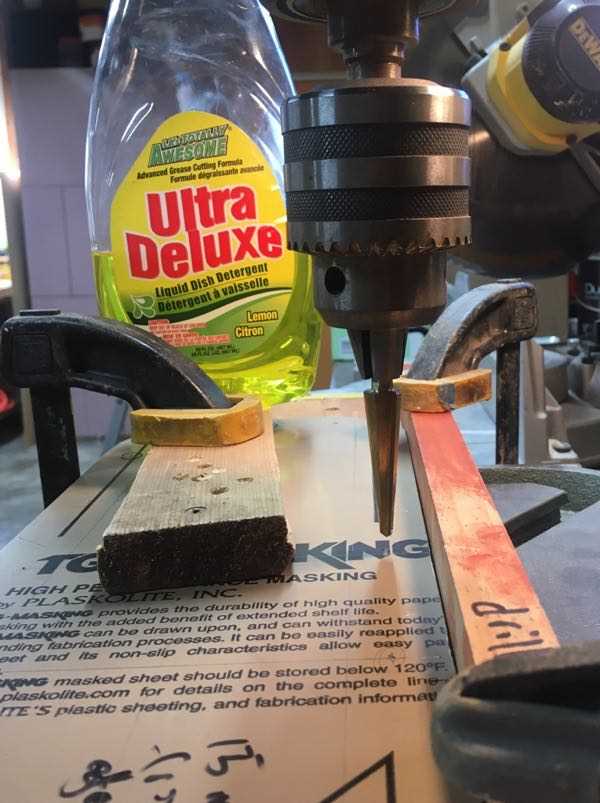
4. Use a lubricant
Using a lubricant can help prevent the plexiglass from overheating and reduce the risk of cracking. Apply a small amount of lubricant, such as water or a specialized plexiglass cutting fluid, to the drill bit before starting to drill.
5. Secure the plexiglass
Before drilling, make sure the plexiglass is securely clamped or held in place. This will prevent it from moving or vibrating during drilling, which can cause the material to crack or splinter.
6. Use a backer board
Placing a backer board, such as a scrap piece of wood or plastic, underneath the plexiglass can help prevent splintering on the underside of the material. The backer board acts as a support and absorbs some of the pressure from the drill.
7. Take breaks
If you’re drilling multiple holes or drilling through thick plexiglass, it’s important to take breaks to allow the drill bit and the plexiglass to cool down. This helps reduce the risk of overheating and cracking.
Speed and Pressure
When drilling holes in plexiglass, it’s important to consider the speed and pressure you use. If your drill is spinning too fast or if you apply too much pressure, it can cause the plexiglass to crack or shatter.
It is recommended to use a drill bit specifically designed for drilling plexiglass, as these bits have a slower speed and are less likely to cause damage. Additionally, using a drill press instead of a handheld drill can help maintain a consistent speed and prevent excessive pressure.
When drilling, it’s important to use a light touch and allow the bit to do the work. Applying too much pressure can increase the risk of cracking the plexiglass. Start with a low speed and gradually increase it as needed, being careful not to exceed a speed that could potentially damage the material.
Another helpful tip is to use a backing material, such as a scrap piece of wood or plastic, behind the plexiglass. This can provide extra support and help prevent cracking. Clamping the plexiglass securely to the backing material can also help stabilize it during the drilling process.
- Use a drill bit specifically designed for plexiglass
- Use a drill press for better control
- Apply light pressure and let the drill bit do the work
- Start with a low speed and gradually increase if needed
- Use a backing material for support and stability
- Clamp the plexiglass securely to the backing material
FAQ:
What tools do I need to drill holes in Plexiglass?
To drill holes in Plexiglass, you will need a drill with a sharp drill bit designed for acrylic materials, masking tape, a clamp or vise to hold the Plexiglass securely, and a scrap piece of wood or plastic to place under the Plexiglass as a backing.
Can I use a regular drill bit for drilling holes in Plexiglass?
No, it is not recommended to use a regular drill bit for drilling holes in Plexiglass. Acrylic materials like Plexiglass are brittle and can crack or shatter easily if not drilled properly. It is best to use a sharp drill bit designed specifically for acrylic materials.
How can I prevent the Plexiglass from cracking while drilling?
To prevent the Plexiglass from cracking or shattering while drilling, you can use masking tape. Apply a strip of masking tape over the area where you want to drill the hole. This will help to provide extra support and reduce the risk of cracking.
Do I need to use a specific technique while drilling holes in Plexiglass?
Yes, there are a few techniques you should follow while drilling holes in Plexiglass. First, make sure to start drilling at a slow speed to avoid applying too much pressure. Apply steady and even pressure as you drill. It is also important to periodically stop and remove any plastic shavings from the hole to prevent them from melting and causing damage.
What is the purpose of using a backing while drilling holes in Plexiglass?
Using a backing while drilling holes in Plexiglass helps to prevent the material from cracking or shattering. Place a scrap piece of wood or plastic under the Plexiglass as a backing. This will provide support and prevent the material from flexing or bending too much while drilling.
Can I drill large holes in Plexiglass?
Yes, it is possible to drill large holes in Plexiglass. However, you will need to use a hole saw drill bit designed for acrylic materials. Follow the same techniques mentioned earlier, such as using masking tape and a backing, to prevent cracking or shattering.
Are there any alternatives to drilling holes in Plexiglass?
Yes, if you are concerned about drilling holes in Plexiglass, there are alternative methods you can consider. One option is to use adhesive hooks or suction cups to attach items to the Plexiglass without drilling. Another option is to use clamps or stands specifically designed for Plexiglass to hold objects in place without the need for drilling.
Video:


Meet Harrison Clayton, a distinguished author and home remodeling enthusiast whose expertise in the realm of renovation is second to none. With a passion for transforming houses into inviting homes, Harrison's writing at https://thehuts-eastbourne.co.uk/ brings a breath of fresh inspiration to the world of home improvement. Whether you're looking to revamp a small corner of your abode or embark on a complete home transformation, Harrison's articles provide the essential expertise and creative flair to turn your visions into reality. So, dive into the captivating world of home remodeling with Harrison Clayton and unlock the full potential of your living space with every word he writes.


