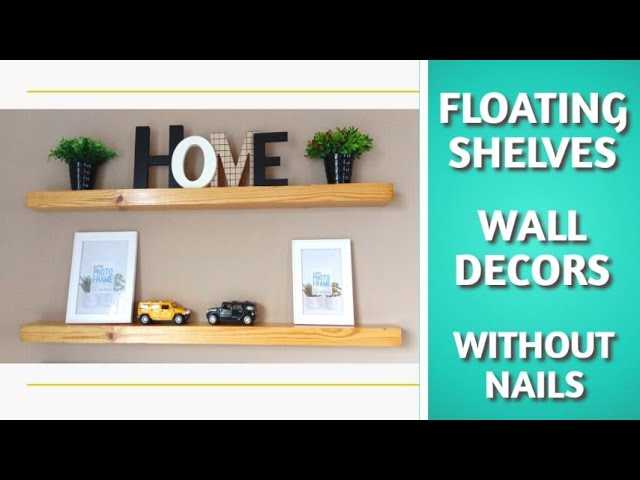
Ways to Hang a Shelf Without Using a Drill
When it comes to hanging a shelf, drilling holes in the wall may not always be an option. Whether you’re a renter who wants to avoid damaging the walls or you simply don’t have access to a drill, there are alternative methods that can be used to hang a shelf without using a drill.
One option is to use adhesive hooks or adhesive strips. These can be easily applied to the wall and provide a secure hold for lightweight shelves. It’s important to choose hooks or strips that are specifically designed for hanging shelves, as they will be able to support the weight. These hooks or strips can often be removed without damaging the wall, making them a great option for temporary shelving solutions.
Another option is to use brackets or brackets with adhesive backings. These brackets can be attached to the wall using screws or adhesive, depending on the weight of the shelf. Brackets provide a sturdy support for shelves and can be a good option for heavier items. However, it’s important to carefully follow the manufacturer’s instructions to ensure the brackets are properly installed and able to support the weight of the shelf.
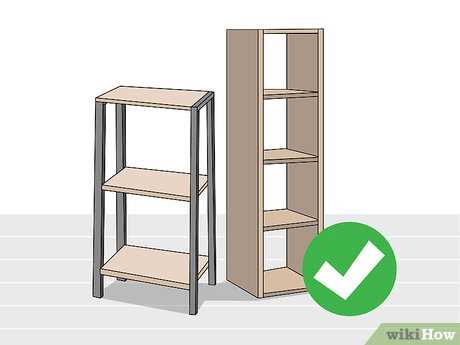
For those who prefer a more minimalist look, there are also floating shelf brackets available. These brackets are typically hidden from view and provide the illusion that the shelf is floating on the wall. Floating shelves can add a modern touch to any room and are often used to display decorative items or books. These brackets may require some additional installation steps, such as screwing into wall studs or using heavy-duty adhesive, but they can provide a sleek and stylish solution for hanging shelves without a drill.
Adhesive Hooks for Lightweight Shelves
One of the easiest ways to hang a lightweight shelf without using a drill is by using adhesive hooks. Adhesive hooks are typically made of plastic or metal and have a sticky back that allows them to be attached to a variety of surfaces.

Benefits of Using Adhesive Hooks
- Easy installation: Adhesive hooks can be easily stuck to the wall without any additional tools or hardware.
- No damage to the wall: Unlike drilling holes, adhesive hooks do not require any drilling or screws, which means they won’t leave any marks or damage on the wall.
- Removable: If you decide to remove the shelf or change its position, adhesive hooks can be easily removed without leaving any residue behind.
Steps to Hang a Shelf Using Adhesive Hooks
- Clean the wall surface: Before applying the adhesive hooks, make sure the wall surface is clean and dry.
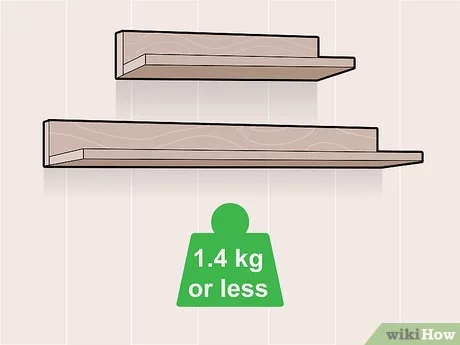
- Choose the right hooks: Adhesive hooks come in various sizes and weight capacities. Make sure to choose hooks that can support the weight of your shelf.
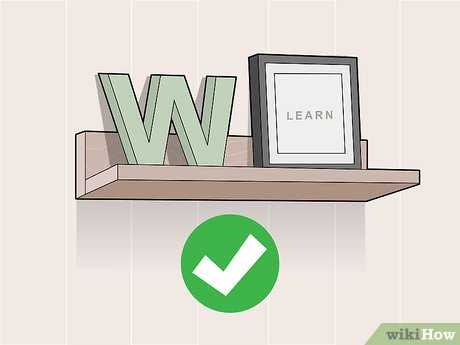
- Measure and mark the position: Use a measuring tape to determine the desired position of the shelf. Mark the spots where the hooks will be placed.
- Attach the hooks: Peel off the backing of the adhesive hooks and firmly press them onto the marked spots on the wall. Make sure they are level and secure.
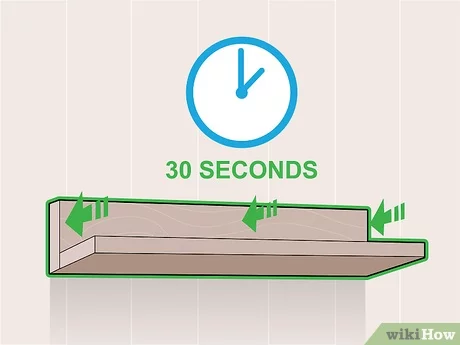
- Wait for the adhesive to cure: Some adhesive hooks require a certain amount of time to fully adhere to the wall. Follow the manufacturer’s instructions for curing time.
- Hang the shelf: Once the adhesive hooks are securely attached, you can hang the lightweight shelf on the hooks.
Considerations
While adhesive hooks are convenient for hanging lightweight shelves, there are a few considerations to keep in mind:
- Weight limit: Adhesive hooks have weight limits, so make sure to choose hooks that can support the weight of your shelf and its contents.
- Surface compatibility: Adhesive hooks work best on smooth, flat surfaces such as painted walls or tiles. They may not adhere well to rough or porous surfaces.
- Not suitable for heavy items: Adhesive hooks are not recommended for hanging heavy shelves or items that could potentially cause injury if they fall.
Overall, adhesive hooks are a great option for hanging lightweight shelves without using a drill. They are easy to install, do not damage the wall, and can be easily removed if needed. Just make sure to choose the right hooks for your shelf and follow the manufacturer’s instructions for proper installation and weight limits.
Tension Rods for Temporary Shelving
Tension rods are a versatile and convenient option for creating temporary shelving without the need for a drill. These adjustable rods can be easily installed and removed without causing any damage to the walls. Here are a few ways you can use tension rods for temporary shelving:
1. Floating Shelf
To create a floating shelf using tension rods, you will need two rods that can fit the width of the space you want to create the shelf on. Place the rods at the desired height on the wall, ensuring they are level. Then, place a sturdy board or plank on top of the tension rods to create the shelf. Adjust the tension rods as needed to provide stability and support for the shelf.

2. Hanging Closet Organizer
Tension rods can also be used to create temporary shelving in a closet. Simply place a tension rod between two walls or closet rods at the desired height. Hang a fabric or plastic closet organizer from the tension rod to create shelves for storing clothes, shoes, or accessories. This is a great solution for temporary storage or if you’re renting and don’t want to make permanent changes to the closet.
3. Kitchen Cabinet Organizer
If you need extra storage space in your kitchen cabinets, tension rods can help. Install tension rods vertically between the cabinet shelves to create additional shelves. You can then use these new shelves to organize plates, cutting boards, or even spices. The tension rods can easily be adjusted or removed when you no longer need the extra shelving.
4. Shower Caddy
A tension rod can also be used to create a convenient storage solution in your shower. Install a tension rod near the wall or between two walls, at the desired height. Hang a shower caddy from the tension rod to store shampoo, soap, and other shower essentials. This eliminates the need for drilling or adhesive hooks in your bathroom.
5. Window Shelf

If you have a window sill that could use some extra space for plants or decor, tension rods can help. Install a tension rod at the desired height and width of the window sill. Then, place a sturdy board or plank on top of the tension rod to create a shelf. This can be a great way to display small plants or create a cozy reading nook by the window.
These are just a few of the many ways you can use tension rods for temporary shelving. Get creative and see how you can add extra storage space to your home without the need for a drill!
Command Strips for Medium-weight Shelves
To hang medium-weight shelves without using a drill, one effective alternative is to use Command Strips. These adhesive strips are designed to securely hold objects on a variety of surfaces, including painted walls, wood, tile, and more.
Materials Needed:
- Medium-weight shelf
- Command Strips (make sure they are suitable for the weight and size of your shelf)
- Clean cloth
- Level
- Pencil
Instructions:
- Choose the location for your shelf and clean the surface with a clean cloth to remove any dirt or dust.
- Measure and mark the desired placement of the shelf using a level and a pencil. Make sure the marks are level and evenly spaced.
- Remove one side of the adhesive backing from a Command Strip and firmly press it onto the back of the shelf, near one end. Repeat this step for the remaining Command Strips and the other end of the shelf.
- Peel off the remaining adhesive backing from the Command Strips.
- Position the shelf on the wall, aligning it with the pencil marks made in step 2.
- Firmly press the shelf against the wall, applying even pressure to activate the adhesive on the Command Strips.
- Hold the shelf in place for the recommended amount of time specified on the Command Strip packaging to ensure a secure bond.
It’s important to note that Command Strips have weight limits, so make sure to choose strips that are suitable for the weight of your shelf. If your shelf is particularly heavy, you may need to use additional Command Strips or consider alternate hanging methods.
By following these instructions, you can easily hang medium-weight shelves without the need for drilling or damaging the walls. Command Strips provide a convenient and secure alternative for displaying your items and organizing your space.

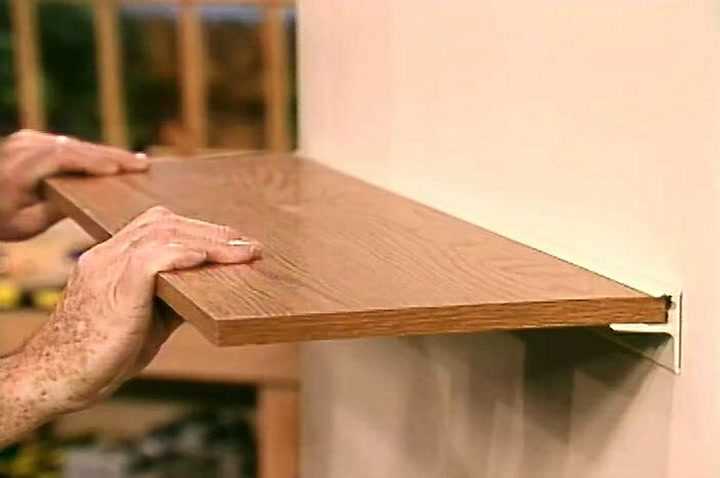
Shelf Brackets with Velcro for Easy Installation
When it comes to hanging shelves without using a drill, one convenient option is to use shelf brackets with Velcro. These brackets provide a quick and easy solution for mounting shelves securely to the wall without the need for any additional tools.
Here are some advantages of using shelf brackets with Velcro:
- No drilling required: One of the biggest benefits of using shelf brackets with Velcro is that they eliminate the need for drilling holes in the wall. This is especially useful for people who are renting a space or those who don’t want to damage their walls.
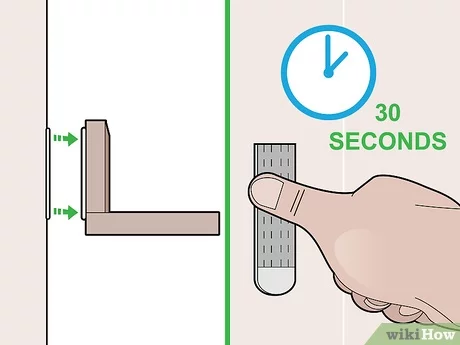
- Easy installation: Installing shelves with Velcro brackets is a breeze. Simply attach the Velcro strips to the back of the shelf and the corresponding strips to the wall. Press the shelf firmly against the wall, and the Velcro will hold it securely in place.
- Adjustable positioning: Another advantage of using Velcro brackets is the ability to easily adjust the position of the shelf. If you want to change the height or move the shelf to a different location, simply peel off the Velcro strips and reposition them as desired.
- Removable and reusable: Shelf brackets with Velcro are not only easy to install but also easy to remove. When it’s time to move or rearrange the shelves, simply detach the Velcro strips from the wall with minimal effort. The best part is that you can reuse the brackets for other shelves or even use them in a different location.
It’s important to note that while Velcro brackets provide a convenient solution for lightweight shelves, they may not be suitable for heavier shelves or items. Make sure to check the weight limitations of the Velcro strips and adjust the number of brackets accordingly.
In conclusion, shelf brackets with Velcro offer an easy and tool-free way to hang shelves securely. They are a great option for renters or anyone looking for a temporary or adjustable shelving solution.

Over-the-Door Shelf Hangers
If you’re looking for a way to hang a shelf without using a drill, over-the-door shelf hangers can be a great option. These hangers are designed to fit over the top of a door, allowing you to instantly create extra storage space.
Advantages of Over-the-Door Shelf Hangers:
- Easy to install – Over-the-door shelf hangers do not require any drilling or tools. Simply fit the hanger over the top of the door and adjust it to the desired position.
- Portable – Since these hangers fit over the door, they can easily be moved from room to room or even taken with you when you move to a new home.
- No damage to walls – If you’re renting a space or don’t want to leave any permanent marks on your walls, over-the-door shelf hangers are an ideal solution.
Choosing an Over-the-Door Shelf Hanger:
When selecting an over-the-door shelf hanger, there are a few factors to consider:
- Door thickness – Make sure the hanger is compatible with the thickness of your door. Most hangers are adjustable to fit a variety of door sizes.
- Weight capacity – Check the weight capacity of the hanger to ensure it can support the items you plan to place on the shelf.
- Size and design – Consider the size and design of the shelf hanger to ensure it fits your aesthetic preferences and storage needs.
Tips for Using Over-the-Door Shelf Hangers:
- Secure the hanger properly – Ensure that the hanger is securely fitted over the top of the door to prevent it from slipping or falling.
- Distribute weight evenly – When placing items on the shelf, distribute the weight evenly to avoid putting too much strain on the hanger.
- Do not overload – Be mindful of the weight capacity and avoid overloading the shelf with too many heavy items.
With over-the-door shelf hangers, you can quickly add storage space to any room without the need for a drill or any permanent installation. They are convenient, portable, and versatile, making them a popular choice for renters, students, and anyone looking for temporary storage solutions.
Magnetic Mounting Systems for Metal Shelves
When it comes to hanging metal shelves without using a drill, one convenient option is to use magnetic mounting systems. These systems utilize the power of magnets to securely hold the shelves in place, eliminating the need for screws, nails, or any other traditional mounting hardware.
Advantages of Magnetic Mounting Systems
There are several advantages to using magnetic mounting systems for metal shelves:
- Easy Installation: Magnetic mounting systems are incredibly easy to install. All you need to do is attach the magnetic strips or brackets to the back of the shelf and then place the shelf on the desired location on the metal surface. The magnets will instantly secure the shelf in place.
- No Damage: One of the biggest benefits of using magnetic mounting systems is that they don’t cause any damage to the metal surface. Unlike drilling holes or using adhesive, magnets can be easily removed without leaving any marks or residue behind.
- Adjustable: Another advantage is that magnetic mounting systems allow for adjustable shelving. Since the shelf isn’t permanently attached, it can be easily moved or adjusted whenever needed. This flexibility is especially useful if you want to rearrange or reconfigure your shelving setup.
Types of Magnetic Mounting Systems
There are a few different types of magnetic mounting systems that can be used with metal shelves. These include:
- Magnetic Tape: Magnetic tape features a strong adhesive backing that allows it to be easily attached to the back of the shelf. The tape contains magnets that securely grip to the metal surface, holding the shelf in place.
- Magnetic Brackets: Magnetic brackets are another option for mounting metal shelves. These brackets attach directly to the back of the shelf and feature a strong magnet that adheres to the metal surface, providing a secure hold.
- Magnetic Hooks: If you have a metal shelf with a rail or lip, magnetic hooks can be a great option. These hooks feature a magnetic backing that easily attaches to the metal surface, allowing you to hang items directly on the hooks.
Considerations for Using Magnetic Mounting Systems
While magnetic mounting systems offer a convenient and versatile solution for hanging metal shelves, there are a few considerations to keep in mind:
- Magnetic Strength: Make sure to choose a magnetic mounting system that has enough strength to securely hold your metal shelf and the items you plan to place on it. Consider the weight capacity of the magnets to ensure they can handle the load.
- Clean Surface: Before attaching the magnets, make sure to clean the metal surface thoroughly to ensure optimal adhesion. Any dirt, dust, or grease can weaken the magnetic grip.
- Magnetic Interference: Keep in mind that magnets can interfere with electronic devices or other items sensitive to magnetic fields. Avoid attaching magnets near these items to prevent any potential damage.
Conclusion
If you’re looking for a simple and non-permanent way to hang metal shelves, magnetic mounting systems can be a great option. They offer easy installation, adjustability, and no damage to the metal surface. Just be sure to choose the right magnetic strength and clean the surface properly for optimal performance.
Suction Cup Shelf Mounts for Non-porous Surfaces
Overview
Suction cup shelf mounts provide an easy and convenient way to hang shelves without using a drill. These mounts are specifically designed for non-porous surfaces, such as glass, tile, and mirrors, where traditional drilling is not an option. They offer a temporary storage solution that can be easily removed or repositioned without leaving any marks or damage.
Benefits
- Quick and easy installation: Suction cup shelf mounts can be installed in a matter of seconds, saving you time and effort compared to drilling.
- No damage to surfaces: Since no drilling is required, your walls or surfaces remain intact and undamaged.
- Removable and reusable: These mounts can be easily removed and reused in different locations, making them a versatile option for renters or those who frequently rearrange their space.
- No need for tools: Unlike drilling, which requires tools and some level of expertise, suction cup mounts can be installed by anyone without the need for special equipment.
Usage
To use suction cup shelf mounts, follow these simple steps:
- Ensure that the surface is clean and dry.
- Moisten the suction cup slightly to enhance its grip.
- Press the suction cup firmly against the surface, ensuring that it is completely flat and free from air bubbles.
- Apply downward pressure to secure the suction cup in place.
- Attach the shelf to the suction cup mount using the provided hooks or clips.
Note: It is important to periodically check the suction cup’s grip to ensure that it is securely attached. If needed, reapply pressure or remoisten the cup to maintain a strong hold.
Limitations
Suction cup shelf mounts are designed for lightweight items and may not be suitable for heavy or bulky shelves. Additionally, they may not adhere well to surfaces with texture or unevenness, as the suction cup requires a smooth and flat surface for optimal performance.
Conclusion
Suction cup shelf mounts offer a practical and versatile alternative to drilling when hanging shelves on non-porous surfaces. They are easy to install, removable, and reusable, making them an ideal choice for those who value flexibility and minimal wall damage. However, it is important to consider the weight and surface texture compatibility before using suction cup mounts for heavier or textured shelves.
Rope or Wire Suspension for Rustic Hanging Shelves

If you want to create a rustic and unique look for your hanging shelves, using rope or wire suspension can be a great option. This method adds a touch of charm and allows you to showcase your shelves in a creative way. Here are some steps to follow:
- Choose your rope or wire: For a more rustic look, you can use thick natural jute rope or sisal rope. If you prefer a modern look, you can use thin steel wire.
- Measure and cut: Measure the desired length of rope or wire for each shelf. Make sure to leave enough extra length to create the hanging loops.
- Create hanging loops: Tie a knot at one end of the rope or wire to create a loop. This loop will hang on the wall hook or any other suspension point. Repeat this step for all the pieces of rope or wire.
- Attach the loops to the shelf: Depending on the design of your shelf, you can either tie the loops directly to the shelf or use hooks or brackets. Ensure that the loops are securely attached to the shelf to prevent accidents.
- Hang the shelves: Find a suitable place on the wall where you want to hang the shelves. Use wall hooks or any other suspension point to hang the loops of the ropes or wires. Make sure that the hooks or suspension points are firmly attached to the wall to support the weight of the shelves.
- Adjust the height: Once the shelves are hung, you can adjust the height by sliding the loops up or down. This allows you to create an aesthetically pleasing display and make sure the shelves are at the desired height.
Note: It is important to consider the weight capacity of the rope or wire you choose and ensure that it can support the weight of your shelves. If you are unsure, it’s always a good idea to consult a professional or use additional support, such as brackets or wall anchors.
Using rope or wire suspension for rustic hanging shelves adds character to your space and allows for a versatile and creative display. It’s an excellent option for those who want to avoid drilling holes and still achieve a unique and stylish look.
FAQ:
What are some alternative ways to hang a shelf without using a drill?
There are several alternative ways to hang a shelf without using a drill. Some options include using adhesive hooks, using suction cups, using hanging strips, using a tension rod, using brackets and nails, or using a picture rail.
Are adhesive hooks a reliable way to hang a shelf?
Adhesive hooks can be a reliable way to hang a shelf, but it depends on the weight and size of the shelf. Adhesive hooks are best suited for lightweight shelves that don’t hold a lot of items. If you have a heavier shelf, it’s best to explore other options.
Can suction cups support a shelf securely?
Suction cups can be a convenient option for hanging a shelf, but they might not provide the most secure support. Suction cups work well on smooth, non-porous surfaces, but they can lose suction over time or when exposed to weight or temperature changes. It’s important to choose high-quality suction cups that are designed to hold heavier items.
How do hanging strips work for hanging shelves?
Hanging strips are a popular option for hanging shelves without drilling. These strips have adhesive on both sides, and they can be attached to the wall and the back of the shelf. They provide a strong hold and are designed to be removable without damaging the walls. However, it’s essential to follow the manufacturer’s instructions and weight guidelines to ensure the strips can support the shelf’s weight.
Is it possible to hang a shelf using a tension rod?
Yes, it is possible to hang a shelf using a tension rod. This method works best for smaller shelves or shelves with lightweight items. The tension rod is placed between two walls or other surfaces, and the shelf is placed on top of it. The pressure from the tension rod holds the shelf securely in place. However, it’s important to make sure the tension rod is properly adjusted and secure before placing items on the shelf.
Can brackets and nails be used to hang a shelf without drilling?
Yes, brackets and nails can be used as an alternative to drilling when hanging a shelf. The brackets can be attached to the wall using nails or screws, and the shelf is then placed on top of the brackets. This method provides a stable support for the shelf, but it does require making small holes in the wall for the nails or screws.
Video:


Meet Harrison Clayton, a distinguished author and home remodeling enthusiast whose expertise in the realm of renovation is second to none. With a passion for transforming houses into inviting homes, Harrison's writing at https://thehuts-eastbourne.co.uk/ brings a breath of fresh inspiration to the world of home improvement. Whether you're looking to revamp a small corner of your abode or embark on a complete home transformation, Harrison's articles provide the essential expertise and creative flair to turn your visions into reality. So, dive into the captivating world of home remodeling with Harrison Clayton and unlock the full potential of your living space with every word he writes.


