Understanding the Purpose of Numbers on a Drill: A Comprehensive Guide

When it comes to using a drill, many people may be confused by the numbers and settings that are often found on the device. However, understanding the purpose of these numbers is crucial for ensuring the precise and effective use of your drill.
First and foremost, the numbers on a drill refer to its speed settings, which determine how fast the drill bit will rotate. Generally, the higher the number, the faster the rotation. This is important because different materials require different speeds to achieve optimal drilling results.
By adjusting the speed settings on your drill, you can prevent overheating, avoid damaging the material you are working with, and increase the overall efficiency of your drilling process. Knowing which speed to use for different materials, such as wood, metal, or plastic, is key to achieving professional-level results.
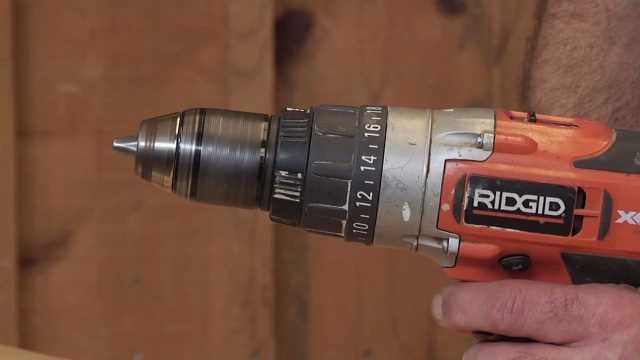
In addition to speed settings, some drills also feature torque settings, which control the amount of rotational force applied by the drill. Torque settings can be particularly useful when working with screws or other fasteners, as they allow you to adjust the power applied to prevent stripping or overtightening.
Overall, understanding the purpose of the numbers on a drill is essential to ensure efficient drilling and prevent damage to your materials. By familiarizing yourself with the speed and torque settings, you can take your drilling skills to the next level and tackle a wide range of projects with confidence.

The Importance of Numbered Settings
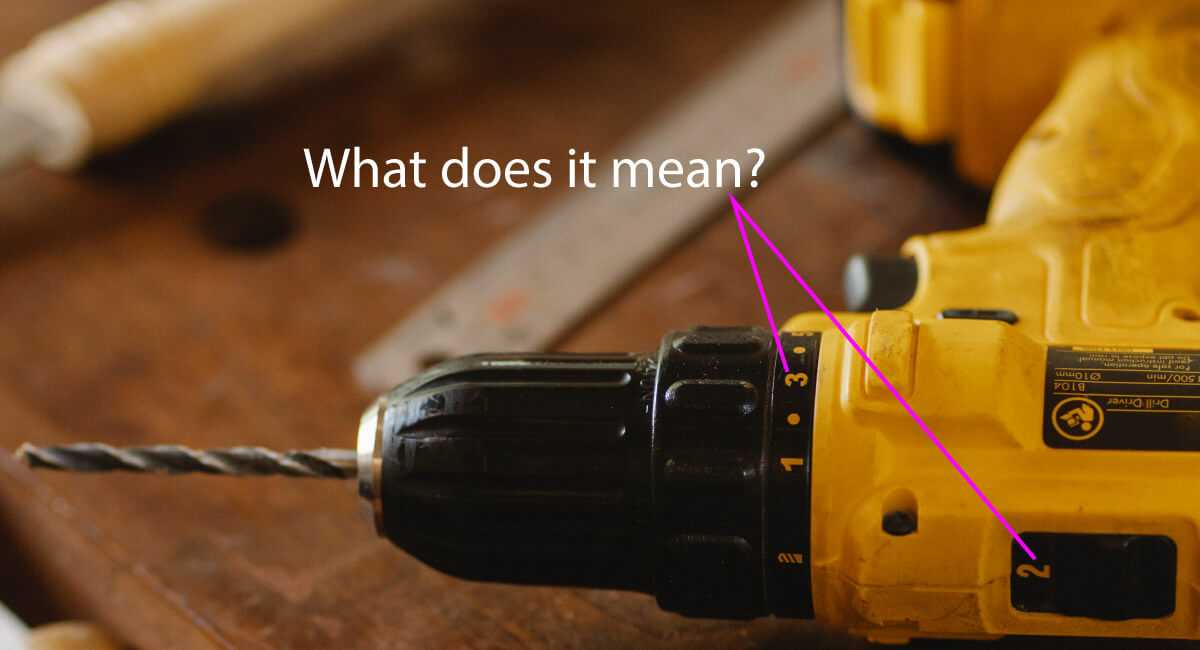
The numbered settings on a drill are a crucial feature that often goes overlooked or misunderstood. These settings allow the user to adjust the drill’s speed or torque to match the specific requirements of a particular task. Understanding and effectively utilizing these numbered settings can greatly enhance both the performance and the longevity of a drill.
1. Speed Control
One of the primary functions of the numbered settings on a drill is to control its speed. Different materials and tasks require varying speeds to achieve optimal results. For example, when drilling into soft materials such as wood or plastic, a higher speed setting may be appropriate to achieve a clean and efficient hole. On the other hand, when drilling into harder materials like metal, a slower speed setting may be necessary to prevent overheating or damage to the drill bit.
2. Torque Adjustment
Another important aspect of the numbered settings is the ability to adjust the drill’s torque. Torque refers to the rotational force applied by the drill, and it plays a crucial role in both drilling and driving applications. By selecting the right torque setting, users can prevent overdriving or stripping screws, screws or prevent damaging the material being worked on. Various settings typically range from low torque for delicate tasks to high torque for heavy-duty applications.
3. Precision and Consistency
Using the appropriate numbered setting on a drill ensures precision and consistency in the work performed. By matching the speed and torque to the specifics of a task, users can achieve accurate and repeatable results. This is especially important in tasks where uniformity and precision are critical, such as woodworking or metalworking.
4. Protection and Safety
The numbered settings on a drill can also contribute to the protection and safety of both the user and the drill itself. By selecting the correct settings, users can prevent accidents, such as drill bit breakage, kickbacks, or material damage. Additionally, using the right settings can help extend the lifespan of the drill by preventing unnecessary wear and tear caused by incorrect speed or torque settings.
5. Versatility
One of the key advantages of drills with numbered settings is their versatility. These settings allow the drill to be used in a wide range of applications, making it a valuable tool for both professionals and DIY enthusiasts. By being able to adjust the speed and torque to suit different materials and tasks, users can tackle a variety of projects and achieve optimal results.
Conclusion
The numbered settings on a drill offer a range of benefits, from speed control and torque adjustment to precision, safety, and versatility. Understanding the purpose and properly utilizing these settings can greatly enhance the performance and efficiency of a drill, allowing users to achieve accurate and reliable results in their projects.
Choosing the Right Number for the Task
When it comes to choosing the right number for a drill, there are a few factors to consider. The number on a drill bit refers to its size, and selecting the correct size is crucial to achieve the desired outcome.
Type of Material
The type of material you’ll be drilling into is an important factor in determining the right number for the task. Different materials require different drill bit sizes to achieve the best results. For example, drilling into wood may require a smaller number drill bit compared to drilling into metal or concrete.
Desired Hole Size
The desired hole size also plays a role in selecting the right number drill bit. If you want to create a small hole, a smaller number drill bit would be appropriate. Conversely, if you need a larger hole, a drill bit with a larger number would be necessary.
Drill Bit Compatibility
It’s important to make sure that the drill bit you choose is compatible with your drilling equipment. Different drills have varying chuck sizes, and it’s crucial to select a drill bit that fits securely into the chuck. Using the wrong size drill bit can result in poor performance and potential damage to the drill.
Application
Consider the specific application or task you’ll be using the drill for. Different tasks may require different drill bit sizes. For example, if you’re drilling pilot holes for screws, a smaller number drill bit would be suitable. On the other hand, if you’re drilling holes for dowels, a larger number drill bit may be necessary. Understanding the purpose of the task will help guide you in selecting the right number for the job.
Reference Guides and Charts
If you’re uncertain about the right number for a specific task, there are reference guides and charts available that provide recommendations based on the type of material and desired hole size. These resources can be helpful in ensuring you choose the correct number for your drilling needs.
In Conclusion
Choosing the right number for a drill bit is essential for achieving accurate and efficient results. Factors such as the type of material, desired hole size, drill bit compatibility, and specific application should all be taken into consideration. By selecting the appropriate number for the task, you can enhance your drilling experience and achieve optimal outcomes.
Understanding the Power behind the Numbers
Introduction
When it comes to drills, the numbers printed on the device may seem like random figures. However, these numbers actually hold valuable information about the power of the drill and its capabilities. By understanding what these numbers mean, you can make an informed decision when choosing a drill for various tasks.
Volts (V)
One of the most crucial numbers to consider is the voltage rating. This number indicates the power that the drill can deliver. The higher the voltage, the more powerful the drill will be. However, it’s important to note that higher voltage drills are generally heavier and larger, which may affect their maneuverability and comfort during use.
For light tasks such as drilling holes in soft materials like wood or drywall, a drill with a voltage between 6V and 12V may be sufficient. For more heavy-duty tasks like drilling through metal or concrete, a drill with a higher voltage, such as 18V or 20V, would be more suitable.
Ampere-Hours (Ah)
The ampere-hours rating, commonly abbreviated as Ah, indicates the capacity of the drill’s battery. This number determines how long the drill can operate before needing to be recharged. A higher Ah rating means the drill can run for a longer period of time without interruption.
However, higher Ah batteries also tend to be larger and heavier, which can impact the overall weight and balance of the drill. It’s important to find a balance between battery capacity and the comfort of using the drill.
Rotations Per Minute (RPM)
Rotations per minute (RPM) is a measurement of how fast the drill bit can spin. This number indicates the speed at which the drill can complete a task. Different materials require different RPMs for optimal drilling.
Lower RPMs are suitable for drilling into hard materials like metal or concrete, while higher RPMs are more suitable for softer materials like wood or plastic. Some drills offer adjustable speed settings, allowing you to customize the RPM to match the task at hand.
Additional Considerations
- Torque: Torque refers to the rotational force that the drill can exert. Higher torque is generally better for tasks that require more power, such as driving screws or drilling into tough materials.
- Chuck Size: The chuck size determines the maximum diameter of the drill bit that the drill can accommodate. Larger chuck sizes allow for the use of bigger bits, which can be useful for drilling larger holes or using specialized bits.
- Weight and Ergonomics: Consider the weight and ergonomics of the drill, especially if you will be using it for extended periods. A lighter drill with a comfortable grip will be easier to handle and reduce fatigue.
Conclusion
By understanding the power behind the numbers on a drill, you can make a more informed decision when selecting a drill for your needs. Consider the voltage, ampere-hours, and RPMs to ensure that the drill is capable of handling the tasks you have in mind. Additionally, factors such as torque, chuck size, weight, and ergonomics should also be taken into account for a drill that is comfortable and efficient to use.
Exploring the Different Drill Functions
Drills are versatile tools that offer a variety of functions to suit different tasks. Understanding the different functions of a drill can help you choose the right tool for the job and maximize its potential. Here are some common drill functions:
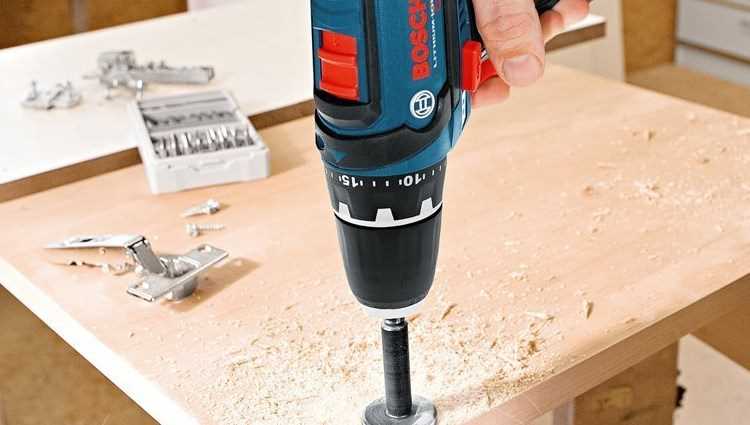
1. Drilling
Drilling is the most basic function of a drill. It involves creating holes in different materials such as wood, metal, or plastic. With the right drill bit, drills can easily penetrate the material and create precise holes of various sizes.
2. Screwdriving
Screwdriving is another essential function of a drill. With the help of a screwdriver bit, drills can quickly and efficiently drive or remove screws. This function is particularly useful when working on projects that involve assembling or disassembling furniture, cabinets, or other objects.
3. Reaming
Reaming is a function that helps enlarge an existing hole or smoothen its edges. This is commonly done to achieve a precise fit or to remove any burrs or rough edges. Reaming is often done with drill bits specifically designed for this purpose.
4. Grinding and polishing
Some drills come with attachments that allow them to be used for grinding and polishing tasks. These attachments typically include sanding pads, grinding stones, or polishing wheels. This function is useful for tasks such as sanding wood surfaces, sharpening blades, or polishing metal objects.
5. Mixing
Drills with mixing attachments can be used for mixing liquids or other materials. These attachments typically consist of a paddle-shaped tool that can be inserted into a container to thoroughly mix the contents. This function is commonly used in construction projects that involve mixing paint, cement, or other types of solutions.
6. Hammer drilling
Hammer drilling is a function that combines the rotation of the drill with a hammering action. This allows the drill to easily penetrate hard materials such as concrete or masonry. Hammer drilling is often used in construction or renovation projects that involve drilling into solid surfaces.
7. Chiseling
Drills equipped with chiseling attachments can be used for tasks that require chiseling or breaking through materials. This function is particularly useful in demolition or renovation projects where the removal of tiles, bricks, or other materials is necessary.
8. Countersinking
Countersinking is a function that helps create a recessed hole for screws or fasteners. This ensures that the screw head sits flush with the surface, giving a clean and professional appearance. Countersinking can be done using a countersink bit attached to the drill.
9. Sanding
Some drills come with sanding attachments that allow them to be used for sanding tasks. These attachments typically consist of sanding pads or discs that can be attached to the drill. Sanding with a drill is useful for tasks such as smoothing wood surfaces or removing paint or rust.
10. Wire brushing
Drills equipped with wire brushing attachments can be used for tasks that require removing rust, paint, or other debris from surfaces. The wire brushes attach to the drill and can be used to scrub away unwanted substances. This function is commonly used in metalworking or restoration projects.
These are just some of the many functions that drills can offer. By understanding the different functions, you can make the most out of your drill and tackle a wide range of tasks with ease.
The Role of Numbers in Drilling Speed
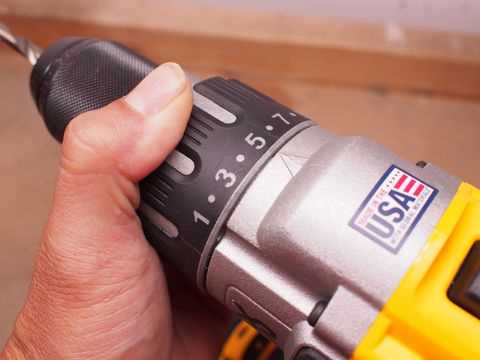
When it comes to using a drill, the speed at which the bit rotates can greatly impact the efficiency and effectiveness of the drilling process. In order to control the speed of a drill, manufacturers include numbers on the drill that correspond to different settings. These numbers are typically located on the drill’s speed control switch.
Suitable Applications for Different Speed Settings
- A lower number setting, such as 1 or 2, is generally used for drilling larger holes in materials like wood or plastics. These settings provide more torque and lower speed, allowing for greater control and reducing the chances of the bit getting stuck.
- Medium speed settings, usually around 3 to 6, are versatile and suitable for a wide range of drilling applications. They can handle materials like metal, ceramic, and certain types of stone. These settings strike a balance between speed and torque, allowing for efficient drilling.
- Higher number settings, such as 7 to 10, provide faster drilling speeds. They are often used for drilling smaller holes in softer materials like drywall or thin metal sheets. These settings prioritize speed over torque and are useful for quick and lightweight drilling tasks.
Considerations When Choosing a Speed Setting
While the numbers on a drill can provide a general indication of the speed setting, it’s important to consider a few other factors:
- Material: Different materials require different drilling speeds. Harder materials like metal may require slower speeds to prevent overheating or damage to the bit, while softer materials may allow for higher speeds.
- Bit Size: Smaller drill bits work best at higher speeds, while larger bits may require slower speeds to achieve optimal results.
- Bit Type: Some drill bits, such as masonry bits or spade bits, may have specific speed requirements. It’s important to refer to the manufacturer’s instructions for these specialized bits.
- User Experience: The operator’s skill and experience level can also influence the choice of speed setting. Beginners may find it easier to start with lower speeds until they gain more confidence.
Conclusion
The numbers on a drill play a vital role in controlling the speed of the bit, which in turn affects the efficiency and effectiveness of the drilling process. By understanding the suitable applications for different speed settings and considering various factors, users can optimize their drilling experience and achieve optimal results.
Creating Precision with Numbered Settings
When using a drill, it is important to understand the purpose and function of the numbered settings on the device. These numbered settings allow for precise control over the speed and power of the drill, resulting in more accurate and effective drilling operations. Here, we will explore how to create precision by utilizing the numbered settings on a drill.
The Importance of Numbered Settings
Numbered settings on a drill provide users with options to adjust the speed and torque of the drill. This is essential for various drilling tasks, as different materials and drill bits require different speeds and power levels to ensure optimal performance. By selecting the appropriate numbered setting, users can achieve the desired results with improved accuracy and control.
Understanding Numbered Settings
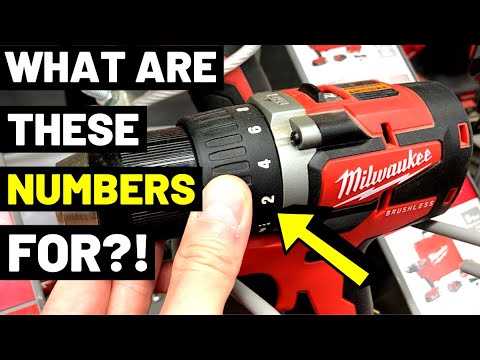
The numbered settings on a drill typically range from 1 to 10, with lower numbers indicating lower speeds and higher torque, while higher numbers represent higher speeds and lower torque. It’s important to consult the drill’s manual to understand the specific speed and torque ranges associated with each numbered setting. This knowledge will enable users to select the appropriate setting for their specific drilling needs.
Matching Numbered Settings to Materials
Different materials require different drilling speeds and power levels to achieve optimal results. For example:
- Setting 1: This setting is suitable for softer materials like wood or plastic, where slower speeds and higher torque are preferred to prevent damage.
- Setting 5: This setting is a good default setting for general drilling tasks in various materials, providing a balance between speed and torque.
- Setting 10: This setting is ideal for drilling through harder materials such as metal or concrete, where higher speeds and lower torque are needed to ensure efficient drilling.
By understanding the material being drilled and its associated requirements, users can select the appropriate numbered setting to achieve precise results.
Experimentation and Calibration
While the numbered settings provide a good starting point for drilling tasks, it is important to note that individual drill models may have slight variations in their speed and torque ranges. To ensure optimal performance, users may need to experiment and calibrate their drills accordingly. This can be done by testing different numbered settings on scrap material or conducting small pilot holes to determine the most suitable setting for the specific task.
Conclusion
The numbered settings on a drill provide users with the ability to create precision in their drilling operations. By understanding the importance of these settings, their functions, and how to match them to different materials, users can achieve accurate and efficient drilling results. Remember to consult the drill’s manual and calibrate as necessary to optimize performance.
Unlocking the Potential of Higher Numbered Settings
While lower numbered settings on a drill are typically used for lighter tasks, such as screwing in small screws or drilling into soft materials, the higher numbered settings offer a range of capabilities that can help you tackle more demanding projects. Understanding how to use the higher numbered settings on your drill will not only increase the versatility of your tool, but also enable you to work with a wider variety of materials and achieve better results.
Increased Torque
One of the main benefits of the higher numbered settings on a drill is the increased torque they provide. Torque refers to the rotational force or twisting power of the drill. By dialing up to a higher numbered setting, you can access greater torque, which allows you to drive screws or drill into tougher materials with ease.
Higher torque settings are particularly useful when working with hardwoods, metal, or concrete. They can help prevent the drill bit from getting stuck or the screw from stripping, as the increased torque provides more power to overcome resistance.
Drilling Through Thick Materials
If you need to drill through thick or dense materials, such as thick plywood or masonry, higher numbered settings are essential. These settings allow the drill to apply more force, making it easier to penetrate the material and achieve the desired hole depth.
When using higher numbered settings for drilling, it’s important to choose the appropriate drill bit for the material you’re working with. For example, when drilling into masonry, a masonry drill bit is required to effectively break through the tough surface. Using the correct bit, combined with a higher numbered setting, will ensure efficient and precise drilling.
Faster Drilling and Screwing
Higher numbered settings on a drill also translate to faster drilling and screwing speeds. This is particularly useful when you have a large number of holes to drill or screws to drive.
By selecting a higher setting, you can increase the drill’s rotational speed, reducing the time it takes to complete your project. This is especially beneficial when working on time-sensitive tasks or projects with tight deadlines.
Adjusting Speed and Reaction Sensitivity
Some drills with higher numbered settings may also offer variable speed control. This feature allows you to adjust the rotational speed of the drill to match the requirements of your specific task.
In addition, certain drills may have settings that control the sensitivity of the reaction when the drill bit encounters resistance. This can help prevent the drill from accidentally jerking or spinning out of control if it becomes stuck or encounters a hard spot in the material being drilled.
It’s important to refer to your drill’s user manual to understand the specific features and functions available on your particular model. This will enable you to unlock the full potential of the higher numbered settings and use them to their fullest advantage.
The Relationship between Numbers and Drill Bit Performance
When using a drill, you may have noticed numbers on the drill bits or on the drill chuck. These numbers are not random, but rather indicate important information related to the drill bit’s performance. Understanding the relationship between these numbers and the drill bit performance is crucial for achieving efficient and accurate drilling results.
Drill Bit Size
One of the most important aspects indicated by the numbers on the drill bits is the bit size. The size of the drill bit refers to its diameter, and it is usually measured in inches or millimeters. Common sizes range from 1/16 inch to 1-inch or larger. The appropriate bit size should be selected based on the desired hole diameter.
Speed and Power Ratings
In addition to indicating the size, numbers on the drill bits may also specify speed and power ratings. These ratings are crucial for ensuring optimal performance and preventing damage to both the drill bit and the drilling surface. Higher numbers generally indicate higher speed and power ratings.
The speed rating is the maximum rotational speed at which the drill bit should be operated. It is typically measured in revolutions per minute (RPM). Exceeding the recommended speed rating can lead to overheating, reduced drilling accuracy, and premature wear or breakage of the drill bit.
The power rating, on the other hand, refers to the amount of torque or force the drill bit can withstand. This rating is important when drilling through tough materials or when using a powerful drill. Using a drill bit with a lower power rating than required can result in the drill bit getting stuck or breaking.
Material Compatibility
The numbers on the drill bits may also indicate the compatibility of the bit with specific materials. Certain drill bits are optimized for drilling through specific materials such as wood, metal, or masonry. These bits are designed with different cutting angles, coatings, and tip shapes to ensure efficient drilling in their intended materials.
For example, a drill bit with a higher number might be suitable for drilling through metal, while a lower number might indicate suitability for wood. It is important to use the appropriate drill bit for the material being drilled to achieve optimal results and prevent unnecessary wear on the bit.
Summary
- The numbers on drill bits indicate important information about the bit size, speed and power ratings, and material compatibility.
- Bit size is indicated by the diameter and is crucial for achieving the desired hole diameter.
- Speed and power ratings help determine the appropriate operating conditions and prevent damage to the drill bit and drilling surface.
- Material compatibility is indicated by the numbers and ensures efficient drilling in specific materials.
By understanding the relationship between the numbers on drill bits and the performance of the drill bit, you can choose the right bit for your drilling needs, achieve accurate results, and prolong the lifespan of your drill bits.
FAQ:
What do the numbers on a drill mean?
The numbers on a drill refer to the speed settings of the drill. They indicate how many revolutions per minute (RPM) the drill will make at each setting. The higher the number, the faster the drill will spin.
How do I know which speed setting to use on my drill?
The speed setting you should use on your drill depends on the material you are drilling into and the size of the drill bit you are using. Generally, a lower speed setting is better for drilling into soft materials like wood, while a higher speed setting is more suitable for drilling into hard materials like metal.
What is the purpose of the clutch settings on a drill?
The clutch settings on a drill allow you to control the amount of torque the drill applies when drilling. This is particularly useful when driving screws, as it helps prevent overtightening and stripping of the screw or material. The clutch settings can be adjusted based on the type of screw and material you are working with.
Can I use a drill without adjusting the speed settings?
Yes, you can use a drill without adjusting the speed settings, but it is not recommended. Using the wrong speed setting for the material or drill bit size can lead to poor drilling performance, overheating, and even damage to the drill or workpiece. It is best to always adjust the speed settings to ensure optimal drilling results.
How do I change the speed settings on a drill?
The method for changing the speed settings on a drill depends on the model and brand. Most drills have a switch or selector on the side or top that allows you to adjust the speed. Some drills have a variable speed trigger, where you can control the speed by how far you depress the trigger. Refer to the user manual of your drill for specific instructions on changing the speed settings.
What are some common uses for higher speed settings on a drill?
Higher speed settings on a drill are commonly used for tasks such as drilling through metal, driving screws into hard materials, or when using larger drill bits. The increased speed helps provide more power and efficiency for these types of drilling applications.
Video:


Meet Harrison Clayton, a distinguished author and home remodeling enthusiast whose expertise in the realm of renovation is second to none. With a passion for transforming houses into inviting homes, Harrison's writing at https://thehuts-eastbourne.co.uk/ brings a breath of fresh inspiration to the world of home improvement. Whether you're looking to revamp a small corner of your abode or embark on a complete home transformation, Harrison's articles provide the essential expertise and creative flair to turn your visions into reality. So, dive into the captivating world of home remodeling with Harrison Clayton and unlock the full potential of your living space with every word he writes.


