Understanding the Numeric Markings on a Dewalt Drill

When it comes to choosing a power tool, understanding the various markings and labels can make all the difference. This is especially true for a Dewalt drill, which is known for its quality and durability. The numeric markings on a Dewalt drill can provide valuable information about its power, performance, and capabilities.
One of the most important numeric markings on a Dewalt drill is the voltage rating. This indicates the amount of electrical power the drill can handle, and it can range from 12V to 60V or more. A higher voltage rating generally means more power and torque, which is important for heavy-duty tasks.
Another important numeric marking is the RPM (revolutions per minute), which tells you how fast the drill can rotate. Higher RPMs are often desirable for tasks that require fast drilling or driving, while lower RPMs are better for tasks that require precision and control. It’s important to note that the maximum RPM may vary depending on the drill’s mode or setting.
Additionally, the torque rating is a numeric marking that indicates the drill’s twisting force. This is important for tasks that require drilling into tough materials or driving screws with precision. A higher torque rating means the drill can apply more force, which can be useful for heavy-duty applications.
In conclusion, understanding the numeric markings on a Dewalt drill is crucial for selecting the right tool for your needs. Whether it’s the voltage rating, RPM, or torque, these markings provide valuable information about the drill’s power, performance, and capabilities. By paying attention to these markings, you can ensure that you choose a Dewalt drill that is suited to your specific tasks and requirements.
Understanding Dewalt Drill Markings: A Comprehensive Guide
Introduction
When it comes to choosing a Dewalt drill, understanding the numeric markings on the drill is essential. These markings provide important information about the drill’s features and capabilities, allowing you to select the right tool for your needs. In this comprehensive guide, we will break down the various numeric markings found on Dewalt drills and explain what they mean.

1. Voltage
One of the most important markings to consider is the voltage of the drill. This indicates the power output of the drill and determines its ability to drive screws and drill holes. Dewalt drills typically range from 12V to 60V, with higher voltage drills offering more power for tougher tasks.
2. Battery Type
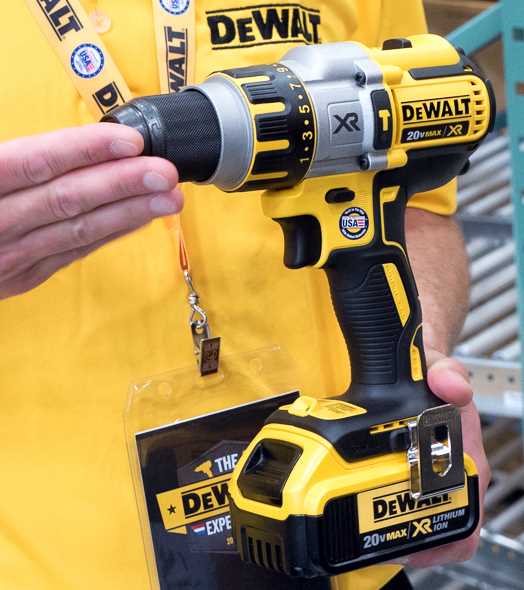
Dewalt drills come with different types of batteries, indicated by markings such as “XR” or “FlexVolt”. XR batteries are the standard lithium-ion batteries, while FlexVolt batteries are innovative and offer higher voltage for increased runtime and power.
3. Chuck Size
The chuck size refers to the diameter of the hole where the drill bit is inserted. Dewalt drills come with various chuck sizes, usually ranging from 1/4 inch to 1/2 inch. Larger chuck sizes allow for the use of larger drill bits and provide more versatility.
4. Torque Settings
Many Dewalt drills come with adjustable torque settings, which allow you to control the amount of power delivered to the drill bit. Higher torque settings are suitable for drilling through tough materials, while lower settings are ideal for driving screws without damaging the surface.
5. Speed Settings
Dewalt drills offer variable speed settings, typically ranging from 0 to 2000 RPM (rotations per minute). Higher speeds are useful for drilling holes quickly, while lower speeds provide more control when driving screws or working with delicate materials.

6. Hammer Function
Some Dewalt drills feature a hammer function, indicated by markings such as “Hammer” or a hammer icon. This function allows the drill to perform hammering motion along with rotation, making it suitable for drilling into masonry and concrete.
7. Brushless Motor
Dewalt drills with a brushless motor are indicated by markings such as “Brushless” or “BL”. These motors offer increased efficiency, longer runtime, and extended tool life. They are also generally more expensive compared to drills with brushed motors.
Conclusion
Understanding the numeric markings on a Dewalt drill is crucial for selecting the right tool for your needs. By considering the voltage, battery type, chuck size, torque settings, speed settings, hammer function, and motor type, you can make an informed decision and ensure that your Dewalt drill meets your requirements.
The Basics of Dewalt Drill Markings: What Do They Mean?
Introduction
Dewalt drills are known for their quality and durability, but one aspect that can be confusing for users is understanding the numeric markings on these drills. In this article, we will explore the basics of Dewalt drill markings and what they mean, so you can make an informed decision when choosing the right drill for your needs.
Understanding the Model Number

The model number of a Dewalt drill can provide valuable information about its capabilities and features. Typically, the model number consists of a combination of letters and numbers. The numbers in the model number usually indicate the voltage rating of the drill. For example, a model number like DW745X would indicate a drill with a voltage rating of 7.2V.
Decoding the Chuck Size
The chuck size refers to the diameter of the drill’s chuck, which is the part that holds the drill bit. Dewalt drill chucks come in various sizes, including 1/4 inch, 3/8 inch, and 1/2 inch. The chuck size is often mentioned in the product description and can affect the types and sizes of drill bits that can be used with the drill.
Understanding the Torque Settings
Torque is an important factor to consider when choosing a drill. It refers to the rotational force that the drill can generate. Dewalt drills often have multiple torque settings that allow you to adjust the drill’s power based on the task at hand. This is especially useful when working with different materials or when using different drill bits. The torque settings are usually indicated by numbers or symbols on the drill.
Deciphering the RPM Rating
The RPM (revolutions per minute) rating indicates the speed at which the drill bit rotates. A higher RPM rating means that the drill can rotate at a faster speed, which can be advantageous when drilling through hard materials. Dewalt drills often have variable speed controls that allow you to adjust the RPM based on your specific needs.
Interpreting the IPM Specification
IPM stands for impacts per minute and refers to the number of times the drill’s hammer mechanism strikes the bit in a minute. This specification is particularly relevant for hammer drills, which are designed for drilling into concrete, masonry, and other hard materials. A higher IPM value indicates a drill with a more powerful hammer mechanism.

Conclusion
Understanding the numeric markings on a Dewalt drill can help you choose the right drill for your specific needs. By decoding the model number, chuck size, torque settings, RPM rating, and IPM specification, you can make an informed decision and select a drill that will enable you to tackle a wide range of drilling tasks with ease.
Deciphering Dewalt Drill Model Numbers: Understanding the Code
Decoding the model numbers of Dewalt drills can provide important information about the drill’s capabilities, features, and specifications. The model number typically consists of a combination of letters and numbers, which may appear confusing at first glance. However, by understanding the code, users can easily identify the key characteristics of the drill.
Components of a Dewalt Drill Model Number
A Dewalt drill model number usually consists of several components, each representing a particular feature or characteristic of the drill:
- Brand Identifier: The first letters in the model number typically indicate the brand. In this case, “Dewalt” is commonly represented by the letters “DWT” or “DW”.
- Tool Type: The following letters in the model number represent the type of drill. For example, “DC” indicates a cordless drill and “D” represents a corded drill. Other variations may include “XRP” for an extended runtime drill or “K” for a kit that includes additional accessories.
- Voltage Rating: The voltage rating is represented by a numerical value, such as “18” for an 18-volt drill.
- Battery Type: If the drill is cordless, the model number may include letters that indicate the type of battery used. For example, “NICD” represents a nickel-cadmium battery and “LI” represents a lithium-ion battery.
- Chuck Size: The chuck size is often indicated by a numerical value, such as “1/2” for a 1/2-inch chuck.
- Additional Features: Some model numbers may include additional letters or numbers that represent specific features, such as “XR” for an extra runtime feature or “H” for a hammer drill capability.
Example Dewalt Drill Model Number: DWTDCD780C2
Let’s take the model number “DWTDCD780C2” as an example to illustrate how to decipher the code:
- DWT: Indicates the brand, in this case, Dewalt.
- D: Represents a corded drill.
- CD: Indicates a 20-volt drill with a lithium-ion battery.
- 780: Represents the model series or specific model within the series.
- C2: Indicates that it is a kit with two batteries included.
Conclusion
Deciphering Dewalt drill model numbers may seem complex at first, but once you understand the code, it becomes much easier to determine the key characteristics of the drill. By decoding the model number, users can quickly identify the brand, type of drill, voltage rating, battery type, chuck size, and any additional features. This knowledge allows users to make informed decisions when selecting a Dewalt drill that meets their specific needs and requirements.

Power Rating: How to Interpret Dewalt Drill Voltage and Amps
When choosing a power tool like a Dewalt drill, understanding the power rating is important to ensure you select the right tool for your needs. Two important factors to consider when interpreting the power rating of a Dewalt drill are the voltage and amps. These ratings determine the overall power and performance of the drill.
Voltage
The voltage rating of a Dewalt drill refers to the amount of electrical potential difference supplied to the drill by its battery or power source. It is commonly measured in volts (V). A higher voltage rating typically indicates a more powerful drill with greater drilling and driving capabilities. Dewalt drills are available in various voltage ratings, such as 12V, 18V, and 20V. Higher voltage drills are generally suited for heavy-duty applications, while lower voltage drills are ideal for lighter tasks.
Amps
The amp rating of a Dewalt drill refers to the amount of electrical current the drill can draw from its power source. It is measured in amperes (A). The amp rating determines the strength and duration of the drill’s power supply. A higher amp rating indicates that the drill can handle higher power demands and sustain longer periods of use without overheating or draining the battery quickly. Dewalt drills usually have amp ratings ranging from 1.5A to 10A, with higher amp ratings providing more power and performance.
Interpreting the Power Rating
To interpret the power rating of a Dewalt drill, it is essential to consider both the voltage and amp ratings together. Higher voltage and amp ratings typically indicate a more powerful drill suitable for heavy-duty tasks and professional use. These drills are capable of providing greater torque, faster drilling speeds, and extended operation times. However, they may also be larger and heavier compared to drills with lower power ratings.
On the other hand, lower voltage and amp ratings are suitable for light to medium-duty applications and occasional use. These drills are generally more compact, lightweight, and easier to handle. While they may not offer the same level of power and performance as higher-rated drills, they are often sufficient for DIY projects and general household tasks.
Conclusion
Understanding the power rating of a Dewalt drill, including the voltage and amp ratings, is crucial for selecting the right tool for the job. By considering these factors, you can ensure that you choose a drill that meets your specific needs and provides the necessary power and performance. Whether you require a powerful drill for heavy-duty tasks or a compact drill for occasional use, Dewalt offers a range of options to suit various applications.
Understanding Dewalt Drill Chuck Sizes: Which One is Right for You?
If you own a Dewalt drill or are considering purchasing one, it’s important to understand the different sizes of drill chucks available and which one is right for your needs. The chuck size refers to the maximum diameter of the drill bit that can be inserted into the drill.
Key Factors to Consider
- Chuck Size Range: Dewalt drills generally come in three main chuck sizes: 3/8-inch, 1/2-inch, and 1/4-inch. The chuck size range will determine the compatibility of various drill bits and accessories.
- Application: Consider the type of tasks you will be performing with your drill. Smaller chuck sizes are suitable for light-duty tasks such as drilling small holes in wood or metal, while larger chuck sizes are better for heavy-duty applications such as drilling large holes or using paddle bits.
- Drill Power: Chuck size is often correlated with the power of the drill. Typically, drills with larger chuck sizes have higher power capabilities and are more suited for demanding tasks.
Understanding Chuck Size Measurements
Chuck sizes are commonly expressed in both fractional and metric measurements. Here’s a quick breakdown of the most common chuck sizes:
| Chuck Size (Fractional) | Chuck Size (Metric) | Suitable Task |
|---|---|---|
| 3/8-inch | 10 mm | Light-duty drilling, general purpose |
| 1/2-inch | 13 mm | Heavy-duty drilling, larger holes |
| 1/4-inch | 6.35 mm | Light-duty drilling, screwdriving |
Choosing the Right Chuck Size
To determine the right chuck size for your needs, consider the tasks you will be performing most frequently. If you will primarily be drilling small holes in wood or metal, a 3/8-inch chuck size should suffice. For heavier tasks or larger holes, a 1/2-inch chuck size would be more appropriate. A 1/4-inch chuck size is suitable for light-duty drilling and screwdriving tasks.
It’s worth noting that some Dewalt drills offer interchangeable chucks, allowing you to easily switch between different chuck sizes depending on the task at hand. This can offer added versatility and convenience.
Overall, choosing the right chuck size is an important consideration when selecting a Dewalt drill. By understanding the different chuck sizes available and how they impact drill bit compatibility and performance, you can make an informed decision and ensure that your drill meets your needs.
Torque Settings: Making Sense of the Numbers on Your Dewalt Drill
When using a Dewalt drill, it is important to understand the torque settings and what the numbers on the drill mean. The torque setting determines the amount of force or power generated by the drill to rotate the drill bit or fastener. Knowing how to set the proper torque is essential for achieving the desired results and avoiding damage to the workpiece or the drill itself.
Understanding the Numbers
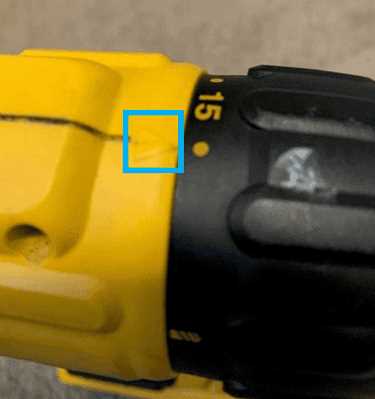
The numbers on your Dewalt drill represent the torque settings available. Typically, these numbers range from 1 to a higher value, depending on the model of your drill. The higher the number, the greater the torque. However, it is important to note that the numbers on the drill may not indicate the exact amount of torque generated, but rather a relative value between the different settings.
Using the Torque Settings
To set the torque on your Dewalt drill, locate the numbered torque adjustment collar near the chuck. Rotate the collar until the desired number aligns with the indicator on the drill body. It is important to select the appropriate torque setting based on the task at hand.
Lower Torque Settings:
- Lower torque settings, typically ranging from 1 to 10, are used for delicate tasks or when working with softer materials such as drywall, wood, or plastic.
- These lower torque settings allow for precise control and help prevent over-tightening or damaging the workpiece.
Medium Torque Settings:
- Medium torque settings, ranging from 11 to 20, are suitable for general drilling and driving applications.
- These settings provide a good balance between power and control and are commonly used for tasks involving metal, such as drilling into metal studs or driving screws into metal surfaces.
Higher Torque Settings:
- Higher torque settings, typically above 21, are intended for heavy-duty tasks that require more power.
- These settings are suitable for tasks such as drilling into concrete, driving large screws, or tackling other demanding applications.
Additional Considerations
While the torque settings on your Dewalt drill can help you achieve the desired results, it is important to exercise caution and use appropriate techniques for each task. Some additional considerations include:
- Using the correct drill bit or screwdriver tip for the task at hand.
- Applying consistent pressure without forcing the drill.
- Using proper drilling or driving techniques, such as starting with a pilot hole or pre-drilling for larger screws.
- Adjusting the torque setting based on the material being worked on or the size of the fastener.
By understanding the torque settings on your Dewalt drill and following these guidelines, you can work more efficiently and effectively while minimizing the risk of damage to your workpiece or drill. Remember to always consult the drill’s user manual for specific instructions and recommended torque settings for different applications.
RPM: Demystifying the Speed Settings on Your Dewalt Drill
One of the key features of a Dewalt drill is its variable speed capability, which allows you to adjust the rotational speed of the drill bit. The speed of the drill is measured in revolutions per minute (RPM). Understanding the different RPM settings on your Dewalt drill can help you optimize its performance and ensure safe and efficient operation.
Why Speed Settings Matter
The speed at which your drill rotates can greatly impact the performance and outcome of your drilling or driving tasks. Adjusting the RPM helps you match the speed of the drill to the type of material or application you are working with. Choosing the right speed setting can enhance drilling accuracy, prevent overheating, reduce the risk of material damage, and prolong the life of the drill bit.
Understanding the RPM Range
The RPM range on a Dewalt drill can vary depending on the model and type of drill. Some drills have a single speed setting, while others offer multiple speed options. It’s important to consult your drill’s user manual for specific RPM range information.
Typically, Dewalt drills are designed with a wide RPM range that allows you to choose slower speeds for tasks that require precision and higher speeds for tasks that require more power. The speed settings can usually be adjusted using a switch or dial located on the drill body.
Making the Right Speed Selection
When selecting the RPM setting for your Dewalt drill, consider the following factors:
- Material Type: Different materials require different drilling speeds. Hard materials, such as metal or hardwood, generally require slower speeds, while softer materials, like plastic or softwood, can be drilled at higher speeds.
- Drill Bit Size: Larger drill bits tend to work more effectively at slower speeds, while smaller drill bits may require higher speeds for optimal performance.
- Task: The type of drilling or driving task you are performing can also dictate the optimal speed setting. For example, drilling pilot holes may require a different speed than driving screws.
Experimenting and Practicing
To find the best speed setting for your specific task, consider experimenting with different RPM options on scrap material beforehand. This will help you become familiar with the drill’s performance at different speeds and determine the optimal setting for your needs.
Conclusion
Understanding the speed settings on your Dewalt drill and knowing how to adjust the RPM can make a significant difference in the efficiency and quality of your drilling and driving tasks. By considering the material, drill bit size, and task at hand, you can choose the appropriate speed setting and achieve the best results.
Special Features: Exploring Additional Markings on Dewalt Drills
1. Torque Settings
Dewalt drills often come with torque settings that allow you to adjust the amount of force applied from the drill to the screw or fastener you are working with. These torque settings are typically indicated by markings on the drill’s collar or handle.
By adjusting the torque setting, you can prevent the drill from over-tightening or stripping screws, and also have more control over the depth at which the screw is inserted. Higher torque settings are typically used for drilling into harder materials like concrete, while lower torque settings are ideal for delicate projects or driving screws into softer materials.
2. Speed Settings
In addition to torque settings, Dewalt drills also have speed settings that allow you to control the rotation speed of the drill bit. These speed settings are indicated by markings on the drill’s trigger or a separate control dial.
Higher speed settings are typically used for drilling into materials like wood and metal, while lower speed settings are ideal for tasks that require more precision, such as driving screws or drilling into delicate materials like ceramic tiles or drywall.
3. Hammer Drill Function
Many Dewalt drills also feature a hammer drill function, which is indicated by a separate marking or symbol on the drill. The hammer drill function is designed for drilling into harder materials like concrete or masonry.
When the hammer drill function is activated, the drill bit not only rotates but also moves in a hammer-like motion, creating small impacts that help to break through the tough material. This function is especially useful for tasks like installing anchors or drilling holes for electrical conduits in concrete walls.
4. Battery Indicator
Some Dewalt drills come with a battery indicator, which is typically a series of LED lights located on the battery pack or the drill itself. These lights indicate the remaining charge or the battery’s approximate power level.
A fully charged battery usually shows all the lights lit up, while a low battery may only show one or two lights. This feature helps you to keep track of the battery’s power level, allowing you to plan your work accordingly, or ensure you have enough power for the task at hand.
5. Built-in LED Light
Many Dewalt drills also feature a built-in LED light, which is typically located near the drill’s chuck. This light automatically turns on when you start drilling, providing illumination to your work area.
The LED light is especially useful when working in poorly lit areas or tight spaces, as it allows you to clearly see where you are drilling and make accurate holes or drive screws without any mistakes.
| Marking | Description |
|---|---|
| Torque Settings | Adjustable force applied to screws or fasteners |
| Speed Settings | Control over rotation speed of the drill bit |
| Hammer Drill Function | Designed for drilling into harder materials |
| Battery Indicator | Indicates remaining charge or power level |
| Built-in LED Light | Provides illumination to the work area |
Choosing the Right Dewalt Drill for Your Needs: Using Markings as a Guide
Introduction
When it comes to choosing a Dewalt drill, it’s important to understand the numeric markings on the drill to ensure that you’re selecting the right one for your needs. These markings can provide valuable information about the drill’s power, speed, and capabilities.
Power
One of the key factors to consider when choosing a Dewalt drill is its power rating. The power rating is usually indicated by a numeric value followed by the letter “W” for watts. This rating gives you an idea of the drill’s overall power output, which can determine its ability to handle different types of tasks.
Higher power ratings are generally better suited for heavy-duty applications, such as drilling through concrete or metal, while lower power ratings may be sufficient for lighter tasks, such as assembling furniture or drilling into wood.
Speed
Another important consideration is the drill’s speed rating. This is typically indicated by a numeric value followed by the abbreviation “RPM” for revolutions per minute. The speed rating determines how quickly the drill bit rotates, which can affect the efficiency and precision of your drilling.
For example, a higher speed rating may be more suitable for tasks that require fast drilling, such as creating pilot holes, while a lower speed rating may be better for tasks that require more control, such as driving screws.
Battery Voltage
For cordless Dewalt drills, the battery voltage is an important factor to consider. The voltage rating is usually indicated by a numeric value followed by the letters “V” for volts.
Higher voltage ratings generally indicate more power and longer battery life, but they may also result in a heavier and bulkier drill. Lower voltage ratings are usually more suitable for lighter tasks or for users who prefer a more compact and lightweight drill.
Additional Features
In addition to the numeric markings, it’s also important to consider any additional features that may be available on the Dewalt drill. These can include adjustable torque settings, brushless motors, LED lights, and more.
Take into account the specific tasks you’ll be using the drill for and consider whether these additional features would be beneficial to you.
Conclusion
By understanding the numeric markings on a Dewalt drill, you can make an informed decision when choosing the right drill for your needs. Consider the power rating, speed rating, battery voltage, and any additional features that may be important to you.
Remember to also take into account your specific tasks and the materials you’ll be working with. With the right information, you can confidently select a Dewalt drill that will meet your requirements and help you accomplish your projects with ease.
FAQ:
What do the numeric markings on a Dewalt drill represent?
The numeric markings on a Dewalt drill represent the power and capabilities of the drill. They indicate the voltage of the drill’s battery, which determines the strength of the drill.
How can I determine the voltage of a Dewalt drill?
The voltage of a Dewalt drill can be determined by looking at the numeric markings on the drill or by checking the information provided on the drill’s battery.
What is the significance of the voltage in a Dewalt drill?
The voltage in a Dewalt drill determines how powerful the drill is. Higher voltage means more power and capability to tackle tougher tasks.
What is the highest voltage available for Dewalt drills?
The highest voltage available for Dewalt drills is 20 volts. These drills are known for their high power and ability to handle heavy-duty applications.
Are all Dewalt drills labeled with numeric markings for voltage?
Yes, all Dewalt drills are labeled with numeric markings for voltage. This helps users easily identify the power capabilities of each drill.
Can I use a higher voltage battery on my Dewalt drill?
No, it is not recommended to use a higher voltage battery on a Dewalt drill. Each drill is designed to work with a specific voltage, using a higher voltage battery can damage the drill and void the warranty.
Why should I consider the voltage when choosing a Dewalt drill?
Considering the voltage is important when choosing a Dewalt drill as it determines the power and capability of the drill. Higher voltage drills are more suitable for heavy-duty tasks, while lower voltage drills are better for lighter applications.
Video:


Meet Harrison Clayton, a distinguished author and home remodeling enthusiast whose expertise in the realm of renovation is second to none. With a passion for transforming houses into inviting homes, Harrison's writing at https://thehuts-eastbourne.co.uk/ brings a breath of fresh inspiration to the world of home improvement. Whether you're looking to revamp a small corner of your abode or embark on a complete home transformation, Harrison's articles provide the essential expertise and creative flair to turn your visions into reality. So, dive into the captivating world of home remodeling with Harrison Clayton and unlock the full potential of your living space with every word he writes.


