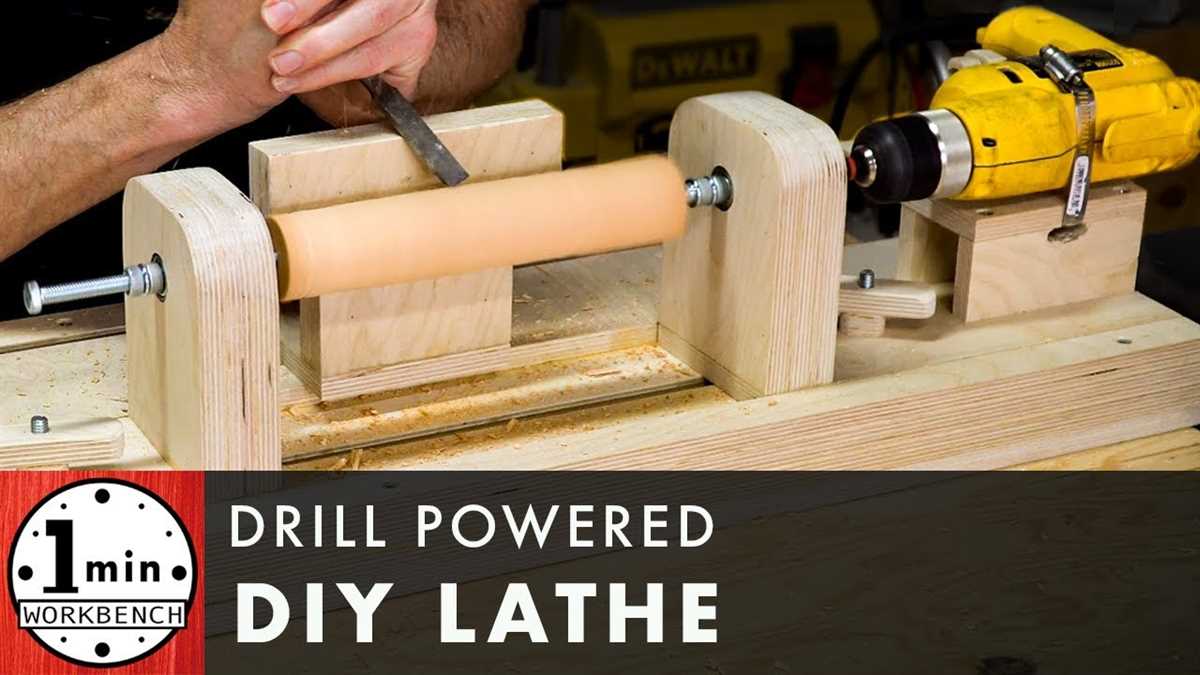
Turn a Drill into a Lathe: Step-by-Step Guide
If you’re a DIY enthusiast or someone who loves working on projects, you’ve probably encountered situations when you needed a lathe but didn’t have one at hand. Don’t worry, because there’s a solution! In this step-by-step guide, we’ll show you how to turn a drill into a lathe.
A lathe is a tool used for shaping and machining various materials, such as wood or metal. It allows you to rotate the workpiece while using cutting tools to remove material and create your desired shape. Lathes can be quite expensive and take up a lot of space, but with a few modifications, you can transform your handheld drill into a similar tool.
The process may require some basic tools and materials, but it’s a cost-effective way to have a makeshift lathe for smaller projects. With the right setup, you’ll be able to create precision cuts and turn cylindrical shapes with ease. So let’s get started and turn your drill into a lathe!
What is a Drill Lathe?
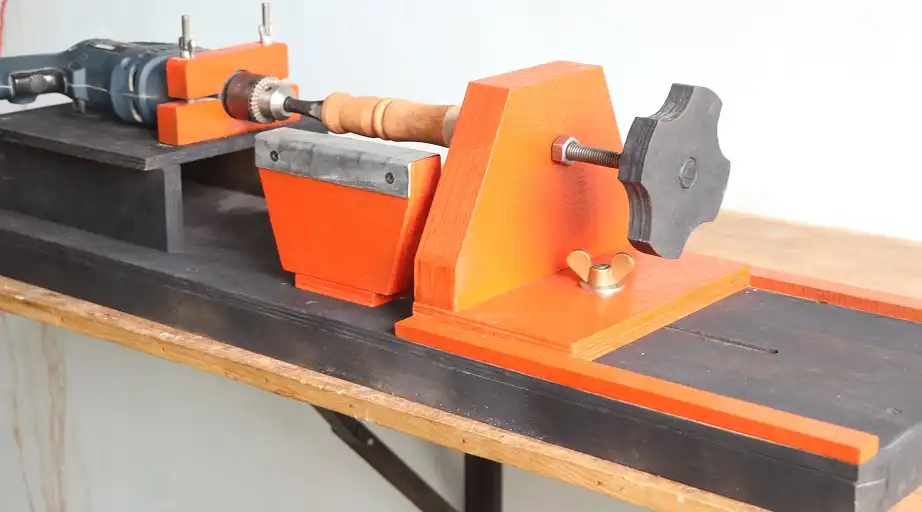
A drill lathe is a tool that allows you to convert a handheld drill into a miniature lathe. It is a handy device for hobbyists, woodworkers, and DIY enthusiasts who don’t have the space or budget for a full-sized lathe.

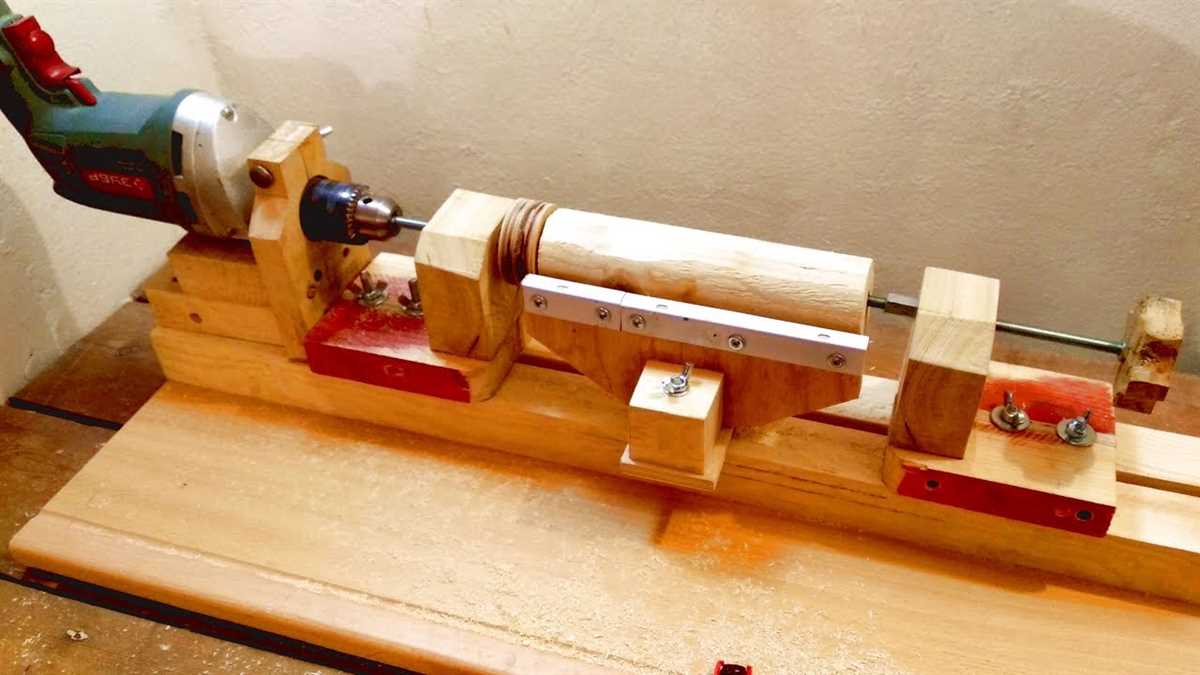
The drill lathe consists of a base that holds the drill securely in place, a tool rest that provides support for the workpiece, and a tailstock that can be adjusted to apply pressure to the workpiece. By using different attachments and accessories, you can turn your drill lathe into a versatile tool capable of performing a variety of tasks.
Key Features of a Drill Lathe:
- Power Source: A drill lathe is powered by a handheld drill, which can be corded or cordless. The drill provides the rotational power needed to spin the workpiece.
- Stability: The base of the drill lathe is designed to provide stability and prevent the drill from moving during operation. This ensures accuracy and safety.
- Tool Rest: The tool rest is used to support the cutting tool and guide it along the workpiece. It can be adjusted to achieve different cutting depths and angles.
- Tailstock: The tailstock is used to apply pressure to the workpiece and keep it securely in place. It can be adjusted to accommodate different workpiece lengths.
- Accessories: Various accessories are available for a drill lathe, including different types of cutting tools, chucks, and centers. These accessories allow you to perform different operations, such as drilling, turning, sanding, and polishing.
Overall, a drill lathe is a compact and versatile tool that offers many of the capabilities of a full-sized lathe at a fraction of the size and cost. It is a great option for those who want to get started with lathe work or have limited space in their workshop.
Advantages of a Drill Lathe
A drill lathe is a versatile tool that offers several advantages over traditional lathes. Here are some of the key advantages:
- Cost-effective: Unlike dedicated lathes, a drill lathe can be made using a regular drill, which makes it a cost-effective solution for hobbyists and DIY enthusiasts. It eliminates the need to invest in an expensive lathe machine.
- Space-saving: A drill lathe takes up significantly less space compared to a dedicated lathe. This makes it an ideal option for those with limited workshop space.
- Portability: Since a drill lathe can be made using a portable drill, it allows for greater mobility and flexibility in terms of usage. It can be easily transported and used in different locations.
- Versatility: A drill lathe can handle a wide range of turning operations, including both external and internal turning, facing, drilling, and chamfering. This makes it a versatile tool that can be used for various projects.
- Easy to set up: Setting up a drill lathe is relatively simple and straightforward. With the right attachments and proper alignment, one can quickly convert a drill into a lathe and start using it for turning operations.
Overall, a drill lathe provides a cost-effective, space-saving, and versatile solution for turning operations. It allows hobbyists and DIY enthusiasts to enjoy the benefits of a lathe without the need for a dedicated machine.

Materials Needed
- A handheld drill with adjustable speed settings
- A solid cylindrical rod or stock material (such as wood or metal) for turning
- A set of lathe chisels or turning tools
- Anchoring device (such as a clamp or vise) to secure the drill to a workbench or table
- Safety goggles or face shield
- Gloves for hand protection
- Measuring tools (e.g. calipers, ruler) to ensure precise measurements
- Sandpaper or sanding pads for finishing
- Optional: a drill press stand or a stand-alone lathe tool rest for added stability
Step 1: Prepare the Drill
The first step in turning a drill into a lathe is to gather all the necessary materials and tools. Here’s what you’ll need:
- A power drill with a chuck that can hold a 1/2 inch diameter rod
- A 1/2 inch diameter rod made of sturdy material such as steel or aluminum
- Two nuts and bolts that fit the drill chuck and the rod
- A piece of scrap wood or a small block for mounting
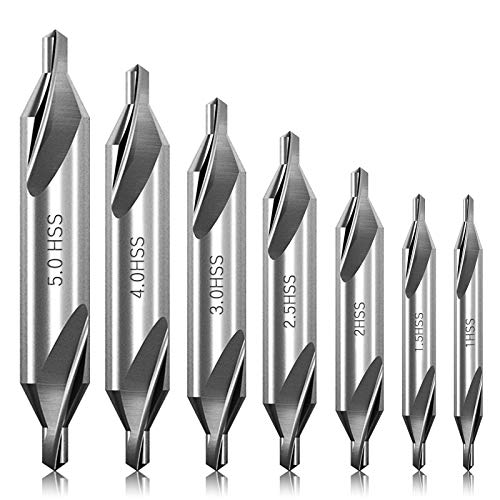
- A drill bit guide or a center marker
- Clamps to secure the drill to the workbench
- Safety equipment such as goggles and gloves
Once you have gathered all the materials, follow these steps to prepare the drill:
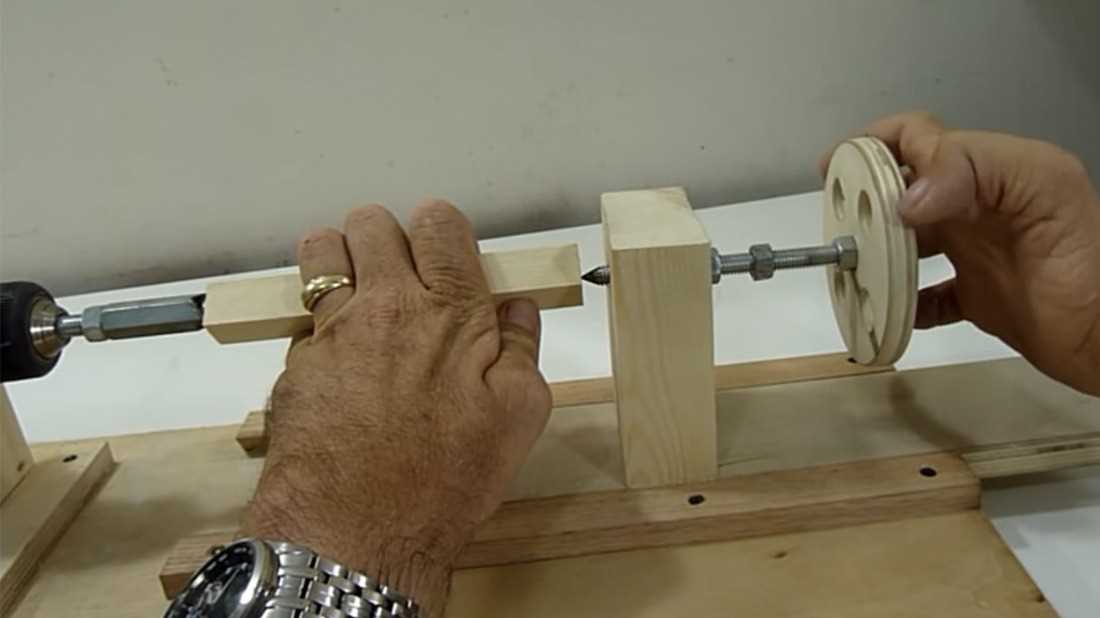
- Remove the chuck: Unscrew the chuck on the drill and remove any drill bits that may be inserted.
- Attach the rod: Insert the rod into the chuck and tighten it securely using the nuts and bolts. Make sure the rod is centered and straight.
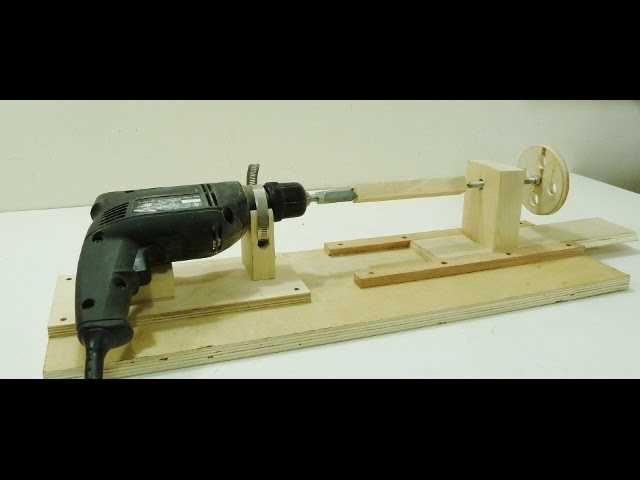
- Mount the drill: Use clamps to secure the drill to a workbench or a sturdy surface. Make sure it is stable and won’t move during the turning process.
- Adjust the height: Position the drill so that the rod is at a comfortable height for your workpiece. You may need to use a piece of scrap wood or a small block to raise or lower the drill.
- Mark the center: Use a drill bit guide or a center marker to mark the center of your workpiece. This will help you align the drill accurately.
Once you have completed these steps, your drill is now prepared to be used as a lathe. Make sure to double-check that everything is properly secured before starting the turning process.

Step 2: Mounting the Drill
After gathering all the necessary materials and tools, it’s time to mount the drill onto the lathe. Follow these steps to securely attach the drill:
- Prepare the Workbench: Clear off any clutter and make sure you have ample space to work. Place a non-slip mat or rubber mat on the workbench to prevent the drill and lathe from sliding around during use.
- Position the Drill: Place the drill on the workbench with the handle facing towards you. Ensure that the drill is centered and aligned with the edge of the workbench.
- Secure the Drill: Use clamps to firmly secure the drill to the workbench. Position the clamps so that they hold the drill tightly in place without impeding any moving parts or obstructing access to the drill’s controls.
- Attach the Lathe Adapter: If your drill does not have a built-in lathe adapter, attach one to the drill’s chuck. The adapter should have a Morse taper that matches the tailstock of the lathe you are using.
- Connect the Power Cord: Plug in the power cord of the drill to a power outlet that is suitable for the drill’s voltage requirements. Ensure that the power cord is not tangled or obstructed in any way.
By following these steps and properly mounting the drill onto the lathe, you are ready to move on to the next step of setting up your lathe and preparing it for turning operations.
Step 3: Setting Up the Workpiece
Now that you have your lathe setup, it’s time to prepare the workpiece that you’ll be turning. Follow these steps to correctly set up the workpiece:
- Choose the right wood: Select a piece of wood that is suitable for turning. It should be free of knots and cracks, and have a straight grain. Hardwoods like maple, oak, or walnut are commonly used for turning projects.
- Measure and mark the workpiece: Use a ruler or tape measure to determine the length and diameter of the workpiece. Mark these measurements on the wood using a pencil or marker. This will serve as a guide during the turning process.
- Mount the workpiece: Place the workpiece between the lathe’s drive center and tailstock center. Make sure the centers align with the marked points on the wood. Tighten the tailstock to hold the workpiece securely in place.
- Check for stability: Before turning on the lathe, ensure that the workpiece is stable and won’t move or wobble during the process. Adjust the tailstock or tighten the centers if necessary.
Setting up the workpiece correctly is essential for safety and achieving accurate and smooth turning results. Take your time to ensure everything is properly aligned and secure before moving on to the next step.

Step 4: Starting the Lathe
Now that you have your drill converted into a lathe, it’s time to start using it. Follow these steps to get your lathe up and running:
- Double check that your drill is securely clamped onto the workbench. Make sure it is tightly secured to prevent any accidents.
- Plug in your drill and make sure it is working properly. Check that the chuck is properly tightened and that the drill is functioning smoothly.
- Prepare your workpiece by marking the center point on each end. This will help you align and balance the piece while it is spinning.
- Insert one end of the workpiece into the drill chuck and tighten it securely. Make sure the workpiece is centered and aligned properly.
- Adjust the speed of the drill according to the type of material you are working with and the desired outcome. Start with a slow speed and gradually increase it as needed.
- Place a tool rest near the workpiece to provide support while you shape and turn it. Make sure the tool rest is securely attached to the workbench.
- Turn on the drill and carefully guide your tool along the workpiece, shaping it as desired. Take your time and pay attention to safety precautions.
- Monitor the temperature of both the drill and the workpiece. If either becomes too hot, take a break and let them cool down before continuing.
- Continue shaping and turning your workpiece until you achieve the desired result. Remember to take breaks when needed and exercise caution at all times.
With these steps, you are now ready to start using your homemade lathe. Enjoy the process of creating beautiful turned objects with this DIY tool!
Safety Tips
- Always wear appropriate protective gear, such as safety glasses, gloves, and a dust mask, when operating the drill turned lathe.
- Ensure that your work area is well-ventilated to prevent the buildup of dust and fumes.
- Before starting any project, make sure the drill is securely fastened to a stable surface to prevent it from moving during operation.
- Take your time to understand how to properly set up and operate the drill turned lathe before beginning any project. Read the manufacturer’s instructions carefully.
- Keep your hands and fingers away from the rotating parts of the drill turned lathe at all times to avoid injury. Use clamps or other holding devices to secure your workpiece.
- Never wear loose clothing or jewelry that can get caught in the moving parts of the drill turned lathe.
- Do not overload the drill turned lathe with a workpiece that is too large or heavy. This can cause the drill to become unstable and increase the risk of accidents.
- Regularly inspect the drill turned lathe for any signs of wear or damage. If you notice any issues, such as loose parts or frayed cords, do not use the machine until it is repaired.
- Always unplug the drill turned lathe from the power source when not in use and when making any adjustments or changes to the setup.
- Never leave the drill turned lathe unattended while it is running. Stay focused and pay attention to your work.
FAQ:
What is a lathe?
A lathe is a machine tool that rotates a workpiece about an axis of rotation to perform various operations such as cutting, sanding, drilling, knurling, or deformation.
Can I turn a drill into a lathe?
Yes, it is possible to turn a drill into a lathe with some modifications and attachments.
What tools do I need to turn a drill into a lathe?
You will need a drill, a sturdy base or frame, a tool rest, a workpiece holder, and various cutting tools for shaping the workpiece.

How difficult is it to turn a drill into a lathe?
It can be moderately difficult, as it requires some technical skills and precision in setting up the attachments and tools. However, with proper instructions and guidance, it can be achievable for DIY enthusiasts.
What are the steps to turn a drill into a lathe?
The steps include securing the drill onto a sturdy base, attaching a tool rest and workpiece holder, setting up the cutting tools, adjusting the speed and feed rate, and performing the desired lathe operations on the workpiece.
What are the limitations of using a drill as a lathe?
Using a drill as a lathe may have some limitations in terms of the size and weight of the workpiece that can be handled, the precision and stability of the setup, and the range of lathe operations that can be performed.
Are there any safety precautions I need to take when using a drill as a lathe?
Yes, it is important to wear appropriate safety gear such as goggles and gloves, secure the workpiece properly, avoid excessive speeds or force, and be cautious of the rotating parts and cutting tools to prevent accidents or injuries.
Video:


Meet Harrison Clayton, a distinguished author and home remodeling enthusiast whose expertise in the realm of renovation is second to none. With a passion for transforming houses into inviting homes, Harrison's writing at https://thehuts-eastbourne.co.uk/ brings a breath of fresh inspiration to the world of home improvement. Whether you're looking to revamp a small corner of your abode or embark on a complete home transformation, Harrison's articles provide the essential expertise and creative flair to turn your visions into reality. So, dive into the captivating world of home remodeling with Harrison Clayton and unlock the full potential of your living space with every word he writes.


