Top tips for drilling clean holes in wood

Drilling clean and precise holes in wood is essential for a variety of woodworking projects. Whether you’re building furniture, installing shelves, or doing any kind of woodworking, being able to make clean holes is crucial. It not only ensures a professional finish but also helps prevent any potential damage to the wood.
To achieve clean holes, there are several tips and techniques you can follow. Firstly, it’s important to choose the right drill for the job. A drill with a sharp and appropriately sized drill bit will make a significant difference in the quality of the hole. Using a dull bit or one that is too large can result in splintering or an uneven hole.
Another tip is to mark your drill points accurately before drilling. This helps ensure that the holes are placed in the right position and prevents any mistakes. Using a square or a straight edge can be helpful in creating straight and precise lines for drilling.
In addition to using the right tools and marking accurately, it’s important to control the drilling speed and pressure. Starting the drill at a slow speed and gradually increasing it can help prevent splintering and rough edges. Applying too much pressure can also lead to similar issues, so it’s important to let the drill do the work and avoid forcing it through the wood.
Lastly, using a backing board or sacrificial piece of wood can help prevent tear-out on the backside of the hole. This is especially useful when drilling through thin or delicate materials. Placing the backing board under the wood being drilled provides support and prevents any damage.

By following these top tips, you can ensure clean and precise holes when drilling in wood. Remember to choose the right tools, mark your drill points accurately, control the drilling speed and pressure, and use a backing board when needed. With these techniques, you’ll be able to achieve professional results in your woodworking projects.
Preparation
Before you start drilling holes in wood, it’s important to properly prepare both the wood and your tools. Taking the time to prepare will ensure that you achieve clean and precise holes without any damage to the wood or your equipment.
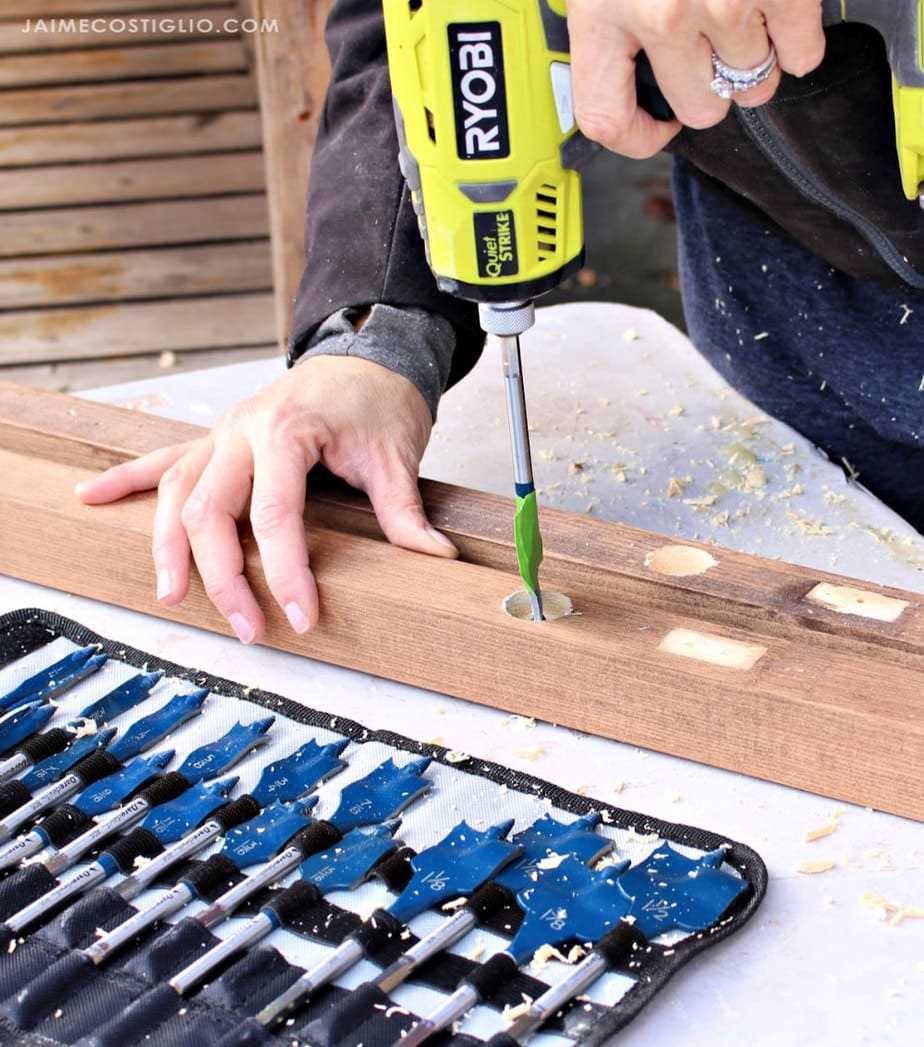
Select the right drill bit
Choosing the right drill bit for the type of hole you need is crucial. There are various types of drill bits designed for specific tasks, such as spade bits, brad point bits, twist bits, and Forstner bits. Consider the size and depth of the hole you need to drill, as well as the type of wood you’ll be working with, and select the appropriate drill bit accordingly.
Mark the drilling points
Prior to drilling, use a pencil or marker to mark the points where you want to drill the holes. This will help ensure accuracy and prevent any mistakes. Use a ruler or measuring tape to measure and mark the exact location of each hole according to your project requirements.

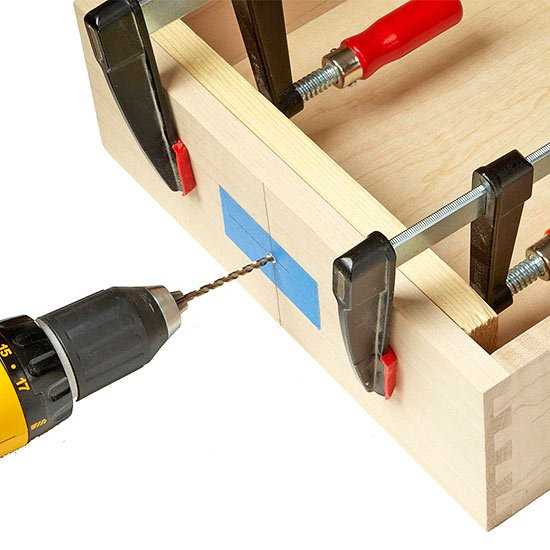
Secure the wood
Before you start drilling, it’s important to secure the wood in place. You can use clamps or a vice to hold the wood firmly. This will prevent it from slipping or moving while you drill, ensuring clean and accurate holes.
Use a backing board
If you’re drilling through a piece of wood that you don’t want to have any tear-out or splintering on the backside, it’s recommended to use a backing board. Place a piece of scrap wood behind the material you’re drilling into. This will provide support and prevent the wood from splintering or tearing out on the backside.
Wear safety gear
When drilling holes in wood, it’s important to prioritize safety. Wear safety glasses to protect your eyes from any flying debris. If you’re using power tools, consider wearing ear protection as well to prevent damage to your hearing.
Choose the right drill bit
Choosing the right drill bit is essential for drilling clean and precise holes in wood. The correct drill bit will ensure that you have the proper size hole and prevent any tearing or splintering of the wood.
When selecting a drill bit, consider the following factors:

- Material: Different drill bits are designed to work with specific materials. For drilling clean holes in wood, choose a drill bit specifically made for wood drilling. These drill bits usually have a sharp point and a wide, flat cutting edge.
- Diameter: The diameter of the drill bit determines the size of the hole. Measure the size of the hole you need and select a drill bit that matches that diameter.
- Length: The length of the drill bit should be appropriate for the depth of the hole you want to drill. Make sure the drill bit is long enough to reach the desired depth without being too long.
- Type: There are various types of drill bits available, such as twist bits, spade bits, brad point bits, and Forstner bits. Each type is designed for different purposes and produces different results. Consider the type of hole you want to drill and choose the appropriate drill bit.
It’s also a good idea to have a few extra drill bits on hand in case one gets dull or breaks during drilling. Sharp drill bits will provide cleaner holes and reduce the risk of splitting the wood.
| Drill Bit Type | Pros | Cons |
|---|---|---|
| Twist Bits | Widely available, versatile | Can cause tear-out in wood |
| Spade Bits | Fast drilling, great for rough holes | Can cause splintering |
| Brad Point Bits | Precise drilling, reduces tear-out | Not suitable for drilling deep holes |
| Forstner Bits | Creates flat-bottomed holes, smooth cutting action | Expensive, requires more power |
Take the time to choose the right drill bit for your specific woodworking project, and you’ll be rewarded with clean and professional-looking holes.
Mark the drilling spot
Before you start drilling, it’s important to clearly mark the spot where you want to make the hole. This will help ensure that you drill in the right place and achieve accurate results.
Here are some tips for marking the drilling spot:

- Measure and mark: Use a measuring tape or ruler to measure and mark the exact location where you want to drill. Use a pencil or a marking knife to make a small, precise mark on the wood.
- Use a center punch: For larger or deeper holes, consider using a center punch. Place the center punch on the mark and give it a light tap with a hammer. This will create a small indentation that will help guide the drill bit.
- Double check your measurements: Before you start drilling, double check your measurements to ensure accuracy. Use a level or square to make sure your mark is straight and aligned correctly.
- Consider pilot holes: If you’re drilling into hardwood or thick pieces of wood, it can be helpful to create a pilot hole before drilling the full-sized hole. This will help prevent the wood from splitting and make drilling easier.
By taking the time to mark the drilling spot properly, you can ensure that your holes are clean and precise, giving you professional-looking results.
Use a drill press
If you want to achieve perfectly clean holes in wood, using a drill press is highly recommended. A drill press is a stationary tool that allows for precise drilling and ensures straight holes. It consists of a motor, a drill bit, and a worktable.
Here are some reasons why using a drill press is beneficial:
- Precision: A drill press provides accurate drilling as it allows you to set the desired depth and angle. This ensures that each hole is consistent in size and depth.
- Safety: Using a drill press reduces the risk of accidents compared to handheld drills. The workpiece is secured on the worktable, providing stability and preventing it from moving or spinning out of control.
- Stability: The sturdy construction of a drill press eliminates vibrations, resulting in cleaner and more professional-looking holes. The drill press can be bolted onto a workbench, further enhancing stability.
- Efficiency: With a drill press, you can save time and effort. The ability to set the drill bit at a specific depth allows for rapid and consistent drilling.
- Versatility: Drill presses come with various speed settings, allowing you to choose the appropriate speed for different materials and drill bit sizes. This versatility makes it suitable for a wide range of woodworking projects.
Overall, using a drill press is highly recommended for achieving clean and precise holes in wood. It offers the necessary stability, precision, and safety to ensure the best results.
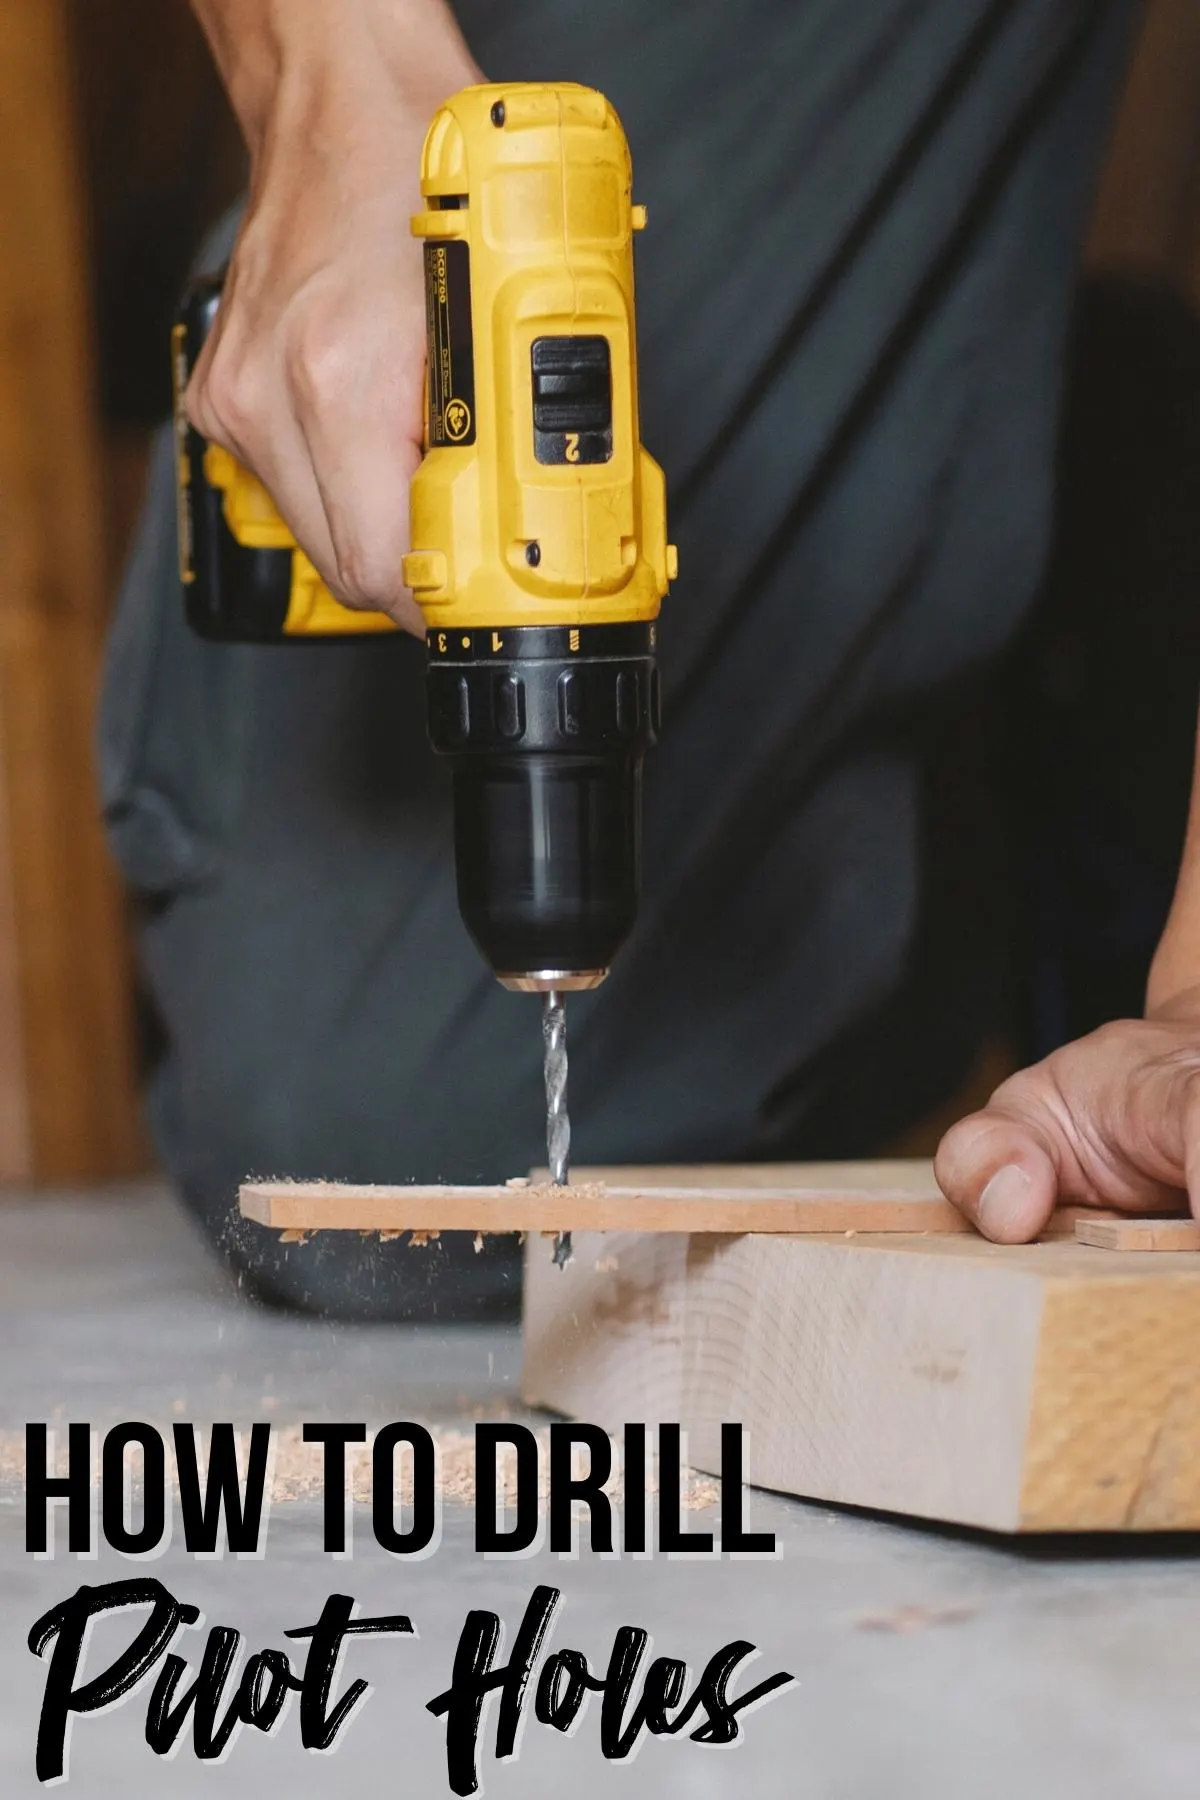
Start with a pilot hole
One of the most important tips for drilling clean holes in wood is to start with a pilot hole. This small hole serves as a guide for the drill bit and helps prevent the wood from splintering or cracking as you drill.

To create a pilot hole, you will need a drill bit that is smaller in diameter than the final hole you want to create. The size of the pilot hole will depend on the size of the drill bit you plan to use for the final hole. As a general rule, the pilot hole should be about 1/4 to 1/2 the size of the final hole.
Here are the steps to create a pilot hole:
- Mark the center of the hole you want to drill on the wood surface using a pencil or a center punch.
- Select an appropriate drill bit for the pilot hole. The size of the drill bit should be smaller than the final hole size.
- Secure the wood piece in a vice or clamp it down to prevent it from moving while drilling.
- Attach the drill bit to the drill and adjust the speed setting to match the type of wood you are working with.
- Position the drill bit over the marked center of the hole and apply gentle pressure to start drilling.
- Drill the pilot hole straight down, making sure to maintain a steady and controlled motion.
- Once the pilot hole is drilled, inspect it to ensure it is clean and free of any debris.
By starting with a pilot hole, you can significantly improve the accuracy and cleanliness of your drilled holes in wood. It is a simple yet effective technique that every woodworker should practice.
Drilling technique
Having the right drilling technique can make all the difference when it comes to drilling clean holes in wood. Here are some tips to help you improve your drilling technique:
- Choose the right drill bit: Using the correct drill bit for the type of hole you need to make is crucial. For wood, a twist drill bit or a spade bit are commonly used.
- Mark the spot: Before you start drilling, it’s important to mark the exact spot where you want the hole to be. This will help you ensure accurate drilling.
- Secure the wood: To prevent the wood from moving while drilling, make sure it is securely clamped or held down with a clamp or vice. This will allow for more precise drilling and avoid any accidents.
- Start with a pilot hole: For larger holes, it’s a good idea to start with a smaller pilot hole. This will help guide the larger drill bit and minimize any splintering or chipping of the wood.
- Drill at the right speed: Controlling the speed of the drill is essential for clean holes. Too high of a speed can cause the wood to burn or chip, while too low of a speed can lead to an uneven hole. Experiment with different speeds until you find the right one for your task.
- Apply steady pressure: When drilling, apply steady and consistent pressure to the drill to ensure a smooth and clean hole. Avoid pushing too hard or using excessive force, as this can cause the drill bit to become stuck or break.
- Clear away debris: After drilling the hole, use a brush or compressed air to clear away any wood chips or debris. This will help prevent the drill bit from getting clogged and ensure a clean and accurate hole.
Keep the drill bit sharp
One of the most important tips for drilling clean holes in wood is to keep your drill bit sharp. Dull drill bits can cause splintering and rough edges, making it difficult to achieve clean and professional-looking holes.
To keep your drill bit sharp, you can use a sharpening stone or a bench grinder. Simply run the drill bit over the stone or grinder at a slow speed, making sure to maintain a steady pressure. This will help remove any dull or damaged edges, restoring the sharpness of the bit.
It’s also important to regularly inspect your drill bits for any signs of wear or damage. If you notice any chips or dullness, it’s time to sharpen or replace the bit. Using a dull bit can not only impact the quality of your holes, but it can also put unnecessary strain on your drill.
Additionally, it’s important to use the correct drill bit for the type of wood you’re working with. Different types of wood may require different types of drill bits, such as spade bits, twist bits, or auger bits. Using the correct bit for the job will help ensure clean and precise holes.
Finishing touches
After drilling your hole, there are a few finishing touches you can do to ensure a clean and professional result.
1. Sanding the edges
When drilling a hole, the edges may become rough or splintered. To smooth them out, use a fine-grit sandpaper and gently sand the edges of the hole. This will give the hole a clean and polished look.
2. Removing dust and debris
After drilling, there may be dust and debris left in the hole. Use a brush or a can of compressed air to remove the dust and clean out the hole. This will ensure a snug fit when inserting screws or other fasteners.
3. Applying a finish
If you want to give your drilled hole a more finished appearance, you can apply a finish. This can be a clear varnish, paint, or even wood stain. Apply the finish with a brush or a cloth, following the manufacturer’s instructions. Make sure to let the finish dry completely before using the hole.
4. Filling the hole
If you accidentally drilled a hole in the wrong place or you no longer need it, you can fill it. There are different options for hole fillers, such as wood filler or putty. Choose a filler that matches the color of your wood and fill the hole. Allow it to dry completely, then sand it down until it’s flush with the surface of the wood.
5. Protecting the hole
If you have drilled a hole that will be exposed to the elements or subject to wear and tear, it’s a good idea to protect it. You can use a wood plug or a plastic cover to cover the hole and prevent moisture or debris from entering. This will help to maintain the integrity of the hole over time.
By following these finishing touches, you can ensure that your drilled holes in wood have a clean and professional look. Whether you are working on a DIY project or a professional woodworking job, attention to detail is key in achieving a polished final result.
FAQ:
What is the best type of drill bit for drilling holes in wood?
There are several types of drill bits that can be used for drilling holes in wood, but the best type is usually a twist drill bit. This type of bit has a pointed tip that helps to center the hole and two cutting edges that quickly and cleanly remove the wood as you drill.
Does the speed of the drill affect the quality of the hole?
Yes, the speed of the drill can have an impact on the quality of the hole. If you drill too fast, the bit can generate too much heat and burn the wood, leading to a rough and messy hole. On the other hand, if you drill too slowly, the bit can become clogged with wood chips, making it difficult to drill a clean hole.
Are there any techniques for preventing splintering when drilling holes in wood?
Yes, there are a few techniques that can help prevent splintering when drilling holes in wood. One method is to place a piece of masking tape over the area where you plan to drill the hole. The tape helps to provide support and reduce the likelihood of the wood splintering. It’s also important to use a sharp drill bit and to drill slowly and gently to minimize any tearing or splintering.
What should I do if the drill bit gets stuck in the wood?
If the drill bit gets stuck in the wood, it’s important to stay calm and avoid forcing the bit out. Trying to force the bit can cause damage to the wood or the drill. Instead, you can try gently rotating the bit back and forth while applying slight pressure to loosen it. If that doesn’t work, you may need to use pliers or a wrench to carefully remove the bit.
How can I ensure that the hole I drill is the correct size?
To ensure that the hole you drill is the correct size, it’s a good idea to use a drill bit that has markings or measurements on it. This will help you determine the diameter of the hole as you drill. Another technique is to start with a smaller drill bit and gradually increase the size until you reach the desired diameter. This allows for more control and helps to prevent accidentally drilling a hole that is too large.
Video:


Meet Harrison Clayton, a distinguished author and home remodeling enthusiast whose expertise in the realm of renovation is second to none. With a passion for transforming houses into inviting homes, Harrison's writing at https://thehuts-eastbourne.co.uk/ brings a breath of fresh inspiration to the world of home improvement. Whether you're looking to revamp a small corner of your abode or embark on a complete home transformation, Harrison's articles provide the essential expertise and creative flair to turn your visions into reality. So, dive into the captivating world of home remodeling with Harrison Clayton and unlock the full potential of your living space with every word he writes.


