Tips on How to Find the Right Spot for Drilling in a Wall

Drilling into a wall can be a daunting task, especially if you’re not sure where to start. Whether you’re hanging a picture frame or installing a shelf, finding the right spot to drill can make all the difference in the world. If you’ve ever experienced the frustration of drilling into a wall only to hit a pipe or electrical wire, you know just how important it is to locate the right spot.
To begin, it’s crucial to have a clear understanding of what lies behind the wall. This can be done by using a stud finder or tapping on the wall to listen for changes in sound, indicating the presence of a stud. Once you’ve identified the studs, the next step is to determine where you want to drill. Measure and mark the desired location, making sure to leave enough space between studs to accommodate your desired placement.
Another important factor to consider when finding the right spot for drilling is the purpose of the hole. If you’re hanging something heavy, it’s crucial to drill into a stud to ensure stability and prevent damage to the wall. However, if you’re drilling for a lighter item, such as a small shelf or mirror, you can use drywall anchors to provide extra support.
Pro tip: Before you start drilling, it’s always a good idea to double-check the location using a wire and pipe detector. This device will detect any electrical wires or pipes behind the wall, allowing you to avoid them while drilling.
Finally, always make sure to use the correct tools and techniques when drilling. Use a drill bit that is appropriate for the material of your wall, and apply firm, steady pressure while drilling. It’s also a good idea to start with a small pilot hole before drilling the full-size hole to avoid any potential damage or mistakes.
Finding the right spot for drilling in a wall can seem like a daunting task, but with these simple tips, you can ensure a successful and worry-free drilling experience. Remember to always prioritize safety, double-check your measurements, and use the correct tools for the job. Happy drilling!

Use a Stud Finder for Accuracy
When it comes to drilling into a wall, accuracy is key. One of the best tools to use for finding the right spot is a stud finder. A stud finder is a handheld device that uses electronic or magnetic sensors to detect the presence of studs or other solid structures behind the wall.
Using a stud finder is simple and straightforward. Here are the steps:
- Turn on the stud finder and hold it against the wall.
- Slowly move the stud finder along the surface of the wall in a horizontal direction.
- Watch and listen for any signals from the stud finder. Most stud finders will beep or light up when they detect a stud.
- When you find a stud, mark the spot on the wall using a pencil or tape.
- Repeat the process in different areas of the wall to find multiple studs if needed.
Using a stud finder is crucial because it helps you avoid drilling into any electrical wires, plumbing pipes, or other hidden obstacles that may be behind the wall. By locating the studs, you can ensure that your drilling is secure and will hold the weight of any objects you hang on the wall.
If you don’t have access to a stud finder, there are alternative methods you can use to find studs, such as tapping on the wall to listen for a solid sound or looking for clues like electrical outlets and switch plates, which are usually attached to the sides of studs. However, these methods are not as accurate or reliable as using a stud finder.

Investing in a good-quality stud finder is well worth it, especially if you plan on doing any DIY projects or hanging heavy objects on your walls. It will save you time, effort, and potential damage to your walls.
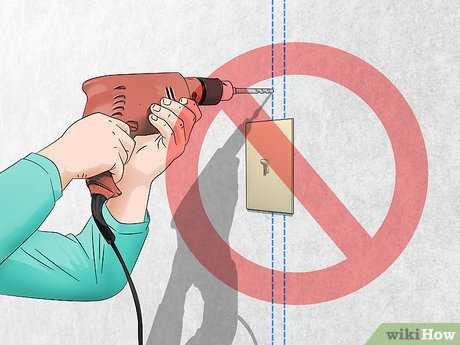
Look for Electrical Outlets and Switches
One of the easiest ways to find a suitable spot for drilling in a wall is to locate an electrical outlet or switch. These fixtures are typically installed at a convenient height and are often located near where you might want to hang something.
Here are a few tips for using electrical outlets and switches as a guide:
- Vertical Placement: Electrical outlets and switches are typically installed at a standard height of 12 to 16 inches above the floor. This can help you determine the general area where you might want to hang something.
- Horizontal Alignment: Electrical outlets and switches are usually aligned horizontally along a wall. By identifying the nearby switches or outlets, you can get an idea of the general positioning you should consider for your drilling location.
- Avoid Obstructions: Make sure to consider any obstructions such as furniture, trim, or baseboards that may interfere with your drilling location. It’s always a good idea to double-check the area to ensure it is clear before proceeding.
- Use a Stud Finder: While electrical outlets and switches can be a helpful guide, it’s still important to locate the studs within the wall to ensure your drilling spot is secure. Use a stud finder to find the closest stud near the outlet or switch you’ve identified.
By using electrical outlets and switches as a guide, you can narrow down the potential areas for drilling and increase your chances of finding a suitable spot for your needs. Remember to always exercise caution when drilling into a wall and take the necessary precautions to avoid damaging any electrical or plumbing systems.
Identify Wall Construction Material
One of the most important steps in finding the right spot for drilling in a wall is to identify the type of construction material used in the wall. Different materials require different drilling techniques and tools, so it’s crucial to determine the right approach before starting the drilling process.

How to Identify Wall Construction Material
Here are a few methods to help you identify the type of construction material used in your wall:
- Visual Inspection: The first step is to visually inspect the wall. Look for any visible clues such as seams, patterns, or texture that may indicate the type of material used. For example, if you see visible bricks or stone, it’s likely that the wall is made of masonry.
- Tap Test: Lightly tap on the wall with your knuckles or a small hammer. Listen to the sound it makes. A hollow sound usually indicates a drywall construction, while a solid sound may indicate a concrete or masonry wall.
- Magnetic Test: Use a small magnet to test the wall. If the magnet sticks, it’s likely that the wall is made of metal or contains metal studs. If the magnet doesn’t stick, it may be a different material like drywall or wood.
- Outlets and Switches: Remove the cover plate of an electrical outlet or switch. Look inside the opening to see if you can identify the type of material used in the wall.
Common Types of Wall Construction Materials
Here are some common wall construction materials and their characteristics:
| Material | Characteristics |
|---|---|
| Drywall | ~1/2 inch thick, hollow sound when tapped, easily penetrated with a drill |
| Concrete | Heavy and solid, may require special drill bits or anchors |
| Brick or Masonry | Visible bricks or stones, may require masonry drill bits |
| Wood | Light and solid, easily penetrated with a drill |
| Metal | Magnet sticks to the wall, may require special drill bits |
By identifying the wall construction material, you can make a more informed decision on the right approach and tools to use for drilling. It’s always recommended to use the appropriate tools and techniques for each material to ensure a successful and safe drilling process.
Use a Tape Measure for Precise Measurements
When it comes to drilling holes in a wall, precise measurements are essential. Using a tape measure is the best way to ensure accuracy and avoid any mistakes. Here are some tips on how to use a tape measure effectively:
- Select the Right Tape Measure: Choose a tape measure that is at least 25 feet long. This will allow you to measure distances accurately without any constraints.
- Start from a Fixed Point: To measure a specific spot for drilling, start from a fixed point, such as a corner or an edge. This will serve as a reference point for all your measurements.
- Measure Twice: Always measure your desired spot at least twice to ensure accuracy. Take the first measurement, then measure again to check if the two measurements match. If they don’t, measure a third time and use the average between the measurements.
- Mark the Spot: Once you have determined the precise measurement, use a pencil or a marker to mark the spot on the wall where you will be drilling. This will serve as a guide during the drilling process.
- Consider Obstacles: Take into account any obstacles that may be present on the wall, such as electrical outlets or pipes. Measure the distance from these obstacles to ensure that you will not damage them while drilling.
- Double-check: Before drilling, double-check your measurements to make sure everything is accurate. It’s better to spend a few extra minutes verifying your measurements than having to fix a mistake later.
By using a tape measure for precise measurements, you can ensure that your drilling is accurate and efficient. Following these tips will help you find the right spot for drilling in a wall with confidence.

Find Wall Studs by Knocking
One of the simplest and most common methods to locate wall studs is by knocking on the wall. This technique relies on the fact that the sound produced when knocking on different parts of the wall varies depending on whether there is a solid stud behind or just hollow space.
Here’s how you can find wall studs by knocking:
- Choose an area to start: Begin by choosing an area on the wall where you suspect there might be a stud.
- Knock on the wall: Use your knuckles or a small hammer to lightly tap on the wall at the chosen spot.
- Listen for the sound: Pay attention to the sound produced when you knock on the wall. A solid, dull thud indicates the presence of a stud, while a hollow, high-pitched sound suggests there is no stud.
- Mark the spot: Once you’ve identified a stud, use a pencil or a piece of tape to mark the spot for future reference.
- Repeat the process: Move horizontally and vertically from the initial spot, tapping and listening for the sound to locate additional studs. Studs are typically spaced 16 or 24 inches apart, so try to follow this pattern.
It’s important to note that this method may not always be 100% accurate, especially if the wall is covered in thick layers of paint or wallpaper, or if there are other obstacles behind the wall. Therefore, it’s a good idea to use additional methods to confirm the stud’s location.
| Advantages | Disadvantages |
|---|---|
| Simple and low-cost method | Not always accurate, especially in certain wall conditions |
| Does not require any special tools or equipment | May require some practice or experience to distinguish between sounds |
| Can be done quickly | May damage the wall if done with excessive force |
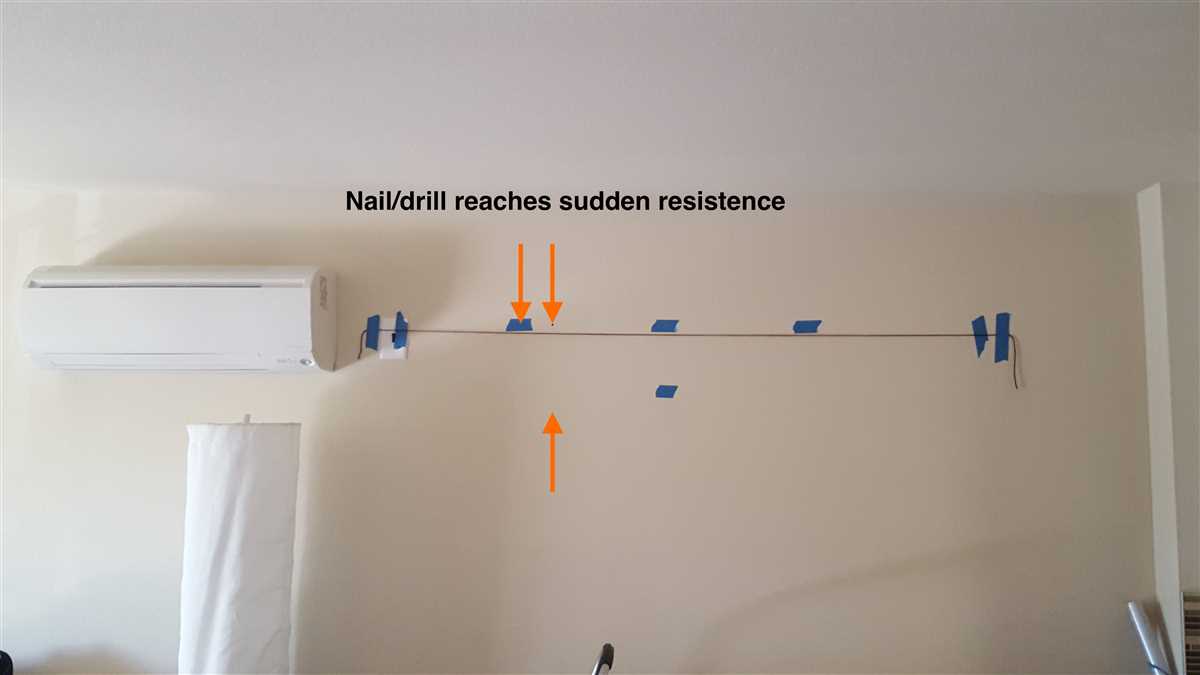
Avoid Plumbing and HVAC Lines
When drilling into a wall, it is important to avoid plumbing and HVAC lines to prevent any damage or potential leaks. Here are some tips to help you avoid hitting these lines:

- Before drilling, use a stud finder or a pipe and wire detector to locate any plumbing or HVAC lines that may be behind the wall. These devices can sense metal or electrical currents and can give you a good idea of where the lines are located.
- If you are unsure about the location of the lines, you can also check the blueprints or building plans of your house. These documents usually indicate the position of the plumbing and HVAC lines.
- Another precaution is to turn off the water supply and shut off the HVAC system before drilling. This will prevent any potential leaks or damage if you accidentally hit a line.
- When drilling near plumbing or HVAC lines, it is best to use a smaller drill bit and go slowly. This will allow you to be more precise and lessen the chance of hitting the lines.
- If you do hit a plumbing or HVAC line while drilling, immediately stop drilling and assess the situation. If there is a leak or damage, it is important to call a professional plumber or HVAC technician to fix the issue.
By taking these precautions and being mindful of the location of plumbing and HVAC lines, you can safely drill into a wall without causing any damage or disruptions.
Consider the Weight of the Object to Hang
When choosing a spot for drilling in a wall, it is important to consider the weight of the object that you will be hanging. Different objects have different weights, and the weight will determine the type of anchor or screw that you need to use for proper support.
The weight of the object is especially important when hanging heavy objects such as large mirrors, shelves, or artwork. These objects require a more secure anchoring method to ensure that they do not fall and cause damage to the wall or injure anyone.
Before drilling, carefully consider the weight of the object you are hanging and choose an anchor or screw that is appropriate for that weight. It is always better to choose a stronger anchor or screw than necessary to ensure that the object is securely attached to the wall.
You can find information about the weight capacity of different anchors and screws on their packaging or by consulting the manufacturer’s guidelines. If you are unsure of the weight of the object or the appropriate anchor to use, it may be helpful to consult a professional or a hardware store employee for guidance.
By considering the weight of the object to hang, you can ensure that you choose the right spot and use the proper anchoring method to securely hang your object and prevent any potential damage or accidents.
Use a Level for Proper Alignment
When drilling holes in a wall, it’s important to ensure that they are properly aligned. Using a level is a great way to achieve this accuracy. A level is a simple tool that consists of a straight ruler with a bubble level attached to it. Here are some tips on how to use a level for proper alignment:
Step 1: Choose the Right Level
There are different types of levels available, such as bubble levels, laser levels, and digital levels. Choose the one that suits your needs and budget. Bubble levels are the most common and affordable option for everyday use.
Step 2: Position the Level
Place the level against the wall where you want to drill the hole. Make sure that the level is perfectly vertical if you are drilling a vertical hole, or perfectly horizontal for a horizontal hole.
Step 3: Check the Bubble
Look at the bubble in the level. If the bubble is centered between the two lines, it means that the level is perfectly aligned. If the bubble is off to one side, it means that the level is tilted. Adjust the level until the bubble is centered.
Step 4: Mark the Spot
Once the level is properly aligned, use a pencil or marker to mark the spot where you want to drill the hole. This mark will serve as a guide to ensure that your hole is drilled in the correct location.
Step 5: Repeat the Process
If you need to drill multiple holes in a straight line, repeat the process with the level to ensure that each hole is properly aligned with the others. This will help you achieve a clean and professional-looking result.
By using a level for proper alignment, you can ensure that your holes are drilled accurately and precisely. This will not only make your finished project look better but also help prevent any structural or functional issues that may arise from improperly placed holes.
FAQ:
What tools do I need to drill a hole in my wall?
To drill a hole in a wall, you will need a drill, drill bits suitable for your wall material, a level, a pencil or marker to mark the drilling spot, and a screwdriver or wrench to attach any fixtures or screws.
How do I know where it is safe to drill in my wall?
Before drilling in a wall, it is important to locate any electrical wires, water pipes, or other hidden obstacles. You can use a stud finder or a wire detector to identify these hazards. Additionally, if you are drilling near a window or door frame, be cautious of any supporting structures. It is always a good idea to consult a professional if you are unsure.
What should I do if I accidentally drill into a wire or pipe?
If you accidentally drill into a wire or pipe, it is important to stop immediately and turn off the power or water supply if necessary. You should then call a professional to assess the damage and make any necessary repairs. It is always better to be safe than sorry when it comes to potential hazards in the wall.
How can I find the right height for drilling a hole?
Finding the right height for drilling a hole depends on the purpose of the hole. For example, if you are hanging a picture, you typically want the center of the picture to be at eye level. If you are installing a shelf, you may want to consider the height of nearby furniture or appliances. It is also important to use a level to ensure that the hole is straight and even.
What can I do to prevent dust and debris while drilling?
While drilling in a wall, it is common for dust and debris to be produced. To prevent this, you can place a piece of tape vertically over the drilling spot, leaving only a small opening for the drill bit to go through. This will catch most of the dust and debris, making the cleanup process much easier.
Are there any precautions I should take while drilling in a wall?
Yes, there are a few precautions you should take while drilling in a wall. First, always wear safety goggles to protect your eyes from any flying debris. Second, make sure to hold the drill firmly and use steady pressure. This will prevent the drill bit from slipping and causing damage. Lastly, be cautious of your surroundings and avoid drilling near flammable or hazardous materials.
Video:


Meet Harrison Clayton, a distinguished author and home remodeling enthusiast whose expertise in the realm of renovation is second to none. With a passion for transforming houses into inviting homes, Harrison's writing at https://thehuts-eastbourne.co.uk/ brings a breath of fresh inspiration to the world of home improvement. Whether you're looking to revamp a small corner of your abode or embark on a complete home transformation, Harrison's articles provide the essential expertise and creative flair to turn your visions into reality. So, dive into the captivating world of home remodeling with Harrison Clayton and unlock the full potential of your living space with every word he writes.


