Tips for Drilling Straight Holes for Floating Shelves

If you’re planning to install floating shelves in your home, one of the most important things to consider is drilling straight holes. Properly aligned holes will ensure that your shelves are secure and level, preventing them from sagging or falling off the wall. While drilling straight holes may seem like a daunting task, there are a few tips and techniques that can help you achieve professional results.
1. Measure and Mark
Before you start drilling, it’s crucial to measure and mark the exact positions where you want your shelves to be. Use a tape measure and a pencil to make accurate marks on the wall. It’s a good idea to use a level to ensure that your marks are straight. Taking the time to measure and mark will help you drill the holes in the right place, preventing any unnecessary mistakes.
2. Use a Drill Guide
A drill guide is a handy tool that can help you drill straight holes. It attaches to your drill and provides a stable surface for the drill bit to follow. Simply align the guide with your marked hole and start drilling. The guide will keep the drill bit straight, ensuring that the hole is drilled at the correct angle. This is especially useful when drilling multiple holes, as it maintains consistency throughout the project.

3. Start with a Small Pilot Hole
When drilling into walls, it’s a good idea to start with a small pilot hole before moving on to a larger one. A pilot hole helps to guide the larger drill bit and prevents it from wandering off track. Start by drilling a small hole at each marked position, and then gradually increase the size of the drill bit until you reach the desired diameter for your shelves. This technique will help you maintain better control over the drilling process.
4. Take Your Time
Drilling straight holes requires patience and precision. Take your time and be careful not to rush the process. Applying too much force or drilling too quickly can cause the drill bit to slip, resulting in crooked holes. Remember, it’s better to drill slowly and accurately than to have to make repairs later on. By taking your time and paying attention to detail, you can achieve perfectly straight holes for your floating shelves.
Choosing the Right Drill Bit
When it comes to drilling straight holes for floating shelves, choosing the right drill bit is essential. The type of drill bit you use can greatly affect the accuracy and precision of your holes. Here are some tips for selecting the right drill bit for the job:

1. Twist Drill Bits
The most common type of drill bit is the twist drill bit. These bits have a cylindrical shape with a pointed tip and spiral flutes that help to remove debris from the hole. Twist drill bits are available in a variety of sizes and materials, including high-speed steel (HSS) and carbide. They are suitable for drilling into most types of materials, including wood, metal, and plastic.
2. Brad-Point Drill Bits
If you want to drill precise and clean holes in wood, brad-point drill bits are a great choice. These bits have a pointed tip with small spurs on the sides that help to keep the bit centered and prevent it from wandering. Brad-point drill bits are ideal for drilling holes for floating shelf brackets, as they create clean entry and exit holes without splintering the wood.
3. Forstner Drill Bits
When drilling larger diameter holes for floating shelf dowels or inserts, forstner drill bits are the preferred choice. These bits have a flat bottom and sharp cutting edges that allow for clean and precise holes with smooth sides. Forstner drill bits are commonly used for drilling holes in wood, but they can also be used for drilling in other materials like plastic or soft metals.
4. Spade Drill Bits
Another option for drilling larger diameter holes is to use spade drill bits, also known as paddle bits. These bits have a flat, paddle-shaped tip with two cutting spurs on the sides. While not as precise as forstner bits, spade drill bits are suitable for drilling holes in wood with larger diameter requirements, such as for cable or pipe pass-throughs.
5. Countersink Drill Bit
If you want to create holes with a countersunk finish for flush-mounting screws on your floating shelves, a countersink drill bit is a must-have. These bits feature a tapered drill bit at the center, surrounded by a larger conical shape that creates the countersink. Countersink drill bits are available in different sizes and styles, including combined ones that can drill and countersink in one step.

6. Step Drill Bit
When drilling holes with multiple diameters, a step drill bit can be handy. These bits have a stepped design with increasing diameters, allowing you to drill holes of different sizes without needing to switch between different drill bits. Step drill bits are commonly used for drilling holes in thin materials like metal or plastic.
| Drill Bit Type | Best For |
|---|---|
| Twist Drill Bits | Drilling into most materials |
| Brad-Point Drill Bits | Precise and clean holes in wood |
| Forstner Drill Bits | Larger diameter holes in wood |
| Spade Drill Bits | Larger diameter holes in wood |
| Countersink Drill Bit | Countersunk holes for flush-mounting screws |
| Step Drill Bit | Holes with multiple diameters |
By choosing the right drill bit for your floating shelf project, you can ensure that you achieve accurate and straight holes, resulting in a professional-looking installation. Consider the type of material you will be drilling into and the specific requirements of your project when selecting the appropriate drill bit.
Preparing the Drill and Work Surface
Before you begin drilling straight holes for floating shelves, it’s important to prepare both your drill and work surface. Taking the time to properly set up will help ensure accurate and straight holes.
1. Choose the Right Drill Bit
Start by selecting the appropriate drill bit for your project. The size of the drill bit will depend on the diameter of the screws or dowels you plan to use for your floating shelves. Use a tape measure or calipers to determine the exact size needed.
2. Mark the Desired Hole Locations
Using a pencil or marker, mark the spots where you want to drill the holes. Take measurements and use a level to ensure that the marks are straight and evenly spaced. This step is crucial for achieving uniform and symmetrical floating shelves.

3. Secure your Work Surface
It’s important to have a stable and secure work surface to ensure accurate drilling. If you’re working with a wooden surface, consider using clamps to hold it in place. For other surfaces, such as tile or concrete, make sure they are firmly secured to prevent any movement while drilling.
4. Set the Drill to the Desired Depth
Depending on the length of the screws or dowels you plan to use, set the depth gauge on your drill. This will help you achieve consistent hole depths, resulting in a more professional-looking finished product.
5. Use a Backing Board
To prevent tear-out and splintering on the backside of your work surface, place a scrap piece of wood or a backing board underneath it. This will provide support and minimize any damage or chipping that may occur during drilling.
6. Keep the Drill Level
When drilling, it’s important to keep the drill level to ensure straight holes. Use a bubble level or align the drill with a fixed object, such as a wall or countertop, to help maintain a straight drilling angle.
7. Wear Safety Gear
Finally, always prioritize safety when using power tools. Wear safety goggles to protect your eyes from flying debris, and consider wearing ear protection if necessary. Additionally, ensure that you have a firm grip on the drill and maintain control throughout the drilling process.

Marking the Hole Placement
Before drilling the holes for your floating shelves, it is essential to carefully mark the placement to ensure that they are perfectly aligned and level. There are a few different methods you can use to mark the hole placement, depending on your preferences and the tools you have available.
Method 1: Using a Level and Measuring Tape
One common method is to use a level and measuring tape to mark the hole placement. Here’s how you can do it:
- Decide on the desired height for your shelves and mark this height on the wall using a pencil.
- Place a level on the mark and adjust it until it is perfectly level.
- Once the level is balanced, make additional marks on the wall at each end of the level.
- Use a measuring tape to determine the spacing between the marks. Divide the total spacing by the number of shelves you plan to install to determine the spacing between each shelf.
- Mark the hole placement for each shelf using the measuring tape and level as a guide.
Method 2: Using a Laser Level
If you have a laser level, you can use this tool to make the hole placement marking process even easier. Here’s how:
- Set up the laser level on a stable surface or mount it on a tripod.
- Turn on the laser and position it at the desired height for your shelves.
- Adjust the laser until it creates a perfectly level line on the wall.
- Use the laser line as a guide to mark the hole placement for each shelf.
Method 3: Using a Template
If you are installing multiple shelves and want them to be perfectly aligned, you can create a template to mark the hole placement. Here’s how:
- Cut a piece of cardboard or plywood to the desired size and shape of your shelves.
- Mark the hole placement on the template using a measuring tape and level.
- Hold the template against the wall in the desired location and use a pencil to trace the hole placement onto the wall.
- Repeat this process for each shelf, making sure to align the template with the previous markings for consistent spacing.
Regardless of the method you choose, it is crucial to double-check your markings before drilling to ensure accuracy. Taking the time to mark the hole placement correctly will result in straight and evenly spaced floating shelves.

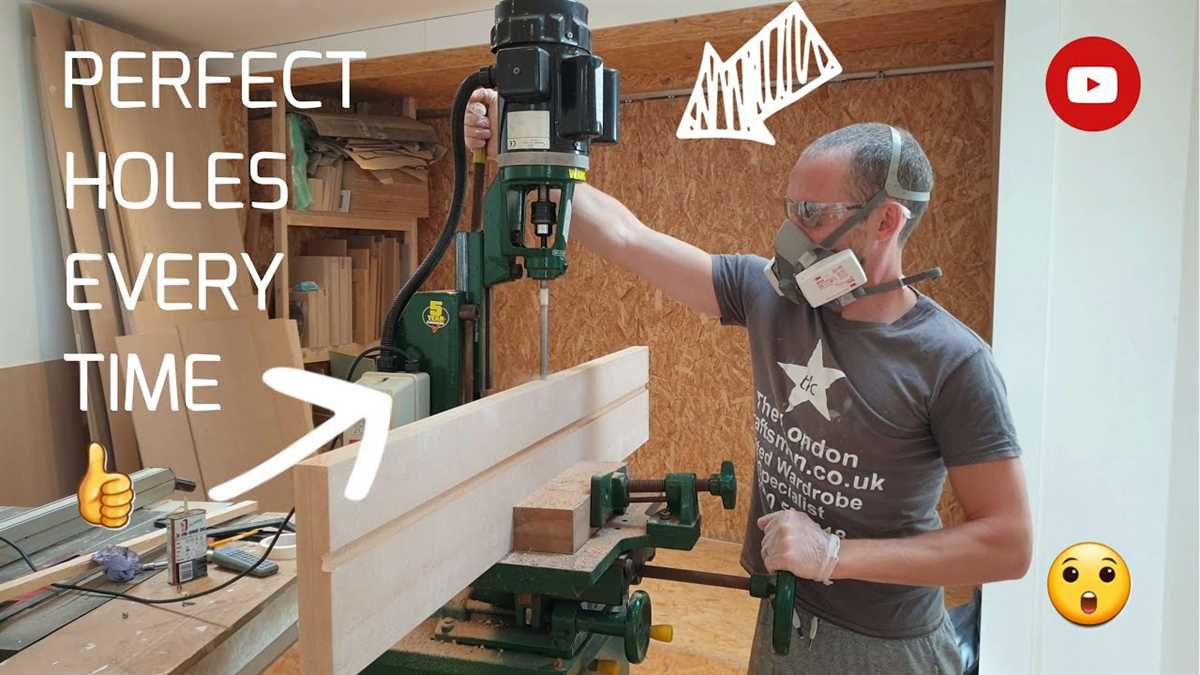
Using a Drill Guide
A drill guide is a useful tool for ensuring that your holes are drilled straight and at the correct angle. It provides a stable platform for your drill and helps you maintain accuracy throughout the drilling process. Here are some tips for using a drill guide effectively:
1. Choose the right drill guide
- There are different types of drill guides available, including portable drill guides, benchtop drill guides, and pocket hole jigs. Choose the one that suits your needs and project requirements.
- Consider the material you’ll be drilling into. Some drill guides are better suited for drilling into wood, while others are designed for drilling into metal or other materials.
2. Set up your drill guide
- Read the instructions that come with your drill guide and familiarize yourself with how it works.
- Attach your drill to the guide according to the manufacturer’s instructions. Ensure that it is secure and properly aligned.
- Adjust the drill guide to the desired angle and depth. Use the built-in measurements or markings to ensure accuracy.
3. Practice on scrap material
- Before drilling into your actual project, practice on a piece of scrap material. This will allow you to get a feel for the drill guide and make any necessary adjustments before working on your final piece.
4. Secure your workpiece
- Use clamps or other securing methods to hold your workpiece in place. This will prevent it from moving or shifting while you drill.
5. Start drilling
- Position the drill guide on the marked spot where you want to drill your hole.
- Hold the drill guide firmly with one hand and your drill with the other hand.
- Align the drill bit with the guide hole in the drill guide and start drilling slowly and steadily.
6. Check for accuracy
- After drilling the hole, remove the drill guide and check the accuracy of the hole. Use a level or another tool to ensure it is straight and at the correct angle.
By using a drill guide, you can increase the precision and accuracy of your drilling. This will result in straight, clean holes and ensure that your floating shelves are securely installed.
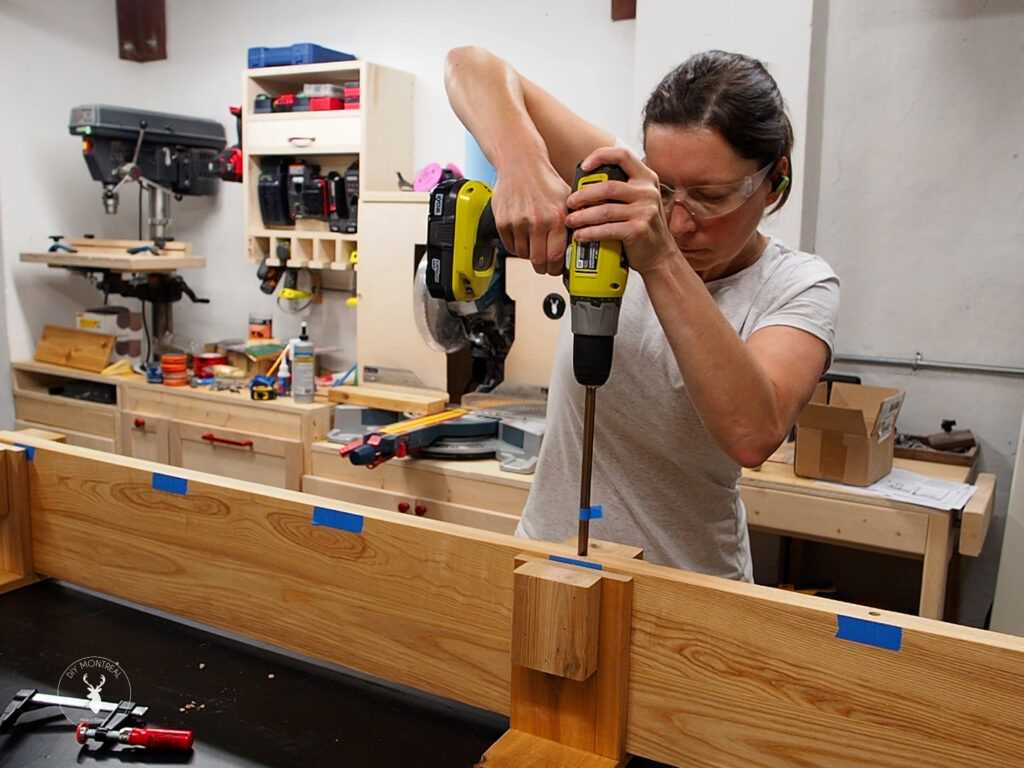
Applying Steady Pressure
One of the most important factors in drilling straight holes for floating shelves is applying steady pressure. This helps ensure that the drill bit goes straight into the material and creates a clean, straight hole.

Here are some tips for applying steady pressure while drilling:
- Position your body correctly: Stand in a comfortable and stable position, with your feet shoulder-width apart. This will give you better control over the drill and help you apply steady pressure.
- Hold the drill firmly: Grip the drill handle firmly with your dominant hand, making sure it is secure and comfortable. This will give you better control and prevent the drill from slipping or wobbling while drilling.
- Use both hands: If possible, use both hands to hold the drill. Your non-dominant hand can grip the front handle or the body of the drill to provide additional support and stability.
- Start slowly: Begin drilling at a low speed and gradually increase the speed as you go. This will help you maintain control and prevent the drill from jumping or veering off course.
- Apply constant pressure: Maintain a consistent downward pressure on the drill as you drill into the material. Avoid pushing too hard, as this can cause the drill to go off track. Instead, apply gentle and steady pressure to guide the drill bit straight into the material.
- Take breaks if needed: Drilling straight holes can be physically demanding, especially if you are working on a large project. If you start to fatigue or lose control, take short breaks to rest and regain your focus.
By applying steady pressure while drilling, you can improve the accuracy of your holes and ensure that your floating shelves are securely attached to the wall.
Checking for Level
To ensure that your floating shelves are installed straight and level, it is important to check for level throughout the drilling process. Here are a few tips for checking for level:
1. Use a Leveling Tool
One of the easiest ways to check for level is to use a leveling tool. You can use a bubble level or a laser level for this purpose. Simply place the level on top of the shelf or against the wall and adjust the position until the bubble is centered or the laser line is straight.
2. Measure the Distance
Another way to check for level is to measure the distance between the shelf and the floor or ceiling. Take measurements on both sides of the shelf and compare them. If the measurements are equal, then the shelf is level. If not, adjust the position until the measurements are equal.
3. Use a Plumb Line
A plumb line is a weighted string that can be used to determine vertical alignment. Attach the string to the edge of the shelf and let it hang freely. If it aligns with a reference point on the wall or floor, then the shelf is level. If not, adjust the position until the plumb line aligns.
4. Visual Inspection
Lastly, you can also visually inspect the shelf to check for level. Step back and look at the shelf from different angles. If it appears straight and level, then it is likely installed correctly. If it looks crooked or uneven, adjust the position until it looks level.
By using these methods, you can ensure that your floating shelves are installed straight and level. This will not only improve the overall appearance of the shelves but also ensure their stability and functionality.
Using a Bubble Level
A bubble level is a simple and effective tool that can help you achieve straight holes when drilling for floating shelves. It consists of a small tube filled with liquid and a bubble. The bubble moves within the tube to indicate whether a surface is level or not.
Here are some tips for using a bubble level:
- Choose a high-quality bubble level that is appropriate for the size of your project. A longer level is better for larger shelves, while a smaller pocket-sized level may be more convenient for smaller shelves.
- Start by placing the level on the surface where you plan to drill the holes. Make sure the surface is clean and free of any debris.
- Hold the bubble level against the surface and adjust it until the bubble is centered within the tube. This indicates that the surface is level.
- Use the bubble level to mark the desired position for your holes. You can either mark the positions directly on the surface or transfer the marks to a template for easier drilling.
- Once you have the hole positions marked, double-check the level to ensure that it is still centered. This will help you maintain accuracy throughout the drilling process.
- When drilling, use the level as a guide to keep the drill bit straight. Hold the level adjacent to the drill bit and adjust as necessary to keep the bubble centered.
- Take your time and drill slowly to ensure precision. Keep checking the level as you drill to make any adjustments if needed.
- After drilling the holes, use the bubble level again to check that the surface is still level. This is important for ensuring that your shelves will be straight and stable.
By using a bubble level, you can greatly improve the accuracy and stability of your floating shelves. It is a simple yet effective tool that can help you achieve professional-looking results.
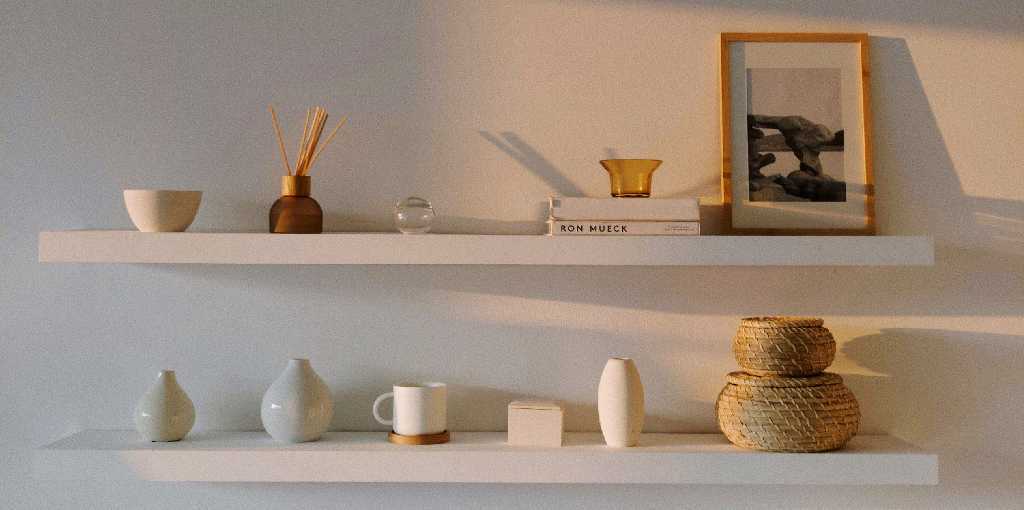
Finishing Touches and Maintenance
Caulking and Painting
Once you have finished drilling the holes for your floating shelves and installed them on the wall, you may want to apply some finishing touches to achieve a more polished look. One option is to use caulking to fill in any gaps between the shelves and the wall. This will create a seamless appearance and prevent any dust or debris from getting trapped in the gaps. Use a caulk gun to apply a thin bead of caulk along the edges of the shelves, and then use a damp cloth or your finger to smooth it out.
If you want your floating shelves to match the color scheme of your room, you can also consider painting them. Before painting, make sure to clean the shelves thoroughly and remove any dust, dirt, or grease. Sand the surface lightly to create a smooth finish and apply a primer coat to enhance the adhesion of the paint. Once the primer is dry, apply a couple of coats of your chosen paint color, allowing each coat to dry completely before applying the next. Finally, apply a clear topcoat to protect the shelves and give them a professional finish.
Maintenance
Proper maintenance is necessary to keep your floating shelves in good condition and prevent them from becoming wobbly or damaged. Here are some maintenance tips to follow:
- Regularly dust the shelves to remove any dirt or debris that may accumulate.
- Avoid placing heavy or bulky items on the shelves as this may cause them to sag or bow.
- Periodically check the tightness of the shelf brackets and screws to ensure they are secure. If you notice any looseness, tighten them immediately.
- Be mindful of the weight limit recommended by the manufacturer. Exceeding the weight limit can lead to structural damage.
- Avoid exposing the shelves to excessive moisture or direct sunlight, as this can cause warping or fading.
By following these simple maintenance steps, you can ensure that your floating shelves remain sturdy and visually appealing for years to come.
FAQ:
What is the best way to drill straight holes for floating shelves?
The best way to drill straight holes for floating shelves is to use a drill guide or a drill press. These tools help to keep the drill bit perpendicular to the surface and prevent it from moving or wandering off course.
Are there any tips for drilling straight holes without a drill guide or a drill press?
Yes, there are a few tips you can follow to drill straight holes without a drill guide or a drill press. First, mark the center of the hole with a punch or a center punch. This will help to guide the drill bit. Second, start with a small pilot hole and gradually increase the size of the drill bit. This will make it easier to keep the drill bit on track. Lastly, apply even pressure and avoid pushing or forcing the drill. Let the drill do the work.
Is it necessary to use a level when drilling holes for floating shelves?
Yes, it is important to use a level when drilling holes for floating shelves. This ensures that the shelves will be straight and level when they are installed. Use a bubble level or a laser level to ensure accuracy.
What type of drill bit should be used for drilling straight holes in wood for floating shelves?
A brad point drill bit or a twist drill bit can be used for drilling straight holes in wood for floating shelves. Both types of drill bits have a sharp point that helps to prevent the drill from wandering off course. Make sure to choose a drill bit that is the appropriate size for the screws or anchors that will be used to secure the shelves.
Can a hand drill be used for drilling straight holes for floating shelves?
Yes, a hand drill can be used for drilling straight holes for floating shelves. However, it can be more challenging to keep the drill bit on track without the use of a drill guide or a drill press. Follow the tips mentioned earlier, such as using a punch to mark the center of the hole and starting with a pilot hole, to help improve accuracy.
Are there any alternative methods for drilling straight holes for floating shelves?
Yes, there are alternative methods for drilling straight holes for floating shelves. One method is to use a self-centering drill bit, which has a spring-loaded tip that automatically centers the drill bit in the hole. Another method is to use a doweling jig, which is a tool that helps to guide the drill bit at a precise angle. These alternative methods can help to improve accuracy when drilling straight holes.
Video:

Harrison Clayton
Meet Harrison Clayton, a distinguished author and home remodeling enthusiast whose expertise in the realm of renovation is second to none. With a passion for transforming houses into inviting homes, Harrison's writing at https://thehuts-eastbourne.co.uk/ brings a breath of fresh inspiration to the world of home improvement. Whether you're looking to revamp a small corner of your abode or embark on a complete home transformation, Harrison's articles provide the essential expertise and creative flair to turn your visions into reality. So, dive into the captivating world of home remodeling with Harrison Clayton and unlock the full potential of your living space with every word he writes.


