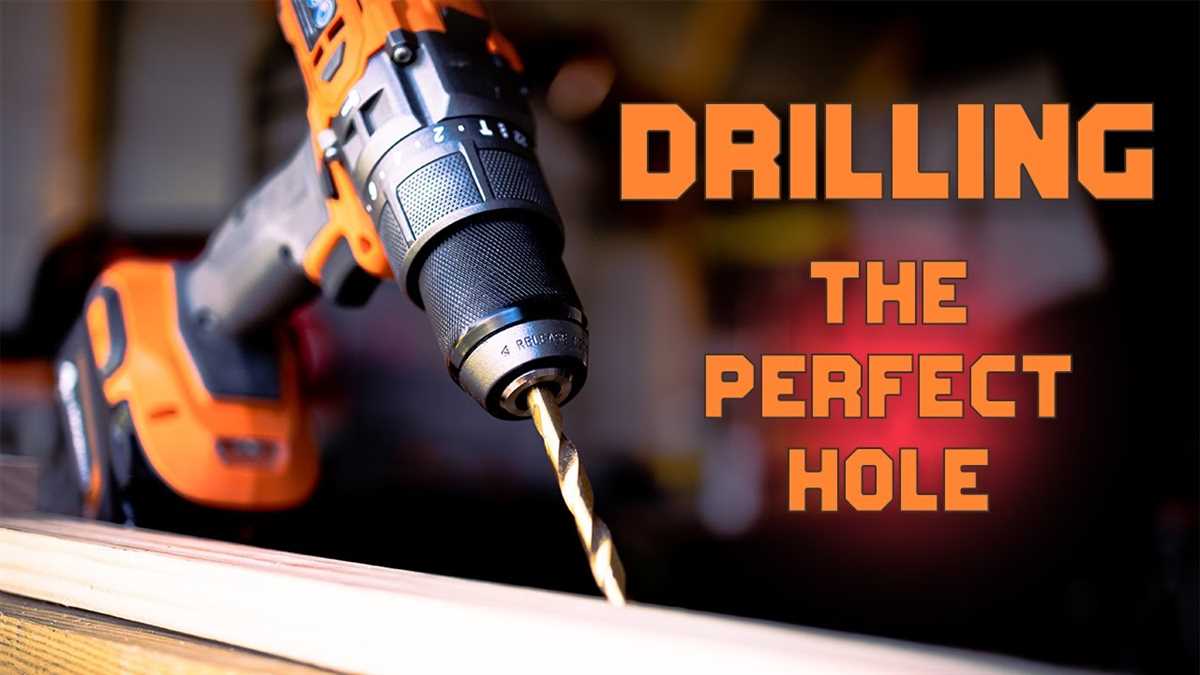
Tips and Techniques for Drilling Straight into Wood

Drilling straight into wood can be a challenging task, especially for beginners. However, with the right techniques and some practice, you can achieve accurate and professional results. Whether you’re working on a DIY project or a professional woodworking task, having the ability to drill straight holes is crucial.
Choose the Right Drill Bit: When drilling into wood, it’s important to select the appropriate drill bit. For most woodworking projects, a twist drill bit with a sharp point and fluted design is ideal. The size of the drill bit should match the size of the hole you want to create. Additionally, using a brad point bit or a forstner bit can help you achieve cleaner and more precise holes.
Mark Your Spot: Before you start drilling, it’s essential to mark the spot where you want to drill the hole. Use a pencil or a marker to make a small dot on the wood surface. Double-check your measurement and ensure that the spot is accurately marked.
Use a Drill Guide: A drill guide can be a valuable tool to ensure that your drilling is straight and precise. A drill guide is essentially a template that helps you position the drill bit at the correct angle and depth. It usually has a built-in level or alignment guide to keep your drilling on track. Using a drill guide is especially helpful if you’re drilling at an angle or working with larger drill bits.
Remember to apply steady pressure and maintain a firm grip on the drill to prevent any wobbling or drifting. Keep the drill perpendicular to the wood surface and let the drill do the work. Avoid forcing the drill or applying excessive pressure, as it can lead to inaccurate holes.
Practice on Scrap Wood: If you’re new to drilling or want to refine your technique, practicing on scrap wood can be beneficial. By drilling a few test holes on a piece of scrap wood, you can get a feel for the drill and adjust your technique as needed. This will help you build confidence and accuracy before working on your actual project.

Take Your Time: Lastly, drilling straight into wood requires patience and a steady hand. Rushing the process can lead to mistakes and crooked holes. Take your time, focus on maintaining a steady motion, and allow the drill bit to penetrate the wood gradually. Remember, practice makes perfect, so don’t get discouraged if your first attempts aren’t perfect.
Choosing the Right Drill Bit
When it comes to drilling straight into wood, one of the most important factors is choosing the right drill bit. Using the wrong drill bit can result in crooked holes or even damage to your drill or the wood itself. Here are some tips for choosing the right drill bit:
1. Determine the Diameter
The first step in choosing the right drill bit is to determine the diameter of the hole you need to drill. This will depend on the size of the screw or fastener you are using. You can measure the diameter of the screw or consult the product specifications to find the appropriate drill bit size.
2. Consider the Material
Next, consider the material you will be drilling into. Different drill bits are designed for different materials, so it’s important to choose one that is suitable for wood. For most wood drilling applications, a standard twist drill bit will work well.
3. Choose the Right Drill Bit Type
There are several types of drill bits to choose from, including twist drill bits, spade bits, and brad-point bits. Twist drill bits are the most common type and can be used for general-purpose drilling in wood. Spade bits are designed for drilling larger holes, while brad-point bits are ideal for drilling precise and clean holes in wood.

4. Check the Shank Size
Another factor to consider is the shank size of the drill bit. The shank is the part of the bit that fits into your drill’s chuck. It’s important to choose a drill bit with a shank size that matches your drill. Most standard drill bits have a 1/4-inch or 3/8-inch shank, but it’s always a good idea to double-check.
5. Consider the Length
Finally, consider the length of the drill bit. The length you choose will depend on the depth of the hole you need to drill. Make sure the drill bit is long enough to reach the required depth without being too long and difficult to control.
By considering these factors and choosing the right drill bit, you can ensure that your holes are straight and clean when drilling into wood. Remember to always wear safety goggles and follow proper drilling techniques for the best results.
Preparing the Wood Surface
Before drilling into a piece of wood, it’s important to properly prepare the wood surface to ensure a straight and effective drilling process. Here are some tips and techniques to help you prepare the wood surface:
Clean the Wood
Start by cleaning the wood surface of any dirt, dust, or debris. Use a soft cloth or brush to remove any loose particles. This will prevent any interference or obstruction during the drilling process.
![The Lapidary Bible: [3 IN 1] The Ultimate Guide for Beginners | Techniques, Tools and Tips for Turning Raw Stones into Beautiful Crafts](https://m.media-amazon.com/images/I/51g8E5SPuzL._SS520_.jpg)
Mark the Drill Hole
Next, mark the exact location where you want to drill the hole. Use a pencil or a small piece of tape to make a clear and visible mark on the wood surface. This will serve as a guide and help you drill straight into the wood.
Use a Center Punch
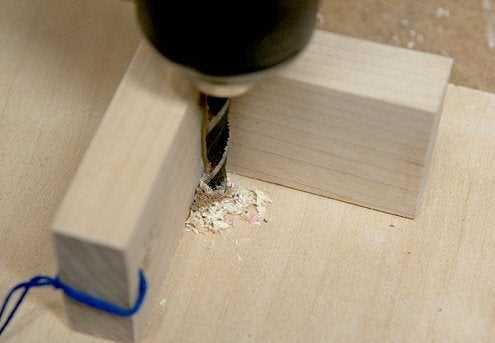
For greater precision, you can use a center punch to create a small indentation at the center of your drill hole mark. This will provide a starting point for the drill bit and help prevent it from slipping or wandering off course.
Secure the Wood

Ensure that the piece of wood you’re drilling into is properly secured. You can use clamps or a vise to hold the wood in place, preventing it from moving or spinning during the drilling process. This will help maintain accuracy and prevent any potential accidents.

Choose the Correct Drill Bit
Finally, select the appropriate drill bit for your project. Consider the type of wood you’re working with and the size of the hole you need to drill. Using the right drill bit will ensure a smooth and efficient drilling process.
By following these preparation techniques, you’ll be well-equipped to drill straight and accurately into the wood surface, achieving professional and high-quality results.
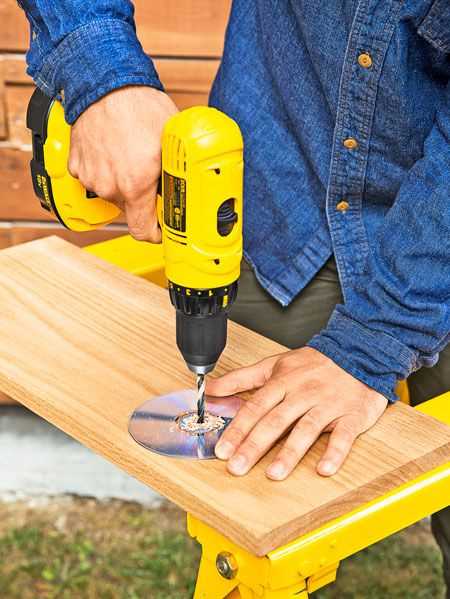
Marking the Drill Spot
Before drilling into wood, it’s important to mark the spot where the hole will be drilled. Properly marking the drill spot helps ensure accuracy and prevents mistakes. Here are some tips and techniques to help you mark the drill spot effectively:
- Measure twice, drill once: Take accurate measurements to determine the exact location where the hole needs to be drilled. Use a tape measure or ruler to measure the distance from the edge of the wood to the desired spot.
- Use a center punch: Once you have determined the drill spot, use a center punch to create a small indentation. This will act as a guide for the drill bit and help prevent it from wandering off course.
- Use a square: If you need to drill a hole at a right angle to the wood surface, use a square to ensure accuracy. Place the square against the edge of the wood and align it with the marked spot. This will give you a perpendicular reference line for drilling.
- Use a marking gauge: For drilling multiple holes at equal distances from the edge of the wood, use a marking gauge. Set the desired measurement on the gauge and run it along the edge of the wood to create a reference line. Mark the drill spots along this line.
- Use masking tape: If you’re drilling into a smooth or polished surface, it can be difficult to mark the drill spot directly. In such cases, apply a piece of masking tape over the desired spot and mark it with a pencil or pen. The tape will provide a better grip for your marking tool.
- Use a drill press: If you have access to a drill press, it can help you achieve even more accuracy when marking the drill spot. Secure the wood on the drill press table and align the drill bit with the desired spot. Lower the drill bit slowly to create a small indentation.
By following these tips and techniques, you can ensure that you mark the drill spot accurately and drill straight into wood with ease.
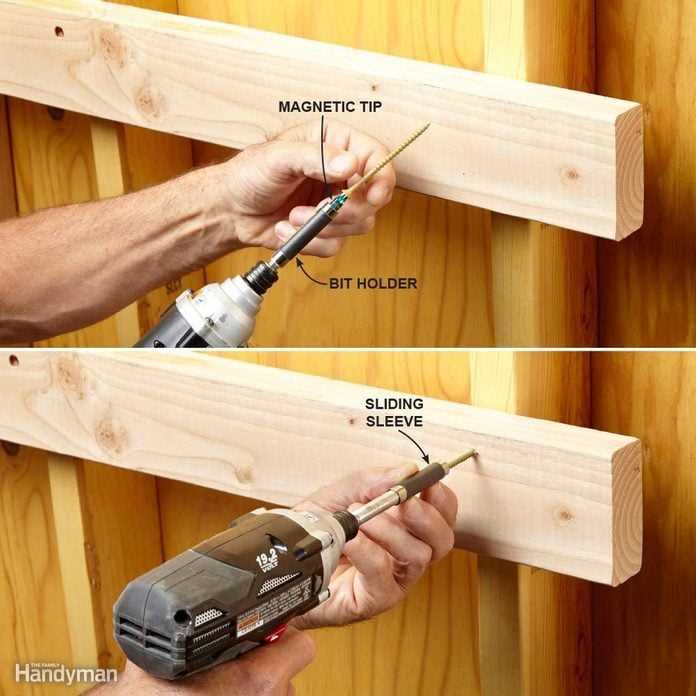
Using a Drill Guide
If you want to ensure accurate and straight holes when drilling into wood, using a drill guide can be incredibly helpful. A drill guide is a tool that provides a stable and precise platform for your drill, reducing the chances of the bit wandering off course. Here are some tips for using a drill guide:
![Olakin Nail Drill Tips[10 Pcs ], Nail Drill Bits Set, For Acrylic Nails, Gel And Natural, Manicure, Pedicure, Nail Care, Manicure Pedicure Set](https://m.media-amazon.com/images/I/41hgI+w6zJL._SS520_.jpg)
1. Selecting the Right Drill Guide
There are various types of drill guides available, each designed for different drilling tasks. Some common types include benchtop drill guides, portable drill guides, and doweling jigs. Consider the type of project you’re working on and choose a drill guide that best suits your needs.
2. Setting Up the Drill Guide
Before using the drill guide, make sure it is properly set up. In most cases, this involves securing it firmly to the workpiece or workbench. Pay attention to the guide’s alignment marks or scales, which can help you position your drill precisely.
3. Aligning the Drill Bit
Once the drill guide is set up, align your drill bit with the desired hole location. Use the guide’s reference marks or adjustable fences to ensure the bit is straight and positioned correctly. This step is crucial for achieving straight and accurate holes.
4. Securing the Workpiece
To prevent the workpiece from moving while drilling, secure it firmly to the workbench or use clamps to hold it in place. This stability is essential for maintaining the drill bit’s alignment and preventing any unwanted movement.
5. Using the Drill Guide
With the drill guide properly set up and the workpiece secured, it’s time to start drilling. Slowly lower the drill bit into the wood, applying even pressure to maintain control. Let the drill guide guide the bit straight into the wood, following the alignment you’ve set. Avoid excessive force or tilting, as it can cause the bit to deviate from its intended path.
6. Rechecking and Adjusting
After drilling a hole, double-check its alignment and depth. If necessary, make any adjustments to the drill guide or the drill bit’s position before proceeding with the next hole.
7. Cleaning Up
Once you’re finished drilling, clean up any wood shavings or debris around the work area. This will help maintain the accuracy and performance of your drill guide for future use.
Using a drill guide can greatly improve the precision of your drilling and make your projects more professional-looking. Whether you’re a beginner or a seasoned woodworker, incorporating a drill guide into your workflow can save you time and frustration while ensuring straight holes every time.
Maintaining Proper Pressure
When drilling into wood, it is important to maintain the proper pressure to ensure accuracy and prevent damage to the wood. Here are some tips and techniques for maintaining proper pressure:
- Start Slowly: Begin drilling at a slow speed and gradually increase the speed as the drill bit begins to penetrate the wood. This helps to maintain control and prevent the drill bit from wandering.
- Use Firm, Even Pressure: Apply firm, even pressure to the drill when drilling into the wood. This helps to keep the drill bit steady and prevents it from slipping or jumping out of the desired drilling path.
- Hold the Drill Properly: Hold the drill with both hands and position yourself in a comfortable and stable stance. This allows you to maintain better control and exert the necessary pressure.
- Let the Drill Do the Work: Do not push the drill into the wood with excessive force. Instead, allow the drill bit to do the work and guide it with steady pressure. Applying too much force can cause the drill bit to bind or break.
- Choose the Right Drill Bit: Selecting the appropriate drill bit for the type of wood you are drilling into is crucial. Using the wrong type of bit can result in uneven pressure and cause the drill to slip or dig into the wood.
- Use a Drill with Adjustable Clutch: If possible, use a drill with an adjustable clutch. This feature allows you to set the desired drilling pressure and prevents you from applying excessive force.
By following these tips and techniques, you can maintain proper pressure while drilling into wood and achieve accurate and clean holes.
Keeping the Drill Level
When drilling into wood, it is important to keep the drill level to ensure straight and accurate holes. Here are some tips to help you keep the drill level:
1. Use a Drill Press
If you have a drill press, it is the best tool to use for drilling straight holes. The drill press has a guided table that keeps the drill level and perpendicular to the surface of the wood. This ensures accurate and straight holes every time.
2. Mark the Drill Depth
Before drilling, mark the desired depth on the drill bit. This will help you control the drilling depth and avoid drilling too deep. Align the mark with the surface of the wood to keep the drill level while drilling.
3. Use a Bubble Level
If you don’t have a drill press, you can use a bubble level to keep the drill level. Place the level on top of the drill and adjust the angle until the bubble is centered. This indicates that the drill is level, and you can proceed to drill straight into the wood.
4. Secure the Wood
To prevent the wood from moving or sliding while drilling, secure it in place with clamps. This will help maintain stability and ensure that the drill stays level throughout the drilling process.
5. Practice Proper Technique
When drilling by hand, hold the drill with a firm grip, keeping your wrist and arm aligned. Apply steady pressure to the drill and maintain a consistent speed while drilling. This will help keep the drill level and prevent it from wandering off course.
By following these tips, you can improve your drilling accuracy and ensure that your holes are straight and level when drilling into wood.
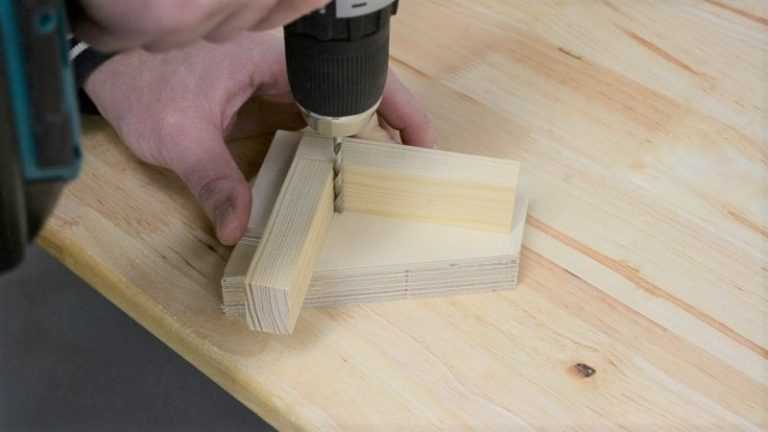
Using Clamps or Braces
Using clamps or braces is a common method for ensuring that your drill remains aligned with the surface of the wood, allowing you to drill straight and accurately. Here are some tips for using clamps or braces effectively:
1. Choose the Right Type of Clamp or Brace
There are various types of clamps and braces available, such as bar clamps, quick-release clamps, and corner clamps. Depending on the size and shape of your wood piece, choose a clamp or brace that will securely hold the wood in place without obstructing your drilling path.
2. Position the Clamps or Braces Properly
Before drilling, position the clamps or braces along the edges of the wood piece to provide support and prevent any movement. Ensure that they are tightly secured and that the wood is held firmly in place.
3. Use Multiple Clamps or Braces
If your wood piece is large or long, using multiple clamps or braces can provide additional stability. Distribute the clamps or braces evenly along the length of the wood to prevent any bending or warping during drilling.
4. Check Alignment Before Drilling
Before starting the drilling process, double-check that the clamps or braces are holding the wood piece securely and that it is aligned properly. This will help ensure that your drill bit will stay on track and drill straight into the wood.
5. Adjust as Needed
If you notice any movement or misalignment while drilling, stop immediately and make any necessary adjustments. Tighten the clamps or braces if they are becoming loose or reposition them if needed.
6. Remove Clamps or Braces Carefully
Once you have finished drilling, remove the clamps or braces slowly and carefully to avoid any movement or damage to the wood. Take your time to avoid any accidents or injuries.
By using clamps or braces properly, you can ensure that your drilling remains straight and accurate, resulting in professional-looking woodworking projects.
Finishing and Smooth Drilling
1. Use sharp drill bits
When drilling into wood, it is important to use sharp drill bits. Dull drill bits can cause the wood to splinter and create rough holes. Sharpen your drill bits regularly or replace them when they become dull.
2. Drill at a slower speed
Drilling at a high speed can cause the drill bit to grab onto the wood and create rough holes. To achieve a smoother hole, drill at a slower speed. This will allow the drill bit to cut through the wood gradually and smoothly.
3. Apply steady and even pressure
When drilling into wood, it is important to apply steady and even pressure. Avoid pushing too hard or applying uneven pressure, as this can cause the drill bit to veer off course and create an uneven hole. Apply consistent pressure to ensure a straight and smooth hole.
4. Use a backing board
For even smoother drilling, use a backing board behind the piece of wood you are drilling into. This can help prevent tear-out and splintering on the back side of the wood. Simply place a scrap piece of wood behind your workpiece and drill through both pieces.
5. Use a pilot hole
If you are drilling into hardwood or thick wood, it can be beneficial to start with a pilot hole. A pilot hole is a small hole drilled as a guide for the larger drill bit. This can help prevent the wood from splitting and make the drilling process smoother and more controlled.
6. Sand the edges
After drilling the holes, you may notice rough or uneven edges around the hole. To achieve a finished look, sand the edges of the holes using sandpaper or a sanding block. This will create a smooth surface and remove any splinters or rough spots.
7. Clean the drilled holes
Once you have finished drilling, clean out any sawdust or debris from the holes. This can be done using a vacuum cleaner or simply blowing into the holes. Removing the debris will ensure a clean and smooth finish.
8. Finish the wood

After drilling the holes, consider finishing the wood to enhance its appearance and protect it from moisture and wear. You can apply a wood stain, paint, varnish, or other protective finish, depending on your preference. This will give the wood a polished and professional look.
9. Practice on scrap wood
If you are new to drilling or want to improve your skills, it can be helpful to practice on scrap pieces of wood first. This will allow you to experiment with different techniques and gain confidence in your drilling abilities before working on your final project.
By following these tips, you can achieve clean, straight, and smooth holes when drilling into wood. Whether you are working on a DIY project or a professional woodworking job, these techniques will help you achieve professional-looking results.
FAQ:
Why is it important to drill straight into wood?
Drilling straight into wood is important to ensure accurate and precise holes. It helps to prevent the drill bit from wandering and creating holes in the wrong place. Additionally, drilling straight into wood ensures that the hole is deep enough and the screws or nails are properly secured.
What can happen if you don’t drill straight into wood?
If you don’t drill straight into wood, the drill bit can wander and create off-center holes. This can result in a sloppy or unprofessional appearance, and can also compromise the strength and stability of the wood joint. The screws or nails may not be securely fastened, leading to loose or weak connections.
Are there any tools or accessories that can help with drilling straight into wood?
Yes, there are several tools and accessories that can help with drilling straight into wood. One popular option is a drill guide, which attaches to the drill and provides a straight surface to guide the drill bit. Another option is a laser level, which can project a laser line onto the wood surface to help guide the drill bit. Additionally, using a center punch or awl to create a starting point can make it easier to drill straight.
What is the best technique for drilling straight into wood?
The best technique for drilling straight into wood begins with marking the desired hole location using a pencil or any other marking tool. Next, use a center punch or awl to create a starting point for the drill bit. Set the drill to a low speed and apply gentle, even pressure as you drill. It’s important to keep the drill bit perpendicular to the wood surface and to avoid applying excessive force, as this can cause the bit to wander.
Can drilling straight into wood be challenging for beginners?
Drilling straight into wood can be challenging for beginners, as it requires a steady hand and a good understanding of proper technique. It may take some practice to develop the necessary skills, but with patience and perseverance, anyone can learn to drill straight. Starting with small pilot holes and gradually working up to larger holes can help build confidence and improve accuracy.
Are there any tips for maintaining a straight drill hole throughout the entire depth of the wood?
Yes, there are a few tips for maintaining a straight drill hole throughout the entire depth of the wood. One tip is to periodically pull the drill bit out of the hole to remove any wood chips or debris that may be causing the bit to veer off course. Another tip is to use a depth stop on the drill to ensure consistent hole depth. Additionally, maintaining a steady hand and applying even pressure throughout the drilling process can help maintain a straight hole.
What should I do if my drill bit starts to wander off course?
If your drill bit starts to wander off course, it’s important to stop drilling immediately. Pull the drill bit out of the hole and reassess the situation. Check if the drill bit is dull or damaged, as this can cause it to wander. Additionally, examine the position and angle of the drill in relation to the wood surface. Adjust the angle and try again, making sure to keep the drill bit perpendicular to the wood surface to prevent further wandering.
Video:


Meet Harrison Clayton, a distinguished author and home remodeling enthusiast whose expertise in the realm of renovation is second to none. With a passion for transforming houses into inviting homes, Harrison's writing at https://thehuts-eastbourne.co.uk/ brings a breath of fresh inspiration to the world of home improvement. Whether you're looking to revamp a small corner of your abode or embark on a complete home transformation, Harrison's articles provide the essential expertise and creative flair to turn your visions into reality. So, dive into the captivating world of home remodeling with Harrison Clayton and unlock the full potential of your living space with every word he writes.


