Steps to drill holes in clay pots

If you enjoy gardening and working with clay pots, you may find yourself in a situation where you need to drill holes in them. Whether you want to create drainage holes or simply want to add a decorative touch, drilling holes in clay pots is a relatively simple process. In this article, we will take you through the steps to drill holes in clay pots, so you can start customizing your pots to fit your gardening needs.
Step 1: Choose the right drill bit
The first step in drilling holes in clay pots is to choose the right drill bit. For clay pots, it is recommended to use a masonry drill bit because of the pot’s composition. Masonry drill bits are designed to drill through hard materials like concrete and brick, so they are well-suited for drilling through clay pots. Make sure the drill bit is the appropriate size for the holes you want to create.
Step 2: Mark where you want the holes
Before you start drilling, mark the spots where you want to create the holes. You can use a pencil or a marker to make small dots on the pot’s surface. This will help guide your drilling and ensure that the holes are evenly spaced. If you are planning on creating multiple holes, you may want to use a ruler or measuring tape to ensure they are all the same distance from each other.

Step 3: Drill the holes
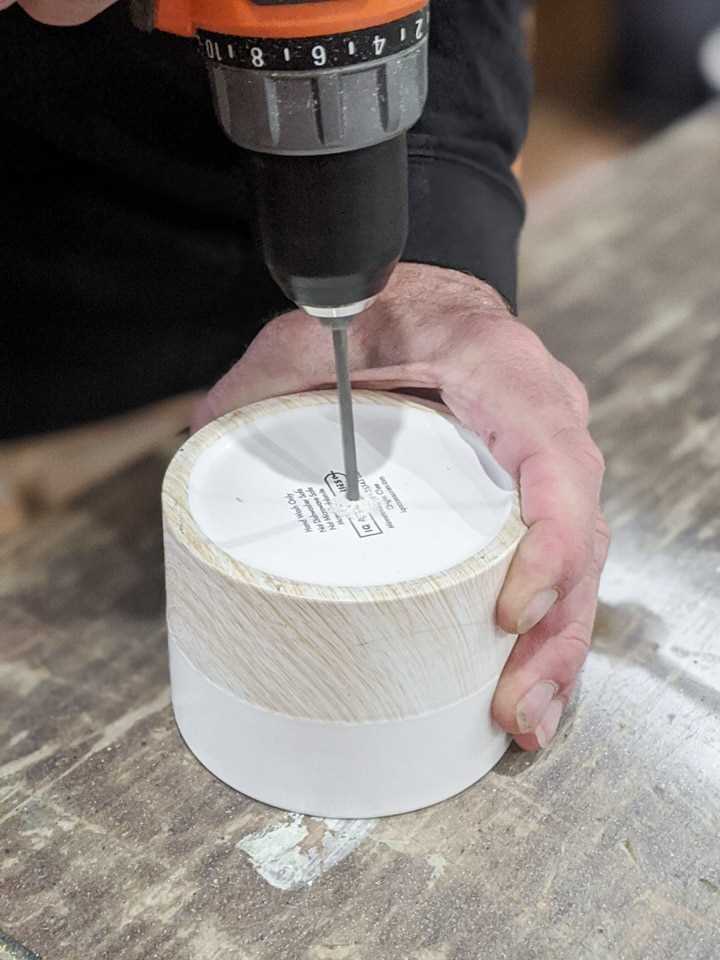
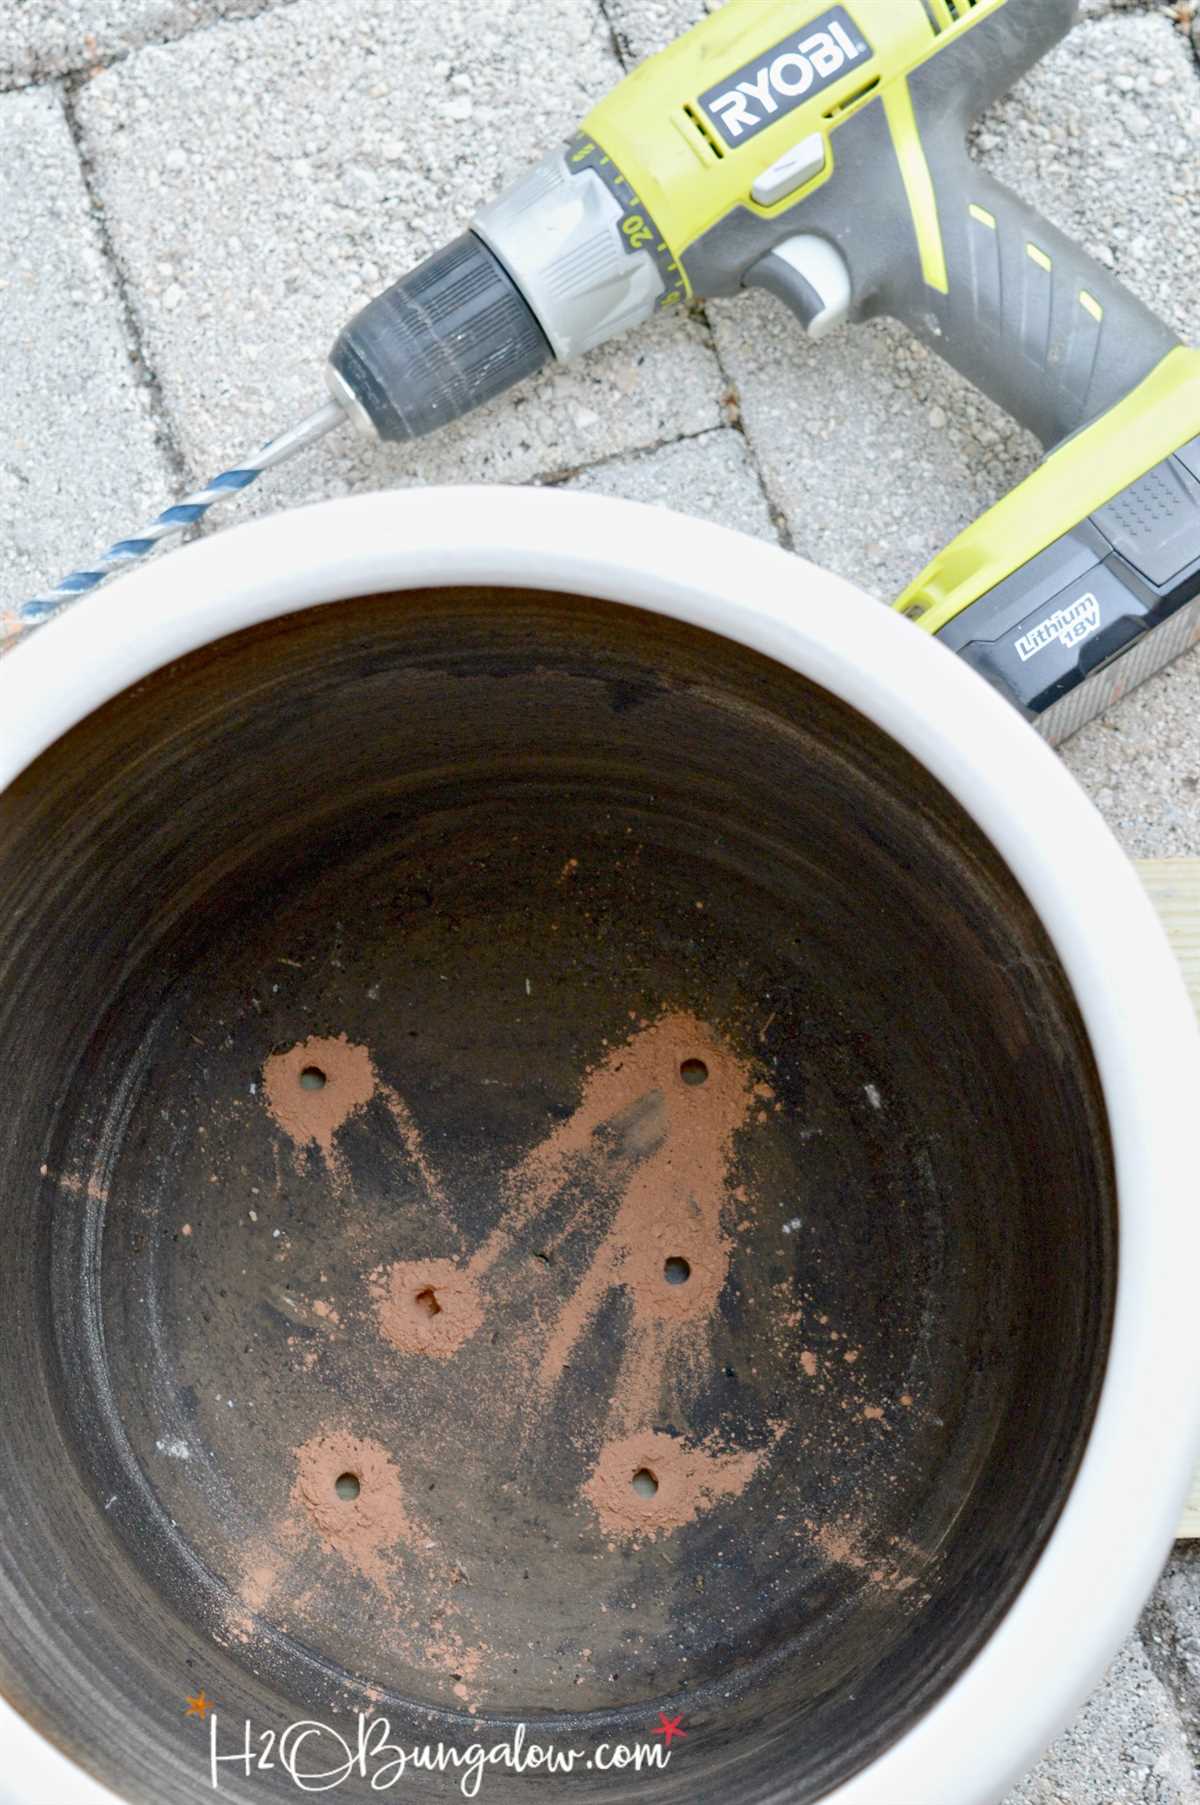
Now it’s time to start drilling. Place the pot on a stable surface, such as a workbench or the ground. Hold the drill with both hands and position the drill bit on one of the marked spots. Apply gentle pressure and start the drill on a low speed to prevent the pot from cracking. Slowly increase the speed as you drill into the pot, keeping the drill bit perpendicular to the surface of the pot. Repeat this process for each marked spot, making sure to take breaks to prevent overheating of the drill bit and the pot.
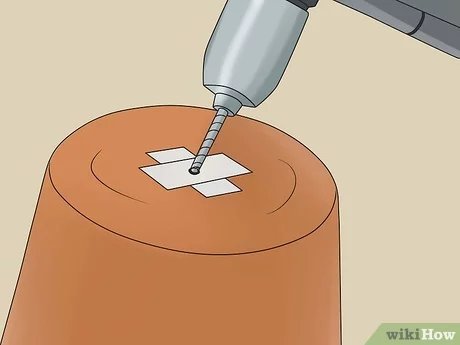
Tip: To prevent cracking, you can also place a small piece of tape over the spot where you want to drill the hole. The tape will help stabilize the pot’s surface and reduce the risk of damage.
Step 4: Clean up the holes
Once you have drilled all the holes, you may notice some rough edges or clay residue around the holes. To clean up the holes, use sandpaper or a sanding block to smooth out any rough edges. You can also use a damp cloth to remove any clay residue.
Now that you know the steps to drill holes in clay pots, you can start experimenting with different designs and patterns. Remember to always wear safety goggles and work in a well-ventilated area when drilling, and don’t forget to have fun with your new customized clay pots!

Understanding the Tools
- Electric Drill: An electric drill is a versatile tool that is commonly used for drilling holes. When drilling holes in clay pots, it is recommended to use a drill with a variable speed and a non-hammering setting. This will allow you to control the drilling speed and prevent the clay pot from cracking.
- Masonry Drill Bit: When drilling into clay pots, it is important to use a masonry drill bit. These drill bits are specifically designed to drill into hard materials such as clay or ceramic. The masonry drill bit has a carbide tip that can withstand the hardness of the clay pot without breaking.
- Masking Tape: Masking tape is used to mark the spot where you want to drill the hole. This will help to ensure that the hole is drilled in the right location and prevent the drill bit from slipping or wandering off during the drilling process.
- Ruler or Measuring Tape: A ruler or measuring tape is used to measure the distance from the edge of the clay pot to the spot where you want to drill the hole. This will help you to accurately position the hole and ensure that it is drilled at the desired location.
- Water: Water is used as a lubricant when drilling holes in clay pots. It helps to keep the drill bit cool and prevents it from overheating. To use water, simply dip the drill bit in a container of water before drilling and periodically wet the drill bit during the drilling process.
- Container or Tray: A container or tray is used to hold water when drilling holes in clay pots. It is recommended to use a shallow container or tray that is large enough to hold the clay pot and allow you to dip the drill bit in the water as needed.
By understanding the tools required for drilling holes in clay pots, you can ensure that you have everything you need to successfully complete the task. Remember to always wear appropriate safety gear, such as safety glasses and gloves, when operating an electric drill.
Selecting the Right Drill Bit
Drilling holes in clay pots requires the use of the right drill bit. While there are various types of drill bits available, it is important to choose one that is suitable for clay pottery. Here are some factors to consider when selecting the right drill bit:
- Diamond-coated bits: Diamond-coated drill bits are an excellent choice for drilling holes in clay pots. The diamond coating makes the drill bit extremely durable and allows for precise drilling without damaging the delicate pottery.
- Carbide-tipped bits: Carbide-tipped drill bits are another good option for drilling holes in clay pots. They are designed to withstand the hardness of clay pottery and provide reliable and precise drilling.
- Size: The size of the drill bit depends on the diameter of the hole you want to create in the clay pot. It is recommended to choose a drill bit that is slightly larger than the desired hole size to allow for adjustments and prevent cracking.
- Shank type: The shank of the drill bit should be compatible with your drill. Most drill bits have round shanks that fit into standard drills, but it is important to check the compatibility before making a purchase.
It is important to note that regular drill bits made for metal or wood may not be suitable for drilling holes in clay pots. These materials are not as delicate as clay pottery and require drill bits specifically designed for their hardness. Using the wrong drill bit can lead to cracking or breaking of the clay pot.
Before drilling, it is always a good idea to practice on a spare clay pot or a small inconspicuous area to ensure the chosen drill bit is suitable and provides the desired results.

Gathering the Necessary Materials
Before you begin drilling holes in clay pots, it is important to gather all the necessary materials. Having everything prepared will make the process smoother and more efficient. Here is a list of materials you will need:
1. Clay pots
You will need the clay pots that you want to drill holes in. Make sure they are clean and free from any debris or dirt.
2. Safety goggles
Protecting your eyes is crucial when working with power tools. Safety goggles will shield your eyes from any flying debris or shards of clay.
3. Drill
A power drill with a masonry drill bit is essential for drilling holes in clay pots. Make sure the drill is fully charged or has a power source nearby.

4. Masonry drill bit
A masonry drill bit specifically designed for drilling into clay or ceramic materials is necessary. This type of drill bit has a carbide or diamond tip for increased durability.
5. Masking tape
Masking tape will help prevent the clay pots from cracking or chipping while drilling. It creates a protective barrier on the surface of the pot.
6. Spray bottle with water
Having a spray bottle filled with water will keep the drill bit and clay pot cool during the drilling process. This will prevent overheating and potential damage to the clay.
7. Workbench or sturdy surface
A stable workbench or surface is necessary for stability and support while drilling. Make sure the surface is sturdy enough to handle the pressure and vibrations of the drill.

8. Dust mask
Since drilling into clay pots can create dust, wearing a dust mask is recommended to protect your respiratory system. Choose a mask that fits securely and has a high filtration level.
Once you have gathered all these materials, you will be ready to proceed with drilling holes in your clay pots. Remember to prioritize safety and take your time while working with power tools.
Preparing the Pot
Before you begin drilling holes in your clay pot, you will need to prepare the pot properly to ensure success and avoid any potential damage.
Clean the Pot
- Start by cleaning the pot thoroughly to remove any dirt, debris, or residue. This will ensure that the drill bit can penetrate the clay easily and create clean holes.
- Use a gentle detergent and water to wash the pot, scrubbing both the inside and outside surfaces.
- Rinse the pot thoroughly to remove any soap residue and allow it to dry completely before proceeding.
Mark the Hole Locations
- Decide where you want the drainage holes to be on the pot.
- Use a marker or pencil to mark the spots on the inside and outside of the pot where you will drill the holes.
- Ensure that the marks are evenly spaced and that they are in the desired locations.
Protect the Pot
- Place a piece of scrap wood or a soft cloth underneath the pot to protect your work surface from any damage during the drilling process.
- This will also help prevent the pot from cracking or breaking if the drill bit goes all the way through.
Select the Right Drill Bit
- Choose a drill bit that is specifically designed for drilling through ceramic or clay materials.
- A carbide or diamond-tipped drill bit is recommended for the best results.
- Make sure the drill bit is the appropriate size for the holes you want to create.
Cleaning the Pot
Before drilling holes in a clay pot, it is important to clean it thoroughly to remove any debris or dirt that may be present. This will ensure that the pot is clean and ready for use.
Here are the steps to clean a clay pot:
- Fill a sink or bucket with warm water.
- Place the clay pot in the water and let it soak for a few minutes.
- Using a scrub brush or sponge, lightly scrub the pot to remove any dirt or residue.
- Rinse the pot with clean water to remove any soap or cleaning solution.
- Inspect the pot to ensure that it is clean and free of any debris.
It is important to thoroughly dry the clay pot before proceeding with drilling. This will help to prevent any unnecessary damage to the pot and ensure that the holes are drilled accurately.
Marking the Hole Locations
Before you can start drilling holes in your clay pots, you need to mark the locations where you want the holes to be. Here are the steps to follow:
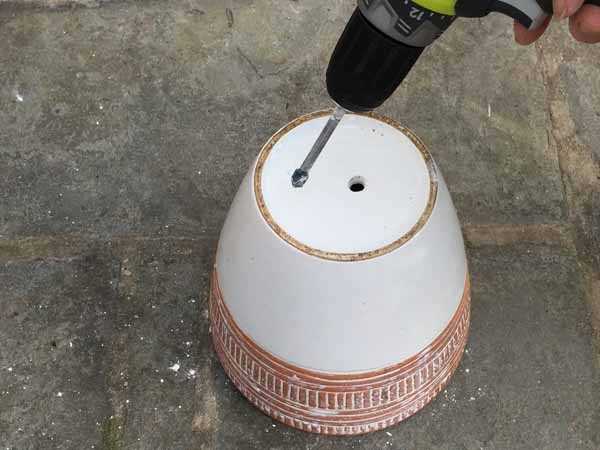
- Choose the spot where you want to drill the hole. This will depend on the type of plant you’ll be planting and its specific needs. For example, if you’re drilling drainage holes, you’ll want to choose the bottom of the pot.
- Using a ruler or measuring tape, measure the diameter of the hole you want to drill. This will help ensure that the hole is the right size for your needs.
- Place a small piece of masking tape or painter’s tape over the spot where you want to drill the hole. This will help prevent the drill bit from slipping while you’re drilling.
- Use a marker or a pencil to mark the exact center of the hole on the tape. This will serve as a guide when you start drilling.
Once you have marked the hole locations, you are ready to move on to the next step of drilling holes in your clay pots.
Drilling the Holes
Once you have gathered all the necessary tools and materials, it’s time to start drilling the holes in your clay pots. Follow these steps to ensure a successful outcome:
- Prepare the work area: Find a stable surface to work on, such as a workbench or sturdy table. Make sure it is clean and free from any clutter.
- Mark the spot: Use a pencil or marker to mark the exact spot where you want to drill the hole on the clay pot. Take measurements if necessary to ensure accuracy.
- Secure the pot: Place the clay pot securely on the work surface, ensuring that it doesn’t move or wobble during the drilling process. This can be done by holding it firmly with one hand or using a clamp.
- Select the appropriate drill bit: Choose a drill bit that is suitable for drilling through clay pots. A masonry or ceramic drill bit with a diamond tip is recommended for this task.
- Attach the drill bit: Insert the selected drill bit into the drill chuck and tighten it securely. Make sure it is centered and aligned properly.
- Put on safety gear: Before drilling, put on a pair of safety glasses or goggles to protect your eyes from flying debris and wear a pair of gloves to protect your hands.
- Start drilling: Position the drill bit on the marked spot and apply gentle pressure. Start drilling at a slow speed to prevent cracking or damaging the clay pot. Gradually increase the speed as needed.
- Keep the hole lubricated: While drilling, it is important to keep the drill bit and the hole lubricated to prevent overheating. Use water or lubricating oil to cool down the drill bit and reduce friction.
- Monitor the progress: Continuously monitor the drilling process to ensure that the hole is being drilled smoothly and evenly. Make any necessary adjustments as needed.
- Clean and inspect: Once the hole is drilled, clean the clay pot and remove any debris or excess clay. Inspect the hole to ensure that it is the desired size and shape.
By following these steps, you will be able to drill holes in your clay pots with ease and precision. Remember to take your time and work carefully to avoid any mishaps. Good luck with your project!
Positioning the Pot
Before you start drilling holes in your clay pot, it’s important to properly position it to ensure that the holes are in the right place and that you don’t damage the pot. Here are the steps to properly position the pot:
- Choose a flat surface: Find a stable and flat surface to work on. This could be a worktable or even the ground, as long as it’s level and won’t cause the pot to wobble or tip over.
- Place a protective layer: To protect the surface from scratches or damage, place a soft cloth, towel, or a piece of cardboard underneath the pot. This will also help provide stability and prevent the pot from slipping while you drill.
- Determine the drilling area: Decide where you want to drill holes in your clay pot. Consider the type of plant you will be planting and the drainage needs it requires. Typically, you’ll want to drill holes near the bottom of the pot to allow excess water to drain out.
- Mark the drilling spots: Use a permanent marker or a pencil to mark the spots where you’ll be drilling. It’s recommended to start with a few small holes and then increase the size if needed. Make sure the marks are visible and evenly spaced.
- Secure the pot: To prevent the pot from moving while drilling, use your non-dominant hand to hold it firmly in place. Make sure you have a good grip on the pot and that your fingers are clear of the drilling area.
- Prepare your tools: Make sure you have the right drill bit for clay pots. Typically, a masonry bit works best. Set up your drill and ensure it’s in good working condition.
- Start drilling: With the pot securely positioned, start drilling at a slow speed. Apply gentle and steady pressure as you drill. Be patient and avoid rushing the process, as excessive force can crack or break the pot.
- Clean up: Once you have drilled all the necessary holes, clean up any debris or dust that may have accumulated on the pot or the work surface. Dispose of the waste properly.
By following these steps and properly positioning the pot, you can successfully drill holes in clay pots without causing any damage. Having adequate drainage in your clay pots is essential for the health and well-being of your plants, so take the time to ensure the holes are positioned correctly.
Using the Correct Technique
Drilling holes in clay pots is a delicate process, and it’s important to use the correct technique to avoid damaging the pot. Here are some steps to follow:
1. Choose the right drill bit
When drilling holes in clay pots, it’s important to choose the right drill bit. A masonry drill bit, made of carbide or diamond, is the best choice for drilling through the hard surface of clay pots.
2. Prepare the pot
Before drilling, make sure the pot is clean and dry. Remove any dirt or debris from the surface of the pot to ensure a smooth drilling process.
3. Mark the spot
Decide where you want to drill the hole and mark it with a pencil or marker. This will help guide you as you start drilling.
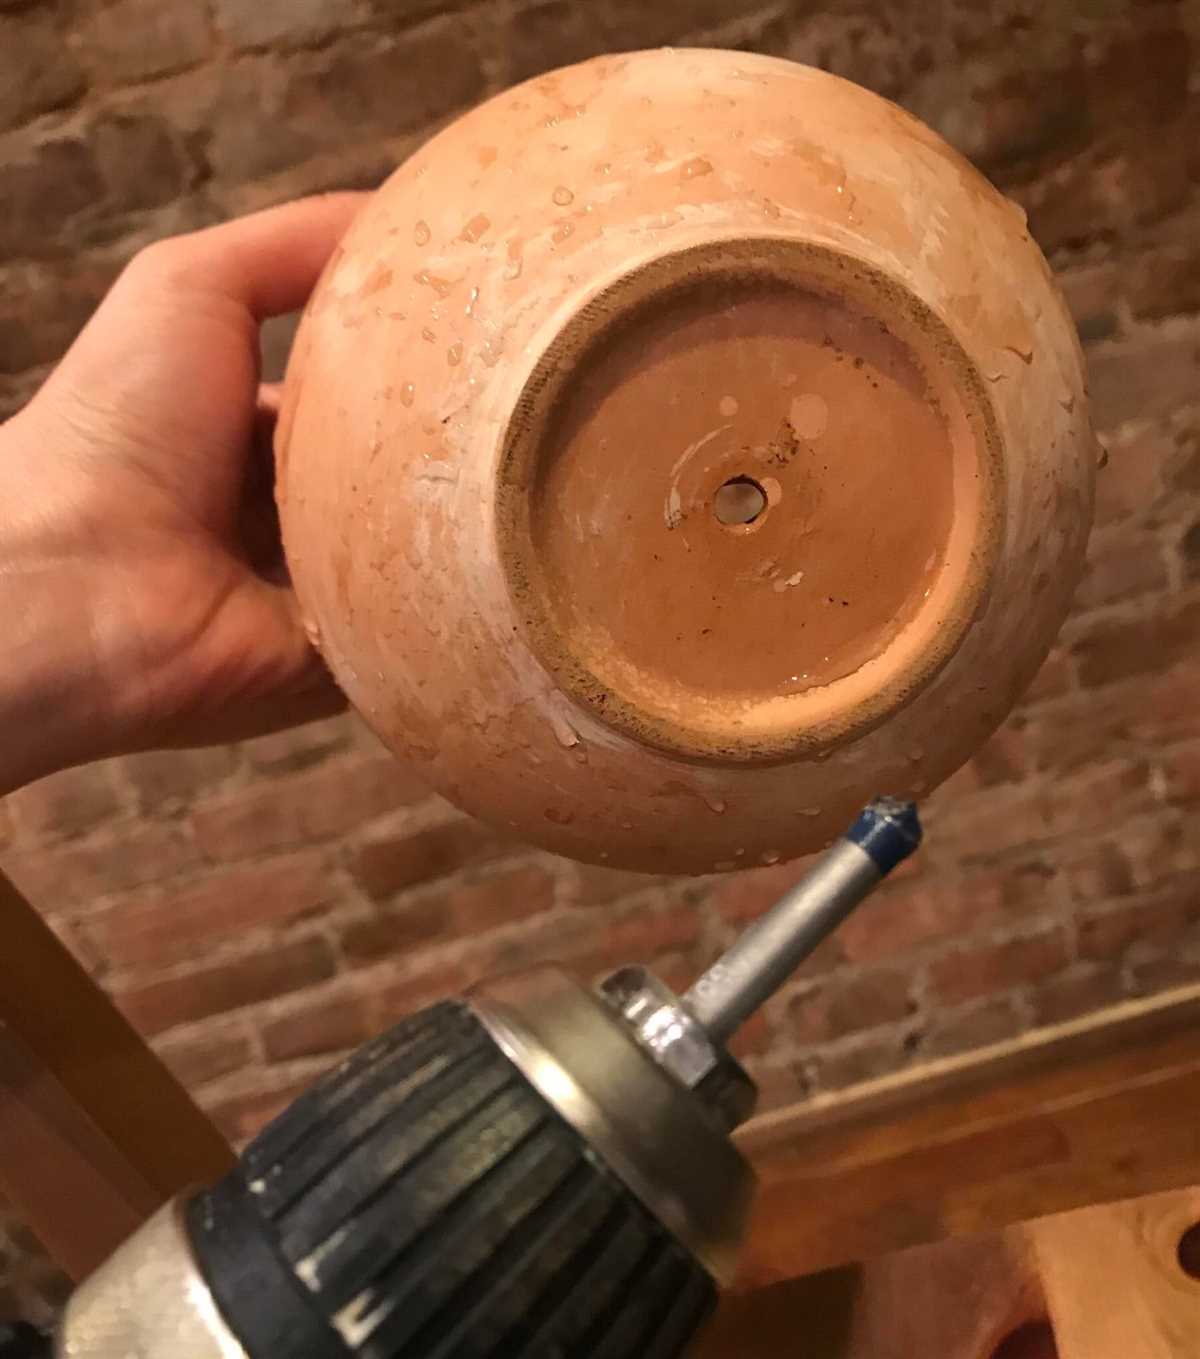
4. Start drilling
Place the pot on a steady surface, like a workbench or table, to stabilize it. Hold the pot firmly with one hand, and with the other hand, slowly start drilling at the marked spot. Apply gentle but steady pressure as you drill.
5. Keep the drill bit cool
While drilling, it’s important to keep the drill bit cool to prevent it from overheating. You can do this by dipping the drill bit in water from time to time, or by using a spray bottle to mist the drill bit with water.
6. Take breaks if needed
If you notice the drill bit getting too hot or the pot starting to crack, stop drilling and let everything cool down for a few minutes. Taking breaks during the drilling process can help prevent damage to the pot.
7. Clean up
Once you have drilled the hole, remove any clay debris from the pot. You can use a brush or a damp cloth to clean the surface of the pot and remove any loose clay particles.
Following these steps will help you drill holes in clay pots successfully and without causing any damage. Remember to always wear protective goggles and gloves when drilling to ensure your safety.
Finishing Touches

Once you have successfully drilled the holes in your clay pots, it’s time to add some finishing touches to make them look more attractive and functional. Here are a few ideas:
1. Sand the edges
After drilling the holes, you may notice that the edges are rough or sharp. To make them smoother, use sandpaper to gently sand the edges of the holes. This will not only create a neater appearance but also prevent any sharp edges from accidentally harming yourself or other objects.
2. Paint or decorate
If you want to add a personal touch to your clay pots, you can paint them or decorate them with various designs. You can use acrylic paints, spray paints, or even apply some decoupage techniques. Be creative and let your imagination guide you!
3. Apply a sealant
To protect your clay pots from water damage and prolong their lifespan, consider applying a sealant. There are different types of sealants available, such as waterproof sealants or clear varnish. Apply the sealant according to the manufacturer’s instructions, and ensure that it is safe for use on clay surfaces.
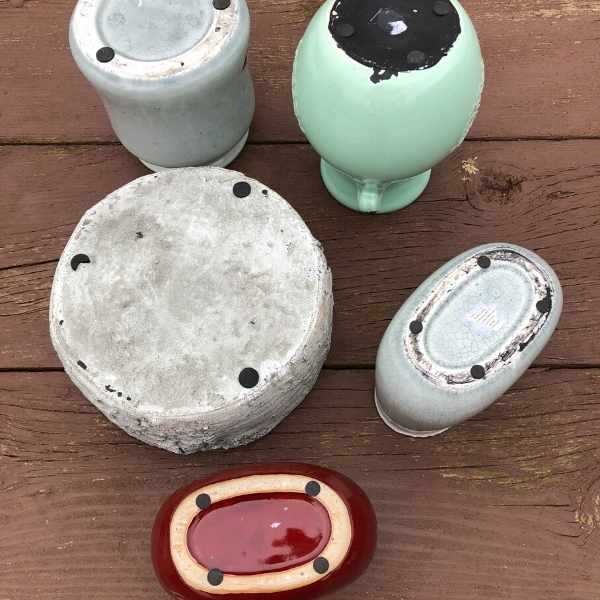
4. Add drainage trays
To catch any excess water that drains out of the holes, place small drainage trays or saucers under your clay pots. This will prevent water from pooling around the pots and damaging surfaces or creating a mess. Choose trays that are slightly larger than the diameter of your pots.
5. Label or tag your pots
If you have a variety of plants in different clay pots, it can be helpful to label or tag them. You can use small labels made of wood, plastic, or even write directly on the pots with a permanent marker. This will make it easier for you to identify the different plants and keep track of their care needs.
6. Arrange your pots
Once you have finished all the necessary touches, arrange your clay pots in an appealing way. You can create different arrangements and group them based on plant type, color, or size. Get creative with the placement and use different levels or stands to add visual interest to your display.
7. Care for your plants
Remember to provide proper care for your plants in the clay pots. This includes watering them regularly, ensuring they receive adequate sunlight, and fertilizing them as needed. With the right care, your plants will thrive in their beautifully finished clay pots.
By adding these finishing touches, your drilled clay pots will not only serve their functional purpose but also become decorative elements that enhance the overall look of your garden or indoor space.
FAQ:
What tools do I need to drill holes in clay pots?
To drill holes in clay pots, you will need a power drill, a suitable drill bit for clay or ceramics, a piece of wood or scrap material as a support, a marker or pencil to mark the drilling spots, and safety goggles to protect your eyes.
How do I find the right drill bit for clay pots?
When looking for a drill bit for clay pots, it is best to choose a carbide or diamond-tipped drill bit. These types of drill bits are strong enough to penetrate the clay without breaking or chipping. You can find them at hardware stores or online.
What is the size of the drill bit I should use?
The size of the drill bit you should use will depend on the type of plants you are planning to grow in the clay pots. In general, a 1/4-inch or 3/8-inch drill bit works well for most plants. However, if you are planning to grow larger plants or ones that require more drainage, you may want to use a larger drill bit.
Should I wet the clay pots before drilling?
It is not necessary to wet the clay pots before drilling. In fact, drilling into wet clay pots can be more difficult and may cause the clay to become mushy or damaged. It is best to work with dry clay pots when drilling holes.
How do I drill holes in clay pots without cracking them?
To prevent cracking the clay pots while drilling holes, it is important to go slowly and apply gentle pressure. Start by marking the spot where you want to drill the hole and use a lower drilling speed. It may also help to place a piece of wood or scrap material underneath the pot to provide support and prevent cracking.
What do I do if the clay pot cracks while drilling?
If the clay pot cracks while drilling, you can try to salvage it by using a waterproof adhesive or sealant to repair the crack. Apply the adhesive or sealant to both sides of the crack and hold them together until the glue dries. However, if the crack is too large or the pot is severely damaged, it may be best to replace the pot.
Video:


Meet Harrison Clayton, a distinguished author and home remodeling enthusiast whose expertise in the realm of renovation is second to none. With a passion for transforming houses into inviting homes, Harrison's writing at https://thehuts-eastbourne.co.uk/ brings a breath of fresh inspiration to the world of home improvement. Whether you're looking to revamp a small corner of your abode or embark on a complete home transformation, Harrison's articles provide the essential expertise and creative flair to turn your visions into reality. So, dive into the captivating world of home remodeling with Harrison Clayton and unlock the full potential of your living space with every word he writes.


