Step-by-Step Guide to Installing Drywall Screws without a Drill

Installing drywall screws without a drill can be a daunting task, but with the right techniques and tools, it can be easily accomplished. Whether you’re a DIY enthusiast or a professional contractor, knowing how to install drywall screws without a drill can come in handy in situations where a drill is not available or suitable.
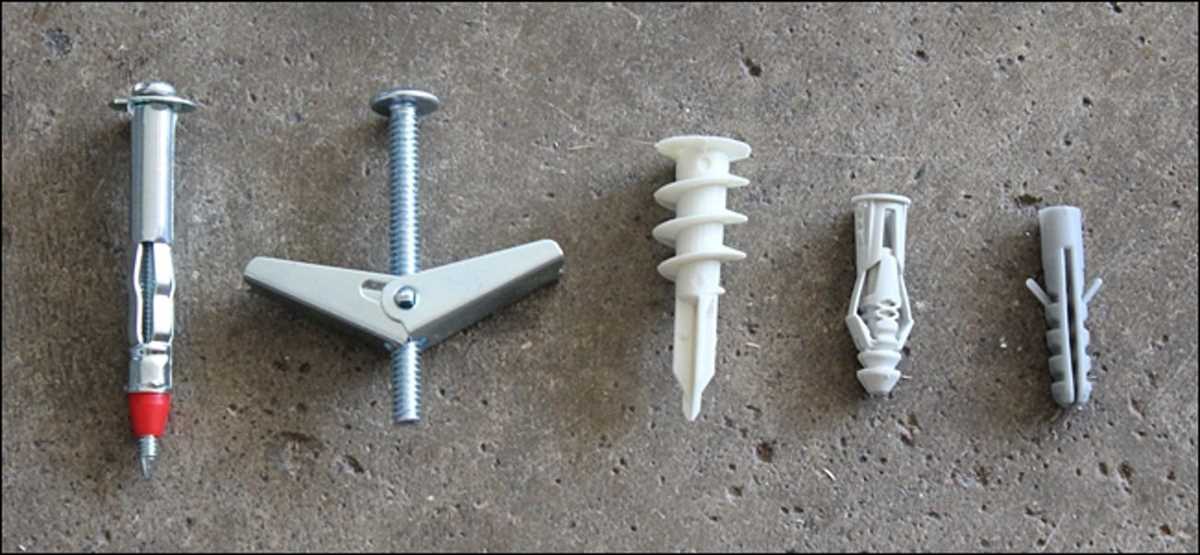
Before we dive into the step-by-step guide, it’s important to understand the purpose of drywall screws. Drywall screws are specifically designed to secure drywall panels to the underlying structure, such as wooden studs. They provide a stronger and more secure hold compared to nails, preventing the panels from shifting or falling off.
Now, let’s get started with the step-by-step guide on installing drywall screws without a drill. Keep in mind that while this method may not be as fast or efficient as using a drill, it can still get the job done effectively.
Step 1: Gather the Necessary Tools
Before you begin installing drywall screws without a drill, it’s important to gather all the necessary tools. Having the right tools on hand will make the task easier and more efficient. Here are the tools you’ll need:

- A screwdriver or a screw gun: This is the main tool you’ll be using to drive the screws into the drywall.
- Drywall screws: Make sure you have the appropriate size and type of screws for your project. It’s best to use coarse-threaded screws for drywall installation.
- Tape measure: Use this tool to measure and mark the spots where you’ll be placing the screws.
- Pencil or marker: You’ll need a pencil or marker to make the necessary markings on the drywall.
- Utility knife: A utility knife will come in handy for scoring and cutting the drywall, if needed.
- Screwdriver bit or drill bit: If you’re using a screw gun, make sure you have the appropriate bit for driving the screws.
- Level: A level will help ensure that your drywall installation is straight and even.
Gather all of these tools before you start the installation process. Having everything prepared will save you time and allow you to work efficiently. Once you have all of these tools, you’re ready to move on to the next step.
Step 2: Mark the Locations for the Screws
Before installing the drywall screws, it is important to mark the locations where they will be inserted. This will ensure that the screws are evenly spaced and properly secured.
Follow these steps to mark the locations for the screws:
- Measure the width and height of the drywall sheet.
- Divide the width of the drywall sheet by the spacing distance you want between the screws. For example, if you want 16-inch spacing, divide the width by 16.
- Note the number of divisions and mark them evenly along the length of the drywall sheet.
- Repeat steps 2 and 3 for the height of the drywall sheet.
Alternatively, you can use a drywall screw template to mark the locations for the screws. These templates are available in hardware stores and can help ensure accurate screw placement.

Once you have marked the locations for the screws, you are ready to move on to the next step in the installation process.
Step 3: Use a Screwdriver to Make Pilot Holes
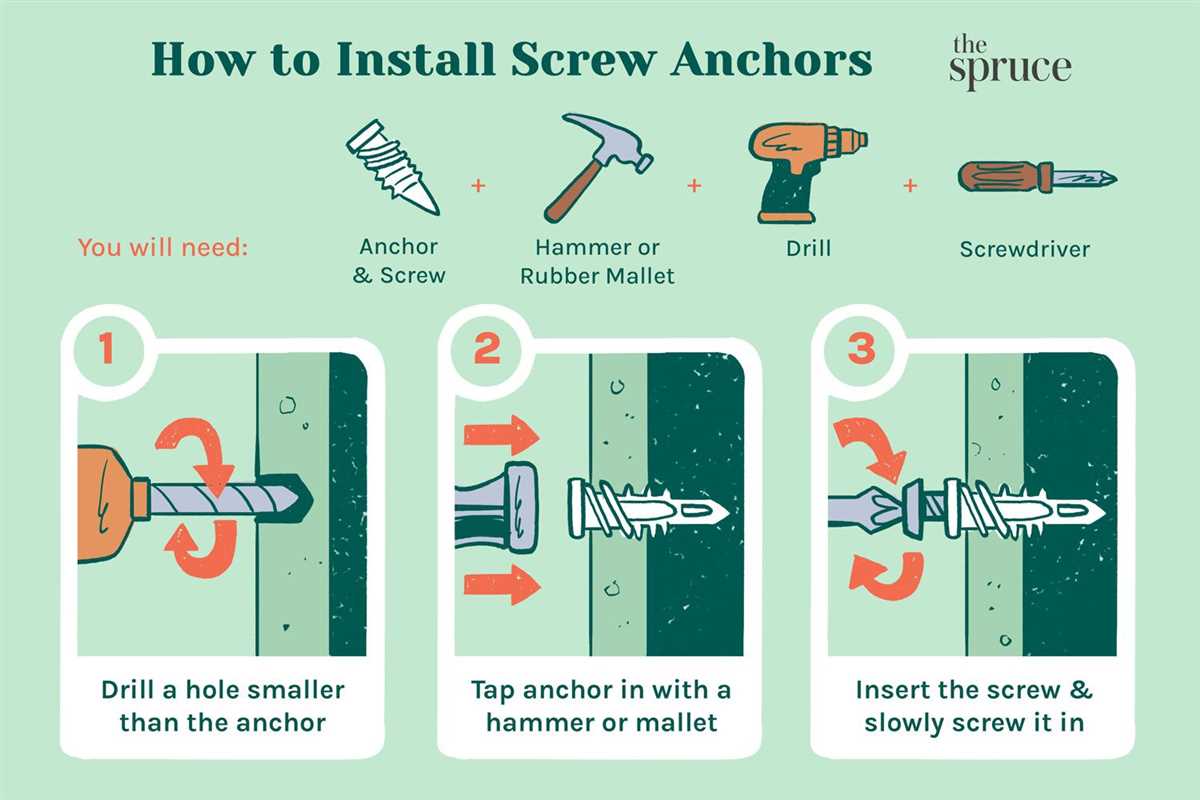
Before inserting the drywall screws, it’s important to create pilot holes. Pilot holes are smaller holes that help guide the screws into the drywall without causing damage or splitting the material. A pilot hole is especially useful when working with delicate or thin drywall.
To make pilot holes, follow these steps:
- Mark the spot: Use a pencil or a marker to mark the exact locations where you want to insert the screws. This will help ensure accuracy and prevent any mistakes.
- Choose the right size screwdriver: Select a screwdriver that matches the size of the screws you will be using. It’s important to have a snug fit to avoid stripping the screw heads.
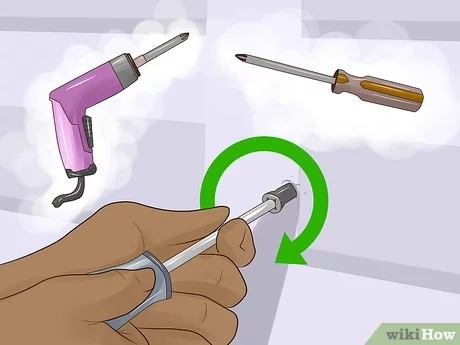
- Position the screwdriver: Hold the screwdriver perpendicular to the wall and align it with the marked spot. Make sure to apply gentle pressure to keep the screwdriver steady.
- Rotate the screwdriver: Start rotating the screwdriver in a clockwise motion, applying constant pressure. Gradually increase the pressure to create a small pilot hole. Be careful not to press too hard, as it can damage the drywall.
- Verify the depth: Check the depth of the pilot hole by inserting the screw into it. The screw should fit snugly without being too loose or too tight.
Repeat these steps for each marked spot where you plan to insert the drywall screws. This preparation will ensure that the screws go in smoothly and securely, providing a solid and long-lasting installation for your drywall.
Step 4: Insert and Tighten the Screws
Once you have positioned the drywall panel properly, it’s time to insert and tighten the screws. Follow these steps:

- Start by placing the first screw approximately 1 inch from the top edge of the drywall panel. Ensure that there is a stud or joist behind the spot where you will be inserting the screw.
- Hold the drywall screw with your dominant hand and position it at a slight angle, making sure it aligns with the designated spot.
- Use your other hand to hold a screwdriver or a drywall screw gun, whichever you feel comfortable using.
- Apply pressure to the screwdriver or screw gun while slowly rotating it in a clockwise direction to insert the screw into the drywall and the underlying stud or joist.
- Continue inserting screws along the top edge of the drywall panel, spacing them approximately 12 inches apart.
- Repeat the process along the bottom edge of the drywall panel, making sure to align the screws with the studs or joists.
- Once the top and bottom edges are secured, move on to the sides of the drywall panel. Insert screws along the vertical edges, again ensuring they align with the studs or joists.
- Space the screws approximately 16 inches apart along the vertical edges of the drywall panel.
- Make sure to insert screws around any door or window openings, following the same spacing guidelines.
- Check the drywall panel for any areas that feel loose or have gaps. If needed, insert additional screws to secure those areas.
Note: When inserting the screws, be careful not to drive them too deep into the drywall, as this can cause the paper surface to break and weaken the hold of the screw.
Once you have inserted all the screws and secured the drywall panel to the studs or joists, go back and tighten any screws that may be sticking out slightly. This will ensure a smooth and even surface for finishing.
Step 5: Check the Screw Depth
After you have driven the drywall screws into the wall, it’s important to check the screw depth to ensure your drywall is properly secured.
To check the screw depth, you can use a straightedge or a level. Place the straightedge or level across the surface of the drywall and see if the screw heads are protruding. If the screw heads are sticking out, they will need to be countersunk.
Countersinking the screws involves using a screwdriver or drill with a countersink bit to create a shallow depression around the screw head. This allows for the screw head to be flush with the surface of the drywall, creating a smooth and even finish.

It’s important to check the screw depth because screws that are not properly countersunk can cause problems later on. If the screw heads are not flush with the surface of the drywall, they can create bumps or ridges that can be difficult to hide when you are finishing and painting the walls.
Once you have checked the screw depth and made any necessary adjustments, you can move on to the next step in your drywall installation process.
Step 6: Fill in any Gaps or Holes
After all the drywall screws have been installed, you may notice some gaps or holes in the drywall. These imperfections can be filled in to create a smooth and seamless finish.
Here are the steps to fill in any gaps or holes in the drywall:

- Clean the area: Before filling in the gaps or holes, make sure the area is clean and free from any dust or debris. Use a brush or cloth to wipe away any loose particles.
- Choose a filler: There are various types of fillers available for drywall repair, such as spackle, joint compound, or drywall mud. Choose the filler that is suitable for the size and depth of the gaps or holes.
- Apply the filler: Take a putty knife or a taping knife and scoop a small amount of filler onto the blade. Press the filler into the gap or hole, making sure to fill it completely. Use the knife to scrape off any excess filler, leaving a smooth and even surface.
- Let it dry: Allow the filler to dry according to the manufacturer’s instructions. This may take several hours or overnight, depending on the type of filler used.
- Sand the area: Once the filler is dry, use a sanding block or sandpaper to smooth out the repaired area. Start with a coarse grit sandpaper and gradually move to a finer grit for a polished finish.
- Inspect and repeat if necessary: Inspect the area for any remaining gaps or imperfections. If needed, repeat the filling and sanding process until the surface is completely smooth.
Following these steps will help you achieve a professional-looking finish and ensure that your drywall is ready for painting or any other desired finish.
Step 7: Sand the Surface
After the drywall screws are installed and the joint compound is dry, it’s time to sand the surface. Sanding helps to create a smooth and even finish, ensuring that the wall is ready for painting or further finishing.
Materials Needed:
- Sanding block or sandpaper
- Dust mask
- Drop cloth or plastic sheeting
Instructions:

- Start by putting on a dust mask to protect yourself from inhaling any dust particles.
- Cover the floor with a drop cloth or plastic sheeting to catch any dust or debris that may be created during the sanding process.
- Use a sanding block or sandpaper to sand the entire surface of the drywall. Start with a coarse grit sandpaper to remove any high spots or imperfections, and then move to a finer grit sandpaper to smooth out the surface.
- Work in a systematic manner, sanding each section of the wall in small, circular motions. Be careful not to apply too much pressure, as this can damage the drywall.
- Once you have sanded the entire surface, use a damp cloth or sponge to wipe away any dust or residue that may be left behind.
- Inspect the wall to ensure that it is completely smooth and free of any imperfections. If necessary, repeat the sanding process in areas that require additional attention.
- After sanding, the wall is now ready for painting or further finishing. You can apply primer and paint directly to the sanded surface, or proceed with any other desired finishing techniques.
Note: Sanding drywall can create a significant amount of dust, so it’s important to take proper safety precautions. Always wear a dust mask and work in a well-ventilated area to minimize exposure. Additionally, be sure to dispose of any sanding debris properly to prevent it from becoming a hazard.
Step 8: Apply the Final Finish
After all the drywall screws are installed, it’s time to apply the final finish to the walls. This step is crucial for achieving a smooth and polished look.
Here are the steps to follow:
- Inspect the screw heads to ensure they are countersunk properly and are below the surface of the drywall.
- Use a putty knife or a drywall knife to apply joint compound over the screw heads. Make sure to spread it evenly, covering the entire area.
- Apply a thin layer of joint compound to the seams and joints where the sheets of drywall meet. Use a drywall knife to smooth it out.
- Once the initial coat of joint compound is applied, allow it to dry completely. This can take several hours, depending on the humidity and temperature of the room.
- After the first coat dries, sand the areas with a fine-grit sandpaper to smooth out any imperfections. Be careful not to sand too much and damage the drywall.
- Apply a second coat of joint compound, extending it slightly beyond the first coat to blend it in with the surrounding area.
- Allow the second coat to dry completely, and then sand it again with a fine-grit sandpaper to ensure a smooth finish.
- If necessary, apply a third coat of joint compound and repeat the drying and sanding process until the desired finish is achieved.
Once the final coat of joint compound is dry and sanded, you can proceed with priming and painting the walls to complete the installation process.

Remember to take your time during the finishing process to ensure a professional-looking result. It’s worth the extra effort to have smooth and flawless walls.
FAQ:
Is it possible to install drywall screws without using a drill?
Yes, it is possible to install drywall screws without using a drill. There are alternative methods that can be used to drive the screws into the drywall.
What are some alternative methods for installing drywall screws without a drill?
Some alternative methods for installing drywall screws without a drill include using a screwdriver, a drywall screw gun, or a power screwdriver.
What are the advantages of using a drill for installing drywall screws?
Using a drill for installing drywall screws can save time and effort, as it allows for quicker installation and is more efficient than using a manual tool.
Can I use a regular screwdriver to install drywall screws?
Yes, you can use a regular screwdriver to install drywall screws. However, it may take more time and effort compared to using a drill or a specialized drywall screw gun.
What is a drywall screw gun?
A drywall screw gun is a specialized power tool designed specifically for driving screws into drywall. It is lightweight and has a narrow nose, making it easier to reach tight spaces.
Can I use a power screwdriver instead of a drill for installing drywall screws?
Yes, you can use a power screwdriver instead of a drill for installing drywall screws. It is a convenient and efficient tool that can save time and effort in the installation process.
Are there any tips for installing drywall screws without a drill?
Some tips for installing drywall screws without a drill include using a screw holder, pre-drilling the holes for easier insertion, and using the right size and type of screws for the job.
Video:

How to screen record on huawei

Meet Harrison Clayton, a distinguished author and home remodeling enthusiast whose expertise in the realm of renovation is second to none. With a passion for transforming houses into inviting homes, Harrison's writing at https://thehuts-eastbourne.co.uk/ brings a breath of fresh inspiration to the world of home improvement. Whether you're looking to revamp a small corner of your abode or embark on a complete home transformation, Harrison's articles provide the essential expertise and creative flair to turn your visions into reality. So, dive into the captivating world of home remodeling with Harrison Clayton and unlock the full potential of your living space with every word he writes.


