Step-by-Step Guide to Drilling Anchors into Concrete

Drilling anchors into concrete can be a daunting task if you are not familiar with the process. However, with the right tools and techniques, it can be a relatively simple process that allows you to securely fasten objects to concrete surfaces. Whether you are hanging shelves, installing a TV mount, or securing a gate, drilling anchors into concrete is an essential skill that every DIYer should have.
The first step in drilling anchors into concrete is selecting the right anchors for your project. There are several types of anchors available, including concrete screws, expansion anchors, and drop-in anchors. Each type of anchor has its own unique features and is suited for different types of applications. It is important to choose anchors that are suitable for the weight and size of the object you are anchoring.
Once you have chosen the right anchors, the next step is to prepare the concrete surface for drilling. This involves cleaning the surface and checking for any cracks or voids that may affect the anchoring process. It is also important to mark the drilling location accurately to ensure precision.
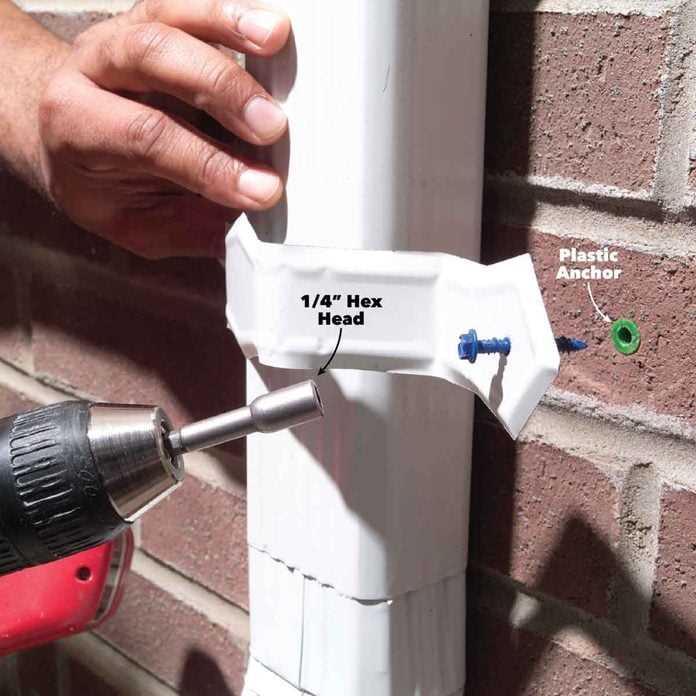
Now comes the actual drilling process. It is important to use the right drill bit for drilling into concrete. A masonry drill bit is specifically designed for drilling into concrete and will provide the best results. It is important to use a hammer drill or a drill with a hammer function to ensure the drill bit penetrates the concrete surface effectively. Remember to apply steady pressure and avoid exerting too much force, as this can damage the drill bit or the concrete surface.
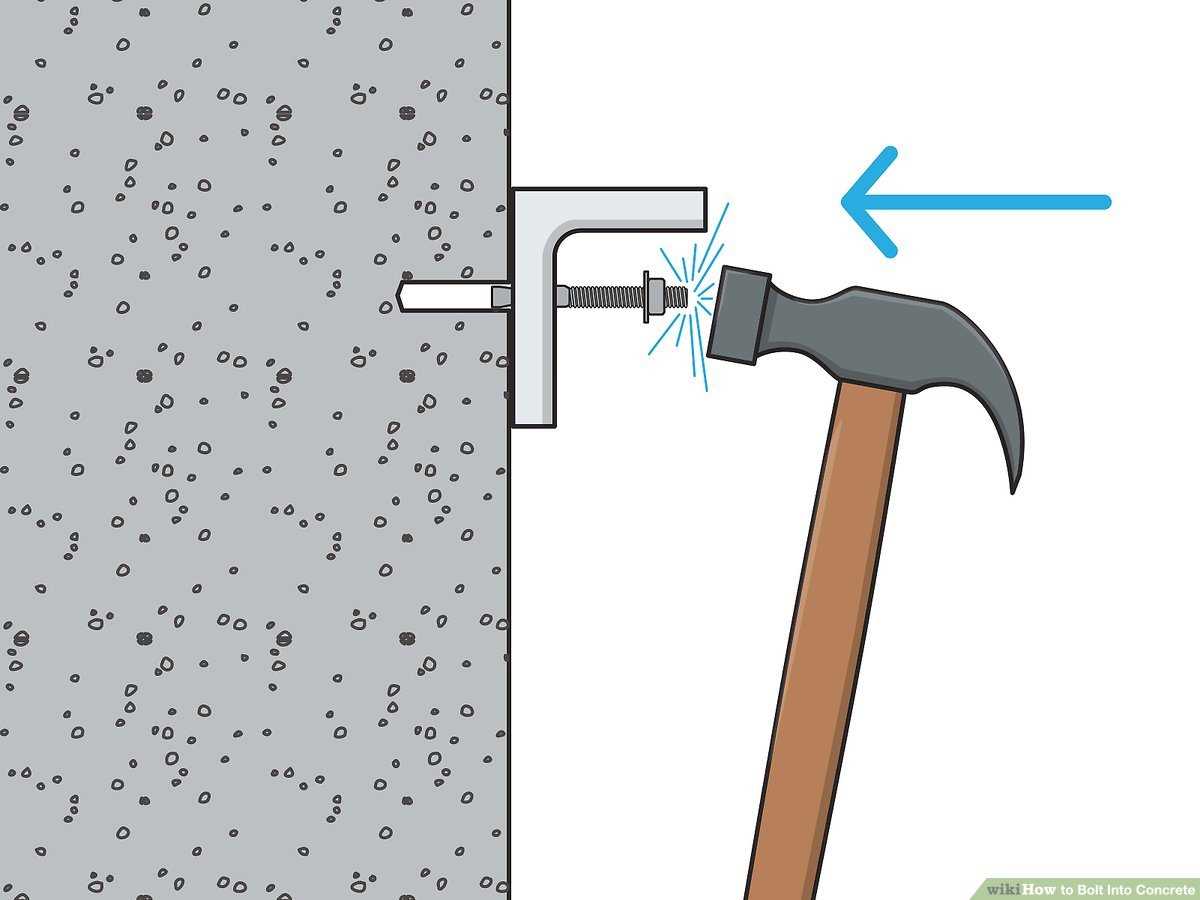
After drilling the hole, it is important to clean out any dust or debris from the hole. This can be done using a blowout bulb or compressed air. Once the hole is clean, insert the anchor into the hole and tap it gently with a hammer to ensure it is securely seated. Finally, tighten the anchor using a wrench or screwdriver, depending on the type of anchor used.

By following these step-by-step instructions, you can successfully drill anchors into concrete and enjoy the benefits of a secure and stable attachment for your objects. Remember to always follow safety precautions while working with power tools and wear appropriate protective gear. With practice and experience, you will become a pro at drilling anchors into concrete in no time!
What Are Anchors and Why Do You Need Them?
When it comes to drilling into concrete, anchors are an essential component. Anchors are devices that secure objects to concrete surfaces, providing stability and support. They are designed to distribute the weight and load evenly, preventing the object from pulling out or falling down. Anchors play a crucial role in ensuring the durability and safety of structures or fixtures attached to concrete.
Types of Anchors
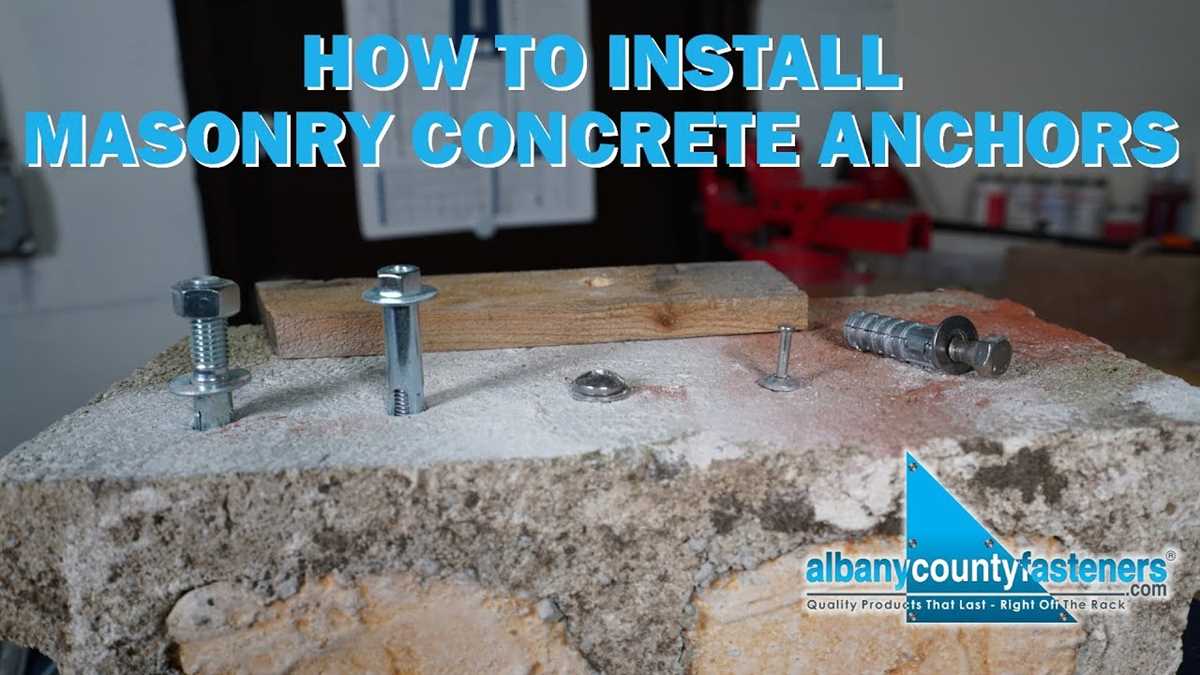
There are various types of anchors available, each designed for different purposes and load capacities. Some common types of anchors used in concrete include:
- Wedge Anchors: These anchors feature a threaded stud and expansion clip that expands and wedges against the concrete, providing secure attachment.
- Sleeve Anchors: Sleeve anchors consist of a threaded stud and a sleeve filled with grooves. When tightened, the sleeve expands against the concrete, creating a strong hold.
- Drop-in Anchors: Drop-in anchors are set into pre-drilled holes and require a setting tool to expand the anchor, providing a tight fit and reliable support.
- Toggle Bolts: Toggle bolts are anchors that use a toggle mechanism to provide a strong hold behind the concrete surface.
Why Do You Need Anchors?
Using anchors when drilling into concrete is essential for several reasons:
- Security: Anchors ensure that the object or fixture attached to the concrete remains securely in place, preventing accidents or damage.
- Strength: By distributing the load evenly, anchors enhance the strength and stability of the attachment, allowing it to handle heavier weights.
- Durability: Anchors play a crucial role in the long-term durability of the attachment. They prevent the object from becoming loose or detached over time.
- Flexibility: Anchors allow for flexibility in attaching different types of objects or fixtures to concrete, including shelves, cabinets, handrails, and more.
Overall, using anchors when drilling into concrete provides the necessary stability and support for a wide range of applications. It ensures that the attached objects remain secure and reduces the risk of accidents or damages.

The Importance of Properly Drilling Anchors
Properly drilling anchors into concrete is a crucial step in ensuring the stability and strength of any structure. Whether you are installing shelves, hanging artwork, or securing heavy machinery, using anchors and drilling them correctly is essential to prevent accidents and damage. In this guide, we will discuss the importance of properly drilling anchors and provide step-by-step instructions to help you do it correctly.
Maintaining Structural Integrity
One of the primary reasons to drill anchors properly is to maintain the structural integrity of the concrete. Anchors act as fasteners that hold objects in place, and their strength depends on how securely they are installed. By drilling holes accurately and at the right depth, you ensure that the anchors are positioned correctly and firmly embedded in the concrete. This helps distribute the load evenly and prevents any structural failure or collapse.
Preventing Accidents and Injuries
Using anchors that are not properly drilled can lead to accidents and injuries. If an anchor is not securely attached to the concrete, it may pull out under stress, causing objects to fall unexpectedly. This can be especially dangerous if heavy or sharp objects are involved. By drilling anchors properly, you ensure that they can support the intended load and minimize the risk of accidents and injuries.
Protecting the Anchored Objects
Properly drilling anchors helps protect the objects you are mounting or hanging. When anchors are installed correctly, they create a stable and secure connection between the object and the concrete wall or floor. This prevents any movement or shifting of the object, reducing the risk of damage. Whether you are anchoring shelves, cabinets, or machinery, drilling anchors properly ensures that they remain firmly in place, preserving the integrity of the objects and extending their lifespan.

Ensuring Longevity and Durability
In addition to providing immediate stability, properly installed anchors contribute to the longevity and durability of the structure. A secure and stable anchor connection helps distribute the load evenly, preventing stress concentrations in the concrete. This reduces the risk of cracks, fractures, and other structural damage over time. By drilling anchors accurately and following the correct procedures, you can ensure that the anchors will withstand the test of time and maintain their strength and integrity.
Properly drilling anchors into concrete is not only essential for the safety and stability of any structure, but it also helps protect the anchored objects and contributes to the longevity of the installation. By following the step-by-step instructions in this guide, you can ensure that your anchors are securely and correctly installed, providing a reliable and long-lasting solution for your needs.
Step 1: Gather the Necessary Tools
Before you begin drilling anchors into concrete, make sure you have all the necessary tools and equipment on hand. Here is a list of items you will need:

- Safety goggles: Protect your eyes from flying debris.
- Ear protection: Use earplugs or earmuffs to prevent damage from loud noise.
- Dust mask: Avoid inhaling concrete dust particles.
- Hammer drill: A hammer drill is essential for drilling into concrete. Make sure it has a carbide-tipped masonry bit.
- Anchors: Choose the appropriate anchors for your project. Common types include sleeve anchors, wedge anchors, and concrete screws.
- Tape measure: Measure and mark the spots where you will be drilling.
- Pencil or marker: Use a pencil or marker to mark the drill spots.
- Clamps (optional): If you are working with a large piece of material, clamps can help hold it in place while you drill.
- Screwdriver or wrench: Depending on the type of anchor you are using, you may need a screwdriver or wrench to tighten it.
- Vacuum: Clean up the concrete dust after drilling to maintain a clean work area.
- Protective gloves: Prevent any injuries to your hands while handling tools and equipment.
Choosing the Right Drill and Drill Bits
Choosing the right drill and drill bits is crucial for successfully drilling anchors into concrete. The type of drill and the drill bits you use will depend on the size and type of anchor you are using, as well as the hardness of the concrete.
Drill Types
There are two main types of drills that can be used for drilling anchors into concrete:
-
Hammer Drills: Hammer drills are specifically designed to drill into hard surfaces like concrete. They have a hammering action that helps to break through the tough concrete surface, making them well-suited for anchor installation. Hammer drills can be corded or cordless, so choose the one that best fits your needs and preferences.
-
Rotary Drills: Rotary drills are another option for drilling anchors into concrete. They use a rotary motion to drill into the material, but they do not have the hammering action of a hammer drill. Rotary drills can also be corded or cordless, and they are generally less expensive than hammer drills.
Drill Bits
When it comes to choosing drill bits for drilling anchors into concrete, there are a few key factors to consider:
- Size: Select drill bits that are the correct size for the anchor you are using. The size of the drill bit should match the diameter of the anchor to ensure a secure fit.
- Material: Look for drill bits that are specifically designed for drilling into concrete. These bits are usually made of carbide or cobalt, which are harder and more durable than standard drill bits.
- Length: The length of the drill bit should be sufficient to reach the desired depth for anchoring. Measure the thickness of the material you are drilling into and choose a drill bit that is at least 1 inch longer than that measurement.
- Flute Design: Consider the flute design of the drill bit. A spiral flute design is usually more effective for removing debris from the hole as you drill.
It is important to use sharp drill bits for drilling into concrete, as dull bits can cause excessive heat and wear on the tool.

| Anchor Size (Diameter) | Recommended Drill Bit Size |
|---|---|
| 1/4 inch | 3/16 inch |
| 3/8 inch | 5/16 inch |
| 1/2 inch | 3/8 inch |
| 5/8 inch | 1/2 inch |
| 3/4 inch | 5/8 inch |
By choosing the right drill and drill bits, you will ensure that your anchor installation is secure and long-lasting.
Other Tools You Will Need
In addition to the drill and anchor bit, there are a few other tools you will need to properly drill anchors into concrete:
- Safety goggles: It is important to protect your eyes from any debris or dust that may be created during the drilling process. Safety goggles will ensure that your eyes are shielded.
- Dust mask: Drilling into concrete can create a lot of dust. To protect your lungs from inhaling any particles, it is recommended to wear a dust mask.
- Gloves: Working with concrete can be rough on the hands. Wearing gloves will protect your hands from any sharp edges or rough surfaces.
- Tape measure: Before drilling, it is important to measure and mark the exact locations where the anchors will be installed. A tape measure will help ensure accuracy.
- Pencil or marker: To mark the spots where the anchors will be drilled, use a pencil or marker to make visible lines or dots on the concrete surface.
- Hammer: Sometimes, it may be necessary to lightly tap the anchor into place using a hammer. Make sure to have a hammer nearby, just in case.
- Vacuum or brush: After drilling the holes, there may be leftover debris or dust. A vacuum or brush can be used to clean out the holes before inserting the anchors.
- Power vacuum or blower: If there is a large amount of dust or debris, a power vacuum or blower can be used to fully clean the area before proceeding.
Having these additional tools on hand will ensure that you have everything you need to safely and effectively drill anchors into concrete.
Step 2: Mark the Location and Prepare the Surface
In order to ensure accurate placement of the anchors and to maximize their effectiveness, it is important to properly mark the location on the concrete surface and prepare it before drilling. This step will help to prevent any potential damage to the surrounding area and ensure a secure anchor installation.
Tools and Materials Needed
- Measuring tape or ruler
- Pencil or marker
- Cleaning brush or broom
- Dust mask
- Safety goggles
Instructions
- Measure and mark the desired location for the anchor on the concrete surface using a measuring tape or ruler and a pencil or marker.
- Double-check the markings to ensure the correct placement before proceeding.
- Clear the area of any debris, dirt, or loose particles using a cleaning brush or broom.
- Put on a dust mask and safety goggles to protect yourself from any potential dust or debris during the drilling process.
- Inspect the surface for any cracks or damage that may affect the anchor installation. If necessary, repair or patch any damaged areas before drilling.
- Ensure that the surface is clean and dry before proceeding to the next step.
Additional Tips
When marking the location on the concrete surface, consider the weight and load of the object that will be attached to the anchor. Make sure to space the anchors evenly and follow any specific guidelines or recommendations provided by the manufacturer.
| Troubleshooting | Solution |
|---|---|
| The surface is too dirty or greasy. | Use a degreaser or concrete cleaner to remove any dirt or grease before marking and preparing the surface. |
| The surface has a thick layer of paint. | Scrape off the paint or use a paint stripper to expose the concrete surface for marking and drilling. |
| The surface is uneven or sloped. | Level the surface or use a suitable anchor designed for uneven surfaces to ensure proper installation. |
Identifying the Ideal Anchor Placement
Before drilling anchors into concrete, it is crucial to determine the ideal placement for them. The location of the anchors will depend on the specific requirements of your project and the weight or load that will be supported. Here are some steps to help you identify the best anchor placement:
1. Assess the weight and load requirements:
Determine the weight or load that the anchors will need to support. This can include the weight of the object being attached to the anchors, as well as any additional forces that may be applied.
2. Consider the concrete’s strength:
Evaluate the strength of the concrete to ensure it can provide sufficient support for the anchors. Weaker or deteriorating concrete may require additional reinforcement or alternative anchor types.
3. Locate any existing anchors or obstructions:
Check if there are any existing anchors, structural elements, or obstructions in the concrete that could interfere with the placement of new anchors. Adjust your anchor placement accordingly to avoid these obstacles.
4. Determine the spacing:
Decide on the spacing between anchor points based on the weight or load requirements. The spacing will depend on the type and size of the anchors being used. Consult manufacturer guidelines or engineering recommendations for specific spacing requirements.
5. Mark the anchor locations:
Using a pencil or marker, mark the desired locations for the anchors on the concrete surface. Double-check your measurements and ensure that the marks are clearly visible.
6. Verify the placement:
Once you have marked the anchor locations, double-check that the positions align with your project requirements and any plans or drawings. Make adjustments as needed before proceeding with the drilling.
By following these steps, you can identify the ideal anchor placement for your concrete project. This will help ensure that the anchors provide secure and reliable support for your intended load or weight.
Cleaning and Preparing the Concrete Surface
Before drilling anchors into concrete, it is important to clean and prepare the surface to ensure proper adhesion and stability. Here are the steps to clean and prepare the concrete surface:
- Remove any loose debris and dirt from the concrete using a stiff brush or broom.
- Inspect the surface for any cracks or damage. If any cracks are found, they should be repaired before drilling anchors.
- If there are any oil or grease stains on the concrete, apply a degreaser and scrub the stains with a brush. Rinse the area thoroughly and allow it to dry completely.
- For heavily stained or discolored concrete, use a concrete cleaner or etcher to remove the stains. Follow the manufacturer’s instructions for application and rinse the area thoroughly.
- If there are any existing coatings or sealants on the concrete, they should be removed using a stripping solution or a mechanical method such as grinding.
- Once the surface is clean and free from any dirt, stains, or coatings, it should be allowed to dry completely before drilling anchors. This will ensure proper adhesion and prevent any moisture-related issues.
By properly cleaning and preparing the concrete surface, you can ensure that the anchors will be securely and safely installed, providing reliable support for your project.
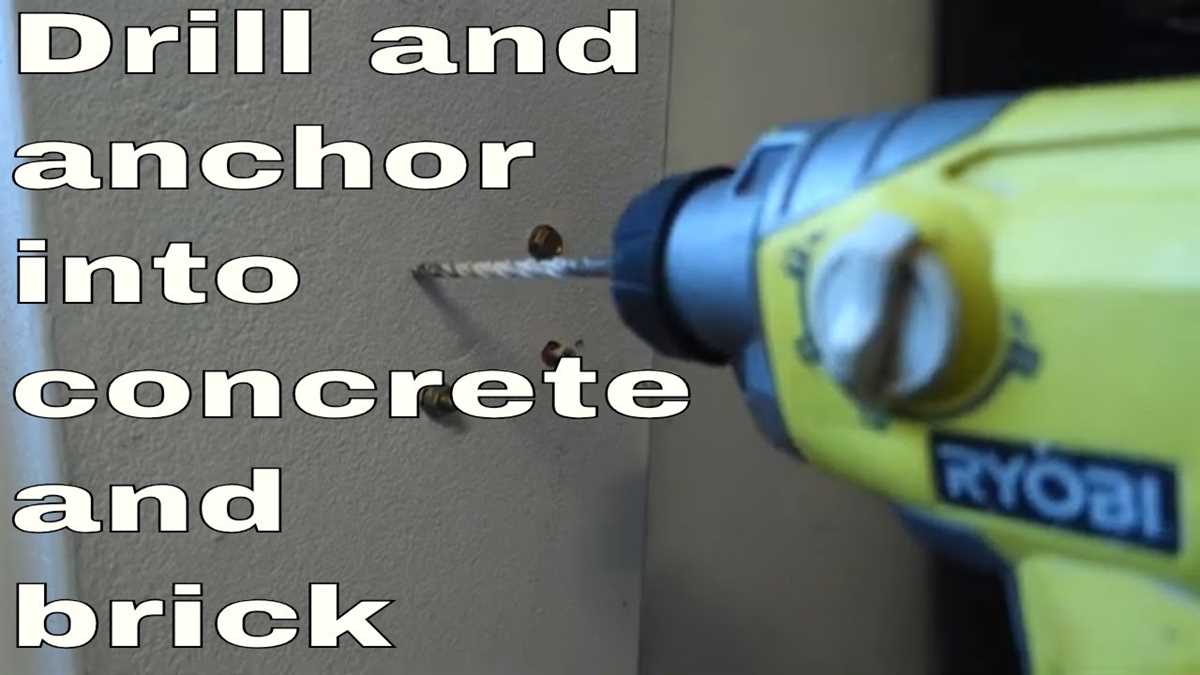
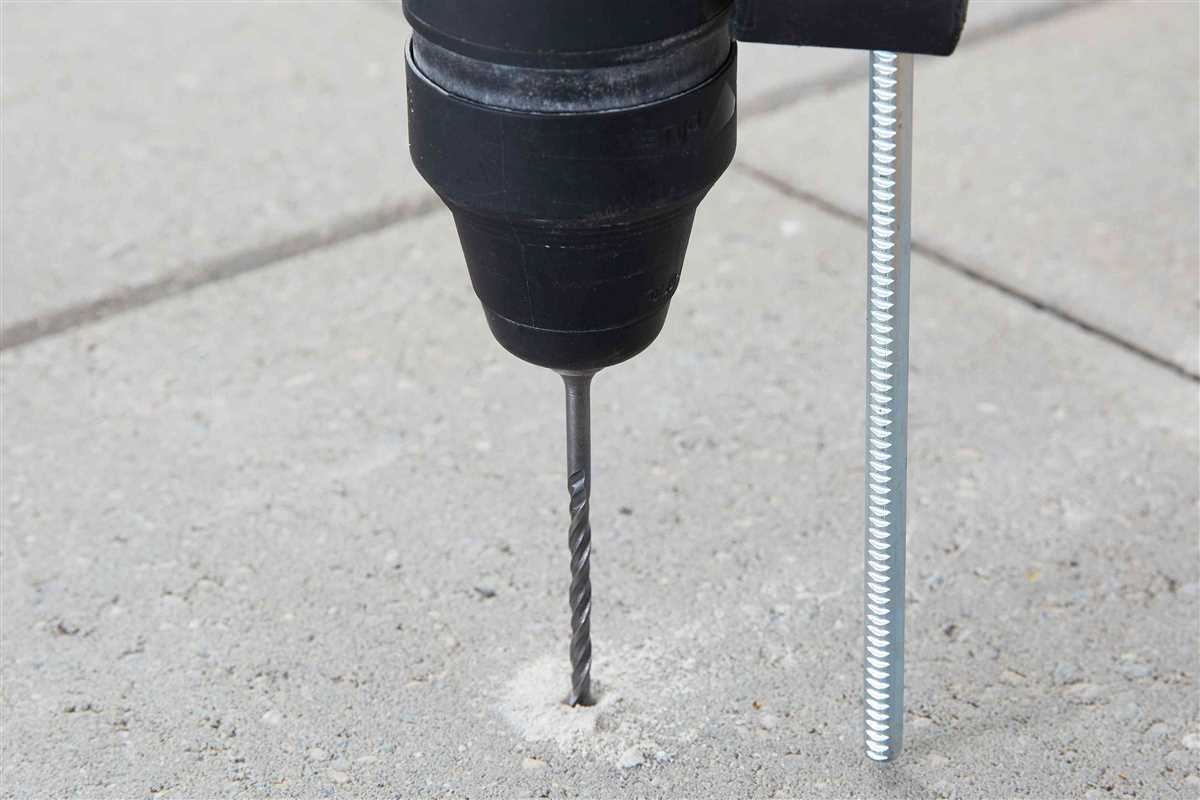
Step 3: Drill the Pilot Hole
Before drilling the anchor hole, it is important to determine the proper size of the hole for the anchor being used. This information can usually be found on the packaging or instructions provided with the anchor.
Once you have the correct size, gather the necessary drilling equipment. This typically includes a hammer drill, a masonry bit, safety goggles, and ear protection.
Follow these steps to drill the pilot hole:
- Put on your safety goggles and ear protection to protect yourself from flying debris and loud noise.
- Attach the correct size masonry bit to your hammer drill. Make sure it is securely fastened.
- Hold the drill perpendicular to the surface of the concrete, positioning the bit at the desired anchor location.
- Apply firm, steady pressure on the drill while slowly increasing the speed. Let the drill do the work and avoid forcing it.
- Drill into the concrete until the desired depth is reached. The depth should be slightly longer than the length of the anchor.
- Periodically pull the drill bit out of the hole to remove any dust or debris. This will help keep the hole clean.
Remember to take breaks and rest your drill if needed. Drilling into concrete can be a physically demanding task.
Once the pilot hole is drilled, you are ready to move on to the next step: inserting the anchor into the hole.
Selecting the Correct Drill Bit Size
Choosing the right drill bit size is crucial for successfully drilling anchors into concrete. Using the wrong size can result in a loose or poorly secured anchor, potentially causing safety hazards or damage to the structure.
The drill bit size you should use depends on the diameter of the anchor you are planning to install. The general rule of thumb is to select a drill bit that is slightly smaller than the diameter of the anchor. This ensures a tight fit and allows for proper anchoring.
Here are the steps to select the correct drill bit size:
- Check the anchor specifications: Refer to the manufacturer’s instructions or packaging to determine the exact diameter of the anchor.
- Choose the appropriate drill bit: Look for a drill bit that has a diameter slightly smaller than the anchor size. For example, if you have a 1/4 inch anchor, opt for a 3/16 inch drill bit.
- Consider the type of anchor: Depending on the type of anchor you are using (plastic, metal, or screw type), you may need a specific drill bit material, such as carbide or high-speed steel. Check the anchor specifications for any specific requirements.
- Use a depth gauge: To ensure proper drilling depth, use a depth gauge or a piece of tape on the drill bit to mark the desired depth. This will prevent over-drilling or insufficient drilling, both of which can affect the anchor’s performance.
It’s important to note that drilling into concrete can be challenging, as it is a tough and dense material. Therefore, using a hammer drill with the appropriate drill bit is recommended for concrete drilling. Regular drill bits may not be able to penetrate the concrete effectively.
Additionally, it’s always a good idea to test the selected drill bit on a small, inconspicuous area of the concrete to ensure it is the right size and can drill through the material smoothly.
FAQ:
What materials do I need for drilling anchors into concrete?
You will need a hammer drill, masonry drill bit, anchor screws, a hammer, safety goggles, and a dust mask.
Can I use a regular drill for drilling anchors into concrete?
No, a regular drill is not designed for drilling into concrete. You will need a hammer drill, which has a hammering action that helps break through the concrete.
How do I know what size of anchor screws to use?
The size of the anchor screws depends on the weight and size of the objects you are hanging. It is best to choose anchor screws that are rated for at least double the weight of the object.
What is the proper technique for drilling anchors into concrete?
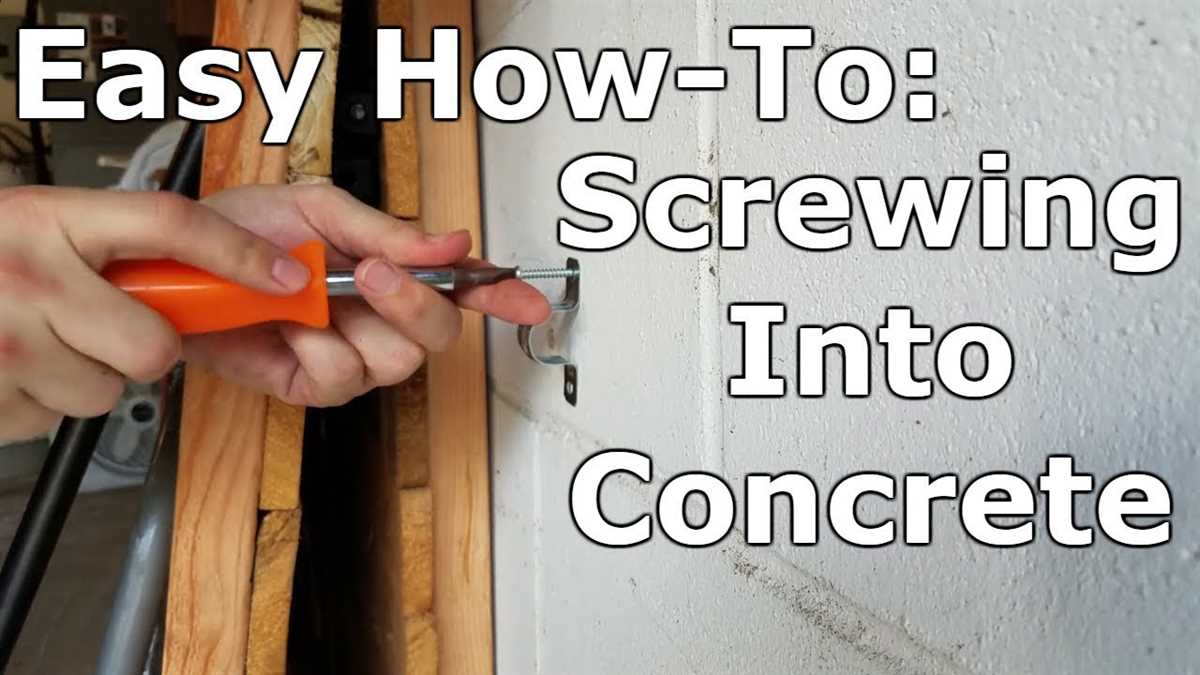
First, mark the location where you want to install the anchor. Then, put on your safety goggles and dust mask to protect yourself from flying debris. Next, attach the masonry drill bit to your hammer drill and position it perpendicular to the concrete surface. Start drilling slowly and apply steady pressure. Once you have drilled the hole to the desired depth, remove the drill bit and insert the anchor screw into the hole. Use a hammer to gently tap the screw into place.
What should I do if the drill bit gets stuck in the concrete?
If the drill bit gets stuck, do not force it or try to twist it out. This can damage the drill bit and the drill. Instead, gently reverse the drill to remove it from the hole. Then, clean off any debris from the drill bit and try to drill again, making sure to apply steady pressure.
Do I need to use a specific type of anchor screws for outdoor applications?
Yes, for outdoor applications, it is best to use anchor screws that are made of stainless steel or have a corrosion-resistant coating. This will help protect the screws from rust and other weather-related damage.
Can I drill anchors into concrete walls?
Yes, you can drill anchors into concrete walls. However, you may need to use longer anchor screws and a longer masonry drill bit to ensure that the anchors are securely fastened to the wall.
Video:


Meet Harrison Clayton, a distinguished author and home remodeling enthusiast whose expertise in the realm of renovation is second to none. With a passion for transforming houses into inviting homes, Harrison's writing at https://thehuts-eastbourne.co.uk/ brings a breath of fresh inspiration to the world of home improvement. Whether you're looking to revamp a small corner of your abode or embark on a complete home transformation, Harrison's articles provide the essential expertise and creative flair to turn your visions into reality. So, dive into the captivating world of home remodeling with Harrison Clayton and unlock the full potential of your living space with every word he writes.


