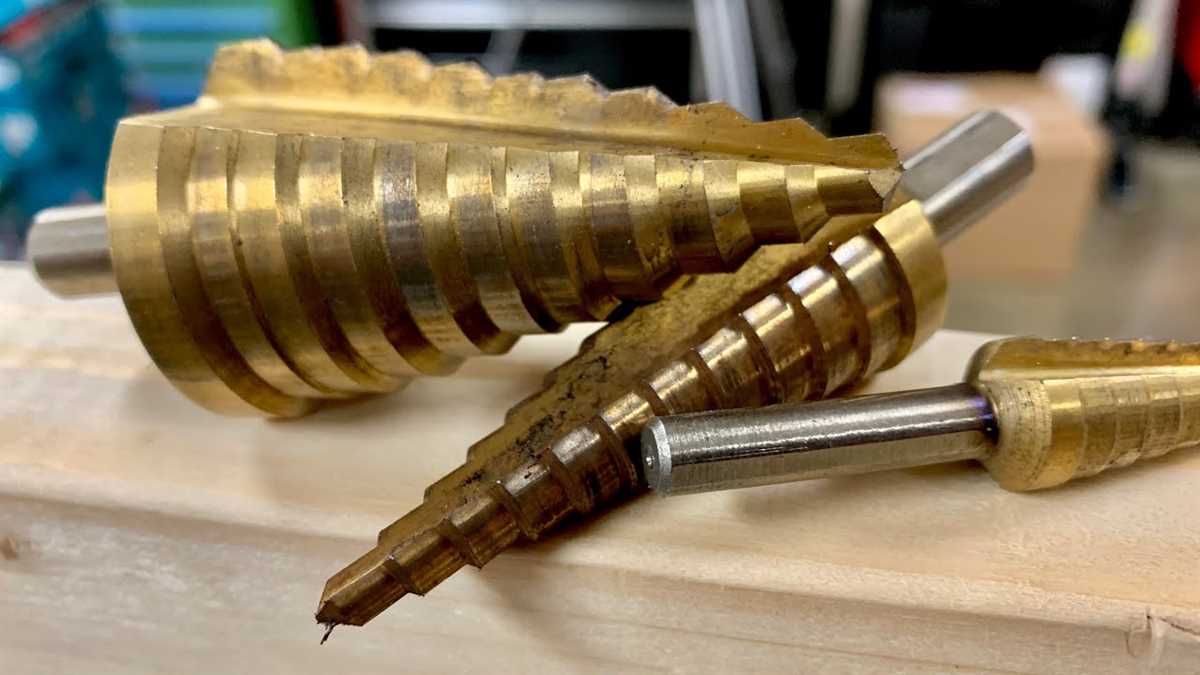
Step-by-Step Guide on Using a Step Drill Bit

When it comes to drilling holes in various materials such as metal, wood, or plastic, a step drill bit can be a handy tool to have in your arsenal. This specialized drill bit is designed to create different size holes without the need for multiple bits.
Using a step drill bit may seem daunting at first, but with the right steps and precautions, anyone can achieve precise and clean holes. In this step-by-step guide, we will walk you through the process of using a step drill bit effectively and safely.
Step 1: Selecting the Right Step Drill Bit
Before you start drilling, it is important to choose the right step drill bit for your specific application. Step drill bits come in various sizes and shapes, so selecting the correct one will ensure optimal results. Consider the material you are drilling into and the desired hole size when choosing a step drill bit.
Pro Tip: Make sure the shank of the step drill bit is compatible with your drill, as different drills may require specific shank sizes.

Step 2: Marking the Hole
Once you have selected the appropriate step drill bit, it’s time to mark the location where you want to drill the hole. Use a pencil or a marker to make an accurate mark on the surface, ensuring that it is clearly visible.
The Benefits of Using a Step Drill Bit
A step drill bit is a versatile tool that offers several benefits when it comes to drilling holes in various materials. Whether you are a professional or a DIY enthusiast, using a step drill bit can make your work easier and provide clean and precise holes.
1. Multiple Hole Sizes
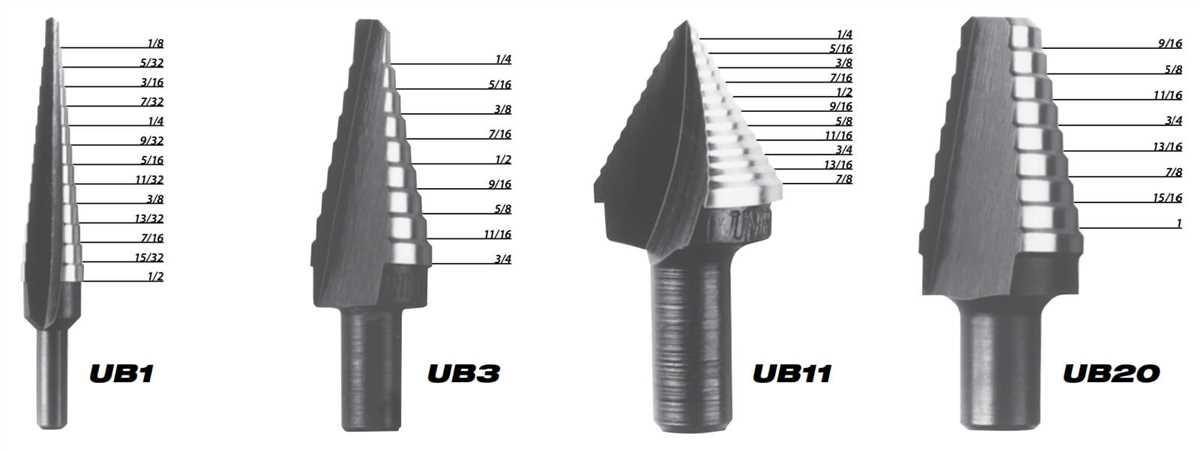
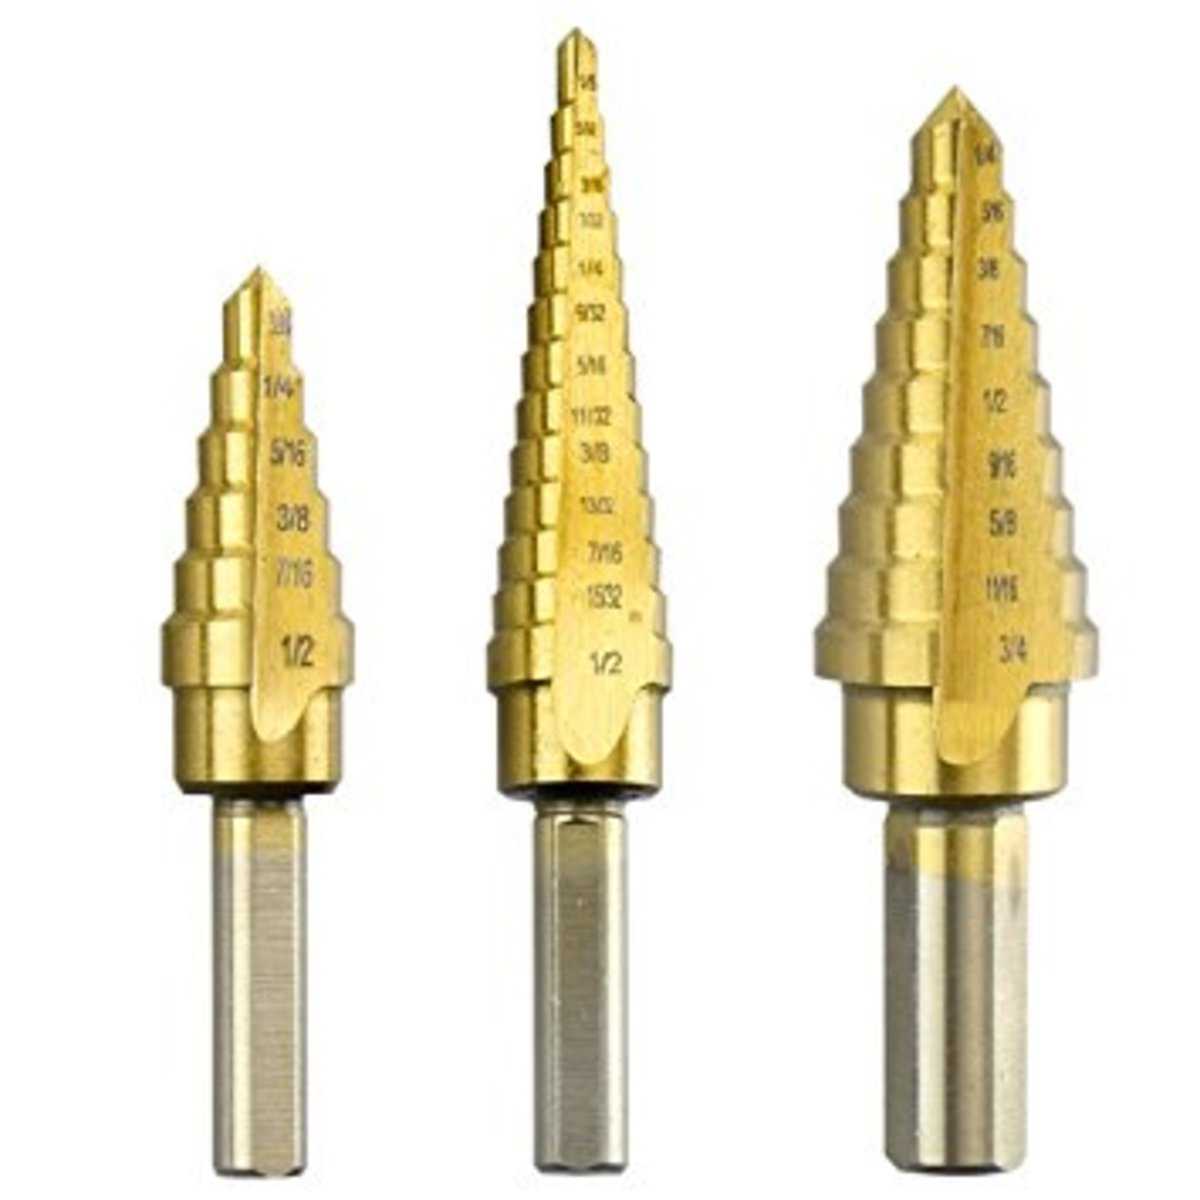
One of the main advantages of a step drill bit is its ability to create multiple hole sizes with a single tool. The design of the bit features several stepped levels, each with a different diameter. This means you can start with a small hole and gradually enlarge it to the desired size without the need for multiple drill bits. It saves both time and effort, making it an ideal tool for projects that require different hole sizes.
2. Reduced Friction and Heat
Step drill bits are designed to reduce friction and heat generated during the drilling process. The flutes on the bit act as channels to remove debris and prevent overheating. This feature is particularly beneficial when working with materials such as metal, as it helps to prevent damage and extend the life of the bit. Additionally, the reduced friction results in smoother and cleaner holes.
3. Versatility
Step drill bits are highly versatile and can be used on various materials, including metal, wood, plastic, and composites. This versatility makes them a valuable tool for professionals in industries such as construction, plumbing, and electrical work. Whether you need to drill holes in sheet metal, PVC pipes, or wooden boards, a step drill bit can handle the job.
4. Precise and Accurate Holes
Using a step drill bit allows you to achieve precise and accurate holes. The stepped design provides incremental size increases, ensuring that the hole is drilled to the desired size without any guesswork. This accuracy is essential, especially when working on projects that require precise measurements, such as installing hardware or creating holes for wiring.

5. Ease of Use
Step drill bits are easy to use, even for beginners. Unlike traditional drill bits that require changing between different sizes, a step drill bit eliminates the need for constant bit swapping. Simply place the bit in your drill, apply steady pressure, and let the tool do the work. The gradual steps make it easy to control the drilling speed and depth, resulting in a smoother drilling experience.
Conclusion
A step drill bit offers several benefits that make it a valuable tool in any toolbox. From multiple hole sizes to reduced friction and precise drilling, using a step drill bit can save time, effort, and provide professional results. Whether you are a professional tradesperson or a DIY enthusiast, owning a step drill bit is a worthwhile investment.
Choosing the Right Step Drill Bit for Your Project
When it comes to using a step drill bit, one of the most important factors to consider is choosing the right one for your project. There are several factors you should keep in mind when selecting a step drill bit, including:
1. Material
The material you will be drilling into is an essential factor to consider when choosing a step drill bit. Different materials require different types of step drill bits. For example, if you are working with metal, you will need a step drill bit designed specifically for metal drilling. On the other hand, if you are drilling into wood or plastic, a general-purpose step drill bit should suffice.
2. Size Range
Step drill bits come in various size ranges, and it’s crucial to choose one that matches your project’s requirements. Consider the maximum and minimum hole sizes you need to achieve and check the available size range of the step drill bit you are considering. Ensure that the step drill bit offers the size increments you need for your project.

3. Shank Size
The shank size of the step drill bit is another factor to consider. The shank is the part of the bit that attaches to the drill. Different drills have different chuck sizes, so make sure the shank size of the step drill bit is compatible with your drill’s chuck. It’s also essential to ensure that the shank is sturdy enough to withstand the torque and vibrations during drilling.
4. Coating
Step drill bits often come with coatings that help increase the life of the bit and improve performance. Common coatings include titanium nitride (TiN), black oxide, and cobalt. These coatings reduce friction and heat build-up, making drilling smoother and faster. Consider the type of coating that would work best for your project based on the material you are drilling and the expected working conditions.
5. Budget
Lastly, consider your budget when choosing a step drill bit. While it’s important to invest in a high-quality bit, especially for more demanding projects, there are various options available at different price points. Evaluate your needs and choose a step drill bit that offers the right balance of quality and price for your project.
By considering these factors, you can choose the right step drill bit that will enable you to achieve precise and efficient drilling results in your project. Remember to always follow the manufacturer’s guidelines and take the necessary safety precautions when using a step drill bit.

Gathering the Necessary Tools and Materials
Before you begin using a step drill bit, it’s important to gather all the necessary tools and materials. Having everything prepared will make the process smoother and more efficient. Here are the items you’ll need:
Tools
- Step drill bit: This is the main tool you’ll be using to make the holes. Make sure you have the correct size for your project.
- Drill: You’ll need a drill to power the step drill bit. Make sure it is fully charged or you have a spare battery.
- Clamps: Clamps will help secure the material you’re working on, preventing it from moving while you drill.
- Safety glasses: Always wear safety glasses to protect your eyes from any flying debris.
- Work gloves: Gloves will provide added protection and grip while handling the tools.
- Deburring tool: This tool will help remove any sharp edges or burrs left behind after drilling.
Materials
- Workpiece: This is the material on which you’ll be drilling. It can be wood, metal, or plastic.
- Marker or pencil: Use a marker or pencil to mark the spots where you’ll be drilling the holes.
- Safety goggles: Protect your eyes from any dust or debris that may be created during the drilling process.
- Deburring tool: This tool will help remove any sharp edges or burrs left behind after drilling.
Make sure you have all these tools and materials gathered before you start using a step drill bit. This will help ensure a successful drilling process and minimize any potential issues or delays.
Preparing the Work Surface
Before you begin using a step drill bit, it is important to properly prepare the work surface in order to ensure a successful and safe drilling experience. Follow these steps to prepare your work surface:
- Clean the Surface: Clear the work surface of any debris, dust, or other materials that may interfere with the drilling process. Use a brush or vacuum to remove any loose particles.
- Secure the Workpiece: Attach or clamp the workpiece securely in place to prevent it from moving or shifting during the drilling process. This will help prevent accidents and ensure accurate drilling.
- Measure and Mark: Use a tape measure, ruler, or other measuring tool to determine the exact location where you want to place the drilled hole. Mark the spot with a pencil to provide a guide for drilling.
- Provide Support: If you are drilling into a thin or delicate surface, it is recommended to provide support. This can be done by placing a piece of scrap wood or a backing plate under the workpiece to prevent it from splintering or cracking.
By properly preparing the work surface, you can ensure that your drilling project goes smoothly and successfully. Taking the time to clean, secure, measure, and provide support will lead to a more accurate and efficient drilling experience.

Marking the Drill Points
Before you start drilling with a step drill bit, it’s important to accurately mark the drill points on your material. This will help ensure that you drill in the right locations and prevent any unnecessary mistakes. Here’s a step-by-step guide on how to mark the drill points:
- Measure and mark: Use a measuring tape or ruler to determine the exact locations where you want to drill. Make sure to double-check your measurements to ensure accuracy.
- Use a center punch: Once you have marked the drill points, use a center punch to create a small indentation at each point. This will help guide the drill bit and prevent it from slipping as you start drilling.
- Align the drill points: If you need to drill multiple holes, use a straightedge or a square to ensure that all the drill points are aligned in a straight line. This is especially important when drilling holes for mounting or attaching hardware.
- Apply masking tape: If you are drilling on a surface that could get scratched or damaged, apply a piece of masking tape over the area where you plan to drill. This will help protect the surface and make it easier to mark the drill points.
- Double-check: Before you start drilling, double-check that all the drill points are correctly marked and aligned. This will help reduce the risk of any errors and ensure that you achieve the desired results.
By taking the time to properly mark the drill points, you’ll have a much easier time drilling with a step drill bit and achieve cleaner and more accurate results.
Using the Step Drill Bit Properly
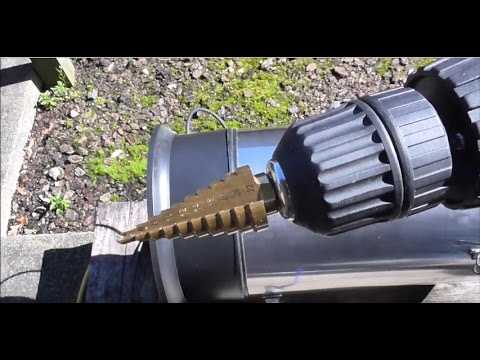
When it comes to drilling holes in various materials, a step drill bit can be a valuable tool. This type of drill bit is known for its ability to create multiple hole sizes without the need to change bits. However, using a step drill bit properly is essential to achieve accurate and clean results. Follow these steps to ensure you are using the step drill bit correctly:
- Select the Right Speed and Drill: Before starting, make sure you are using the appropriate speed and drill for your project. Step drill bits are usually used with a drill press or power drill. Choose a drill press if you need more precision.
- Secure the Material: It is crucial to secure the material you are drilling. Clamp it down firmly to prevent it from moving or vibrating during the drilling process. This will ensure accurate and clean holes.
- Mark the Hole Locations: Use a pencil or marker to mark the locations where you want to drill the holes. This will help guide you and ensure accurate placement.
- Start with a Smaller Hole: Begin drilling with the smallest step on the drill bit. Apply steady and even pressure as you drill. Take your time and let the drill bit do the work. Avoid applying excessive force, as this can cause damage or breakage.
- Step Up to Larger Holes: Once you have drilled the smaller hole, move on to the next step on the drill bit to create a larger hole. Repeat this process with each step until you reach the desired hole size.
- Clear Debris: After drilling each hole, use a brush or compressed air to remove any debris from the hole and the surrounding area. This will help prevent the drill bit from getting clogged or overheated.
- Use Coolant if Necessary: If you are drilling through metal or other hard materials, consider using a coolant to lubricate the drill bit and extend its lifespan. Check the manufacturer’s instructions on whether a coolant is required.
- Inspect the Holes: Once you have completed drilling, inspect the holes for any irregularities or burrs. If necessary, use sandpaper or a deburring tool to smooth out the edges.
By following these steps, you can ensure that you are using the step drill bit properly and achieve accurate and clean results in your drilling projects.

Tips and Tricks for Clean and Accurate Drilling
1. Choose the Right Drill Bit
Using the correct drill bit is crucial for clean and accurate drilling. Make sure to select a bit that is suitable for the material you are drilling into. For example, use a wood bit for drilling into wood, a masonry bit for drilling into concrete, and a metal bit for drilling into metal.
2. Start with a Pilot Hole
When drilling into hard materials or when using a large drill bit, it is a good idea to start with a pilot hole. A pilot hole is a smaller hole that serves as a guide for the larger drill bit. It helps to prevent the drill bit from wandering and ensures a cleaner and more accurate drilling result.
3. Use Proper Technique
Using the right drilling technique can make a big difference in the outcome. Apply steady and consistent pressure while drilling, but avoid pushing too hard. Let the drill bit do the work and allow it to penetrate the material gradually. This will help prevent any cracking or splintering of the material.
4. Mark the Drill Depth
To ensure clean and accurate drilling, it is helpful to mark the desired drill depth on the drill bit using a piece of tape or a marker. This will help you control the depth of the hole and avoid drilling too deep.
5. Keep the Drill Bit Sharp
A sharp drill bit will provide cleaner and more accurate holes. If you notice that the drill bit is becoming dull, take the time to sharpen it or replace it. Dull bits can cause the material to splinter or crack, resulting in an uneven and messy hole.

6. Use Clamps or a Vice
If you are drilling into a workpiece that is difficult to hold steady, such as a small piece of wood or metal, consider using clamps or a vice to secure it. This will help prevent the workpiece from moving or vibrating during drilling, resulting in a cleaner and more accurate hole.
7. Clear Debris During Drilling
As you drill, periodically stop and clear any debris that may accumulate in the hole. This will help prevent the drill bit from getting clogged and ensure a smoother drilling process. You can use a brush or compressed air to remove the debris.
8. Practice on Scrap Material
If you are new to using a step drill bit or want to improve your drilling skills, it can be helpful to practice on scrap material before working on your actual project. This will give you a chance to get familiar with the drill bit and refine your drilling technique.
9. Take Breaks and Let the Bit Cool
When drilling for long periods or into hard materials, it is important to take breaks and let the drill bit cool down. This will help prevent overheating and prolong the life of the drill bit. Simply stop drilling and allow the bit to cool naturally before resuming.
10. Use a Backing Board
If you are drilling through a workpiece and do not want the material to splinter when the drill bit exits, place a scrap piece of wood or a backing board underneath the workpiece. This will provide support and prevent the material from splintering or chipping.
By following these tips and tricks, you can achieve cleaner and more accurate drilling results with a step drill bit. Remember to always prioritize safety and wear appropriate protective gear when using power tools.
Ensuring Safety While Using a Step Drill Bit
- Wear safety glasses or goggles to protect your eyes from any flying debris that may occur during the drilling process.
- Ensure that the work area is clear of any clutter or obstacles that may cause tripping or other accidents.
- Always hold the drill firmly with both hands to maintain control and stability.
- Position yourself in a comfortable stance with your feet shoulder-width apart for better balance.
- Avoid wearing loose clothing or jewelry that may get caught in the drill bit.
- Before drilling, make sure the drill bit is securely attached to the drill chuck.
- Check the drill bit for any damage or wear before use. Replace if necessary.
- Ensure that the material you are drilling is securely clamped or stabilized to prevent slipping or movement.
- Start drilling at a low speed and gradually increase the speed as necessary.
- Apply steady and even pressure while drilling, but avoid pushing too hard as it may cause the drill bit to break or damage the material.
- If the drill bit gets dull or overheats, stop drilling and allow it to cool down before continuing.
- After drilling, remove the drill bit from the material and turn off the drill before setting it down.
- Store the step drill bit in a safe place away from children or pets.
By following these safety guidelines, you can ensure a safe and successful drilling experience when using a step drill bit.
Finishing Up and Cleaning the Work Area
After you have finished using the step drill bit, there are a few steps you should take to complete the process and clean up the work area:
- Inspect the hole: Carefully examine the hole you have drilled to ensure that it is smooth and free of any burrs or rough edges. Use a file or sandpaper to smooth out any imperfections if necessary.
- Remove any debris: Use a brush or vacuum to clean up any metal shavings or debris that may be left behind from drilling. This will help prevent injuries or damage to other tools or surfaces.
- Dispose of waste material: Properly dispose of any waste material, such as scraps of metal or plastic, in accordance with local regulations. This may involve placing it in a designated recycling bin or taking it to a recycling facility.
- Organize your tools: Put away your step drill bit and any other tools you used during the drilling process. This will help prevent accidents and keep your work area neat and tidy.
- Clean up the work area: Sweep or wipe down your work area to remove any dirt, dust, or debris that may have accumulated during the drilling process. This will help maintain a clean and safe work environment.
Remember to always follow proper safety precautions and wear appropriate personal protective equipment when using a step drill bit or any other power tool.
FAQ:
What is a step drill bit used for?
A step drill bit is used for drilling holes of different sizes in materials like metal, plastic, and wood. It eliminates the need for multiple drill bits by allowing you to create holes of varying diameters with just one bit.
How does a step drill bit work?
A step drill bit works by gradually increasing the diameter of the hole as you drill. The bit has multiple steps with varying diameters, allowing you to create holes of different sizes by simply drilling deeper.
What materials can I use a step drill bit on?
You can use a step drill bit on materials like metal, plastic, wood, and even thin sheet metal. It is versatile and can be used for various applications, including plumbing, electrical work, and general DIY projects.
Can I use a step drill bit with a regular drill?
Yes, you can use a step drill bit with a regular drill. Just make sure the drill is set to the appropriate speed for the material you’re working with and apply steady pressure while drilling.
Are there any safety precautions I should take when using a step drill bit?
Yes, there are a few safety precautions you should take when using a step drill bit. Wear safety glasses to protect your eyes from flying debris, use clamps or a vise to secure the material you’re drilling, and avoid applying excessive force or putting your fingers near the drill bit while it’s spinning.
Do I need to use lubricant when using a step drill bit?
It depends on the material you’re drilling. For metal, it’s recommended to use a lubricant like cutting oil to reduce friction and heat buildup. However, for other materials like plastic or wood, lubricant may not be necessary.
Can I sharpen a dull step drill bit?
Yes, you can sharpen a dull step drill bit. You can use a bench grinder or a sharpening stone to carefully remove any dull or damaged edges. Just make sure to follow the manufacturer’s instructions and take proper safety precautions when sharpening the bit.
Video:


Meet Harrison Clayton, a distinguished author and home remodeling enthusiast whose expertise in the realm of renovation is second to none. With a passion for transforming houses into inviting homes, Harrison's writing at https://thehuts-eastbourne.co.uk/ brings a breath of fresh inspiration to the world of home improvement. Whether you're looking to revamp a small corner of your abode or embark on a complete home transformation, Harrison's articles provide the essential expertise and creative flair to turn your visions into reality. So, dive into the captivating world of home remodeling with Harrison Clayton and unlock the full potential of your living space with every word he writes.


