Step-by-Step Guide on How to Drill through Vinyl Siding

Drilling through vinyl siding may seem like a daunting task, but with the right tools and techniques, it can be a straightforward process. Whether you need to install a new electrical outlet, hang decorations, or mount a security camera, drilling through vinyl siding can be necessary. In this step-by-step guide, we will walk you through the process of drilling through vinyl siding to ensure a successful and professional-looking result.
Step 1: Gather the necessary tools and materials. Before you begin, make sure you have all the tools and materials you will need. These may include a drill with a proper drill bit, a ladder or step stool, a pencil or marker for marking the hole, safety glasses, and gloves. Make sure your drill bit is appropriate for drilling through vinyl siding, as using the wrong type can damage the material.
Step 2: Choose the location for the hole. Carefully consider where you need to drill the hole in the vinyl siding. It should be in a location where it is easily accessible and won’t interfere with any existing structures or wiring. Use a pencil or marker to mark the spot where you will be drilling.
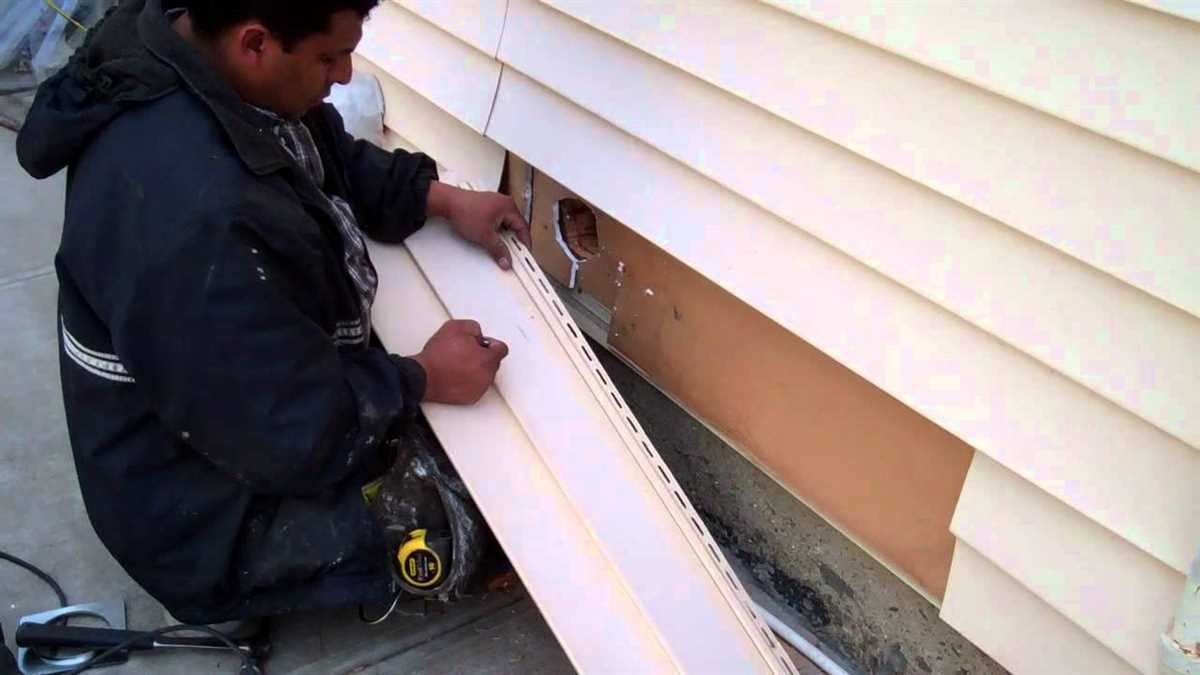
Step 3: Prepare the vinyl siding. Before drilling, it is important to prepare the vinyl siding to minimize any damage. Use a hairdryer or heat gun to warm up the area around the marked spot. This will make the vinyl siding more pliable and less likely to crack or break during drilling. You can also use a block of wood behind the siding to provide support and prevent any damage to the underlying structure.
Step 4: Drill the hole. With the vinyl siding prepared, it is time to drill the hole. Start by selecting the appropriate size drill bit for the job. It is generally recommended to use a bit that is slightly larger than the screw or anchor you will be using. Make sure your drill is set to a low speed and apply gentle pressure as you drill into the vinyl siding. Take care to avoid drilling too deep, as this can damage the underlying structure.

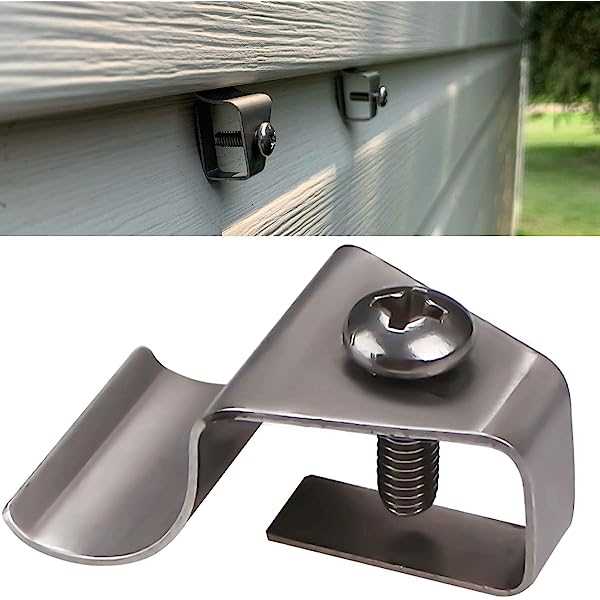
Step 5: Secure the object. Once you have drilled the hole, you can now secure the object you wish to mount or install. This may involve inserting a screw or anchor into the hole and using a screwdriver or other tool to fasten it securely. Make sure to follow the manufacturer’s instructions for properly securing the object to the vinyl siding.
Step 6: Inspect the work. After securing the object, take a step back and inspect your work. Ensure that everything is properly aligned and securely fastened. If necessary, make any adjustments or tighten any screws to ensure a professional-looking result.
By following these step-by-step instructions, you can successfully drill through vinyl siding without causing damage and achieve a clean and professional installation. Remember to always prioritize safety by wearing gloves and safety glasses, and take your time to ensure a precise and accurate result.
Gather the Necessary Tools
Before you begin drilling through your vinyl siding, it’s important to gather all the necessary tools to ensure a smooth and efficient process. Here is a list of tools you will need:
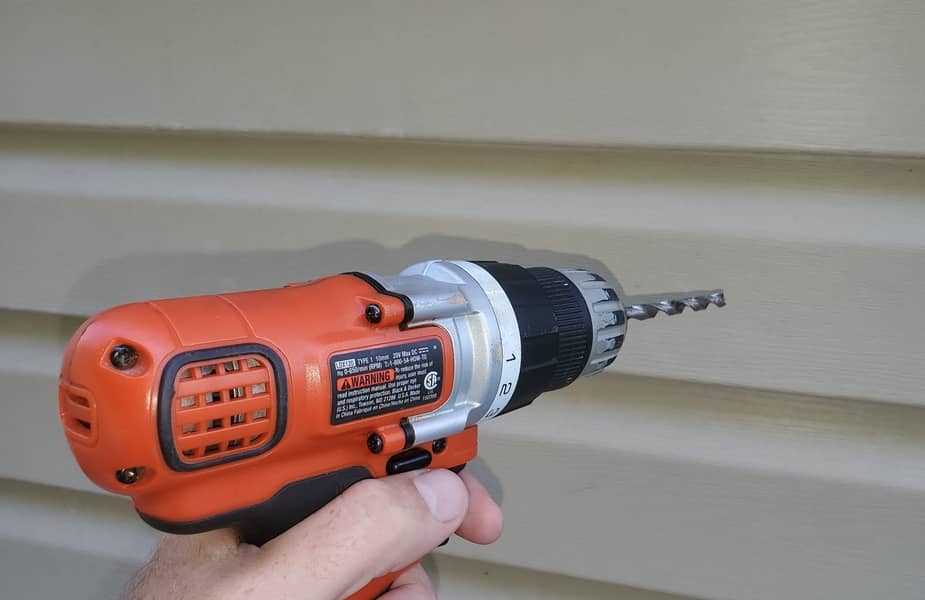
- Drill: You will need a power drill with a drill bit suitable for drilling through vinyl. A drill with adjustable speed settings is recommended for more control.
- Drill bit: Use a drill bit specifically designed for drilling through vinyl siding. It should be sharp and in good condition to ensure clean and precise holes.
- Marker or pencil: Use a marker or pencil to mark the exact location where you want to drill the hole. This will help guide your drilling and ensure accuracy.
- Protective goggles: Safety should always be a priority when using power tools. Wear protective goggles to protect your eyes from any flying debris or particles that may be released while drilling.
- Gloves: Gloves can provide extra grip and protect your hands while handling the drill. They can also help protect your hands from any sharp edges or burrs on the siding.
- Ladder or scaffolding: Depending on the height at which you need to drill, you may need a ladder or scaffolding to ensure you can reach the desired location safely.
- Tape measure: Use a tape measure to measure and mark the exact distance and location where you want to drill the hole. This will help ensure accuracy and precision.
- Dustpan and broom: Keep a dustpan and broom handy to clean up any debris or dust that may be created during the drilling process. This will help keep your work area clean and organized.
Having all these tools ready before you start drilling will save you time and make the process much easier. It’s important to take the necessary precautions and use the appropriate tools for the task to ensure successful drilling through vinyl siding.

Choose the Right Drill Bit
When drilling through vinyl siding, it’s important to choose the right drill bit that is suitable for the material. Using the wrong drill bit can result in damaging the siding or not being able to drill through it at all. Here are some factors to consider when selecting a drill bit for drilling through vinyl siding:
- Material: Choose a drill bit that is specifically designed for drilling through vinyl siding. These drill bits are typically made of carbide or high-speed steel, which are both durable and can easily cut through vinyl.
- Size: The size of the drill bit will depend on the size of the hole you need to drill. Measure the diameter of the screw or anchor you will be using and choose a drill bit that is slightly larger.
- Type: There are different types of drill bits available for different drilling purposes. For drilling through vinyl siding, a twist drill bit or a brad point drill bit can work well. These drill bits have sharp points and are designed to cut through materials with precision.
- Coating: Some drill bits come with a coating that helps reduce friction and heat during drilling. Look for drill bits with a coating like titanium or black oxide, as these can enhance the performance and lifespan of the drill bit.
- Brand: It’s recommended to choose a drill bit from a reputable brand that specializes in manufacturing drill bits. Quality drill bits are more likely to provide better results and last longer.
By choosing the right drill bit for drilling through vinyl siding, you’ll ensure a clean and precise hole without damaging the material. Remember to always wear safety goggles and work slowly and carefully when drilling through siding to minimize any potential risks or accidents.
Mark the Spot for Drilling
Before you start drilling into your vinyl siding, it’s important to mark the spot where you want to make the hole. This will help ensure accuracy and prevent any accidental damage. Follow these steps to mark the spot for drilling:
- Choose the location: Decide where you want to drill the hole in your vinyl siding. This will depend on the purpose of the hole, such as installing a light fixture or hanging a decoration.
- Measure and mark: Use a measuring tape or ruler to determine the precise location for the hole. Mark this spot with a pencil or marker. Make sure to mark both the horizontal and vertical position.
- Consider the surroundings: Take a moment to assess the area around the marked spot. Check for any obstructions, such as electrical wires or plumbing pipes, that could be damaged by drilling. Adjust the location if necessary.
- Double-check: Once you have marked the spot, double-check your measurements to ensure accuracy. It’s better to be sure before drilling into your vinyl siding.
By taking the time to mark the spot accurately, you can proceed with confidence knowing that your hole will be drilled in the right place. This step is crucial for a successful drilling process and will help you avoid any unnecessary damage to your vinyl siding.

Put on Safety Gear
Before you start drilling through vinyl siding, it is important to put on the proper safety gear to protect yourself from any potential hazards. Here are the essential safety gear you should wear:
- Safety glasses: Protect your eyes from debris and flying particles.
- Gloves: Keep your hands safe from sharp edges or potential injuries.
- Dust mask: Prevent inhalation of dust or particles.
- Ear protection: Reduce noise level and protect your hearing.
- Work boots: Provide stability and protect your feet from any falling objects.
Ensure that your safety gear fits properly and is in good condition. Always prioritize your safety when working with power tools and equipment.
Drill a Pilot Hole
Before drilling directly into the vinyl siding, it is important to first create a pilot hole. This small hole will serve as a guide and help ensure accurate drilling without damaging the siding. Here’s how to drill a pilot hole:

- Choose a suitable drill bit: Select a drill bit that is appropriate for the material you will be drilling into. For vinyl siding, a drill bit with a sharp point and a size similar to the diameter of the screw or anchor is generally recommended.
- Mark the drilling spot: Use a pencil or chalk to mark the desired location where you want to drill the hole on the vinyl siding. Take measurements and make sure it aligns with your intended purpose.
- Position the drill: Hold the drill firmly and position the drill bit directly on the marked spot. Make sure the drill is set to rotate clockwise.
- Apply steady pressure: Apply steady and gentle pressure to the drill while keeping it aligned with the marked spot. It is important not to apply excessive force as this might cause the drill to slip or create a larger hole than intended.
- Drill the pilot hole: Start drilling slowly and steadily. Let the drill bit make its way through the vinyl siding, ensuring that it goes straight and perpendicular to the surface. Maintain a controlled speed throughout the drilling process.
- Check the depth: Once the drill bit has gone through the vinyl siding, you can stop drilling. Remove the drill from the hole and inspect the depth of the pilot hole. Use the tip of the drill bit or a measuring device to determine if it is deep enough for your purpose.
By creating a pilot hole first, you can ensure a more precise and clean drilling experience without damaging the vinyl siding. This extra step is crucial in preventing cracks, splits, and other issues that may compromise the integrity and aesthetics of the siding.
Drill the Final Hole
Now that you have marked the spot and prepared the area, it’s time to drill the final hole through the vinyl siding.
Here’s how to do it:
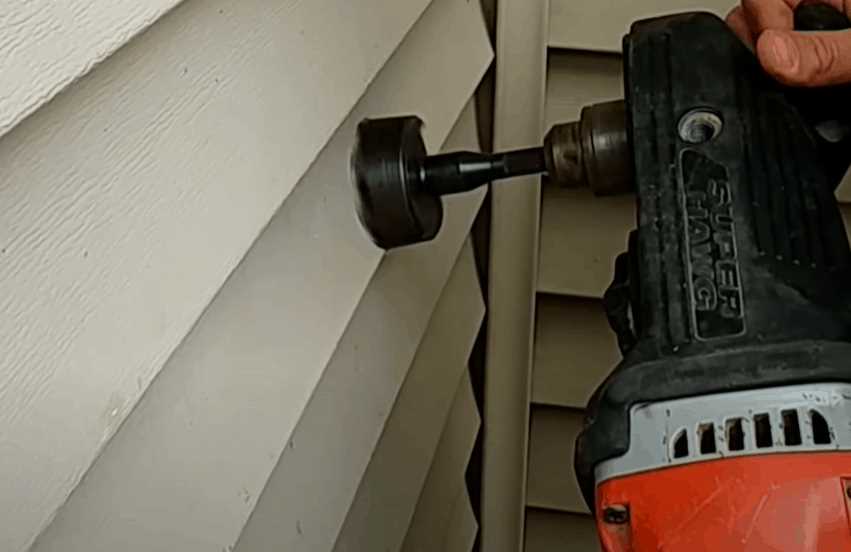
- Attach the appropriate drill bit to your drill. For vinyl siding, it is recommended to use a high-speed steel bit or a carbide-tipped masonry bit.
- Hold the drill perpendicular to the vinyl siding, aligning it with the marked spot.
- Apply steady pressure and start drilling at a slow speed to create a pilot hole. This will help guide the drill and prevent the vinyl siding from cracking or breaking.
- Once the pilot hole is established, increase the speed and continue drilling through the vinyl siding. Make sure to maintain a straight and steady motion.
- Keep drilling until the drill bit penetrates through the vinyl siding.
Tip: To avoid damaging the siding, you can place a scrap piece of wood behind it while drilling. This will provide additional support and prevent the siding from bending or buckling.

After drilling the final hole, you can now proceed with installing your desired fixture or completing any other task that requires access through the vinyl siding.
Install a Grommet or Sealant
After you have drilled the hole through the vinyl siding, you need to install a grommet or apply a sealant to protect the hole and prevent any water from seeping in. This step is crucial to maintain the integrity of your siding and prevent any potential damage.
Install a Grommet
Installing a grommet is a common method to seal the drilled hole in vinyl siding.
- Choose a grommet that is the appropriate size for your drilled hole. Grommets are available in different diameters, so make sure to select one that fits snugly.
- Insert the grommet into the drilled hole from the outside of the siding.
- Push the grommet firmly into place until it is flush with the surface of the siding.
- Ensure the grommet is secure and tightly sealed to prevent any water from entering the hole.
Apply a Sealant


If you don’t have a grommet or prefer not to use one, you can apply a sealant to the drilled hole instead.
- Choose a high-quality sealant that is specifically designed for outdoor use and can adhere to vinyl siding.
- Carefully apply the sealant around the edges of the drilled hole on the outside of the siding.
- Smooth out the sealant with a putty knife to create an even and watertight seal.
- Allow the sealant to dry completely according to the manufacturer’s instructions.
Whether you choose to use a grommet or a sealant, make sure that the drilled hole is fully protected to prevent any water damage to your vinyl siding. Regularly check the grommet or sealant for any signs of wear or deterioration and replace as necessary to maintain the integrity of your siding.
Clean up and Inspect
After drilling through the vinyl siding, it is important to clean up any debris and inspect the area to ensure a proper installation and prevent any potential hazards. Here are the steps to clean up and inspect:
- Remove any loose vinyl pieces: Use a soft brush or a cloth to gently remove any loose vinyl pieces that may have been produced during the drilling process. Be careful not to scratch or damage the surrounding vinyl siding.
- Clean the area: Use a mild detergent and water solution to clean the area where the hole was drilled. Gently scrub the surface to remove any dirt, dust, or grime that may have accumulated.
- Inspect for damage: Carefully inspect the surrounding vinyl siding for any signs of damage. Look for cracks, chips, or any other issues that may have occurred during the drilling process. It is important to address any damage immediately to prevent further problems.
- Check for water infiltration: If you drilled the hole to install a fixture or accessory, such as a hose reel or outdoor light, check for any signs of water infiltration. Make sure that the hole is properly sealed and that water cannot seep into the wall. Consider using a waterproof sealant or caulk to provide an extra layer of protection.
- Ensure proper insulation: If the hole was drilled to pass wires or cables through the vinyl siding, make sure that the opening is properly insulated. Use an insulation sleeve or grommet to protect the wires from rubbing against the sharp edges of the hole and to prevent any potential electrical hazards.
By cleaning up and inspecting the area after drilling through the vinyl siding, you can ensure a clean and secure installation. Taking the time to address any damage or potential issues will help maintain the integrity of your vinyl siding and ensure its longevity.
FAQ:
What tools will I need to drill through vinyl siding?
To drill through vinyl siding, you will need a power drill, available at any hardware store, along with a drill bit designed specifically for use on vinyl siding.

Is it difficult to drill through vinyl siding?
Drilling through vinyl siding is not difficult, but it does require some care and attention to ensure that you do not damage the siding or the underlying structure.
Do I need to remove the vinyl siding before drilling?
No, you do not need to remove the vinyl siding to drill through it. You can drill directly through the siding without causing any damage.
What precautions should I take before drilling through vinyl siding?
Before drilling through vinyl siding, it is important to make sure there are no electrical wires or plumbing pipes behind the area you plan to drill. You should also wear safety goggles to protect your eyes and gloves to protect your hands.
Do I need to use a specific type of drill bit for drilling through vinyl siding?
Yes, it is important to use a drill bit that is designed specifically for use on vinyl siding. These drill bits have a special design that allows them to easily cut through the vinyl without causing any damage.
Can I drill through vinyl siding by hand, or do I need a power drill?
While it is possible to drill through vinyl siding by hand, it is much easier and faster to use a power drill. A power drill will make the job much quicker and reduce the chance of damaging the siding.
What should I do if I accidentally drill through a pipe or wire behind the vinyl siding?
If you accidentally drill through a pipe or wire behind the vinyl siding, you should immediately turn off the water or electricity and seek professional help to repair the damage. It is important to address these issues as soon as possible to prevent further damage or potential hazards.
Video:


Meet Harrison Clayton, a distinguished author and home remodeling enthusiast whose expertise in the realm of renovation is second to none. With a passion for transforming houses into inviting homes, Harrison's writing at https://thehuts-eastbourne.co.uk/ brings a breath of fresh inspiration to the world of home improvement. Whether you're looking to revamp a small corner of your abode or embark on a complete home transformation, Harrison's articles provide the essential expertise and creative flair to turn your visions into reality. So, dive into the captivating world of home remodeling with Harrison Clayton and unlock the full potential of your living space with every word he writes.


