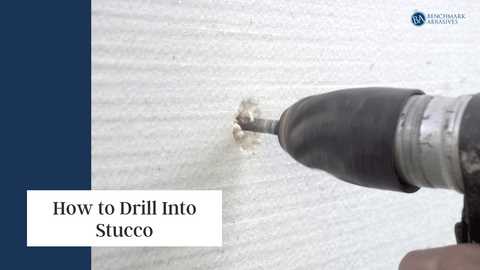
Step-by-Step Guide on How to Drill Through Plaster Safely

Drilling through plaster may seem like a daunting task, but with the right tools and techniques, it can be done safely and efficiently. Whether you are hanging a picture, installing a shelf, or running wires, drilling through plaster is a necessary step in many home improvement projects. It is important to approach this task with caution to avoid damaging the plaster or causing any injuries.
Step 1: Prepare the Area
Before you begin drilling, it is crucial to prepare the area properly. Clear the surrounding area of any furniture or belongings to avoid any accidental damage. Place a drop cloth or tarp on the floor to catch any debris that may fall during the drilling process. It is also a good idea to wear safety goggles and a dust mask to protect your eyes and lungs from dust and debris.
Pro Tip: It is recommended to turn off the power to the room you are working in to avoid any potential electrical hazards.

Step 2: Locate the Studs
Locating the studs behind the plaster is essential for drilling safely and securely. Use a stud finder to identify the location of the studs in the wall. Mark the edges of the stud with a pencil or masking tape to ensure accuracy when drilling. This will help you avoid drilling into any electrical wires or pipes that may be hidden behind the plaster.
Preparing the Area for Drilling
Before you begin drilling through plaster, it’s important to prepare the area to ensure a safe and smooth drilling process. Follow these steps to properly prepare the area:
- Clear the work area: Remove any furniture, decorations, or other items that may obstruct or get in the way of the drilling process. This will provide you with a clear and safe workspace.
- Protect surfaces: Place a drop cloth or plastic sheeting beneath the area where you will be drilling to catch any dust or debris that may fall. This will help protect your floors, furniture, and other surfaces from potential damage.
- Identify electrical wires and pipes: Use a stud finder or a wire and pipe detector to identify any electrical wires or pipes that may be hidden behind the plaster. This will help ensure that you avoid drilling into them and causing any damage or injury.
- Mark the drilling spot: Once you have confirmed it is safe to drill in the desired location, use a pencil to mark the spot on the plaster. This will serve as a guide when you begin drilling.
- Gather necessary tools and materials: Make sure you have all the tools and materials you will need for the drilling process, such as a drill, drill bits suitable for plaster, a level, and safety equipment like safety glasses and gloves.
By taking the time to properly prepare the area, you will ensure a safer and more efficient drilling experience. Following these steps will help you avoid any potential accidents or damage to both yourself and the surrounding surfaces.
Choosing the Right Drill Bit
When it comes to drilling through plaster, choosing the right drill bit is essential for a safe and effective outcome. There are several different types of drill bits available, each designed for specific materials and applications. Here’s a breakdown of the most common drill bits used for drilling through plaster:

- Masonry Drill Bits: These are the most common drill bits used for drilling through plaster. They have a carbide tip that is specifically designed to penetrate masonry materials such as plaster, brick, and concrete. Masonry drill bits are typically made of hardened steel and come in various sizes to accommodate different hole sizes.
- Tungsten Carbide Drill Bits: Tungsten carbide drill bits are another option for drilling through plaster. They have a carbide tip that is extremely durable and can withstand high heat and friction. These drill bits are known for their ability to drill through hardened materials, making them suitable for plaster.
- Wood Drill Bits: While not specifically designed for plaster, wood drill bits can still be used for drilling through plaster if you don’t have access to masonry or tungsten carbide drill bits. However, they may wear down more quickly and may not provide the same level of precision and efficiency as specialized drill bits.
Before selecting a drill bit, it’s important to consider the thickness of the plaster and the size of the hole you want to create. Thicker plaster may require a larger, more durable drill bit, while smaller holes may require a finer drill bit. It’s also a good idea to have multiple drill bits on hand in case you encounter any issues during the drilling process.
Always remember to wear appropriate safety gear, such as safety goggles and gloves, when drilling through plaster. Take your time and apply gentle pressure while drilling to prevent any damage to the plaster or underlying surfaces. By choosing the right drill bit and following proper drilling techniques, you can ensure a safe and successful drilling experience.
Selecting the Appropriate Drill Speed

When drilling through plaster, it is important to select the appropriate drill speed based on the thickness and type of plaster you are working with. Using the wrong drill speed can lead to the drill bit getting stuck or causing damage to the plaster.
Low Drill Speed
For thinner plaster walls, it is recommended to use a low drill speed. This allows for more control and reduces the risk of cracking or chipping the plaster. Set your drill to a low speed setting before beginning the drilling process.

Medium Drill Speed
If you are working with medium thickness plaster, a medium drill speed can be used. This speed provides sufficient power for drilling through the plaster without causing excessive force that could damage the surface. Adjust the drill speed accordingly and use steady pressure while drilling.
High Drill Speed
When dealing with thicker plaster walls, a high drill speed may be necessary. This speed allows the drill bit to penetrate the plaster more efficiently, but it also increases the risk of damaging the plaster. Use caution and ensure you have steady control over the drill while working at a high speed.
Note: It is always a good idea to start with a lower drill speed and increase it gradually as needed. This helps to minimize the chances of damaging the plaster surface.
Marking the Drilling Spot
Before drilling into plaster, it is essential to mark the drilling spot accurately. This will help ensure that the hole is placed exactly where you want it and prevent any unnecessary damage to the plaster.
Here are the steps to effectively mark the drilling spot:

- Start by identifying the exact location where you want to drill. Use a tape measure or ruler to measure and mark the spot with a pencil or marker.
- Next, use a level to ensure that the marking is perfectly straight. Place the level vertically against the wall and adjust the position of the marking if necessary.
- If you are drilling into a specific object or fixture, such as a picture frame or shelf bracket, use the object itself to mark the drilling spot. Hold it against the wall in the desired position and mark the spot through any pre-drilled holes or mounting brackets.
- It is important to double-check your markings before drilling. Take a step back and visually confirm that the spot is accurately marked and aligns with your desired outcome.
By following these steps and taking the time to properly mark the drilling spot, you can ensure a more precise and safe drilling process.
Securing the Plaster Surface
Before you begin drilling into the plaster, it’s important to ensure that the surface is secure and won’t crack or crumble during the process. Follow these steps to properly secure the plaster surface:
- Inspect the plaster: Carefully examine the area where you plan to drill and look for any signs of weakness or damage. Check for cracks, loose pieces, or areas where the plaster seems thin.
- Prepare the surface: Remove any loose debris or dust from the plaster surface. You can use a soft brush or a vacuum cleaner with a brush attachment to gently clean the area.
- Protect nearby surfaces: Cover nearby furniture, floors, or objects with a drop cloth or plastic sheet to prevent any damage or mess caused by drilling.
- Mark the drilling point: Use a pencil or marker to mark the exact spot where you want to drill. Make sure the marking is clear and visible.
- Choose the right drill bit: Select a drill bit that is appropriate for the material behind the plaster. If you’re drilling into a stud or wood lath, use a wood drill bit. If you’re drilling into a masonry wall or a metal stud, use a masonry or metal drill bit, respectively.
- Start with a pilot hole: To prevent the plaster from cracking or chipping, it’s a good idea to start with a small pilot hole. Use a drill with a smaller bit and lightly drill into the marked spot.
- Drill slowly and steadily: Once you’ve created the pilot hole, switch to the appropriate drill bit and slowly drill into the plaster. Apply gentle pressure and avoid pushing too hard, as this could cause the plaster to crack.
- Keep the drill perpendicular: Hold the drill straight and perpendicular to the surface to ensure a clean and accurate hole. Angling the drill can lead to uneven drilling or damage to the plaster.
- Use low-speed and intermittent drilling: Set your drill to a low speed and drill in short intervals, allowing the bit to cool down periodically. This will help prevent overheating and minimize the risk of damaging the plaster.
- Remove dust and debris: After drilling the hole, use a brush or a vacuum cleaner to remove any dust or debris from the drilled area. This will ensure a clean and smooth surface for any screws or anchors you plan to insert.
By following these steps, you can securely drill through plaster without causing any damage to the surface. Remember to always exercise caution and take your time to ensure a successful and safe drilling experience.
Starting the Drilling Process
1. Gather necessary tools and materials
Before starting the drilling process, make sure you have all the necessary tools and materials. Here is a list of items you will need:
- Power drill
- Proper drill bits (masonry bits for plaster walls)
- Tape measure
- Pencil
- Masking tape
- Dust mask
- Goggles or safety glasses
- Vacuum cleaner or dust pan and brush
2. Choose the right drill bit

When drilling through plaster, it is important to use the right type of drill bit. Masonry bits are ideal for plaster walls as they are designed to penetrate hard materials like plaster, brick, and concrete. Make sure the drill bit is appropriate for the size of the hole you need to drill.
3. Mark the drill hole locations
Using a tape measure and pencil, mark the locations on the plaster where you want to drill the holes. Measure and mark the exact positions to ensure accuracy.
4. Protect the surrounding area
Before drilling, it’s a good idea to protect the surrounding area from dust and debris. Place masking tape over the area where you will be drilling to create a barrier. This will help catch any dust or debris generated during the drilling process and make cleanup easier.
5. Put on safety gear
Prior to drilling, it’s important to protect yourself from potential hazards. Put on a dust mask to prevent inhalation of dust particles, and wear goggles or safety glasses to protect your eyes from flying debris.
6. Start drilling
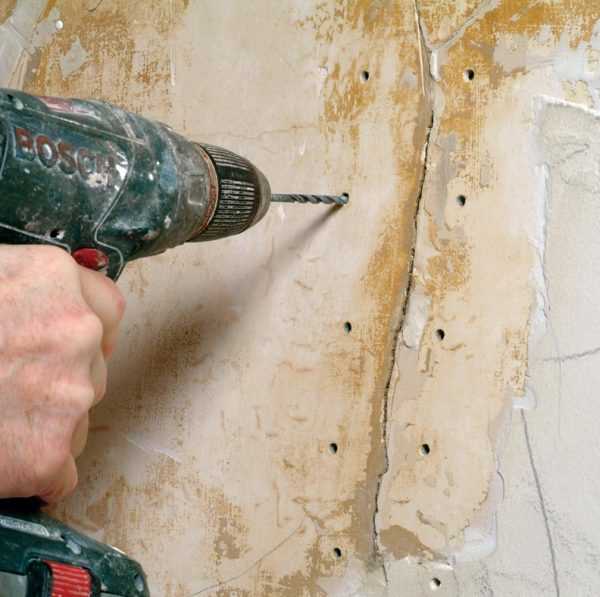

Hold the drill firmly and position the drill bit on the marked spot. With a slow and steady pressure, start drilling into the plaster. Maintain a straight and perpendicular angle to ensure a clean and precise hole. Apply consistent pressure to gradually penetrate the plaster.
7. Remove dust and debris
Periodically stop drilling to remove any dust and debris that may have accumulated. Use a vacuum cleaner or a dust pan and brush to clean up the area. This will help avoid excessive build-up of dust and prevent the drill bit from getting clogged.
8. Continue drilling until desired depth is reached
Continue drilling until you reach the desired depth or until you have penetrated through the plaster and reached the desired material behind it. Take your time and be patient to avoid any potential damage to the wall or the drill bit.
9. Clean up
After you have finished drilling through the plaster, clean up the area by removing any remaining dust and debris. Use a vacuum cleaner or a dust pan and brush to thoroughly clean the surrounding area.

Following these steps will help ensure a safe and successful drilling process through plaster walls.
Using Proper Technique While Drilling
When drilling through plaster, it is important to use the proper technique to ensure a safe and successful outcome. Follow these steps to drill through plaster safely:
1. Choose the Right Drill Bit
Before you start drilling, make sure you have the right drill bit for the job. For drilling through plaster, it is recommended to use a masonry or carbide-tipped bit. These bits are designed to handle the hard surface of plaster without damaging it.
2. Mark the Spot
Using a pencil or marker, mark the spot where you want to drill. It’s important to be as precise as possible to avoid any unnecessary damage to the surrounding plaster.
3. Secure the Area
Prior to drilling, it’s important to secure the area to make sure the plaster doesn’t crumble or break during the process. You can do this by placing a piece of masking tape over the marked spot. The tape will help prevent the plaster from chipping or cracking.
4. Set the Drill to the Proper Speed
Set your drill to a medium speed. Going too fast may cause the plaster to crack, while going too slow may cause the drill to become stuck.
5. Apply Steady Pressure
When drilling, apply a steady amount of pressure to the drill, but not too much. Let the drill bit do the work and allow it to slowly penetrate the plaster.
6. Keep the Drill Level
Keep the drill level and perpendicular to the surface of the plaster. This will help ensure a clean and straight hole without any damage to the surrounding area.
7. Remove Dust and Debris
After drilling, remove any dust and debris from the hole using a vacuum or a soft brush. This will help ensure that your anchor or screw fits securely in the hole.
8. Proceed with Caution
If you encounter any resistance while drilling, proceed with caution. It may indicate that there is a different material behind the plaster, such as a stud or a pipe. Stop drilling and reassess the situation before proceeding.
By following these steps and using the proper technique, you can safely drill through plaster without causing any damage or accidents.
Cleaning Up After Drilling
After you have finished drilling through plaster, it’s important to clean up the work area properly. This will help prevent accidents and keep your space tidy. Here are some steps to follow:
1. Clear the Debris
- Using a broom or a vacuum cleaner, remove any loose plaster dust and debris from the floor, walls, and furniture.
- Make sure to dispose of the debris safely to avoid any health hazards.
2. Wipe Down Surfaces
- Use a damp cloth or sponge to wipe down any surfaces that may have accumulated dust during the drilling process.
- Pay special attention to areas near the drilled hole to ensure they are clean.
3. Return Furniture and Decorations
- If you had to move any furniture or decorations to access the drilling area, now is the time to return them to their original positions.
- Be careful when moving heavy objects to avoid any injuries.
4. Store Tools Properly
- After you are done with the drilling, clean and store your tools in a secure place.
- This will not only help keep your tools organized but also prevent accidents and damage.
5. Dispose of Waste Materials
- If you have any leftover plaster or other waste materials, dispose of them according to your local regulations.
- Do not throw them in regular trash bins if they require special handling.
By following these steps, you can ensure that your work area is clean and safe after drilling through plaster. Remember to take the necessary precautions throughout the process and always prioritize safety.
FAQ:
What tools do I need to drill through plaster?
You will need a power drill, drill bits suitable for plaster, a stud finder, painter’s tape, a pencil, safety goggles, and a vacuum cleaner.
What are the safety precautions I should take when drilling through plaster?
Some safety precautions include wearing safety goggles to protect your eyes from dust and debris, using a stud finder to avoid hitting any electrical wires or plumbing, and ensuring that the drill is securely held and stable during drilling.
How can I locate a stud in the wall before drilling through plaster?
You can use a stud finder to locate a stud in the wall. Simply run the stud finder along the surface of the wall until it indicates a stud. Mark the location with painter’s tape and then proceed with drilling.
What should I do if I accidentally hit a pipe or wire while drilling through plaster?
If you accidentally hit a pipe or wire while drilling through plaster, immediately stop drilling and turn off the power supply to the area. Assess the damage and call a professional plumber or electrician to fix the issue.
Video:


Meet Harrison Clayton, a distinguished author and home remodeling enthusiast whose expertise in the realm of renovation is second to none. With a passion for transforming houses into inviting homes, Harrison's writing at https://thehuts-eastbourne.co.uk/ brings a breath of fresh inspiration to the world of home improvement. Whether you're looking to revamp a small corner of your abode or embark on a complete home transformation, Harrison's articles provide the essential expertise and creative flair to turn your visions into reality. So, dive into the captivating world of home remodeling with Harrison Clayton and unlock the full potential of your living space with every word he writes.


