Step-by-Step Guide on How to Drill Out a Mailbox Lock

Has your mailbox lock suddenly stopped working? Are you in need of quick access to your mail but don’t have the key? Don’t worry, you can easily drill out a mailbox lock yourself! In this step-by-step guide, we will walk you through the process of safely and effectively removing a mailbox lock using basic tools.
Before diving into the steps, it’s important to note that drilling out a mailbox lock should only be done as a last resort. If possible, you should always try other methods of gaining access to your mailbox, such as using a spare key or contacting a professional locksmith. However, if all else fails, drilling out the lock can be a viable option.
Step 1: Gather the necessary tools
To successfully drill out a mailbox lock, you will need a few basic tools. These include a drill with various drill bit sizes, a screwdriver, pliers, and a lubricant such as WD-40. Make sure you have these tools readily available before you begin the process.
Note: If you are not comfortable or familiar with using power tools, it is recommended to seek professional assistance rather than attempting to drill out the mailbox lock yourself.
Gather the necessary tools
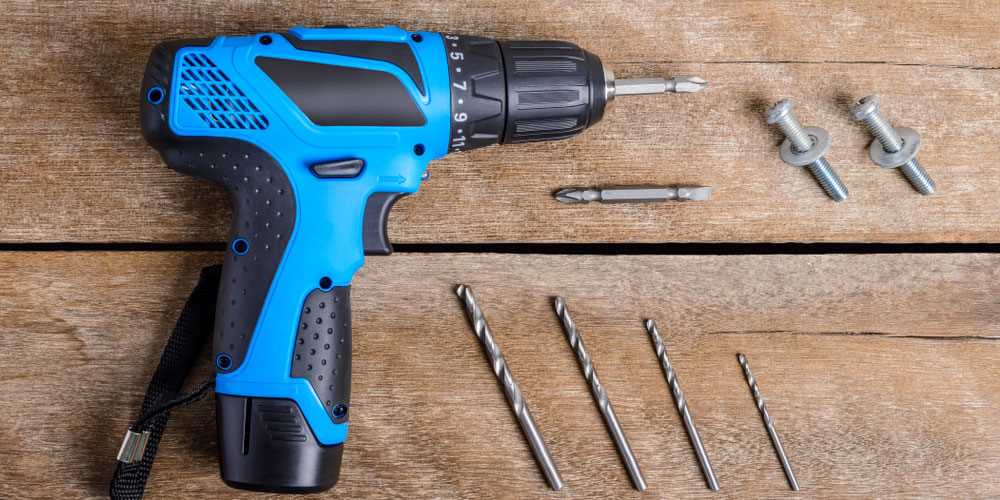
Before you begin drilling out a mailbox lock, you’ll need to gather a few essential tools. Having these tools ready and within reach will make the process smoother and more efficient. Here are the tools you’ll need:

- Drill machine
- Drill bits (various sizes)
- Screwdrivers (Phillips and flathead)
- Hammer
- Pliers
- Protective gloves and eyewear
- Lock lubricant
- Replacement mailbox lock
Make sure your drill machine is charged or has fresh batteries so that you don’t run out of power in the middle of the process. Additionally, having a variety of drill bits will allow you to choose the right size for the lock you’re working on. The screwdrivers will come in handy for removing any screws holding the lock in place. The hammer and pliers may be needed to pry open the lock or remove any stubborn parts. Lastly, it’s important to protect yourself by wearing gloves and eyewear, as drilling metal can produce sharp fragments.
Having a can of lock lubricant on hand is also a good idea. It can help loosen up any stuck components and make the drilling process easier. Lastly, don’t forget to have a replacement mailbox lock ready to install once the old one is drilled out.
Prepare the mailbox lock
Before you begin drilling out the mailbox lock, it’s important to take certain precautions and gather the necessary tools and materials. Follow these steps to prepare the mailbox lock:
- Ensure safety: Put on safety goggles and gloves to protect your eyes and hands throughout the process.
- Gather tools: Collect the following tools: a power drill, drill bits (preferably a set with various sizes), a center punch, a flathead screwdriver, pliers, and a hammer.
- Obtain a replacement lock: Before drilling out the mailbox lock, make sure you have a replacement lock ready. You can purchase one from a local hardware store or locksmith.
- Access the lock: Remove any protective covers or panels that may be obstructing access to the mailbox lock. This will allow you to clearly see and work on the lock.
- Inspect the lock: Take a close look at the lock to determine its type and condition. This will help you choose the appropriate drill bit size and understand any potential challenges.
By following these preparation steps, you will be ready to safely and effectively drill out the mailbox lock.

Mark the drilling point
Before you start drilling, you need to mark the exact spot where you will be drilling. This will ensure that you drill in the right place and avoid damaging any other parts of the mailbox.
To mark the drilling point, use a pencil or a marker to make a small dot on the lock cylinder. This dot will serve as a guide for the drill bit.
Make sure to place the dot in a clear and visible area of the lock cylinder, preferably on the metal portion rather than the plastic housing. This will help you maintain accuracy while drilling.
If you are unsure about the exact location of the lock cylinder, you can use a flashlight or a small mirror to get a better view. Look for a small opening or gap in the mailbox where the lock cylinder is inserted.
Once you have marked the drilling point, double-check to ensure it is in the right place. It’s crucial to be accurate in your markings to avoid any unnecessary damage to the mailbox or lock.

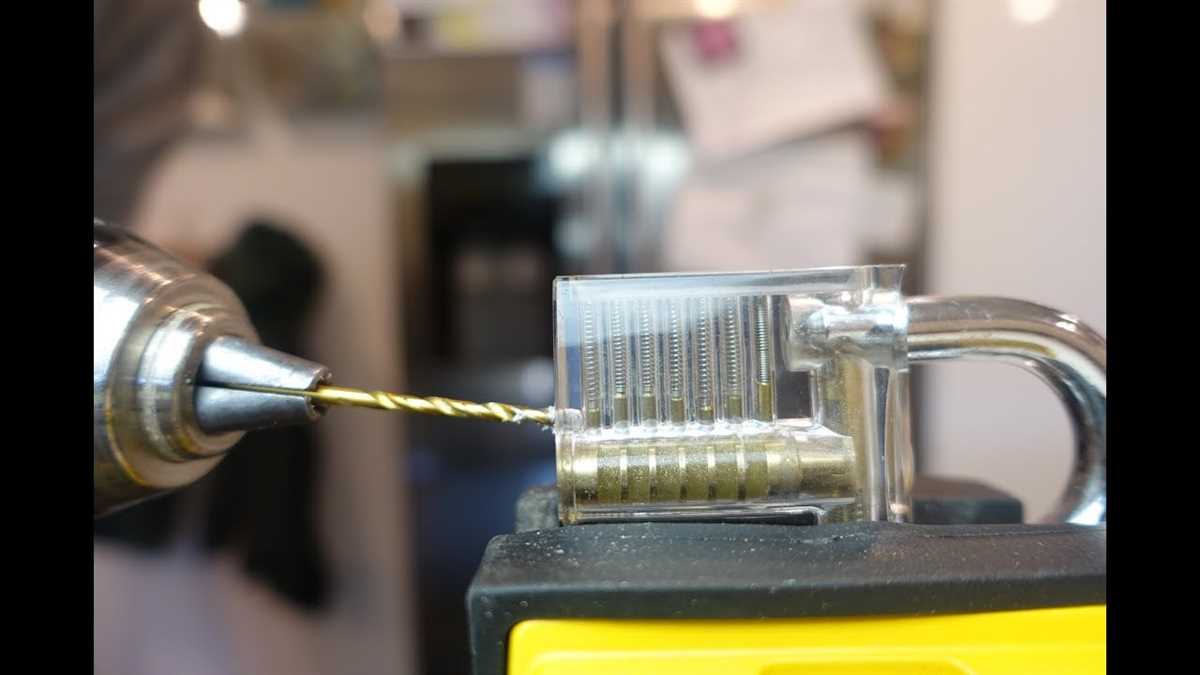
Drill a pilot hole
In order to begin drilling out the mailbox lock, you will need to start by creating a pilot hole. This initial hole will act as a guide for the larger drill bit that you will use to remove the lock.
Here are the steps to drill a pilot hole:
- Insert a small drill bit into your drill. A bit with a diameter of around 1/8 inch should work well for creating the pilot hole.
- Position the drill bit at the center of the lock cylinder, where the key would normally be inserted.
- Apply gentle pressure as you slowly drill into the lock. Be careful not to apply too much pressure or the bit may break.
- Continue drilling until the bit punctures through the front of the lock cylinder.
- Remove the drill bit from the lock and set it aside.
At this point, you have successfully created a pilot hole in the lock. This hole will serve as a guide for the larger drill bit that you will use to remove the lock cylinder completely.
Use a larger drill bit
If the previous step did not successfully drill out the mailbox lock, you may need to use a larger drill bit. A larger drill bit will create a bigger hole in the lock, making it easier to remove. However, it’s important to note that using a larger drill bit can cause damage to the mailbox itself.

Before using a larger drill bit, ensure that you have the appropriate size available. It’s recommended to start with a bit that is slightly larger than the previous one used.
- Choose a larger drill bit: Select a drill bit that is slightly larger than the one that was previously used. This will help enlarge the hole in the mailbox lock.
- Secure the mailbox: Make sure the mailbox is secured and positioned properly before starting the drilling process.
- Apply steady pressure: Place the larger drill bit at the existing hole and begin applying steady pressure to drill through the lock.
- Drill at a slow speed: Use a slow drilling speed to prevent overheating and to maintain control over the drilling process.
- Monitor the progress: Keep an eye on the hole you are drilling to ensure that you are widening it evenly and not causing any unnecessary damage to the mailbox or lock.
- Remove the lock: Once the hole has been widened enough, you should be able to remove the lock using pliers or a screwdriver.
Remember to proceed with caution when using a larger drill bit, as you do not want to cause any additional damage or make the mailbox unusable.
Drill through the entire lock
Once you have selected the appropriate drill bit for the job, it’s time to drill through the lock itself. This step requires precision and care to avoid damaging the surrounding mailbox or any other components.
Step 1: Secure the Mailbox
Before drilling, make sure the mailbox is securely held in place. You can use clamps or a vise to firmly grip the mailbox, ensuring that it doesn’t move or wobble during the drilling process.
Step 2: Center the Drill Bit

Position the tip of the drill bit at the center of the lock cylinder. This will help ensure that the hole is drilled in the right place and minimize the risk of damaging other parts of the mailbox.
Step 3: Start Drilling
With the drill bit lined up, slowly start drilling into the lock. Apply gentle and consistent pressure to allow the bit to penetrate the metal without excessive force. Keep the drill at a low speed to maintain control and prevent overheating.
- Use a 1/8-inch drill bit to create a pilot hole.
- Gradually increase the size of the hole using larger drill bits, working up to the desired size. This will depend on the type of lock you’re dealing with.
- Be cautious not to drill too deep, as you may damage the internal mechanism of the lock or other components of the mailbox.
Step 4: Remove the Lock Cylinder
Once you have drilled through the entire lock, you should be able to remove the lock cylinder from the mailbox. Use pliers or a screwdriver to pull or push the lock cylinder out, depending on how the lock is designed.
Step 5: Clean up the Hole
After the lock cylinder has been removed, inspect the hole and remove any metal shavings or debris. You can use a small brush or compressed air to clean out the hole and ensure a smooth surface.

Remember to dispose of the old lock responsibly and consider replacing it with a new one to maintain the security of your mailbox.
Remove the drilling debris
Once you have successfully drilled out the old mailbox lock, you will need to remove the drilling debris to ensure smooth operation of the new lock. Here are the steps to remove the drilling debris:
- Collect the debris: Use a small brush or a vacuum cleaner to gather all the drilling debris. Be careful not to damage other parts of the mailbox while collecting the debris.
- Clean the area: Remove any remaining debris from the lock cylinder and surrounding area. You can use a compressed air canister to blow away any dirt or dust.
- Inspect the lock cylinder: Once the area is clean, carefully examine the lock cylinder to ensure there are no leftover drilling debris inside it. If you find any debris, use a thin wire or needle to remove it.
- Lubricate the lock cylinder: Apply a small amount of graphite lubricant or other locksmith-approved lubricant to the lock cylinder. This will help ensure smooth operation and prevent future lock-related issues.
It is important to thoroughly clean and inspect the lock cylinder to prevent any issues with the new lock. Failure to remove all drilling debris can lead to difficulties in inserting keys and proper lock functionality.
Once you have completed these steps, you are ready to install the new lock in your mailbox. Make sure to follow the manufacturer’s instructions for installing the specific lock model you have chosen.
Replace the mailbox lock

- Gather the necessary tools: Before you begin, make sure you have all the tools you will need to replace the mailbox lock. This may include a replacement lock, a screwdriver, pliers, and possibly a drill.
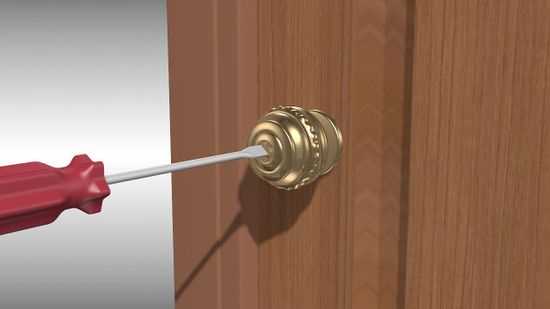
- Remove the old lock: Use a screwdriver to remove any screws that are securing the old lock to the mailbox. Once the screws are removed, the lock should easily come out of the mailbox.
- Measure the new lock: Take measurements of the new lock to ensure it will fit properly in the mailbox. Pay attention to the diameter of the lock cylinder and the length of the lock.
- Prepare the mailbox: If the new lock does not fit perfectly in the existing hole, you may need to use a drill to enlarge the hole. Be sure to carefully measure and mark the spot where you will drill.
- Install the new lock: Once the hole is prepared, insert the new lock into the hole and secure it in place. Use any screws or fasteners provided with the new lock to secure it to the mailbox.
- Test the new lock: After the lock is installed, test it to ensure it is functioning properly. Try inserting the key and turning it to lock and unlock the mailbox.
FAQ:
What tools do I need to drill out a mailbox lock?
To drill out a mailbox lock, you will need a power drill, drill bits, a hammer, and a screwdriver.
Is drilling out a mailbox lock the only way to open a locked mailbox?
No, there are other methods such as picking the lock or using a locksmith. However, drilling out the lock is the most effective method if you have lost the key and need immediate access to the mailbox.
What should I do before drilling out a mailbox lock?
Before drilling out the lock, make sure that you have the legal authority to do so. If the mailbox is your property or you have permission from the owner, you can proceed with drilling out the lock.
How do I choose the right size drill bit for drilling out a mailbox lock?
To choose the right size drill bit, measure the diameter of the lock cylinder and select a drill bit that is slightly larger. It’s better to start with a smaller drill bit and gradually increase the size if needed.
What are the potential risks of drilling out a mailbox lock?
The main risk of drilling out a mailbox lock is damaging the mailbox itself. It’s important to be careful and avoid applying too much force or drilling at an incorrect angle. Additionally, there may be legal implications if you do not have the proper authorization to drill out the lock.
Video:


Meet Harrison Clayton, a distinguished author and home remodeling enthusiast whose expertise in the realm of renovation is second to none. With a passion for transforming houses into inviting homes, Harrison's writing at https://thehuts-eastbourne.co.uk/ brings a breath of fresh inspiration to the world of home improvement. Whether you're looking to revamp a small corner of your abode or embark on a complete home transformation, Harrison's articles provide the essential expertise and creative flair to turn your visions into reality. So, dive into the captivating world of home remodeling with Harrison Clayton and unlock the full potential of your living space with every word he writes.


