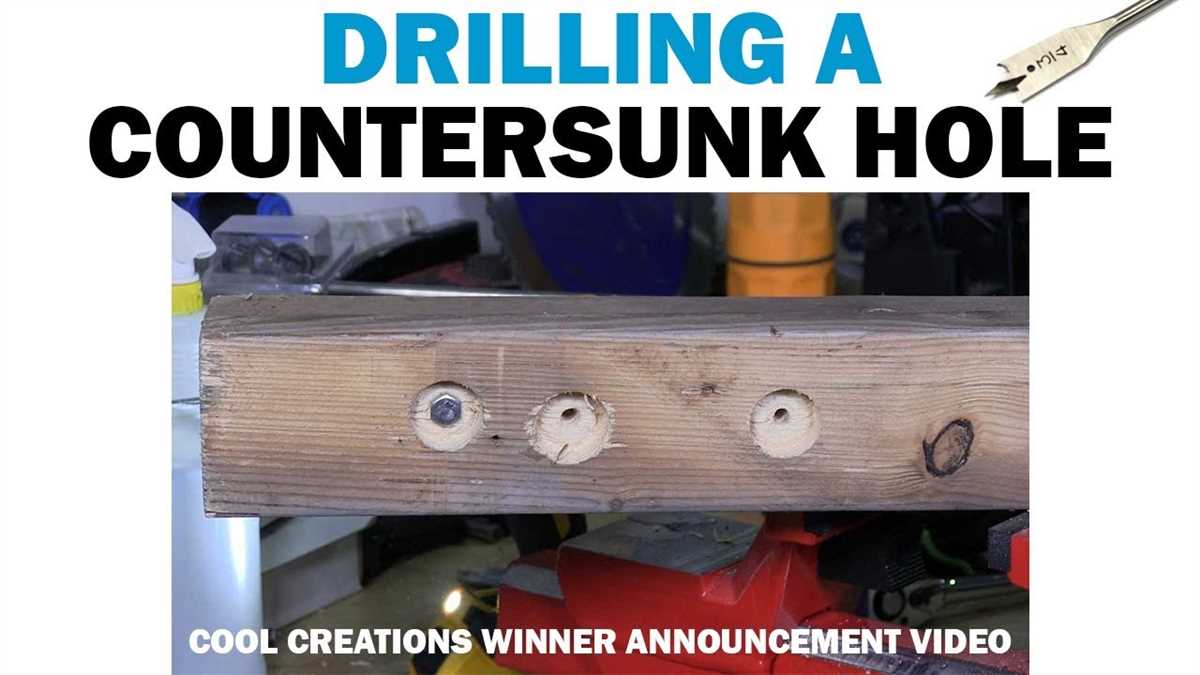
Step-by-Step Guide on How to Drill a Countersink Hole

Drilling a countersink hole is a crucial technique in woodworking and metalworking projects. This specialized hole allows screws and fasteners to sit flat or below the surface of the material, creating a smooth and flush finish. Whether you are a seasoned professional or a DIY enthusiast, knowing how to properly drill a countersink hole is an essential skill to have in your toolbox.
To begin, you will need a few basic tools and materials. These include a drill with a countersink bit, the material you wish to drill into, clamps to secure the material, and a measuring tape or ruler for accurate placement. Additionally, safety equipment such as goggles and gloves should be worn to protect yourself during the drilling process.
Once you have gathered your tools, begin by determining the desired location for the countersink hole. Use a measuring tape or ruler to mark the spot accurately. It’s important to note that the distance between the edge of the material and the center of the hole should be at least two times the diameter of the screw you will be using.
Next, securely clamp the material to a work surface to prevent it from moving while drilling. This will ensure precision and prevent any accidents. Take the drill with the countersink bit and align it with the marked spot. The bit should be slightly larger in diameter than the screw head. Start the drill at a low speed and gradually increase the speed as you penetrate the material. Apply steady and even pressure to create a clean and uniform countersink hole.
Preparing for the Task
Before you start drilling a countersink hole, it is important to make sure you have all the necessary tools and materials. Here’s what you’ll need:

- A power drill and drill bits
- A countersink bit
- A ruler or measuring tape
- A pencil or marker
- A clamp or vise to secure the workpiece
- Safety glasses or goggles
- Protective gloves
- Dust mask or respirator
- Workbench or stable work surface
- A vacuum or brush for cleaning up debris
Once you have gathered all the necessary tools, it’s important to take the following steps to ensure a successful drilling process:
- Choose the appropriate drill bit size for the countersink hole. The size of the bit should match the size of the screw head you plan to use.
- Read the manufacturer’s instructions for the drill and countersink bit to familiarize yourself with any specific recommendations or precautions.
- Inspect the drill bits and countersink bit for any damage or wear. Replace any dull or damaged bits before starting the project.
- Prepare the workpiece by marking the desired location of the countersink hole. Use a ruler or measuring tape to ensure accuracy.
- If necessary, secure the workpiece to a workbench or stable work surface using a clamp or vise to prevent it from moving during the drilling process.
- Put on safety glasses or goggles, protective gloves, and a dust mask or respirator to protect yourself from potential hazards and airborne debris.
- If you are working indoors, consider placing a drop cloth or newspaper underneath the work area to catch any debris or sawdust.
- Ensure that the drill is properly plugged in or has a fully charged battery before starting the drilling process.
By following these steps and preparing for the task ahead, you will be well-equipped to drill a countersink hole safely and effectively.
Choosing the Right Tools
When drilling a countersink hole, it is important to have the right tools in order to achieve the desired result. Here are some essential tools that you will need:
Drill
The most important tool for drilling a countersink hole is a drill. It is recommended to use a drill that has adjustable speed settings and a variable torque clutch. This will allow you to control the speed and power of the drill based on the material you are working with.
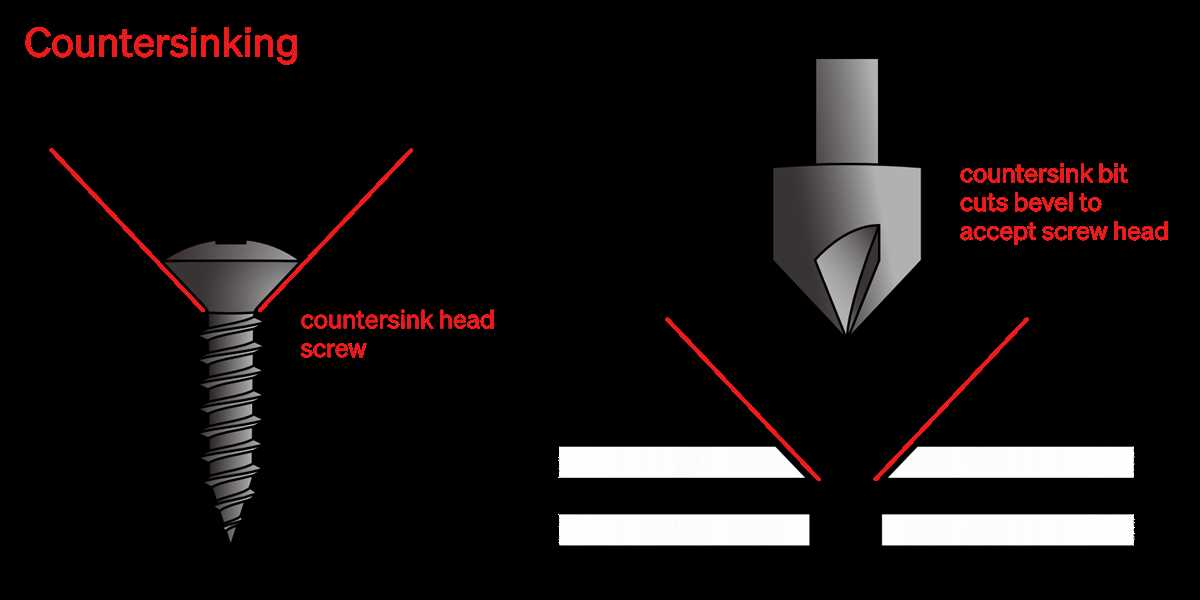
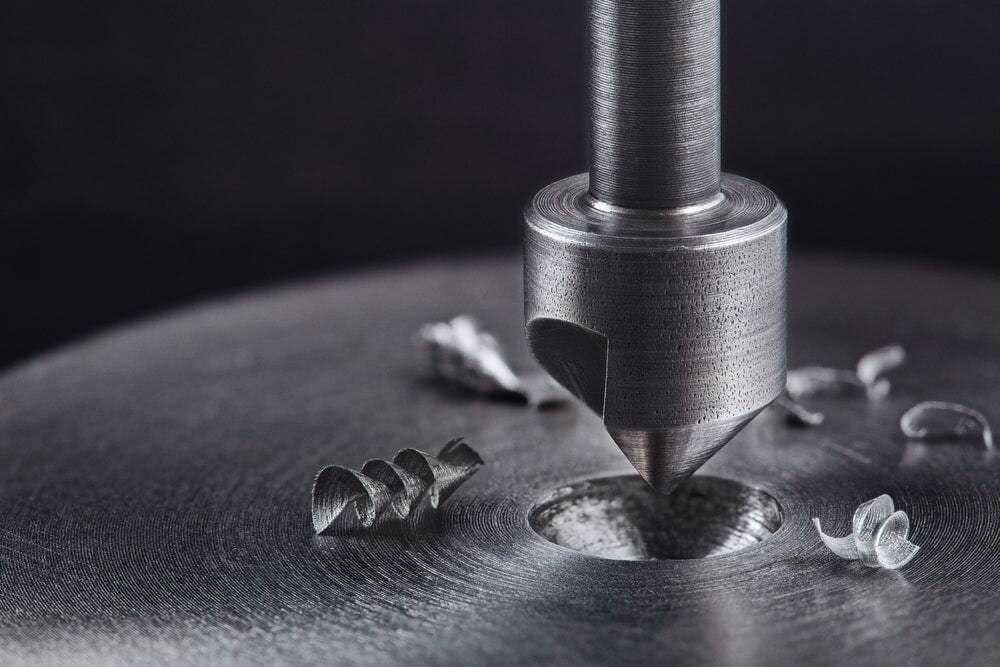
Countersink Bit
A countersink bit is specifically designed to create a conical recess that allows the screw head to sit flush with the surface. It is important to choose a countersink bit that matches the size of the screw you will be using. Ideally, the countersink bit should have multiple cutting flutes to ensure a clean and smooth cut.

Drill Bit
In addition to a countersink bit, you will also need a drill bit to create a pilot hole for the screw. The size of the drill bit should match the size of the screw shaft to ensure a secure fit. It is important to choose a drill bit with a sharp cutting edge to make clean and precise pilot holes.
Clamps
Clamps are useful for securing the material in place while drilling. They help to prevent any movement or slipping, which can lead to inaccurate holes. Choose clamps that are appropriate for the size and shape of the material you are working with.
Protective Gear

Safety should always be a priority when working with tools. It is important to wear protective gear such as safety glasses to protect your eyes from any debris or flying objects. Additionally, if you are drilling on a hard surface, consider wearing ear protection to guard against excessive noise.
With the right tools, you can ensure accurate and professional-looking countersink holes for your woodworking or DIY projects.
Measuring and Marking the Hole
Before you start drilling a countersink hole, it is important to measure and mark the exact location where you want the hole to be. This will ensure accuracy and precision in your drilling process.
Step 1: Gather your tools and safety equipment
- Ruler or measuring tape
- Pencil or marker
- Safety glasses
Step 2: Determine the desired depth of the countersink hole

Decide how deep you want the countersink hole to be. This will depend on the size of the screw or bolt head that you plan to use.
Step 3: Measure and mark the hole location
- Use a ruler or measuring tape to measure the correct distance from the edge of the material to the center of the hole. Make a small mark with a pencil or marker.
- If you are drilling multiple holes, use a square or protractor to ensure that the marks are evenly spaced and aligned.
Step 4: Double-check your measurements
Before drilling, verify that your markings are accurate and align with your requirements. It is better to be sure and make any necessary adjustments before proceeding.
Step 5: Protect the surrounding area
It is a good idea to place a piece of scrap wood or a sacrificial board underneath the material you are drilling into. This will help prevent any damage to the surface below and ensure clean and precise drilling.
By carefully measuring and marking the hole, you will achieve accurate results and avoid any issues during the drilling process.
Securing the Material

Before you begin drilling a countersink hole, it is important to secure the material you will be working with. This will ensure stability and prevent the material from moving around during the drilling process. There are a few different methods you can use to secure the material:
- Clamps: Using clamps is one of the most common methods for securing the material. Place the material on a sturdy surface and use clamps to keep it in place. Make sure the material is firmly secured before proceeding.
- Vise: If you have access to a vise, this can also be used to secure the material. Simply place the material in the vise and tighten it securely. The vise will provide a stable base for drilling.
- Workbench: Another option is to use a workbench with built-in clamps. These benches often have adjustable clamps that can securely hold the material in place while you work.
Regardless of the method you choose, it is important to ensure that the material is stable before drilling. This will help prevent accidents and ensure the accuracy of your countersink hole.
Drilling the Pilot Hole
Before drilling the countersink hole, it is important to first create a pilot hole. The pilot hole serves as a guide for the countersink bit, ensuring that the hole is drilled accurately and straight.
To drill the pilot hole, follow these steps:

- Choose a drill bit that is slightly smaller in diameter than the countersink bit. This will help create a precise pilot hole.
- Secure the material to be drilled. If the material is thin or prone to damage, it is recommended to place a scrap piece of wood underneath to prevent any tearing or splintering.
- Mark the desired location for the pilot hole using a pencil or marker. Double-check the measurements to ensure accuracy.
- Put on safety glasses to protect your eyes from any flying debris.
- Insert the drill bit into the drill chuck and tighten it securely.
- Position the tip of the drill bit on the marked location and apply gentle pressure to start drilling.
- Keep the drill steady and maintain a slow and steady speed throughout the drilling process.
- Once the pilot hole is complete, remove the drill bit from the hole and set it aside.
It is important to note that the depth of the pilot hole should be no deeper than the length of the countersink screw. This will ensure that the screw sits flush with the surface once it is installed.
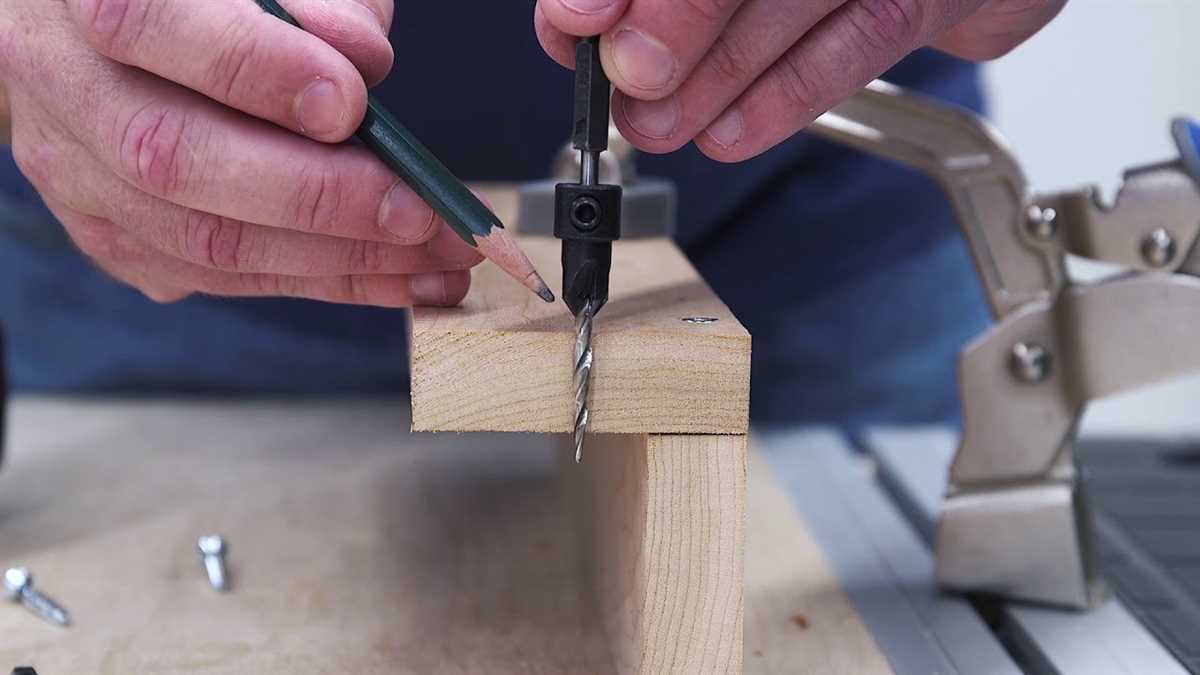
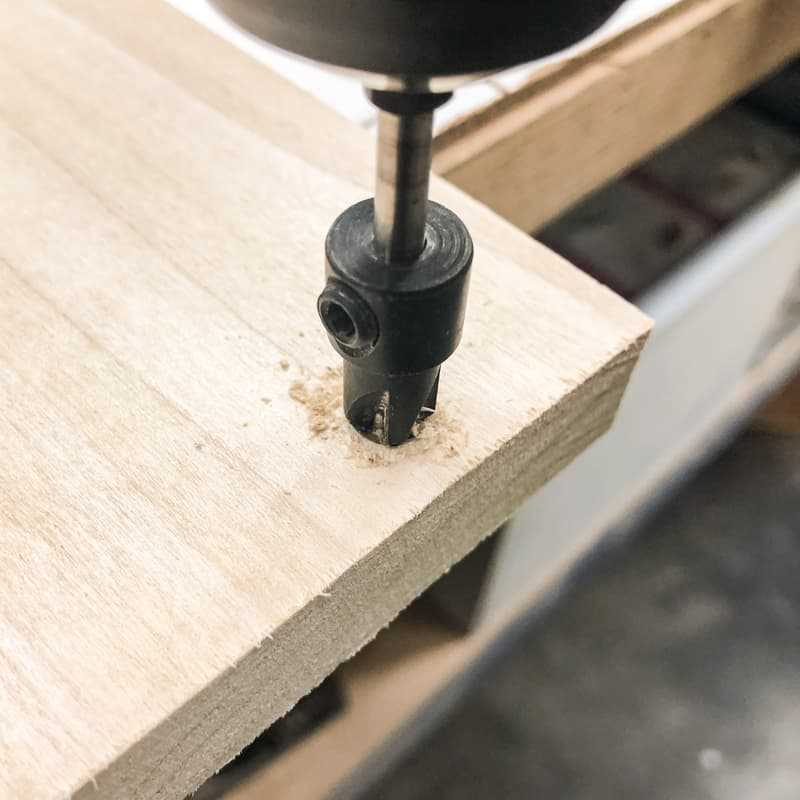
Switching to the Countersink Bit
Once you have finished drilling the pilot hole, it’s time to switch to the countersink bit. The countersink bit will create a cone-shaped recess around the pilot hole, allowing the screw head to sit flush with the surface of the material.
Follow these steps to switch to the countersink bit:
- Remove the drill bit from the drill chuck by loosening the chuck and releasing the bit.
- Select the appropriate countersink bit for your screw size. Countersink bits come in various sizes to match different screw head diameters. Choose the bit that matches the size of the screw head you will be using.
- Insert the countersink bit into the drill chuck and tighten it securely.
- Set the depth of the countersink using the adjustable collar on the countersink bit. The depth should be equal to the thickness of the screw head.
Pro Tip: If you are unsure of the appropriate depth, start with a shallower setting and gradually increase the depth until the screw head sits flush with the surface.
Now you are ready to start drilling the countersink hole. Place the tip of the countersink bit at the center of the pilot hole and apply steady pressure to drill into the material. Make sure to keep the drill perpendicular to the surface to create a clean and accurate countersink hole.

Continue drilling until the desired depth is reached. You can periodically stop drilling and check the depth using a measuring tape or ruler.
Note: If you are drilling multiple holes, make sure to clear any debris from the countersink bit after each hole to maintain its effectiveness.
Once you have drilled the countersink hole, you are now ready to insert the screw and secure your materials together. The countersink hole will ensure that the screw head sits flush with the surface, providing a clean and professional finish to your project.
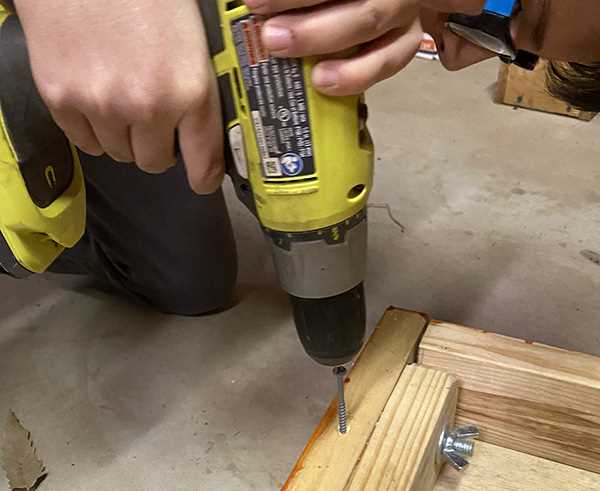
Drilling the Countersink Hole
Once you have marked the spot where you want to drill the countersink hole, follow these steps to complete the drilling process:
- Attach the appropriate drill bit to your drill. The size of the drill bit will depend on the desired depth and diameter of the countersink hole.
- Secure the material you are working with. Use clamps or a vise to hold it firmly in place.
- Put on safety goggles to protect your eyes from any debris that may fly off during drilling.
- Position the drill bit above the marked spot and align it perpendicular to the surface.
- Start drilling at a low speed to ensure accuracy. Apply gentle pressure as you begin to drill into the material.
- Continuously monitor the depth of the hole using a depth gauge or by using tape to mark the depth on the drill bit.
- Once you have reached the desired depth, gradually increase the drilling speed to finish the hole.
Remember to clean off any excess debris from the drill bit and the material surface after drilling to ensure a clean finish.
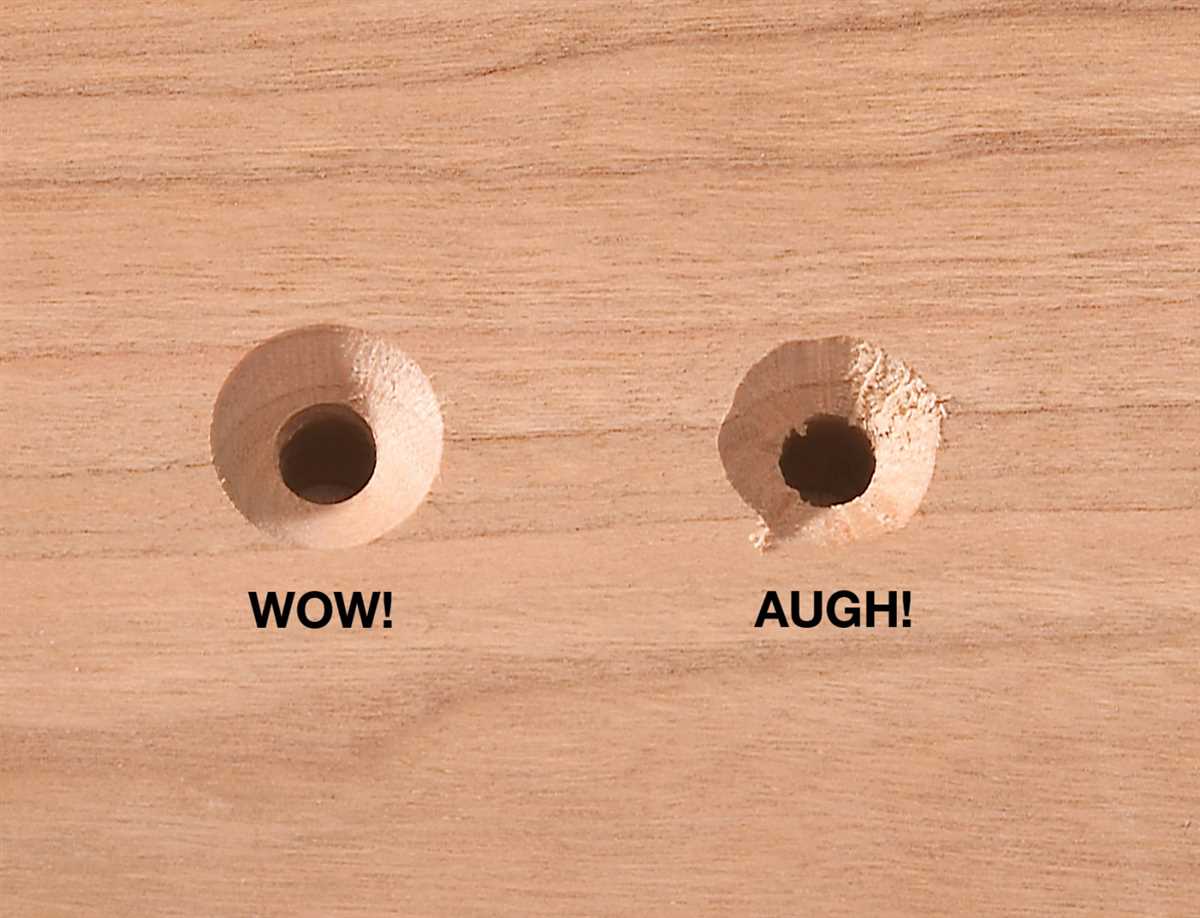
Finishing and Cleaning Up
Once you have drilled the countersink hole, there are a few steps you can take to finish and clean up the hole to ensure a professional and polished result.
1. Remove the Drill Bit
First, carefully remove the drill bit from the hole. Make sure to do this slowly and gently to avoid any damage or splintering of the wood.
2. Sand the Hole
Next, use a fine-grit sandpaper to smooth out any rough edges or imperfections in the hole. Sand in a circular motion until the edges are smooth and even. Be sure to remove any sawdust or debris from the hole afterwards.
3. Fill the Hole (optional)
If desired, you can fill the countersink hole with a wood filler or putty to create a seamless finish. Apply the filler with a putty knife, ensuring that it is level with the surface of the wood. Allow the filler to dry completely before moving on to the next step.
4. Apply a Finish
To enhance the appearance of the countersink hole and protect the wood, you can apply a finish. This can be a clear coat, stain, or paint, depending on your preference and the type of wood you are working with. Follow the manufacturer’s instructions for application and drying times.
5. Clean Up

Finally, it’s important to clean up your work area. Dispose of any waste materials, such as wood shavings or sandpaper, in a trash bin. Wipe down your tools and work surface to remove any dust or debris. This will help keep your workspace organized and ensure the longevity of your tools.
Following these steps will help ensure that your countersink hole is clean, smooth, and ready for further woodworking tasks or finishing touches to your project.
FAQ:
Why would I need to drill a countersink hole?
You would need to drill a countersink hole to create a depression at the top of a hole, allowing the head of a screw to sit flush with or below the surface of the material.
What materials can I drill a countersink hole in?
You can drill a countersink hole in materials such as wood, plastic, and metal.
What tools do I need to drill a countersink hole?
You will need a drill press, a countersink bit, a drill chuck, and safety goggles.
Are there any safety precautions I should take when drilling a countersink hole?
Yes, you should always wear safety goggles to protect your eyes from flying debris.
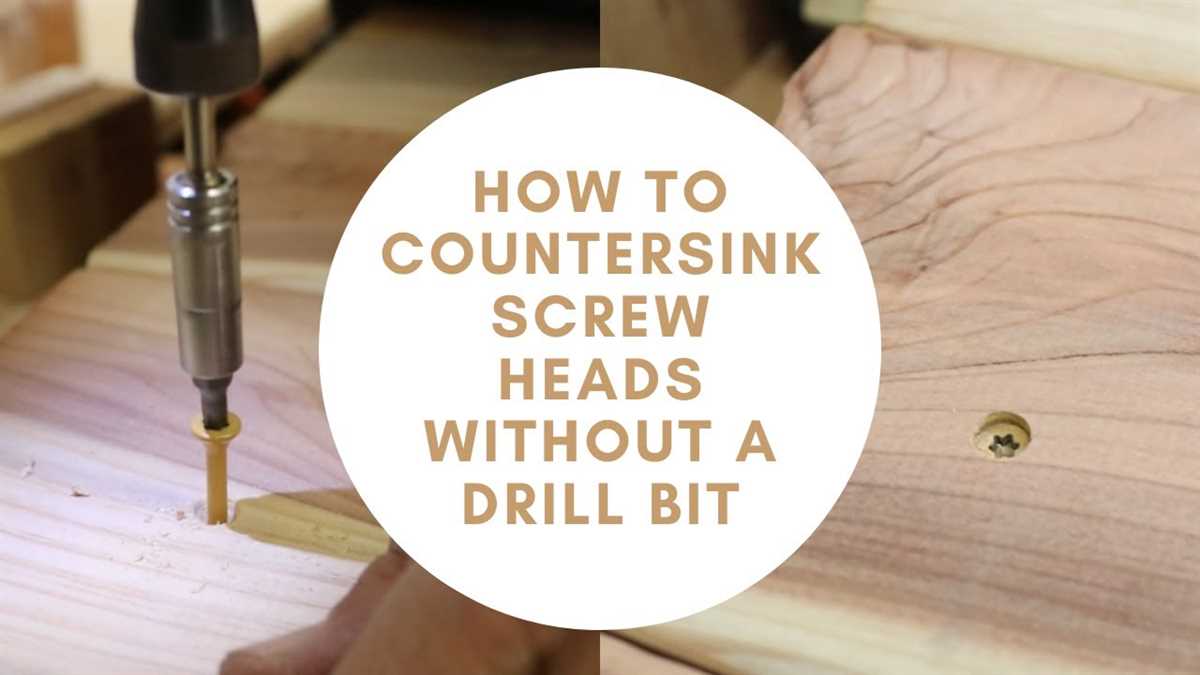
Can I drill a countersink hole without a drill press?
Yes, you can use a handheld drill instead of a drill press, but it might be more difficult to achieve accurate results.
Video:


Meet Harrison Clayton, a distinguished author and home remodeling enthusiast whose expertise in the realm of renovation is second to none. With a passion for transforming houses into inviting homes, Harrison's writing at https://thehuts-eastbourne.co.uk/ brings a breath of fresh inspiration to the world of home improvement. Whether you're looking to revamp a small corner of your abode or embark on a complete home transformation, Harrison's articles provide the essential expertise and creative flair to turn your visions into reality. So, dive into the captivating world of home remodeling with Harrison Clayton and unlock the full potential of your living space with every word he writes.


