Step-by-Step Guide on Fixing a Nail Drill

Having a nail drill is essential for any nail technician, but like any other tool, it can encounter problems and require repairs. Fixing a nail drill may seem daunting, but with the right knowledge and steps, it can be a relatively straightforward process.
The first step in fixing a nail drill is to identify the problem. Is it not turning on? Is it running slowly or erratically? Determining the specific issue will help guide your troubleshooting process. Once you’ve identified the problem, you can proceed with the necessary repairs.
One common issue with nail drills is a faulty power source. Start by checking the power cord and plug to ensure they are in good condition and securely connected. If there are any signs of damage or loose connections, they may need to be repaired or replaced. Additionally, check the power source itself, such as an outlet or power strip, to ensure it is functioning correctly.
If the power source is not the problem, the next step is to check the drill’s internal components. This may require disassembling the drill, so be sure to consult the manufacturer’s instructions or seek professional assistance if needed. Inspect the motor, bearings, and other moving parts for any signs of damage or wear. If any components are broken or worn out, they will likely need to be replaced.
Once you’ve identified the problem and determined the necessary repairs, you can begin the process of fixing your nail drill. Follow the manufacturer’s instructions or use online resources and guides for step-by-step instructions specific to your drill model. Be sure to take your time, work carefully, and follow all safety precautions to avoid further damage or injury.

Note: If you are unsure about any aspect of fixing your nail drill, it is always best to seek professional assistance or consult with a qualified technician. They will have the necessary expertise and tools to properly diagnose and repair the issue.
By following these step-by-step instructions and exercising caution, you can effectively fix a nail drill and keep it running smoothly for years to come. Regular maintenance and proper care can also help prevent future issues, so be sure to keep your nail drill clean and lubricated according to the manufacturer’s recommendations.
Preparation for Repair
Before starting the repair process of a nail drill, it is important to gather all the necessary tools and materials. This will help ensure a smooth and efficient repair process. Here are some steps to prepare for the repair:
1. Gather the necessary tools
- Screwdriver set: A set of screwdrivers with different sizes and types will be needed to disassemble the nail drill.
- Needle nose pliers: These pliers will be useful for manipulating small components and wires.
- Wire cutters: These will be necessary for cutting and stripping wires.
- Multimeter: A multimeter will help in diagnosing electrical issues with the nail drill.
- Soldering iron: If there are any broken wires or components that need to be soldered, a soldering iron will be necessary.
2. Prepare a clean and organized workspace
Having a clean and organized workspace will help ensure that the repair process goes smoothly. Clear away any clutter and make sure there is plenty of space to work. Arrange the tools in a way that is easily accessible, and keep them organized throughout the repair process.
3. Safety precautions
It is important to take safety precautions when working with a nail drill or any other electrical device. Remember to unplug the nail drill from the power source before starting the repair process. Additionally, it is recommended to wear safety goggles or glasses to protect your eyes from any potential hazards.
4. Familiarize yourself with the nail drill
Take some time to familiarize yourself with the nail drill and its components. This will help you understand how it works and make it easier to diagnose and fix any issues. Refer to the manufacturer’s manual or online resources for information on the nail drill’s specifications and parts.

By following these preparation steps, you will be well-equipped and ready to begin repairing your nail drill.
Identifying the Problem
Determine if the drill is not working at all or has reduced power
If your nail drill is not working at all, it could be due to a power issue or a motor problem. Check if the drill is properly plugged into a power source and if the power switch is turned on. If the drill still does not work, you may need to troubleshoot the motor or consider replacing it.
If the drill has reduced power or is not working as effectively as before, it could be due to a worn-out drill bit or a clogged air vent. Check the drill bit for signs of wear and tear, such as dullness or chipping. If the drill bit is worn out, replace it with a new one. Additionally, check the air vent for any debris or dust buildup. Clean the vent using a small brush to ensure proper airflow.
Identify any unusual noises or vibrations
If your nail drill is making unusual noises or vibrating excessively, it could be a sign of a loose or damaged component. Check all the screws and connections to ensure they are tight and secure. If any parts are damaged, such as the handpiece or collet, they may need to be repaired or replaced.

Inspect the speed and rotation settings
If the nail drill is not operating at the desired speed or rotation, check the speed and rotation settings. Make sure the drill is set to the appropriate speed for the task at hand. If the drill has multiple speed settings, try adjusting them to see if it improves performance. Refer to the user manual for instructions on how to change the speed and rotation settings.
Gathering the Necessary Tools
Before you begin fixing your nail drill, it’s important to gather all the necessary tools. Having the right tools on hand will make the repair process much easier and more efficient.
Here’s a list of the tools you’ll need:
- Screwdriver set – To remove screws and access the internal components of the nail drill.
- Needle-nose pliers – Useful for gripping and manipulating small parts.
- Wire cutters – To cut and strip wires, if necessary.
- Multimeter – Used to test electrical connections and troubleshoot any issues.
- Replacement parts – If you have identified specific parts that need to be replaced, make sure you have the new parts ready.
- Cotton swabs – To clean any dirt or debris that may be affecting the drill’s performance.
- Lubricant – A small amount of lubricant can help improve the smoothness of the drill’s rotation.
- Clean cloth – To wipe down the drill and remove any excess oil or debris.
Having these tools readily available will save you time and frustration during the repair process. Make sure to gather them all before you start working on your nail drill.
Disassembling the Nail Drill

To begin the process of fixing your nail drill, you will need to disassemble it. This will allow you to access the internal components that may need repair or replacement. Follow these steps to disassemble the nail drill:
- Unplug the nail drill from the power source to ensure your safety.
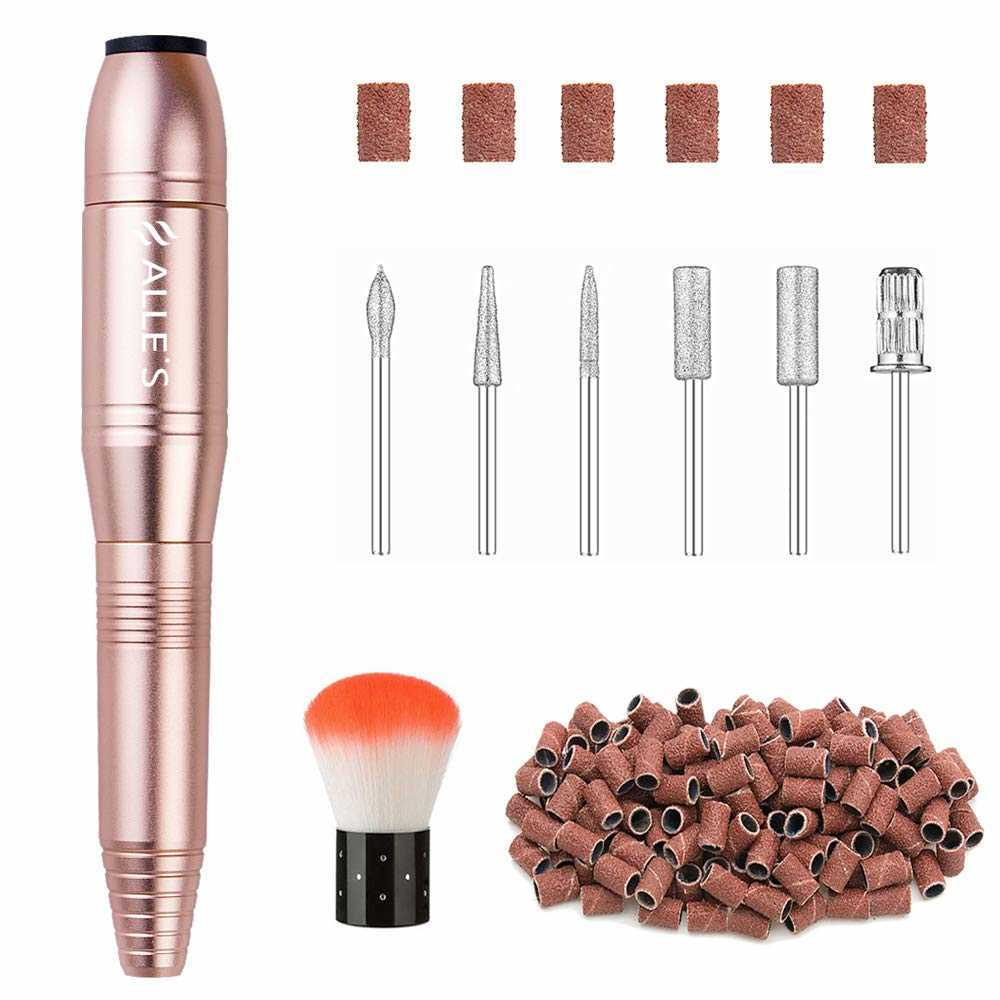
- Remove any attachments or accessories from the nail drill.
- Place the nail drill on a clean and flat surface.
- Look for screws or fasteners that are holding the drill housing together. These are usually located underneath rubber grips or labels.
- Use a screwdriver or an appropriate tool to unscrew and remove the screws.
- Gently pry open the housing using a flat tool, such as a plastic opening tool or a flathead screwdriver. Be careful not to damage any delicate components inside.
- Once the housing is open, you will have access to the internal components of the nail drill.
It’s important to note that different nail drill models may have slight variations in the disassembly process. Refer to the user manual or online resources specific to your nail drill model for more detailed instructions.
Important: Before proceeding with any repairs or replacements, it is recommended to take pictures or make notes of the current arrangement of the components. This will make reassembly easier.
Inspecting and Cleaning the Components
Inspecting and cleaning the components of your nail drill is an important step in the fixing process. By doing a thorough inspection, you can identify any damaged or worn-out parts that need to be replaced. Cleaning the components helps remove any dirt or debris that may be affecting the performance of the nail drill.
What you’ll need:

- Cotton swabs or a soft-bristled brush
- Rubbing alcohol or nail cleaner solution
- Clean cloth or paper towel
Steps to inspect and clean the components:
- Unplug the nail drill: Before you begin inspecting and cleaning the components, make sure the nail drill is unplugged and turned off to avoid any accidents.
- Remove the drill bit: Gently unscrew or pull out the drill bit from the handpiece. This will allow you better access to the components that need inspection and cleaning.
- Inspect the handpiece: Examine the handpiece for any visible damage such as cracks, dents, or loose parts. Pay attention to the cord as well and check for any frayed or exposed wires. If you notice any damage, it may be necessary to replace the handpiece or cord.
- Clean the handpiece: Dip a cotton swab or soft-bristled brush into rubbing alcohol or nail cleaner solution. Gently clean the interior and exterior of the handpiece, making sure to remove any dirt or debris that may have accumulated. If the handpiece is particularly dirty, you can use a damp cloth or paper towel to wipe it down.
- Inspect the drill bit: Carefully examine the drill bit for any signs of wear or damage. Look for dull edges, bent shafts, or chipped surfaces. If the drill bit is worn-out or damaged, it’s time to replace it with a new one.
- Clean the drill bit: Soak the drill bit in rubbing alcohol or nail cleaner solution for a few minutes to remove any built-up residue. Then, use a clean cloth or paper towel to wipe it dry.
- Inspect other components: Depending on the type of nail drill, you may have additional components such as sanding bands, mandrels, or attachments. Inspect these components for any damage or wear and clean them as necessary.
- Reassemble and test: Once you have inspected and cleaned all the components, reassemble the nail drill by inserting the drill bit back into the handpiece. Plug it in and turn it on to test its functionality. If everything is working properly, you’re ready to continue using your nail drill.
By regularly inspecting and cleaning your nail drill components, you can ensure its longevity and optimal performance. Remember to always follow the manufacturer’s instructions and recommendations for maintenance and care.
Replacing Faulty Parts
If you have identified a faulty part in your nail drill, it is important to replace it as soon as possible. Here is a step-by-step guide on how to replace common faulty parts:
1. Gather the necessary tools
Before replacing the faulty part, make sure you have all the tools you need. This may include screwdrivers, pliers, a replacement part, and any other tools specific to your nail drill model.
2. Turn off and unplug the nail drill
Before beginning any repairs or replacements, it is crucial to turn off and unplug the nail drill to ensure your safety.
3. Disassemble the nail drill
Using the appropriate screwdriver, carefully remove the screws holding the casing of the nail drill together. Gently separate the casing to access the internal components of the drill.
4. Identify the faulty part
Inspect the internal components of the nail drill and identify the faulty part. This may be a motor, a switch, a cord, or any other component that is not functioning properly.
5. Remove the faulty part
Once you have identified the faulty part, use the appropriate tools to remove it from the nail drill. This may involve unscrewing it, disconnecting any wiring, or gently pulling it out of its housing.
6. Install the new part
Take the new, replacement part and carefully install it in the nail drill. Make sure it is properly aligned and securely fastened according to the manufacturer’s instructions.
7. Reassemble the nail drill
Once the new part is installed, reassemble the nail drill by aligning the casing pieces and tightening the screws. Ensure that all components are properly connected and in their correct positions.
8. Test the nail drill
After reassembling the nail drill, plug it back in and turn it on to test the functionality of the replaced part. Check for any unusual noises, vibrations, or other signs of malfunction.
9. Repeat if necessary
If the nail drill is still not functioning correctly, repeat the process to identify and replace any other faulty parts. It may be necessary to consult the manufacturer or a professional technician for further assistance.
10. Properly dispose of the old part
Dispose of the old, faulty part responsibly according to local regulations. Do not throw it in regular trash bins as it may contain hazardous materials.
By following these steps, you can effectively replace faulty parts in your nail drill and restore its functionality.
Reassembling the Nail Drill
Once you have finished troubleshooting and repairing your nail drill, it is time to reassemble the parts back together. Follow these steps to ensure proper reassembly:
- Start by gathering all the individual components of the nail drill that you have disassembled.
- Inspect each part for any damage or wear. Replace any damaged parts with new ones.
- Refer to your notes or photographs taken during the disassembly process to help you remember the correct order and orientation of each part.
- Carefully insert the motor back into the drill handle, making sure it is aligned properly.
- If applicable, reattach the switch or control buttons to the handle.
- Reattach any springs or other small components that may have been disconnected during the disassembly process.
- Place the handpiece or drill bit holder back into its socket, ensuring a secure fit.
- Secure any screws or fasteners that hold the components together. Use a screwdriver or other appropriate tool to tighten them.
- Test the reassembled nail drill to ensure everything is functioning properly. Turn it on and check for any unusual sounds, vibrations, or malfunctions.
By following these steps, you should be able to successfully reassemble your nail drill and have it ready for use again.
Testing and Troubleshooting
When fixing a nail drill, it is important to properly test and troubleshoot the problem before attempting any repairs. Here are some steps you can follow to identify the issue and determine the best course of action:
- Inspect for visible damage: Start by examining the nail drill for any visible damage such as broken or loose parts, frayed wires, or signs of overheating. If you notice any physical damage, it may indicate the source of the problem.
- Check the power supply: Ensure that the nail drill is properly plugged into a reliable power source. Try using a different outlet or power cord to rule out any issues with the electrical supply.
- Test the switch: If the nail drill is not turning on, check the switch for any defects. Toggle the switch on and off to see if there is any response from the drill. If the switch appears to be faulty, it may need to be replaced.
- Inspect the motor connections: Open up the nail drill and examine the motor connections. Make sure all the wires are securely connected and there are no loose or damaged connections. Sometimes, a loose connection can cause the drill to stop working or run erratically.
- Test the motor: If the nail drill is not running smoothly or making strange noises, it could be a problem with the motor. Remove the motor from the drill and test it separately. Apply power to the motor and observe its performance. If the motor is not functioning properly, it may need to be replaced.
- Check for debris: Sometimes, the nail drill may not be working properly due to the presence of debris or build-up in the drill head or chuck. Remove the drill bit and inspect for any dirt, dust, or debris. Clean the chuck and drill head thoroughly and reassemble the drill to see if the problem persists.
- Consult the user manual: If you are still unable to determine the issue or fix the nail drill, refer to the user manual that came with the drill. The manual may contain troubleshooting steps specific to your model and provide guidance on how to resolve common issues.
By following these testing and troubleshooting steps, you can identify the problem with your nail drill and take appropriate action to fix it. However, if you are unsure or uncomfortable with conducting the repairs yourself, it is recommended to seek professional assistance to avoid any further damage.
FAQ:
Why is my nail drill not turning on?
If your nail drill is not turning on, there could be a few possible reasons for this. First, make sure it is properly plugged in and that the outlet is functioning. If it is plugged in and the outlet is working, check the power switch on the drill to ensure it is in the “on” position. If it still does not turn on, the motor may be burned out and may need to be replaced.
How do I clean my nail drill?
Cleaning your nail drill is an important step to keep it in good working condition. Start by removing any nail debris or dust from the drill bit with a brush. Then, use a cotton pad soaked in rubbing alcohol to wipe down the entire surface of the drill, including the handle and bit. This will help disinfect and remove any buildup of oils or products. Finally, make sure to dry the drill thoroughly before using it again.
What should I do if my nail drill is overheating?
If your nail drill is overheating, it is important to address the issue as soon as possible to avoid damage to the motor. First, allow the drill to cool down by turning it off and unplugging it. Check for any obstructions that may be blocking proper airflow, such as dust or debris. If the issue persists, it may be a sign of a motor problem, and you should consider taking it to a professional for repair.
Why is my nail drill vibrating excessively?
If your nail drill is vibrating excessively, it could be due to an imbalance in the drill bit. Start by removing the drill bit and inspecting it for any visible signs of damage or wear. Clean the bit thoroughly and reinsert it into the drill. If the excessive vibration continues, it may be necessary to replace the drill bit, as it may be out of balance and causing the issue.
How often should I replace the drill bit on my nail drill?
The frequency at which you should replace the drill bit on your nail drill depends on several factors, including how often you use it and the type of materials you are working with. As a general guideline, it is recommended to replace the drill bit every 3-6 months for regular use. However, if you notice any signs of wear or the bit becomes dull, it should be replaced immediately.
What can I do if my nail drill is making a loud noise?
If your nail drill is making a loud noise, it may be a sign of a mechanical issue. Start by checking the drill bit to ensure it is properly secured and not causing any vibrations. If the noise persists, the motor may be damaged and in need of repair or replacement. It is best to consult a professional in this case, as attempting to fix it yourself could cause further damage.
Can I use a nail drill on natural nails?
Yes, a nail drill can be used on natural nails, but it should be done with caution. It is important to use a low speed setting and gentle pressure to avoid damaging the nail plate. It is also recommended to use a fine-grit drill bit for natural nails. If you are not experienced in using a nail drill, it is best to seek the help of a professional to prevent any potential damage or injury.
Video:


Meet Harrison Clayton, a distinguished author and home remodeling enthusiast whose expertise in the realm of renovation is second to none. With a passion for transforming houses into inviting homes, Harrison's writing at https://thehuts-eastbourne.co.uk/ brings a breath of fresh inspiration to the world of home improvement. Whether you're looking to revamp a small corner of your abode or embark on a complete home transformation, Harrison's articles provide the essential expertise and creative flair to turn your visions into reality. So, dive into the captivating world of home remodeling with Harrison Clayton and unlock the full potential of your living space with every word he writes.


