Step-by-Step Guide on Drilling a Hole into a Crystal

Crystals have long been appreciated for their beauty and spiritual properties. Whether you are a crystal enthusiast or a jewelry maker, drilling a hole in a crystal can be a useful skill to have. A hole in a crystal allows you to string it onto a wire or cord, turning it into a pendant or bead. While drilling into a crystal may seem intimidating, with the right tools and technique, it can be a straightforward process. This step-by-step guide will walk you through the process of drilling a hole into a crystal.
Step 1: Choose the Right Crystal
Not all crystals are suitable for drilling. Some crystals, like quartz or amethyst, are harder and more durable, making them ideal for this process. It’s important to choose a crystal that is sturdy enough to withstand the drilling without shattering or cracking. Additionally, consider the size and shape of the crystal, as it will determine the location and size of the hole you can drill. It’s also worth noting that softer crystals, like selenite or calcite, may not be suitable for drilling as they can easily break.
Step 2: Gather the Necessary Tools
Before you start drilling, make sure you have the right tools at hand. You will need a high-speed rotary tool with a diamond drill bit specifically designed for drilling through hard materials like crystals. Regular drill bits may shatter the crystal or not create a clean hole. You will also need a small container filled with water to keep the drill bit and crystal cool during the drilling process. Safety glasses and a dust mask are recommended to protect your eyes and lungs from any debris that may be generated while drilling.

Step 3: Prepare the Crystal
Once you have selected your crystal and gathered the necessary tools, it’s time to prepare the crystal for drilling. Clean the crystal thoroughly to remove any dirt or oils that may interfere with the drilling process. Then, mark the spot where you want to drill the hole using a pencil or a piece of tape. The mark will help you align the drill bit and ensure that the hole is in the desired location. It’s a good idea to start with a small hole and gradually increase the size if needed.
Choosing the Right Crystal
Size of Crystal
When choosing a crystal for drilling, it is important to consider its size. Larger crystals may be easier to work with, as they provide more surface area for drilling. However, larger crystals may also be more difficult to handle and require more time and effort to drill. Smaller crystals may be more delicate and require careful handling, but they can also be easier to drill.
Hardness of Crystal
The hardness of the crystal also plays a role in determining whether it is suitable for drilling. Some crystals, such as quartz, have a high hardness and are therefore more resistant to being drilled. Other crystals, such as calcite, may be softer and more prone to cracking or chipping during the drilling process. It is important to choose a crystal with a hardness that will allow for successful drilling without damaging the stone.
Transparency and Clarity
The transparency and clarity of the crystal can also be factors to consider when choosing a crystal for drilling. Transparent crystals, such as quartz, can be more visually appealing when the hole is drilled. Crystals with a high level of clarity can also showcase the beauty of the stone, especially when light passes through it. However, opaque crystals can also be interesting to drill and may have unique patterns or textures that can add character to the finished piece.
Shape of Crystal
The shape of the crystal can affect the drilling process and the final outcome. Crystals with irregular shapes or intricate formations may be more challenging to drill. Flat, smooth surfaces are generally easier to work with and provide a stable base for drilling. However, the shape of the crystal can also add visual interest to the finished piece, so it is a matter of personal preference.
Table for Reference
| Crystal | Size | Hardness | Transparency | Clarity |
|---|---|---|---|---|
| Quartz | Various | 7 | Transparent | Clear to cloudy |
| Calcite | Various | 3 | Transparent to translucent | Clear to cloudy |
| Amethyst | Various | 7 | Transparent to translucent | Clear to cloudy |
Conclusion
Choosing the right crystal for drilling involves considering factors such as size, hardness, transparency, clarity, and shape. It is important to find a crystal that will be both suitable for drilling and visually pleasing in its finished form. By carefully considering these factors, you can select the perfect crystal for your drilling project.
Gathering the Necessary Tools
Before you begin drilling a hole into a crystal, it’s important to gather all the necessary tools to ensure a successful and safe process. Here is a list of tools you will need:
- Safety goggles: Protect your eyes from any flying debris or particles.
- Gloves: Wear gloves to protect your hands from any potential injuries.
- Masonry drill bit: Use a masonry drill bit specifically designed for drilling into hard materials like crystals. Choose a size depending on the desired hole diameter.
- Drill: Use a drill with variable speed control to have better control over the drilling process. Make sure it is compatible with the chosen masonry drill bit.
- Masking tape: Use masking tape to create a protective barrier on the surface of the crystal. This will help prevent any potential cracking or scratching during the drilling process.
- Cooling lubricant: Use a cooling lubricant to prevent the drill bit from overheating and to prolong its lifespan. Water or a specialized cooling lubricant can be used.
- Water container: Prepare a container of water nearby to cool down the drill bit during the drilling process.
- Clamp or vice: Secure the crystal in place using a clamp or vice to minimize movement and ensure stability when drilling.
- Clean cloth or towel: Prepare a clean cloth or towel to wipe away any debris or excess lubricant during the drilling process.
By gathering these tools beforehand, you will be well-prepared for the drilling process and have everything you need to safely and effectively create a hole in your crystal.
Preparing the Crystal
Gather the Materials
Before you begin drilling a hole into a crystal, gather all the necessary materials. You will need:
- A crystal of your choice
- A drill with a diamond-tipped drill bit
- A container with water
- A mask and safety goggles
Select the Right Crystal

Choose a crystal that is suitable for drilling. Some crystals, like quartz and amethyst, are more durable and easier to drill through. Avoid crystals that are brittle or have a high likelihood of cracking during the drilling process.
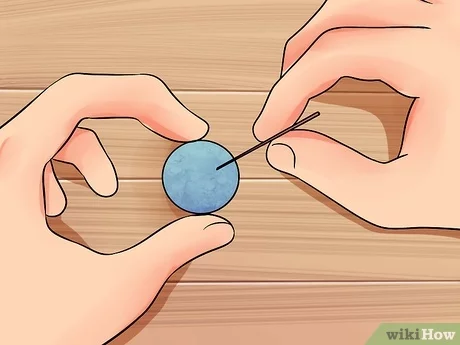
Mark the Drilling Spot
Decide where you want the hole to be in the crystal and make a small mark with a fine-tipped permanent marker. Take your time to ensure the spot is accurate, as it may be difficult to change once you start drilling.
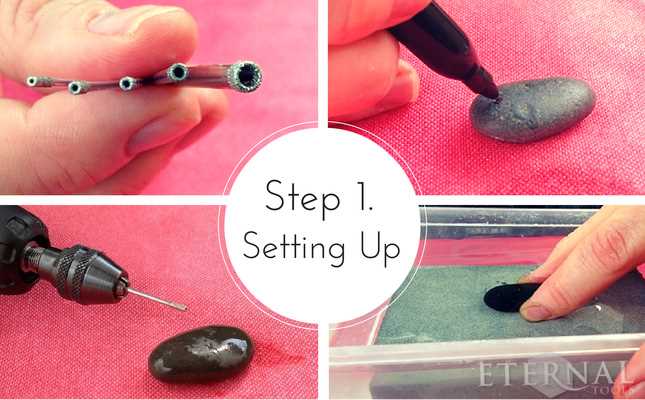
Set Up Your Work Area
Find a stable surface to work on and place a towel or soft cloth underneath the crystal to prevent it from slipping. Fill a container with water and place it nearby to keep the drill bit cool during the drilling process.
Wear Protective Gear
Before you start drilling, put on a mask and safety goggles to protect yourself from any flying debris or dust. It’s important to take precautions and keep yourself safe.
Prepare the Drill Bit
If your diamond-tipped drill bit is new, you may need to condition it before using it. This involves slightly worn the tip of the drill bit on a hard surface like glass or a brick. This will help ensure that the drill bit is sharp and efficient.
Marking the Spot
Before drilling a hole into a crystal, it is important to mark the spot where the hole will be drilled. This will ensure accuracy and precision during the drilling process. Here are the steps to effectively mark the spot:
- Gather the necessary tools: To mark the spot, you will need a fine-tipped marker or a pencil, a ruler or measuring tape, and a piece of masking tape.
- Choose the desired location: Decide where you want the hole to be drilled on the crystal. Consider the size and shape of the crystal, as well as the design or purpose of the final product.
- Measure and mark: Use a ruler or measuring tape to measure the appropriate distance from the edge of the crystal to the desired location of the hole. Make a small mark on the crystal using the fine-tipped marker or pencil.
- Double-check the position: With the mark in place, take a step back and visually inspect the crystal to ensure that the chosen location is indeed where you want the hole to be. Make any necessary adjustments to the mark if needed.
- Secure the mark: Once you are satisfied with the chosen location, place a piece of masking tape over the mark. This will help prevent the drill bit from slipping during the drilling process and also protect the crystal from potential damage.
By following these steps to mark the spot, you will have a clear indication of where to drill the hole into the crystal. This will help ensure accuracy and minimize any potential mistakes or damage to the crystal.
Securing the Crystal
Before you begin drilling the hole into the crystal, it is important to secure it properly to prevent any damage or accidents during the process. Follow these steps to securely hold the crystal in place:
- Gather the necessary supplies: You will need a soft cloth or towel, a clamp or vise, and a foam pad or rubber mat.
- Wrap the crystal: Place the soft cloth or towel on your work surface and carefully wrap the crystal in it. Make sure to cover the entire crystal to provide cushioning and protection.
- Secure the crystal: Position the wrapped crystal in a clamp or vise, ensuring that it is held firmly but not too tightly. Avoid putting excessive pressure on the crystal, as this can cause it to crack or break.
- Add additional support: Place a foam pad or rubber mat under the clamp or vise to provide additional stability and prevent any slipping. This will help keep the crystal in place during the drilling process.
Securing the crystal is an essential step to ensure the safety of both yourself and the crystal. Taking the time to properly secure it will minimize the risk of damage and allow for a more accurate drilling process.
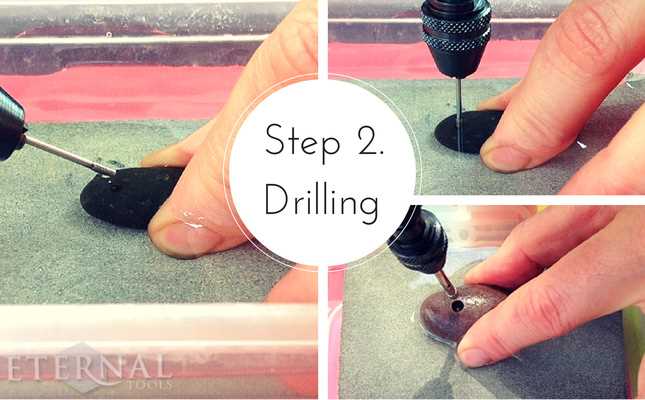
Drilling the Hole
Once you have gathered all the necessary materials and prepared your crystal, you can proceed with drilling the hole. Follow these steps to ensure a successful drilling process:
- Choose the right drill bit: Select a diamond-tipped drill bit that is suitable for drilling into crystals. Diamond drill bits are specifically designed for hard and durable materials like crystals. Make sure the size of the drill bit matches the desired size of the hole.
- Secure the crystal: Place the crystal securely in a vise or clamp to hold it in place during the drilling process. This will prevent the crystal from moving or rolling, ensuring precision and safety.
- Add water as a lubricant: Drill the hole under running water to act as a coolant and lubricant. This will help prevent overheating and damage to the crystal, as well as minimize dust and debris.
- Start drilling: Start the drilling process by positioning the drill bit perpendicular to the surface of the crystal. Apply gentle pressure and begin drilling at a slow speed to create a small indentation or “starter hole”.
- Continue drilling: Gradually increase the drilling speed and apply slightly more pressure as you continue to drill deeper into the crystal. Take breaks and let the crystal cool down periodically to avoid overheating.
- Monitor the progress: Keep an eye on the drilling progress and adjust your drilling speed and pressure accordingly. Be patient and take your time to prevent any accidents or damage to the crystal.
- Finish the hole: Once you have drilled through the crystal, remove the drill bit and clean the hole using water and a small brush. Rinse the crystal with water to remove any debris or residue.
Following these steps will ensure that you drill a clean and precise hole into your crystal without causing any damage. Remember to always wear safety goggles and gloves during the drilling process to protect yourself from any potential hazards.
Cleaning and Finishing

Once you have drilled a hole into your crystal, it’s important to clean and finish it properly to ensure it looks polished and professional. Follow these steps to clean and finish your crystal:
1. Remove any debris
Use a soft brush or cloth to remove any debris or dust from the drilled hole. This will ensure that the finished hole is clean and free from any obstructions.
2. Smooth the edges

Using a fine-grit sandpaper or a diamond file, gently smooth the edges of the drilled hole. This will help remove any rough spots or sharp edges and make the hole look more polished.
3. Polish the crystal

To give your crystal a shiny and polished finish, you can use a polishing compound or a jewelry polishing cloth. Apply the polishing compound to a cloth and gently rub the surface of the crystal in a circular motion. If using a jewelry polishing cloth, simply buff the crystal until it shines.
4. Rinse and dry
After polishing, rinse the crystal with clean water to remove any residue from the polishing compound. Dry it thoroughly with a soft cloth or allow it to air dry.
5. Apply a protective coating (optional)
If desired, you can apply a protective coating to the drilled hole and the surface of the crystal to prevent tarnishing or discoloration. There are various crystal sealants or jewelry coatings available that can help maintain the appearance of your crystal.
6. Final inspection
Before using or displaying your crystal, give it a final inspection to ensure that it is clean, polished, and free from any imperfections. If necessary, repeat the cleaning and finishing steps for a flawless result.
By following these steps, you can ensure that your drilled hole in the crystal is clean, polished, and finished to a professional standard. This will enhance the overall appearance of your crystal and make it suitable for various crafting or jewelry-making projects.
Caring for Your Drilled Crystal
Once you have successfully drilled a hole into your crystal, it is important to take proper care of it to ensure its longevity and beauty. Here are some tips on how to care for your drilled crystal:
1. Cleaning
Regularly clean your drilled crystal to remove any dirt, dust, or oils that may accumulate on its surface. Use a soft, lint-free cloth or a gentle brush to gently wipe away any particles.
2. Storage
When not in use, store your drilled crystal in a safe and secure place. Avoid exposing it to extreme temperature changes or direct sunlight, as this can cause damage or fading.
3. Handling

Handle your drilled crystal with care to prevent any chips or cracks. Avoid dropping it onto hard surfaces or knocking it against other hard objects.
4. Avoid Chemicals
Avoid exposing your drilled crystal to harsh chemicals or cleaning agents, as these can damage its surface or alter its natural properties. Instead, use mild soap and water for cleaning.
5. Display
If you choose to display your drilled crystal, make sure to place it on a stable surface away from any edges or areas where it could easily be knocked over.
6. Regular Inspection
Periodically inspect your drilled crystal for any signs of damage or wear. If you notice any cracks, chips, or loose parts, handle it with care and consider seeking professional assistance for repair.
7. Avoid Excessive Force
Avoid applying excessive force or pressure to your drilled crystal, as this can cause it to break or shatter. Use gentle movements and allow the natural beauty of the crystal to shine through.
8. Avoid Water Damage
Some crystals are water-sensitive, so it is important to avoid exposing them to water for extended periods. If you need to clean a water-sensitive drilled crystal, use a damp cloth instead of soaking it in water.
| Tip | Description |
|---|---|
| Cleaning | Regularly clean your drilled crystal using a soft cloth or brush. |
| Storage | Store your drilled crystal in a safe place, away from extreme temperatures and direct sunlight. |
| Handling | Handle your drilled crystal with care to prevent chipping or cracking. |
| Avoid Chemicals | Avoid exposing your drilled crystal to harsh chemicals or cleaning agents. |
| Display | If displaying your drilled crystal, ensure it is on a stable surface away from edges. |
| Regular Inspection | Periodically inspect your drilled crystal for any signs of damage or wear. |
| Avoid Excessive Force | Avoid applying excessive force or pressure to your drilled crystal. |
| Avoid Water Damage | Avoid exposing water-sensitive drilled crystals to water for extended periods. |
FAQ:
What materials do I need for drilling a hole into a crystal?
To drill a hole into a crystal, you will need a crystal, a diamond drill bit, water, a drill press or a rotary tool with a drill stand, and safety gear such as goggles and gloves.
Can I use a regular drill bit to drill a hole into a crystal?
No, you cannot use a regular drill bit to drill a hole into a crystal. Regular drill bits are not strong enough to drill through hard materials like crystal. You will need a diamond drill bit, specifically designed for drilling into hard materials, to successfully drill a hole into a crystal.
What is the best way to keep the crystal cool while drilling?
The best way to keep the crystal cool while drilling is to constantly spray it with water. This helps to lubricate the drill bit and prevent it from overheating. You can use a spray bottle filled with water to spray the crystal as you drill, or you can set up a drip system where water drips onto the crystal while you drill.
Is it necessary to wear safety gear while drilling into a crystal?
Yes, it is necessary to wear safety gear while drilling into a crystal. The process of drilling can create fine dust and debris, which can be harmful if it gets into your eyes or skin. It is recommended to wear safety goggles and gloves to protect yourself while drilling. Additionally, if using a high-speed rotary tool, ear protection may also be advisable.
Video:


Meet Harrison Clayton, a distinguished author and home remodeling enthusiast whose expertise in the realm of renovation is second to none. With a passion for transforming houses into inviting homes, Harrison's writing at https://thehuts-eastbourne.co.uk/ brings a breath of fresh inspiration to the world of home improvement. Whether you're looking to revamp a small corner of your abode or embark on a complete home transformation, Harrison's articles provide the essential expertise and creative flair to turn your visions into reality. So, dive into the captivating world of home remodeling with Harrison Clayton and unlock the full potential of your living space with every word he writes.


