Step-by-step guide on drilling a hole in a terracotta pot

If you are a plant enthusiast, chances are you have come across the need to drill a hole in a terracotta pot. Whether you want to improve drainage or create a hole for a new plant, drilling a hole in a terracotta pot can be a simple and satisfying DIY project. In this step-by-step guide, we will walk you through the process of drilling a hole in a terracotta pot to help you achieve a healthy and thriving plant.
Step 1: Gather the necessary tools
Before you begin, make sure you have all the necessary tools at hand. You will need a terracotta pot, a drill with a masonry bit, safety goggles, and a marker or pencil. It’s important to use a masonry bit specifically designed for drilling into ceramics or terracotta to prevent any cracking or damage to the pot.
Step 2: Mark the spot
Next, identify the desired location for the hole. Use a marker or pencil to make a small dot on the surface of the pot, where you want the hole to be. Take into consideration the size of your plant’s roots and the drainage needs when determining the size and location of the hole.

Tip: If you are planning on drilling multiple holes, make sure to evenly space them around the pot to ensure proper drainage.
Gathering the necessary tools
Before you start drilling a hole in a terracotta pot, you’ll need to gather a few essential tools. These tools will help make the process safer and more efficient. Here is a list of the tools you’ll need:
- Drill machine: You’ll need a drill machine with a masonry drill bit. Make sure the drill machine is in good working condition and has a fully charged battery or is connected to a power source.
- Masonry drill bit: Choose a masonry drill bit specifically designed for drilling into ceramic or terracotta surfaces. The size of the drill bit will depend on the size of the hole you want to create.
- Masking tape: Use masking tape to create a barrier and prevent the drill bit from slipping on the surface of the terracotta pot.
- Marker: A marker will help you mark the exact spot where you want to drill the hole on the terracotta pot.
- Safety goggles: Protect your eyes from potential debris or shards by wearing a pair of safety goggles.
- Gloves: It’s a good idea to wear gloves to protect your hands during the drilling process.
- Damp cloth: Keep a damp cloth nearby to clean the surface of the pot and remove any dust or debris that may accumulate during drilling.
Having all these tools at hand will ensure that you can carry out the drilling process smoothly and successfully.
Choose the right drill bit
Choosing the right drill bit is essential for drilling a hole in a terracotta pot successfully. The wrong drill bit can crack or break the pot, ruining your project. Here are a few factors to consider when selecting the drill bit:

- Material: Choose a drill bit specifically designed for drilling into ceramics or pottery. These drill bits have a carbide or diamond tip, which is much harder than the terracotta material, allowing it to cut through without damaging the pot.
- Size: The size of the hole you want to make will determine the size of the drill bit you need. Measure the diameter of the hole you want and select a drill bit that matches that size.
- Type: There are different types of drill bits available, such as twist bits, spear-point bits, or spade bits. Twist bits are the most commonly used and are suitable for most projects. However, if you need to drill a larger hole, a spade bit may be more appropriate.
- Shank: Consider the shank size of the drill bit. The shank is the part of the bit that fits into the drill. Make sure the shank size matches the chuck size of your drill to ensure a secure fit.
It is always a good idea to have a few spare drill bits on hand, especially if you are drilling multiple holes or if the material is particularly hard. This way, you can easily switch to a new bit if one becomes dull or breaks during the drilling process.
Remember to handle the drill bit with care and always wear safety goggles to protect your eyes from any flying debris. Once you have chosen the right drill bit, you are ready to move on to the next step of drilling the hole in your terracotta pot.
Prepare the terracotta pot
Before you can begin drilling a hole in your terracotta pot, you’ll need to gather a few materials and make sure the pot is ready for drilling.
Materials needed:
- Terracotta pot
- Measuring tape or ruler
- Marker or pencil
- Drill with a masonry bit
- Protective eyewear and gloves
- Water source
Steps to prepare the terracotta pot:
- Choose the location for the hole. Determine where you want the hole to be and mark it on the pot using a marker or pencil. This will help guide you when drilling.
- Measure the size of the hole. Determine the size of the hole you want to drill and choose an appropriate masonry bit for your drill. Ensure that the diameter of the bit matches the desired size of the hole.
- Put on protective eyewear and gloves. It’s important to protect your eyes and hands while drilling, as small debris and fragments may fly off.
- Wet the area to be drilled. Fill a small container or bucket with water and wet the area of the pot where you’ll be drilling the hole. This will help keep the pot from cracking or splitting during the drilling process.
Now that you have prepared the terracotta pot, you are ready to start drilling a hole. The next section will guide you through the drilling process step by step.
Marking the drilling spot
- Before drilling a hole in a terracotta pot, it is essential to mark the exact spot where you want the hole to be.
- Ensure that you choose a suitable location, depending on the purpose of the hole. For example, if you plan to use the pot for drainage, you may want to mark the spot closer to the bottom of the pot.
- Use a ruler or a measuring tape to measure and mark the desired spot using a pencil or a marker. Make sure the mark is visible and clear.
- If you’re drilling multiple holes, ensure that the marks are evenly spaced and aligned.
Marking the drilling spot accurately will help you avoid any mistakes and ensure that the hole is drilled at the desired location.

Measure and mark the spot
Before drilling a hole in your terracotta pot, you’ll need to measure and mark the spot where you want the hole to be. Here’s how to do it:
- Place the pot on a flat surface where you can easily work on it.
- Take a measuring tape or ruler and measure the diameter of the plant or drainage hole you want to create. Make sure to measure accurately so that your plant fits properly.
- Once you have the diameter measurement, divide it by two to find the radius. This will be the distance from the center of the hole to the edge.
- Using a pencil or marker, make a small dot on the pot’s surface to mark the center of the hole. This dot will guide you when drilling.
- If you’re drilling multiple holes, repeat the above steps for each hole, making sure to space them out evenly.
By measuring and marking the spot accurately, you’ll ensure that you drill the hole where you want it and that it fits your plants perfectly. Taking the time to do this step properly will lead to a successful drilling experience.
Safety precautions
- Wear protective eyewear or safety goggles to protect your eyes from any flying shards of terracotta.
- Wear gloves to protect your hands from sharp tools and the rough edges of the terracotta pot.
- Work in a well-ventilated area to avoid breathing in any dust or debris generated during the drilling process.
- Use a respirator mask if drilling in an enclosed area or if there is a high amount of dust present.
- Ensure that the drilling area is clear of any objects or obstructions that may interfere with the drilling process.
- Use clamps or a non-slip mat to secure the terracotta pot in place and prevent it from moving during drilling.
- Keep a fire extinguisher nearby in case of any accidental fires caused by the drilling process.
- Avoid placing excessive pressure on the drill to prevent it from slipping and causing injuries.
- Do not try to force the drill through the terracotta pot if it is not drilling smoothly. This may cause the pot to crack or break.
- Inspect the terracotta pot for any cracks or damage before starting the drilling process. If the pot is already damaged, it may be more prone to breaking during drilling.
- Dispose of any broken terracotta pieces properly to avoid injuries from sharp edges.
Drilling the hole
Drilling a hole in a terracotta pot can be a delicate process, but with the right tools and techniques, it can be easily done. Follow these step-by-step instructions to drill a hole in your terracotta pot:
1. Gather the materials
Before you begin, make sure you have all the necessary materials:

- A terracotta pot
- A drill with a masonry bit
- Safety goggles
- A water source
2. Prepare the pot
Start by soaking the pot in water for at least 30 minutes. This will soften the terracotta and make it easier to drill.
3. Mark the spot
Using a pencil or marker, mark the spot where you want to drill the hole. Take into consideration the size of the plant you’ll be placing in the pot and choose an appropriate spot.
4. Put on safety goggles

Before you start drilling, put on your safety goggles to protect your eyes from any flying debris.
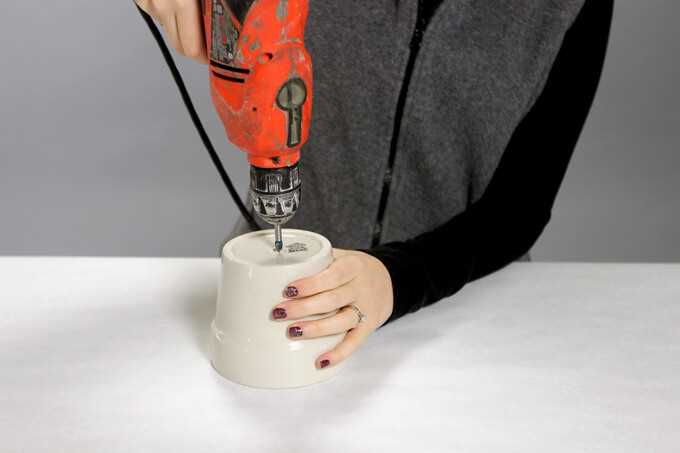
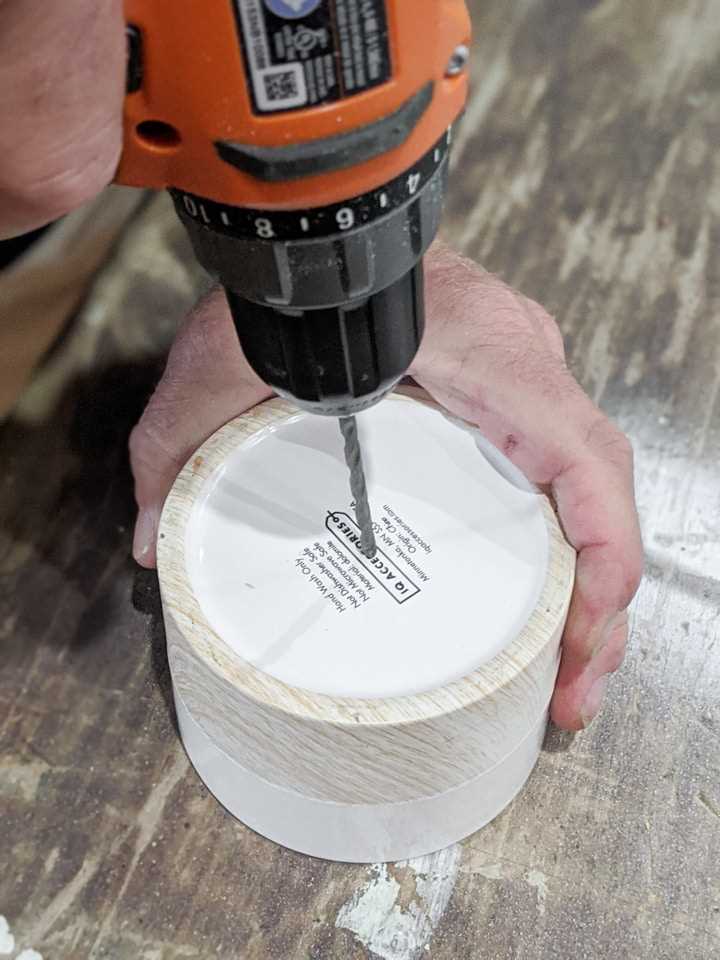
5. Start drilling

Position the drill bit on the marked spot and apply gentle pressure. Start drilling at a slow speed to prevent cracking the terracotta. As you drill, periodically stop to dip the drill bit in water to keep it cool.
6. Increase speed
Once you have made a small indentation, you can increase the speed of the drill. Continue to apply gentle pressure as you drill through the terracotta.
7. Clean the hole
Once the hole is complete, remove the debris and dust from the pot by running water through the hole. This will ensure that the hole is clean and ready for planting.
8. Test the hole
Before planting your desired plant, test the size of the hole by placing the plant’s pot in it. Make any necessary adjustments to ensure a proper fit.
Following these steps will allow you to successfully drill a hole in your terracotta pot and prepare it for planting.
Secure the pot
Before you begin drilling a hole in the terracotta pot, it’s important to secure the pot properly to ensure it doesn’t move or crack during the process. Here are some steps to follow:
- Choose a stable surface: Find a flat and stable surface to place the terracotta pot. This will prevent it from shifting or tipping over while you are drilling.
- Protect the surface: Place a piece of plywood or a thick towel underneath the pot to protect the surface below and provide additional stability.
- Use clamps or a vice: If possible, clamp the pot securely onto the surface using clamps or a vice. This will hold it firmly in place and prevent any movement during drilling.
- Mark the drilling spot: Use a pencil or marker to mark the spot where you want to drill the hole. Make sure it’s centered and avoid going too close to the edges as this might cause the pot to crack.
- Apply masking tape: To further protect the pot from cracking, apply a strip of masking tape over the marked spot. This will help reduce vibrations during drilling, reducing the risk of damage to the pot.
By securing the pot properly before drilling, you can ensure a safer and more successful hole-drilling process in your terracotta pot.
Start drilling slowly
Once you have gathered all the necessary tools and materials and have chosen the location where you want to drill the hole in your terracotta pot, you can begin the drilling process.
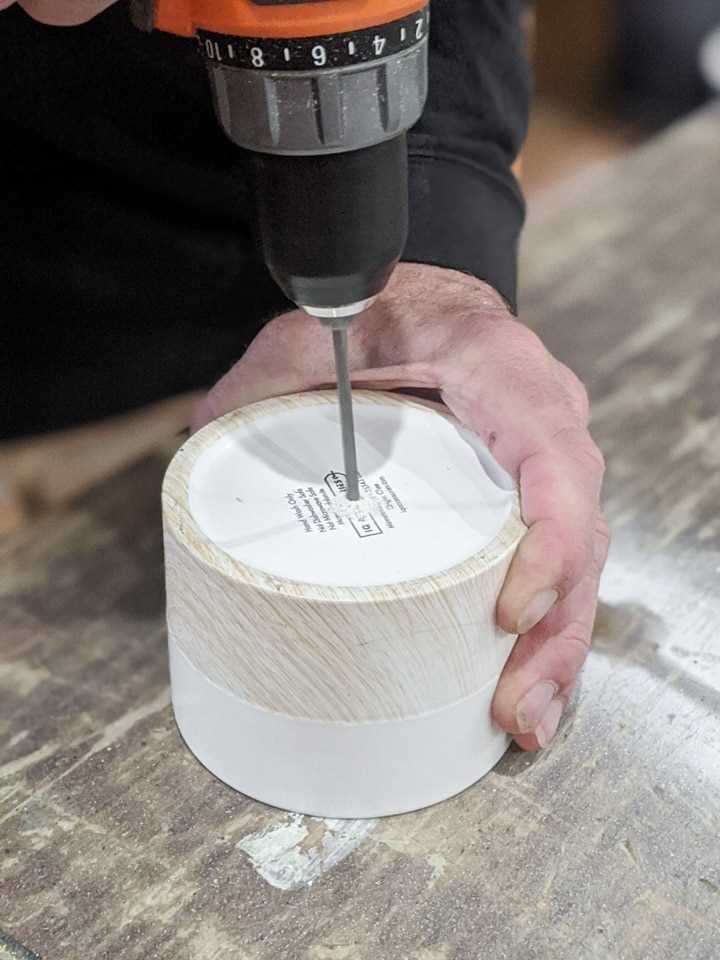
Step 1: Position the pot securely
Place the terracotta pot on a stable surface, such as a workbench or table. Make sure the pot is positioned securely to prevent it from moving or rolling while you are drilling.
Step 2: Mark the drilling spot
Using a marker or a piece of tape, mark the spot where you want to drill the hole on the terracotta pot. This will help you ensure that the hole is placed in the desired location.
Step 3: Put on safety gear
Before you start drilling, it is important to put on some safety gear to protect yourself. Wear safety goggles to shield your eyes from any flying debris or shards of terracotta that may come off during the drilling process. Additionally, wearing gloves will help protect your hands.
Step 4: Start drilling
Take your drill and attach a masonry or ceramic drill bit that is suitable for drilling into terracotta. Start the drill at a low speed and apply gentle pressure to the marked spot on the pot. Begin drilling slowly, allowing the drill bit to make its way through the terracotta gradually.
Step 5: Use water as a lubricant
Drilling into terracotta can generate heat, so it is recommended to use water as a lubricant to keep the drill bit and terracotta cool. Dip the drill bit in water occasionally while drilling to prevent overheating and improve the drilling efficiency.
Step 6: Increase speed and pressure
Once you have created a small indentation in the terracotta pot, you can increase the speed of the drill and apply additional pressure to continue drilling. Remember to do this slowly and cautiously to avoid damaging the pot or causing it to crack.
Step 7: Remove debris
Periodically stop drilling to remove any debris that may have accumulated inside the hole. This will prevent the drill bit from getting clogged and ensure that the drilling process continues smoothly.
Step 8: Check the hole size

After drilling for a while, check the size and depth of the hole. If you need a larger hole, continue drilling using the same techniques until you achieve the desired size.
Congratulations! You have successfully drilled a hole in your terracotta pot. Now you can proceed to use it for your intended purposes such as drainage or adding a plant.
Clean the hole
Once you have successfully drilled the hole in your terracotta pot, it’s important to clean up any debris or dust that may have accumulated in and around the hole.
Here’s how you can clean the hole:
- Using a small brush or a soft cloth, gently sweep away any loose dirt or dust from the top surface of the pot.
- If there are any larger pieces of debris or residue left in the hole, you can use a small tool like a toothpick or a wooden skewer to carefully remove them.
- For a thorough clean, you can rinse the pot under running water, making sure to also flush out the hole. However, be cautious with this step as excess moisture can weaken the terracotta material.
- After rinsing, use a clean cloth or paper towel to pat dry the pot, ensuring that all excess water is removed.
- Inspect the hole to make sure it is completely clean and ready for use. If there is still debris or dust present, repeat the cleaning process until the hole is clear.
By cleaning the hole properly, you ensure that your terracotta pot is ready for planting or any other decorative use you may have in mind.
FAQ:
What tools do I need to drill a hole in a terracotta pot?
To drill a hole in a terracotta pot, you will need a power drill with a masonry drill bit, water, masking tape, and safety goggles.
Can I use a regular drill bit to drill a hole in a terracotta pot?
No, you cannot use a regular drill bit to drill a hole in a terracotta pot. You need a masonry drill bit that is designed to drill through hard materials like terracotta.
Do I need to wet the surface of the terracotta pot before drilling?
Yes, it is important to wet the surface of the terracotta pot before drilling. This helps to prevent the pot from cracking or shattering while you drill.
How do I prevent the drill bit from sliding off the surface of the terracotta pot?
To prevent the drill bit from sliding off the surface of the terracotta pot, you can apply a piece of masking tape over the area where you want to drill. This will help to keep the drill bit in place and make it easier to create a clean hole.
What safety precautions should I take when drilling a hole in a terracotta pot?
When drilling a hole in a terracotta pot, it is important to wear safety goggles to protect your eyes from flying debris. It is also a good idea to work in a well-ventilated area and avoid leaning on the pot while drilling to prevent any accidents.
Video:


Meet Harrison Clayton, a distinguished author and home remodeling enthusiast whose expertise in the realm of renovation is second to none. With a passion for transforming houses into inviting homes, Harrison's writing at https://thehuts-eastbourne.co.uk/ brings a breath of fresh inspiration to the world of home improvement. Whether you're looking to revamp a small corner of your abode or embark on a complete home transformation, Harrison's articles provide the essential expertise and creative flair to turn your visions into reality. So, dive into the captivating world of home remodeling with Harrison Clayton and unlock the full potential of your living space with every word he writes.


