Step-by-Step Guide on Drilling a 4 Inch Well

Drilling a well is a complex process that involves carefully selecting a location, obtaining the necessary permits, and using specialized equipment and techniques. In this step-by-step guide, we will walk you through the process of drilling a 4-inch well.
Before you begin drilling, it is important to do your research and understand the local regulations and requirements for drilling a well. You will need to obtain the necessary permits and permissions from the relevant authorities. Additionally, it is important to hire a licensed and experienced driller who can ensure the well is drilled safely and according to regulations.
The first step in drilling a 4-inch well is to select a suitable location. This involves identifying potential water sources, such as aquifers or underground reservoirs. You will need to consider factors such as proximity to existing wells, geology, and topography. It is also important to consider access for drilling equipment and any potential environmental impact.
Once a suitable location has been identified, the next step is to prepare the site. This involves clearing the area of any vegetation or obstructions and leveling the ground. It may also be necessary to construct a drilling pad or platform to provide a stable base for the drilling equipment. It is important to follow proper safety procedures during this phase.
With the site prepared, the next step is to mobilize the drilling rig and associated equipment. The drilling rig is a large machine that is used to bore through the ground and reach the underground water source. The rig is operated by trained personnel who are responsible for drilling the well. The drilling process involves the use of drilling fluid or mud to cool the drill bit and remove cuttings from the hole.

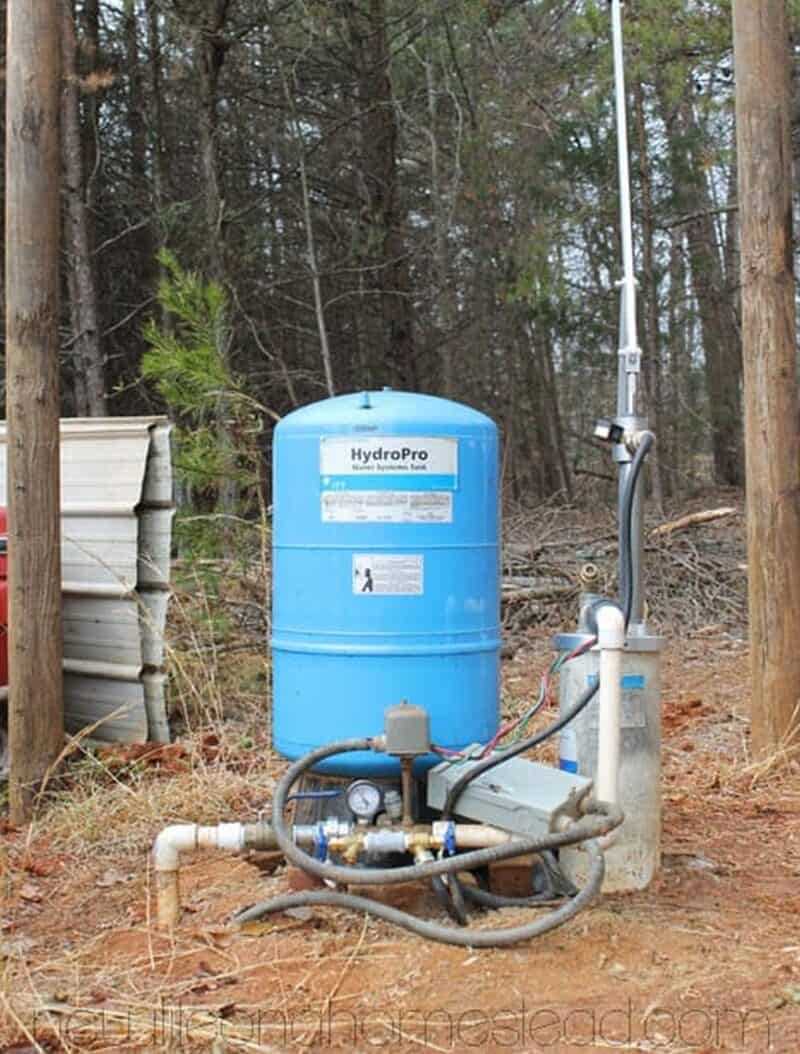
As the drilling progresses, the well is lined with a casing to prevent the hole from collapsing and to protect the water source from contamination. The casing is typically made of steel or PVC and is inserted into the hole as it is being drilled. Once the well has reached the desired depth and the casing is in place, the drilling rig is removed from the site.
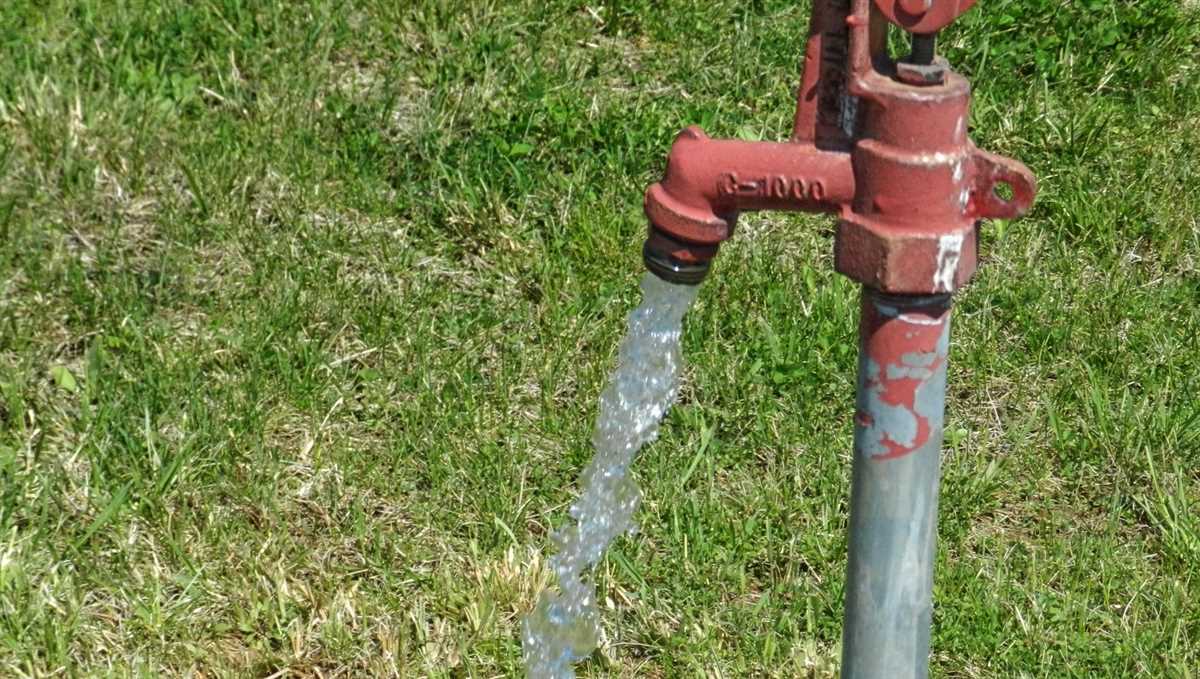
After the drilling is complete, the well is tested to ensure it is producing an adequate water supply. This involves pumping water from the well and measuring the flow rate and quality. If the well meets the required standards, it can be connected to a distribution system or a pump can be installed to provide water for domestic or agricultural use.
In conclusion, drilling a 4-inch well requires careful planning, adherence to regulations, and the use of specialized equipment. By following this step-by-step guide, you can ensure that your well is drilled safely and efficiently, providing a reliable source of water for years to come.
Site Selection and Permits
Before drilling a 4-inch well, it is important to carefully select the site where the well will be located.
Site Selection
When selecting a site, consider the following factors:

- Geology: The geology of the area plays a crucial role in determining the success of drilling a well. Look for areas with suitable rock formations or aquifers that can provide a sustainable source of water.
- Accessibility: Choose a site that is easily accessible for drilling equipment and vehicles. This will ensure smooth drilling operations and facilitate maintenance and repairs in the future.
- Proximity to Contamination Sources: Avoid sites that are close to potential sources of contamination, such as industrial areas, landfills, or chemical storage facilities. These sources can pose a risk to water quality and compromise the safety of the well.
- Topography: Consider the topography of the site. A flat or gently sloping terrain will make drilling and installation easier compared to steep or rocky areas.
- Water Table: Determine the depth of the water table to ensure that there is an adequate supply of water at the desired depth.
Permits
Before drilling a 4-inch well, it is important to obtain the necessary permits and approvals from local authorities. The specific permits required may vary depending on your location, but common permits include:
- Drilling Permit: This permit allows you to drill a well at the selected site. It may require submitting detailed plans, specifications, and an application fee.
- Water Rights Permit: In some areas, you may need a water rights permit to extract and use groundwater. This permit ensures that your water use does not interfere with existing water rights or cause overexploitation of the aquifer.
- Environmental Permit: If your drilling activities may have an impact on the environment, such as disturbing protected habitats or using chemicals, you may need an environmental permit. This permit ensures that drilling is done in compliance with relevant environmental regulations.
Contact your local authorities or a professional well driller to determine the specific permits required for drilling a 4-inch well in your area.
Equipment and Tools
1. Drilling Rig
A drilling rig is the main equipment used for drilling a 4 inch well. It is a large machine that is designed to drill holes in the ground. The drilling rig consists of various components, such as a mast, drill bit, drilling mud system, and power unit. The mast is used to support the drilling equipment and control its movement. The drill bit is attached to the end of the drill pipe and is used to cut through the ground. The drilling mud system is responsible for circulating drilling fluid to cool and lubricate the drill bit, as well as remove the drilled cuttings from the hole. The power unit provides the necessary power to operate the drilling rig.
2. Drill Bit
The drill bit is a cutting tool attached to the drilling rig. It is responsible for creating the hole in the ground. In the case of drilling a 4 inch well, a 4 inch drill bit will be required. The drill bit is designed to cut through various types of soil and rock formations, and it comes in different designs to suit different drilling conditions. It is typically made of steel and features sharp, durable cutting edges.

3. Drill Pipe
The drill pipe is a long, hollow tube that connects the drilling rig to the drill bit. It is used to transmit power from the drilling rig to the drill bit, as well as to circulate drilling fluid. Drill pipes are typically made of steel and come in various lengths and diameters. For drilling a 4 inch well, a 4 inch drill pipe will be required. The drill pipe is threaded at both ends, allowing for easy assembly and disassembly during drilling operations.
4. Drilling Mud System
The drilling mud system is an essential component of the drilling rig. It is responsible for circulating drilling fluid or mud during the drilling process. Drilling mud serves several purposes, such as cooling and lubricating the drill bit, carrying the drilled cuttings to the surface, and providing stability to the wellbore. The drilling mud system consists of a mud tank, pumps, mixing equipment, and mud treatment equipment.
5. Casing
Casing is a pipe that is inserted into the wellbore to provide support and prevent the hole from collapsing. It is typically made of steel and comes in various sizes. For drilling a 4 inch well, a 4 inch casing will be required. Casing is installed as the drilling progresses and is cemented in place to ensure the stability of the well. The casing also serves as a conduit for the production of oil or gas from the well.
6. Cementing Equipment
Cementing equipment is used to pump cement into the wellbore to seal the annular space between the casing and the wellbore wall. This helps to prevent the migration of fluids between different formations and provides zonal isolation. Cementing equipment includes cement pumps, bulk cement storage tanks, cement mixing units, and cementing plugs.

7. Wellhead
The wellhead is the equipment installed at the top of the wellbore. It provides a means of controlling the flow of fluids in and out of the well, as well as a platform for mounting various components, such as valves, pressure gauges, and blowout preventers. The wellhead also provides a connection point for the production tubing or casing strings.
8. Other Tools
In addition to the main drilling equipment, other tools may be required during the drilling process. These include but are not limited to: drilling bits, drill collars, stabilizers, drill reamers, fishing tools, drill pipe elevators, tongs, slips, and wrenches. These tools are used for various purposes, such as drilling in different formations, maintaining wellbore stability, and retrieving stuck drill pipe or other equipment.
Having the right equipment and tools is crucial for successfully drilling a 4 inch well. It is important to ensure that all equipment is in good working condition and properly maintained before starting the drilling operation.
Well Design and Planning
Choosing the Location
Before drilling a 4 inch well, it is important to carefully choose the location. Factors to consider include the distance from potential sources of contamination such as septic tanks, livestock areas, or chemical storage facilities, as well as the proximity to surface water bodies or wetlands. Ideally, the well should be located on high ground to minimize the risk of flooding.
Permitting and Regulations
Prior to drilling a well, it is essential to comply with any local or regional regulations. This may require obtaining permits or licenses, submitting plans and documents for review, and adhering to specific technical requirements. It is advisable to consult with local authorities or a drilling professional to ensure compliance with all applicable regulations.

Drilling Method
There are different methods of drilling a 4 inch well, including cable tool drilling and rotary drilling. Cable tool drilling involves repeatedly lifting and dropping a heavy tool, known as a bit, to break through the layers of soil and rock. Rotary drilling, on the other hand, involves using a drill bit attached to a rotating drill stem to penetrate the ground. The drilling method chosen will depend on various factors, such as the geological conditions and equipment availability.
Well Casing
Well casing plays a crucial role in protecting the well from contamination and maintaining structural integrity. It is recommended to use a durable and corrosion-resistant casing material, such as PVC or stainless steel. The casing should be properly sized and sealed to prevent the entry of surface water, sediment, or other contaminants.
Well Depth
The depth of the well will depend on the specific geology of the area and the desired water yield. It is important to consider factors such as the depth of the water table, the type of aquifer, and the surrounding land use. Consulting with a hydrogeologist or a well drilling professional can help determine the optimal depth for the well.
Well Development
After the drilling process is completed, the well needs to be properly developed to ensure optimal water flow. This typically involves cleaning debris and drilling mud from the well, as well as installing and operating a pump to remove excess water and sediments. Well development may take several days and should be carried out by experienced personnel.
Monitoring and Maintenance
Once the well is operational, it is important to implement a regular monitoring and maintenance program. This includes periodic water testing to ensure water quality, regular inspections of the wellhead and equipment, and timely repairs or upgrades as needed. Proper maintenance is essential for long-term well performance and the protection of groundwater resources.
Conclusion

Designing and planning a 4 inch well involves careful consideration of location, regulations, drilling methods, well casing, depth, development, and maintenance. By following these steps and consulting with professionals when necessary, you can ensure the successful implementation of a safe and reliable water source.
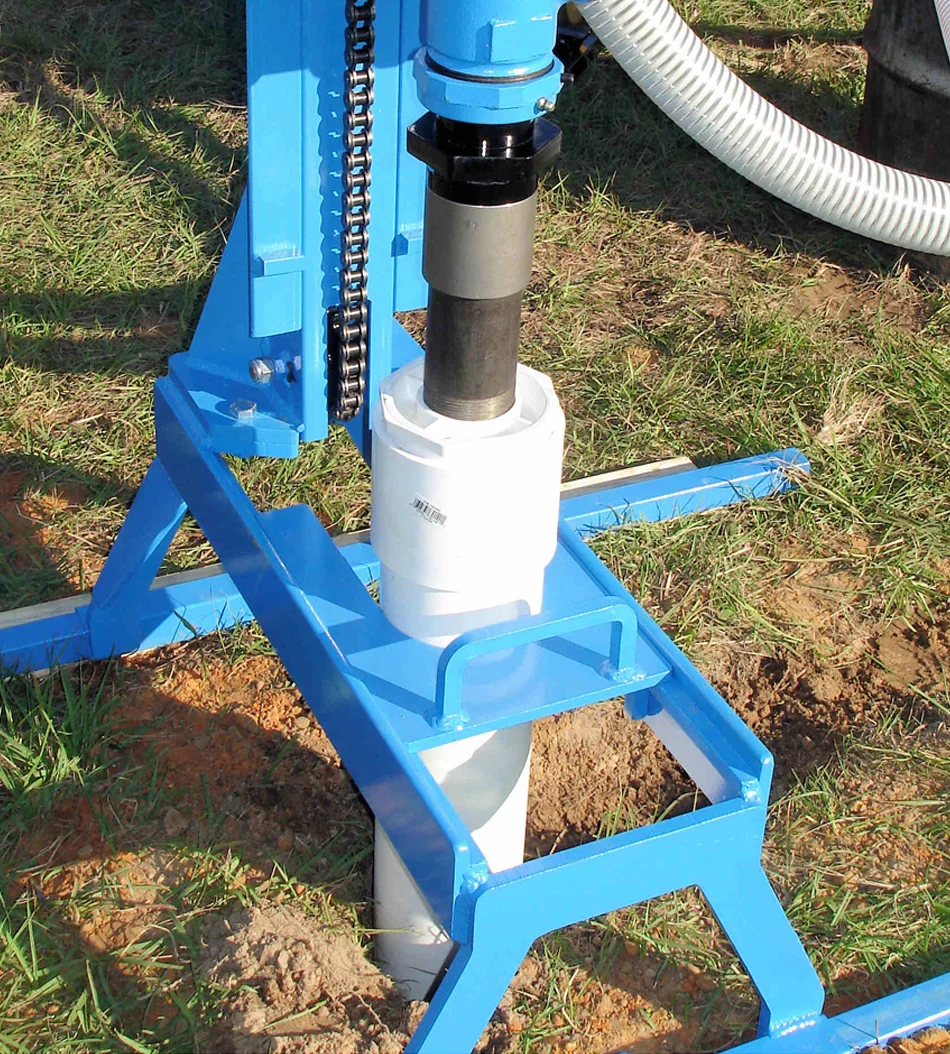
Marking and Setting Up the Drill Rig
Before you begin drilling your 4 inch well, it is important to mark the location where you want to drill. This will ensure that you have a precise point of reference and that you do not deviate from your desired spot. Here are the steps to marking and setting up the drill rig:
- Locate the desired drilling location: Start by using a surveyor’s tape measure or GPS system to determine the exact spot where you want to drill your well. This should be based on factors such as accessibility, topography, and proximity to other structures or utilities.
- Mark the drilling location: Once you have determined the drilling location, mark it with stakes or flags to make it easily visible. You can also use paint or spray marking on the ground to clearly define the spot.
- Clear the area: Remove any obstacles or debris from the drilling area to ensure a safe and clear workspace. This may include rocks, vegetation, or other objects that could interfere with the drilling process.
- Position the drill rig: Set up the drill rig near the marked drilling location. Ensure that the rig is stable and level to prevent any accidents or drilling complications. Use leveling tools such as a bubble level or a laser level to ensure accuracy.
- Secure the drill rig: Once the drill rig is in position, secure it to the ground using stabilizing equipment such as anchors or braces. This will prevent any movement or instability during the drilling process.
- Prepare the drilling equipment: Check all the drilling equipment, including the drill bit, drilling mud, and drill pipes, to ensure they are in good working condition. Make sure they are properly secured to the rig and ready for use.
By following these steps, you will be able to mark and set up the drill rig accurately and safely. This will lay the foundation for a successful drilling operation as you proceed with drilling the 4 inch well.
Drilling the Pilot Hole
Drilling the pilot hole is the first step in the process of drilling a 4-inch well. This hole serves as a guide for the larger drilling equipment and allows for proper alignment during the drilling process.
Step 1: Mark the drilling location
Before beginning the drilling process, it is important to mark the exact location where the well will be drilled. This can be done with a stake or marker to ensure accuracy.
Step 2: Set up the drilling equipment
Next, set up the drilling equipment near the marked location. This may include a drilling rig, mud pump, drill pipe, and other necessary tools.
Step 3: Prepare the drilling fluid
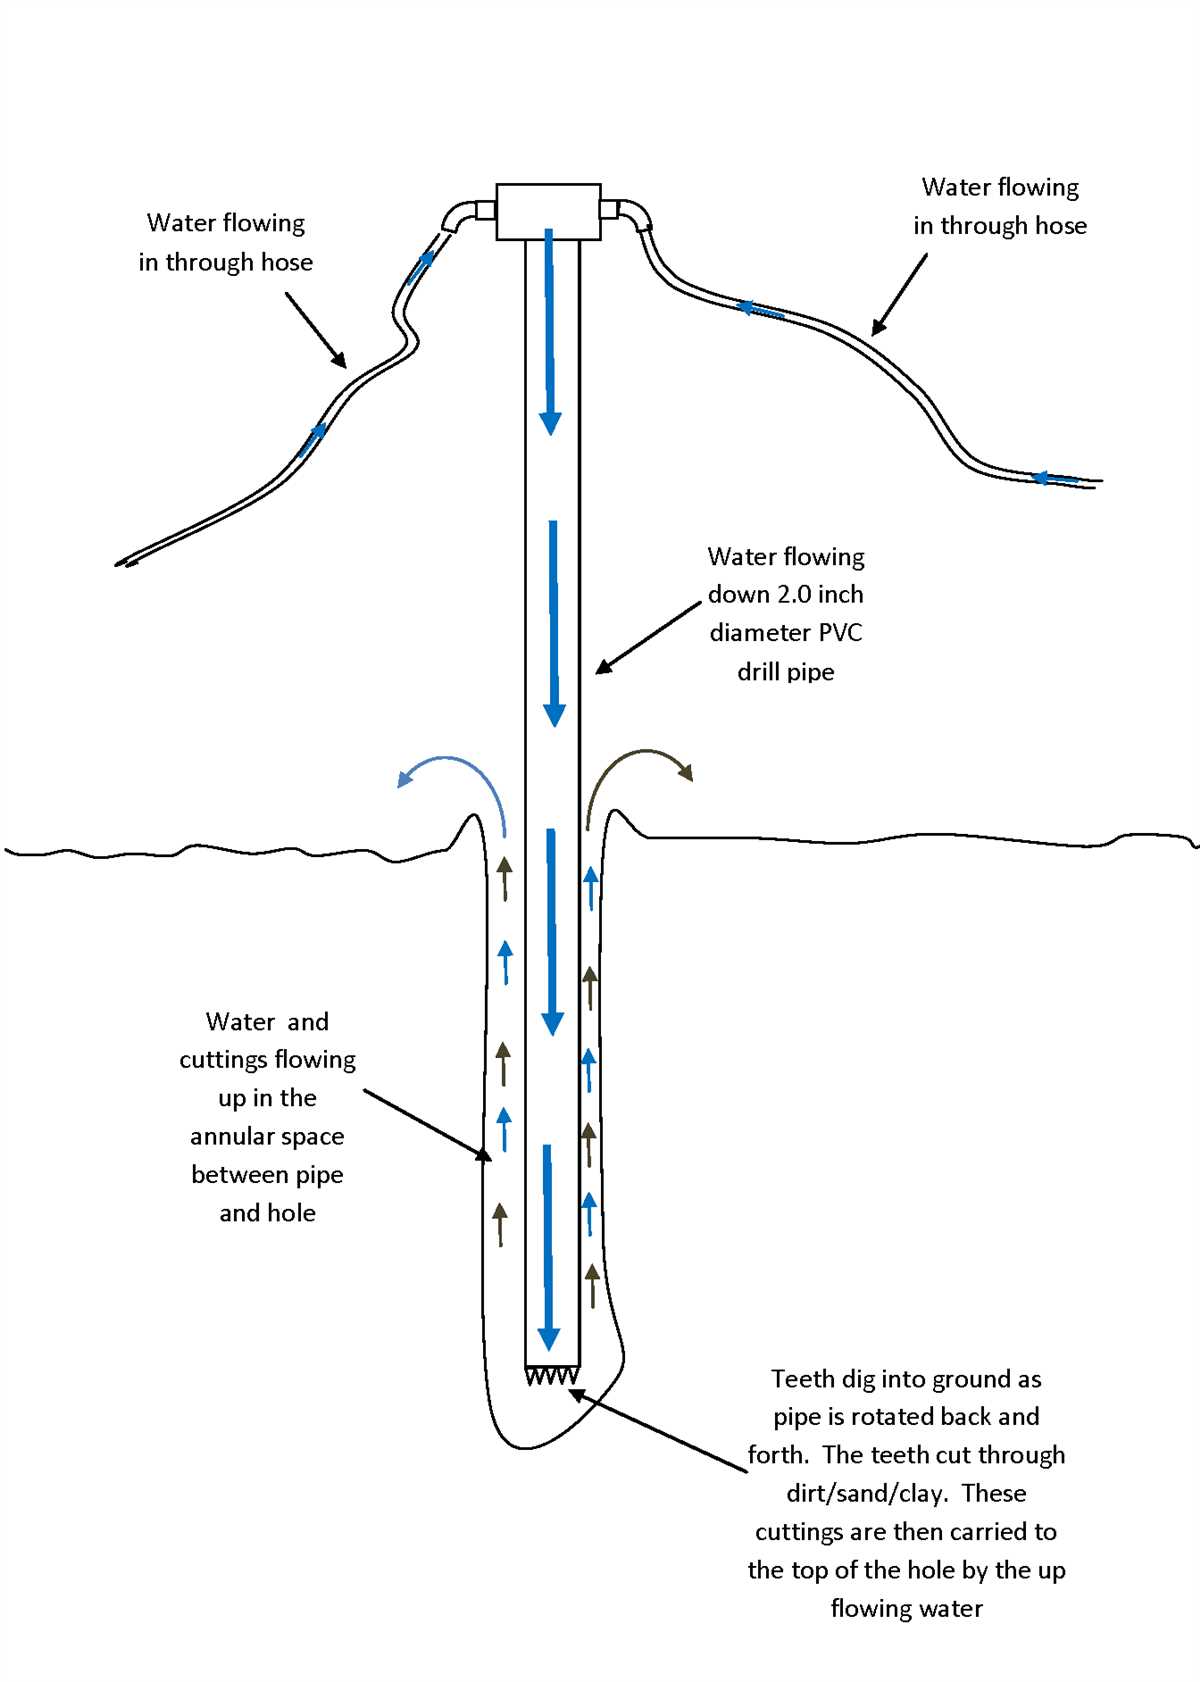
The drilling fluid, also known as mud, is essential for lubricating the drill bit and carrying the cuttings to the surface. Mix the drilling fluid according to the manufacturer’s instructions and ensure it is ready for use.
Step 4: Start drilling
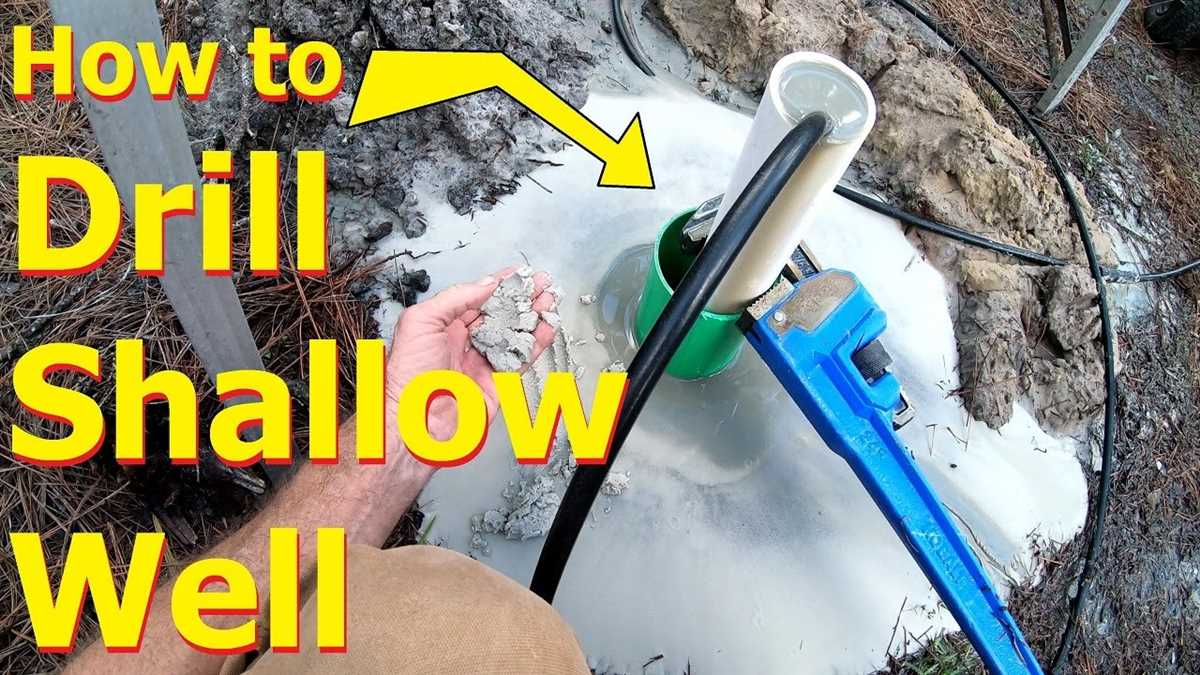
Begin the drilling process by slowly lowering the drill bit into the ground at the marked location. Use caution and take your time to ensure proper alignment and stability.
Step 5: Monitor the drilling progress
As the pilot hole is drilled, it is important to monitor the progress and make any adjustments as necessary. This may include adjusting the drilling speed, adding more drilling fluid, or changing the drilling direction.
Step 6: Measure the depth
Periodically measure the depth of the pilot hole to track progress and ensure that the desired depth is being reached. This can be done using a depth gauge or by marking the drill pipe with measurements.
Step 7: Complete the pilot hole
Continue drilling until the desired depth for the pilot hole is reached. This depth will vary depending on factors such as local geology and water table levels.
Once the pilot hole is completed, it will serve as a guide for the subsequent drilling steps, including enlarging the hole and installing the well casing.
Installing Casing and Grouting
Once the well has been drilled to the desired depth, it is time to install the casing and grout the well. Casing is a pipe that is inserted into the well to provide structural support and prevent the well from collapsing. Grouting is the process of filling the space between the casing and the well bore with cement to secure the casing in place and create a seal.
1. Cut and prepare the casing
Measure the length of the casing required for the depth of the well and cut it accordingly. Ensure that the casing is slightly longer than the depth of the well to allow for any adjustment during installation.
2. Lower the casing into the well
Use a casing elevator or other lifting equipment to lower the casing into the well. Carefully guide the casing to ensure it is centered and aligned properly with the well bore.
3. Connect the casing sections
If multiple sections of casing are required, connect them using casing couplings or other appropriate connectors. Make sure the connections are tight and secure to ensure the integrity of the casing.
4. Cement the casing
Once the casing is in position, begin the grouting process by cementing the well. Mix the cement according to the manufacturer’s instructions and pour it into the space between the casing and the well bore.
5. Allow the cement to set
After the casing has been grouted, allow the cement to set and cure. This typically takes several hours or even days, depending on the specific cement used. Follow the manufacturer’s instructions for the appropriate curing time.
6. Test the well
Once the cement has fully cured, conduct a well test to ensure the integrity and functionality of the well. This may include testing the flow rate, water quality, and pressure of the well. If any issues are detected, they should be addressed before proceeding.
7. Finish the installation

After the well has been tested and deemed successful, finish the installation by securing the wellhead and any necessary equipment. This may include installing a pump, pressure tank, and other components depending on the specific application of the well.
8. Obtain necessary permits and documentation
Before using the well, make sure to obtain any necessary permits or documentation required by local regulations. This may include permits for well construction or water usage permissions.
Conclusion
Installing casing and grouting is a critical step in drilling a 4-inch well. It provides structural support, prevents well collapse, and creates a seal between the casing and the well bore. By following the proper procedures and guidelines, you can ensure a successful and functional well that meets your water needs.
Drilling and Installation of Well Screen
After the drilling process is complete and the well has been adequately developed, the next step is to install a well screen. The well screen is a crucial component of the well system, as it helps prevent the entrance of debris, sand, and other unwanted materials into the well.
To install the well screen, follow these steps:
- 1. Measure the length of the well screen: The length of the well screen should be determined based on the desired depth of the well and the water table level. It is important to choose the appropriate length to ensure effective water intake.
- 2. Cut the well screen: Using appropriate cutting tools, cut the well screen to the desired length. Be sure to make a clean and smooth cut to ensure a tight fit.
- 3. Prepare the well for installation: Clean the inside of the well casing using a brush or other suitable tools to remove any loose debris or sediment. This will help ensure a proper fit and prevent clogging.
- 4. Attach the screen to the bottom end of the casing: Securely attach the well screen to the bottom end of the well casing. This can be done using fittings or other suitable methods.
- 5. Lower the screen into the well: Carefully lower the well screen and casing assembly into the well, ensuring that it is centered and straight. Use a level or plumb line to check for alignment.
- 6. Secure the well screen: Once the well screen is in position, secure it to the well casing using appropriate clamps, fasteners, or other securing methods. This will help prevent any movement or displacement.
- 7. Test the well: After the well screen has been installed, it is important to conduct a thorough test to ensure proper functioning. This may involve measuring the water flow rate, conducting a pumping test, or other appropriate tests.
By following these steps and ensuring proper installation, the well screen can effectively filter out unwanted materials and ensure a clean water supply from the well.
Cleaning and Disinfecting the Well
Once the drilling process is complete and the well is constructed, it is important to clean and disinfect the well before it can be used for drinking water. Cleaning and disinfection help remove any remaining debris, sediment, and bacteria that may be present in the well. Here are the steps to effectively clean and disinfect the well:
1. Remove any leftover drilling equipment
Before cleaning the well, make sure to remove any leftover drilling equipment, such as pipes, casings, or screens. This will help provide better access to the well for cleaning.
2. Flush the well
The first step in cleaning the well is to flush it thoroughly. Start by attaching a garden hose to a nearby water supply and running it into the well. Allow the water to flow into the well for at least 30 minutes. This will help remove any loose debris or sediment.
3. Scrub the well casing
Using a stiff brush or a pump brush, scrub the inside walls of the well casing. Pay special attention to any areas with visible debris or biofilm. This will help remove any remaining dirt or organic matter.
4. Rinse the well again
After scrubbing the well casing, flush the well once again with clean water. This will help remove any loosened debris from the scrubbing process.
5. Disinfect the well
Once the well is thoroughly cleaned, it is time to disinfect it. Use a chlorine-based disinfectant approved for well disinfection. Follow the instructions provided by the manufacturer for the appropriate dosage and application method.
6. Circulate the disinfectant
After adding the disinfectant, circulate the water inside the well by turning on the pump or using other methods. This will help distribute the disinfectant throughout the entire well system, including the casing, pump, and distribution lines.
7. Let the disinfectant sit
Allow the disinfectant to sit in the well for the recommended contact time. This will vary depending on the disinfectant used and the manufacturer’s instructions. During this time, avoid using the water from the well for any household purposes.
8. Flush the well again
After the contact time has passed, flush the well thoroughly with clean water. This will help remove any residual disinfectant and ensure the water is safe for use.
9. Test the water
Once the well has been cleaned and disinfected, it is essential to test the water to ensure it is safe for consumption. Collect a water sample and send it to a certified laboratory for testing. This will provide information about the water quality and confirm if it is suitable for drinking.
Cleaning and disinfecting the well is a critical step in ensuring the safety and quality of the water supply. By following these steps, you can maintain a clean and safe well for years to come.
FAQ:
What is the purpose of drilling a 4-inch well?
The purpose of drilling a 4-inch well is to access groundwater for various uses, such as drinking water, irrigation, and industrial purposes.
How deep should a 4-inch well be drilled?
The depth of a 4-inch well can vary depending on the location and the desired water source. Generally, it is recommended to drill the well to a depth of at least 100 feet to ensure a sustainable water supply.
What equipment is required for drilling a 4-inch well?
Drilling a 4-inch well requires a variety of equipment, including a drilling rig, drill pipe, drilling fluid, well casing, well screen, and a pump system for extracting water. Additionally, safety equipment, such as hard hats, gloves, and safety glasses, should be worn during the drilling process.
Video:


Meet Harrison Clayton, a distinguished author and home remodeling enthusiast whose expertise in the realm of renovation is second to none. With a passion for transforming houses into inviting homes, Harrison's writing at https://thehuts-eastbourne.co.uk/ brings a breath of fresh inspiration to the world of home improvement. Whether you're looking to revamp a small corner of your abode or embark on a complete home transformation, Harrison's articles provide the essential expertise and creative flair to turn your visions into reality. So, dive into the captivating world of home remodeling with Harrison Clayton and unlock the full potential of your living space with every word he writes.


