Step-by-Step Guide: How to Use a Socket with a Drill

Whether you’re a seasoned DIY enthusiast or a beginner looking to tackle a few home improvement projects, knowing how to use a socket with a drill is an essential skill. A socket, when paired with a drill, allows you to tighten or loosen nuts and bolts quickly and efficiently. In this step-by-step guide, we’ll walk you through the process of using a socket with a drill, so you can confidently handle your next project.
Step 1: Gather Your Tools
Before you can start using a socket with a drill, you’ll need to gather your tools. You’ll need a drill with a chuck that can accommodate the size of your socket. You’ll also need the appropriate socket size for the nuts or bolts you’ll be working with. Additionally, you may want to have a socket extension on hand to provide extra reach when necessary.
Step 2: Attach the Socket to the Drill
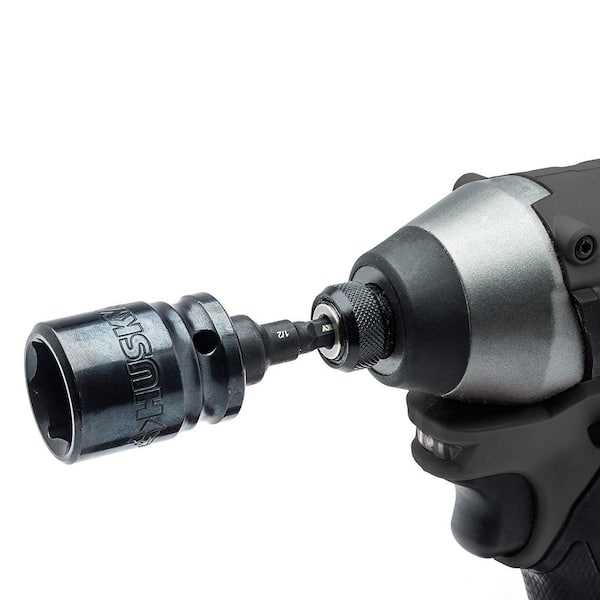
Once you have your tools ready, it’s time to attach the socket to the drill. Start by removing the drill bit from the chuck of your drill, if one is present. Then, insert the socket into the chuck, making sure it sits securely. Use the drill’s chuck key to tighten the chuck and ensure the socket won’t come loose during use.

Step 3: Adjust the Speed and Direction
Before you start using the drill with the socket, it’s important to adjust the speed and direction settings. Most drills have a variable speed control, allowing you to choose between slower and faster speeds. For most socket applications, a moderate speed is recommended. Additionally, ensure that the drill is set to rotate clockwise for tightening and counterclockwise for loosening.
With these steps completed, you’re now ready to use a socket with a drill. Whether you’re assembling furniture, working on a car, or tackling any other project that involves nuts and bolts, using a socket with a drill will make the job easier and faster. Just remember to always wear appropriate safety gear and follow the manufacturer’s instructions for your specific tools.
What is a Socket?

A socket is a type of tool that is used to grip and turn various types of fasteners, such as bolts, nuts, and screws. It is a hollow, cylindrical tool with a square or hexagonal opening on one end, known as the drive, which is designed to fit onto a corresponding drive tool like a ratchet or a drill. The opposite end of the socket is used to grip the fastener and provide torque to rotate it.

Sockets are typically made of durable and tough materials such as steel or chrome vanadium. They come in various sizes and shapes to accommodate different fastener types and sizes. The drive size of a socket refers to the dimension of the square or hexagonal opening, which matches the drive tool it is meant to be used with.
Sockets are commonly used in automotive repair, construction, and other mechanical applications where fasteners need to be tightened or loosened. They are available as individual sockets or in sets, which include a range of socket sizes to cover various fastener types.
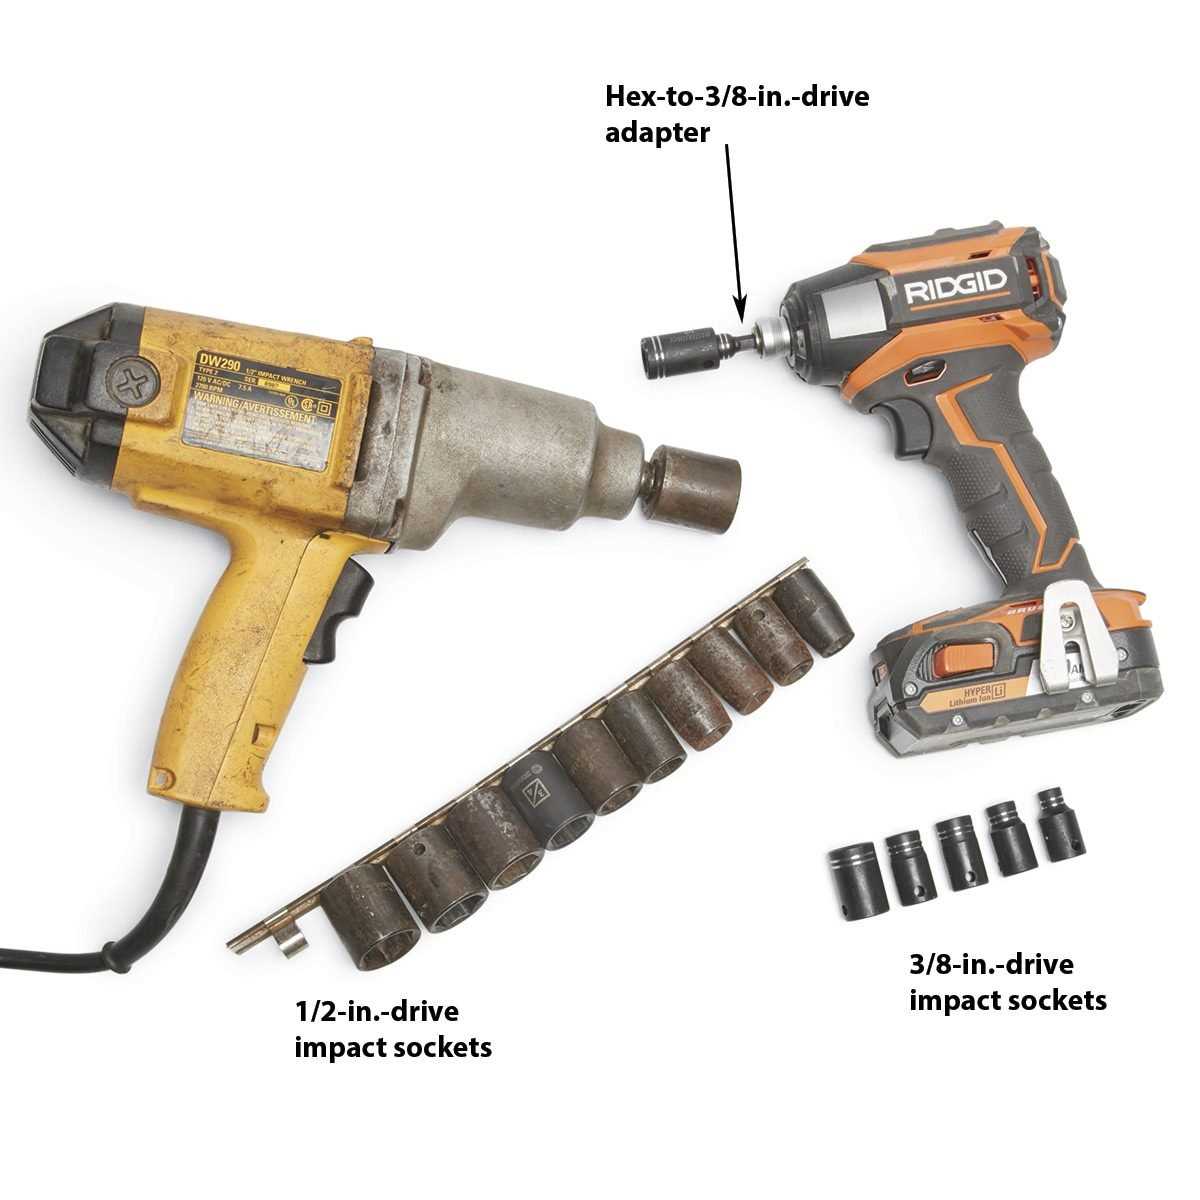
When using a socket with a drill, it is important to select the appropriate socket size and securely attach it to the drill’s chuck. This allows the drill to provide the necessary rotational force to tighten or loosen the fastener.
Overall, a socket is a versatile and essential tool that allows for efficient and effective fastener tightening and loosening in a variety of applications.
What is a Drill?

A drill is a versatile power tool that is commonly used for drilling holes in various materials such as wood, metal, and plastic. It consists of a motor that rotates a drill bit at high speeds, allowing it to penetrate the material and create a hole. Drills are available in both corded and cordless models, providing flexibility and convenience for different applications.
Drills come in different sizes, with the most common sizes being 3/8-inch and 1/2-inch. The size refers to the maximum diameter of the drill bit that can be used with the drill. Larger drills are typically more powerful and designed for heavy-duty tasks, while smaller drills are more suitable for light-duty applications.
Types of Drills
There are several types of drills that are designed for different tasks and applications:
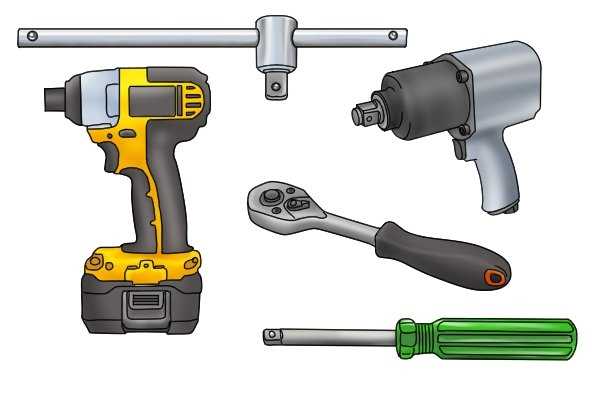
- Drill/Drivers: These drills are the most basic and versatile type, capable of both drilling holes and driving screws. They typically feature adjustable speed settings and a clutch for controlling the torque applied to screws.
- Hammer Drills: Hammer drills are designed for drilling into masonry and concrete. They feature a hammering action that helps to break through tough materials.
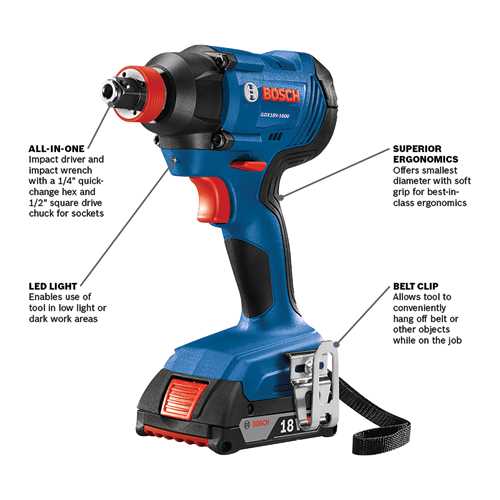
- Impact Drivers: Impact drivers are specifically designed for driving screws and bolts. They provide high torque and are ideal for fastening applications.
- Rotary Drills: Rotary drills are used for heavy-duty drilling tasks and are capable of drilling large holes in tough materials.
Drill Accessories

In addition to drill bits, drills can be used with a range of accessories to enhance their functionality:
- Chuck Key: A chuck key is used to tighten and loosen the drill chuck, which holds the drill bit in place. It is an essential accessory for drills with a keyed chuck.
- Depth Stop: A depth stop allows you to set the drilling depth, ensuring consistent and accurate hole depths.
- Screwdriver Bits: Screwdriver bits can be used with a drill for driving screws. They come in various shapes and sizes to fit different types of screws.
- Drill Attachments: Drill attachments, such as sanding pads and wire brushes, can be used to perform additional tasks beyond drilling.
- Drill Stand: A drill stand provides stability and precision when drilling holes in larger workpieces.
By combining the right drill and accessories, you can tackle a wide range of projects and tasks. Whether you’re a professional contractor or a DIY enthusiast, a drill is an essential tool to have in your toolbox.
Why Use a Socket with a Drill?
Using a socket with a drill can greatly improve the efficiency and effectiveness of your drilling tasks. Here are a few reasons why you should consider using a socket with a drill:
-
Versatility: By using a socket with a drill, you can easily switch between different sizes of nuts and bolts without having to manually adjust and handle multiple wrenches or spanners. This makes the drilling process much more convenient and saves you time.
-
Increased Torque: A socket attached to a drill can provide additional torque, allowing you to tighten or loosen nuts and bolts with greater force. This is especially useful for tasks that require stubborn bolts or working with heavy-duty materials.
-
Speed and Efficiency: Using a socket with a drill allows you to quickly and accurately tighten or loosen nuts and bolts. This can significantly speed up the assembly or disassembly process, whether you are working on automotive repairs, woodworking projects, or other applications.
-
Reduced Strain: Using a socket eliminates the need for manual hand tools, reducing strain on your hands, wrists, and arms. This can be particularly beneficial if you are dealing with repetitive tasks or working on larger projects that require extensive bolt or nut tightening.
-
Compatibility: With the wide range of socket sets available, you can easily find sockets that work with your specific drill’s chuck size or drive type. This makes it convenient to use a socket with your existing drill, eliminating the need for purchasing additional tools.
In conclusion, using a socket with a drill offers numerous advantages, including versatility, increased torque, speed, efficiency, reduced strain, and compatibility. By incorporating this tool combination into your drilling tasks, you can save time, effort, and achieve better results.

Step 1: Gathering the Materials
Before you begin using a socket with a drill, you’ll need to gather all the necessary materials. Luckily, the materials needed for this task are minimal and readily available. Here’s what you’ll need:
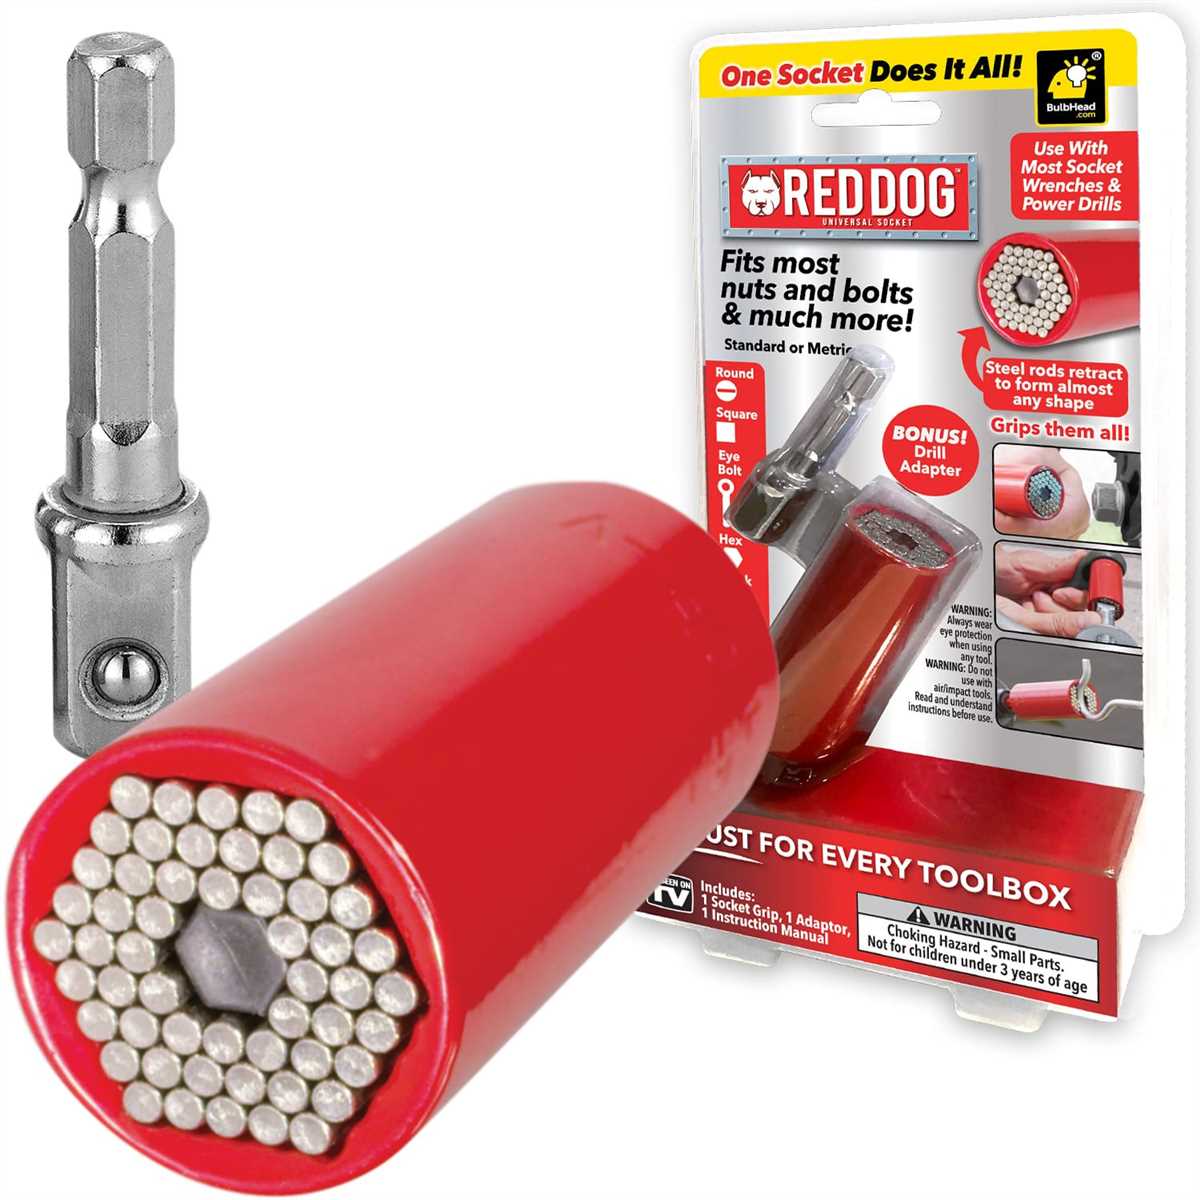
- A socket set: Make sure you have a set that includes the desired size socket for your specific task. Socket sets typically come in metric or standard sizes, so choose the set that matches the measurements you’ll be working with.
- A drill: Any standard power drill will work for this project. Make sure it is in good working condition and has a fully charged battery or is properly plugged into a power source.
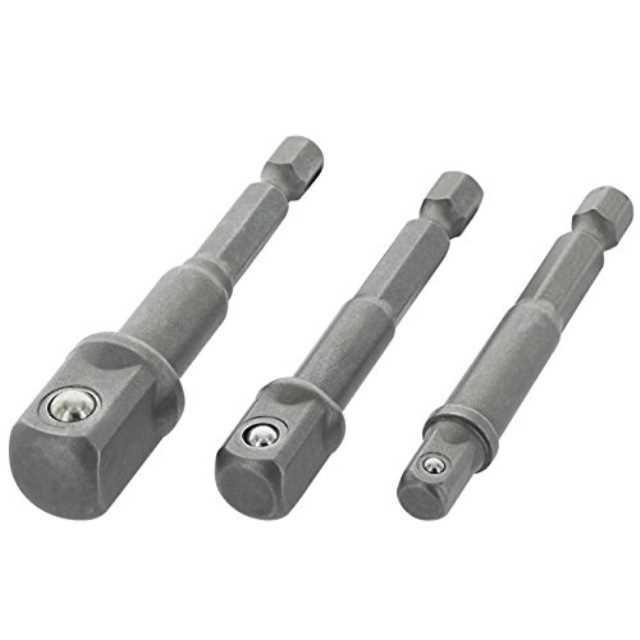
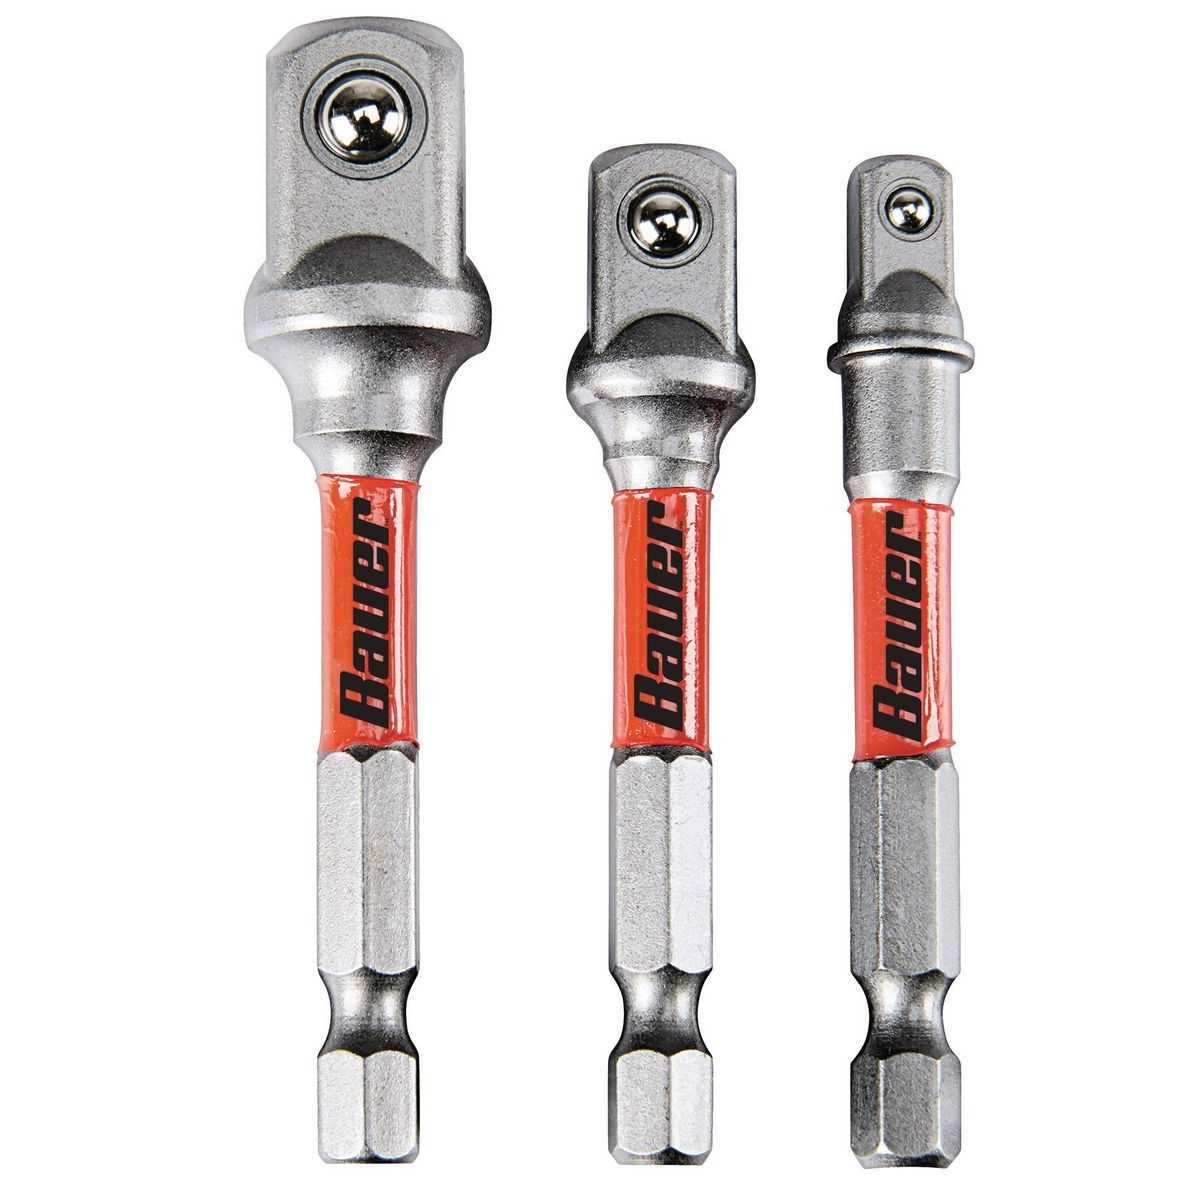
- Extension bar: If your socket set doesn’t come with an extension bar, you may need one to reach those hard-to-access areas. Extension bars come in various lengths, so choose one that suits your needs.
- Safety gear: It’s always best to wear safety goggles to protect your eyes from any debris or flying objects during the drilling process. Additionally, work gloves can provide extra protection and grip as you handle the drill and socket.
Once you have gathered all the necessary materials, you’ll be ready to move on to the next step: choosing the appropriate socket for your task.
Step 2: Preparing the Drill
Before using a socket with a drill, it is important to make sure that the drill is properly prepared. Follow these steps to prepare your drill:
- Make sure your drill is unplugged or has the battery removed for safety.
- Inspect the drill bit and chuck to ensure they are in good condition and free from any obstructions or damage.
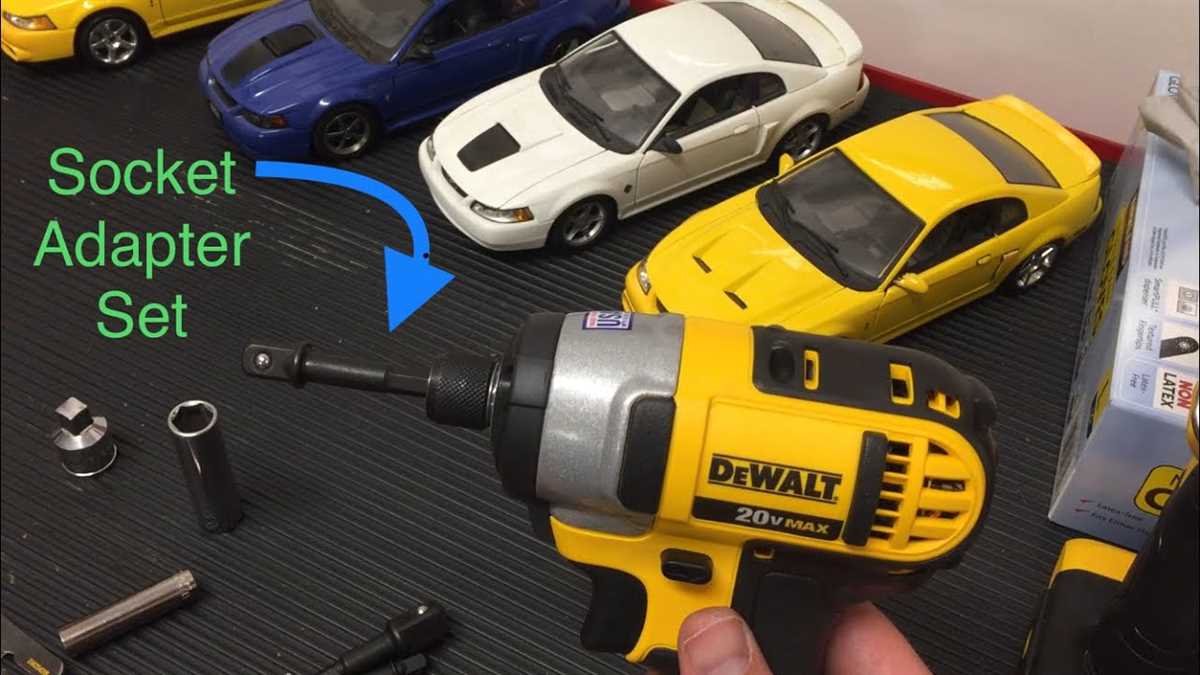
- Attach the appropriate socket adapter to the chuck of the drill. The size of the adapter should match the size of the socket you will be using.
- Tighten the chuck securely to hold the socket adapter in place. Use a chuck key or your hand, depending on the type of chuck on your drill.
- Double-check that the socket adapter is properly secured before proceeding.
By following these steps, you will ensure that your drill is ready to safely and effectively use a socket attachment.
Step 3: Attaching the Socket
Attaching the socket to the drill is a simple process that requires a few basic steps. By following these instructions, you will be able to securely attach the socket to your drill.
- Make sure the drill is turned off and unplugged before attaching the socket.
- Locate the chuck on the front of the drill. The chuck is the part that holds the drill bit or socket.
- Depending on the type of drill you have, there may be a keyless chuck or a keyed chuck. If you have a keyless chuck, you can simply insert the socket directly into the chuck. If you have a keyed chuck, you will need to use the chuck key to loosen the chuck before inserting the socket.
- If using a keyed chuck, insert the chuck key into the holes on the side of the chuck and turn it counterclockwise to loosen the chuck.
- Once the chuck is loosened, insert the socket into the chuck and tighten it by turning the chuck key clockwise or by hand if using a keyless chuck.
- Ensure the socket is securely attached by giving it a gentle tug. It should not come loose from the chuck.
- Once the socket is attached, you can plug in the drill and turn it on to start using it with the socket.
By following these steps, you will be able to easily attach the socket to your drill and begin using it for various tasks and projects. Remember to always exercise caution when working with power tools and observe all safety precautions.
Step 4: Using the Socket with the Drill
Now that you have attached the socket to the drill, it’s time to start using it. Follow these steps to correctly use the socket with the drill:
-
Choose the right socket size: Before you begin, make sure to select the correct socket size for the task you are working on. This will ensure a proper fit and prevent any damage to the fastener or the socket itself.
-
Insert the socket: Insert the socket onto the drill’s spindle. Make sure it fits securely in place.
-
Secure the socket: Depending on your drill model, there might be a locking mechanism that holds the socket in place. Activate this mechanism to ensure the socket stays securely attached during operation.
-
Tighten or loosen: Once the socket is properly attached, you can now use the drill to tighten or loosen fasteners. Hold the drill with a firm grip and position the socket onto the fastener. Activate the drill’s trigger to start turning the fastener.
-
Control the speed: Depending on the task, you might need to adjust the speed of the drill. Refer to the drill’s user manual to learn how to control the speed settings. Some drills have variable speed triggers, while others have speed settings that can be adjusted prior to operation.
-
Monitor the progress: Keep an eye on the progress of tightening or loosening the fastener. Ensure that the socket remains securely attached and observe any signs of stripping or damage to the fastener or socket.
-
Remove the socket: Once the task is complete, turn off the drill and remove the socket from the spindle. Store it in a safe place for future use.
By following these steps, you can safely and effectively use a socket with a drill to handle various fastening tasks.
Step 5: Removing the Socket
Once you have finished using the socket with your drill, it is important to know how to properly remove it. Follow the steps below to safely remove the socket:
- Switch off the drill and unplug it from the power source.
- Gently pull back the collar or sleeve, depending on the type of locking mechanism on your drill.
- While holding the collar or sleeve back, pull the socket straight out of the drill’s chuck.
- Inspect the socket for any damage or wear. If you notice any issues, do not continue using it, and consider replacing it.
Make sure to store your socket in a clean and dry place, away from any moisture or debris. This will help maintain its performance and prolong its lifespan.
FAQ:
What is a socket and how does it work with a drill?
A socket is a tool that is used to tighten or loosen nuts and bolts. It works with a drill by attaching the socket to the drill’s chuck, and then using the drill’s power to rotate the socket and tighten or loosen the nuts or bolts.
What types of sockets are available?
There are various types of sockets available, including deep sockets, shallow sockets, impact sockets, and spark plug sockets. Each type of socket is designed for specific applications and has unique features to provide better performance.
How do I attach a socket to a drill?
To attach a socket to a drill, you will need a socket adapter. Simply insert the adapter into the drill’s chuck, and then insert the desired socket into the adapter. Make sure the socket is securely attached before using the drill.
What are some safety precautions to keep in mind when using a socket with a drill?
When using a socket with a drill, it is important to wear safety goggles to protect your eyes from any flying debris. It is also advisable to wear gloves to protect your hands. Additionally, make sure to use the correct size socket for the nuts or bolts you are working with and always double-check that the socket is securely attached before starting the drill.
Can I use a socket with any type of drill?
Most drills are compatible with sockets, but it is always important to check the drill’s user manual for any specific instructions or limitations. Some drills may require a specific type of chuck or may have a maximum torque limit that needs to be considered when using sockets.
Video:


Meet Harrison Clayton, a distinguished author and home remodeling enthusiast whose expertise in the realm of renovation is second to none. With a passion for transforming houses into inviting homes, Harrison's writing at https://thehuts-eastbourne.co.uk/ brings a breath of fresh inspiration to the world of home improvement. Whether you're looking to revamp a small corner of your abode or embark on a complete home transformation, Harrison's articles provide the essential expertise and creative flair to turn your visions into reality. So, dive into the captivating world of home remodeling with Harrison Clayton and unlock the full potential of your living space with every word he writes.


