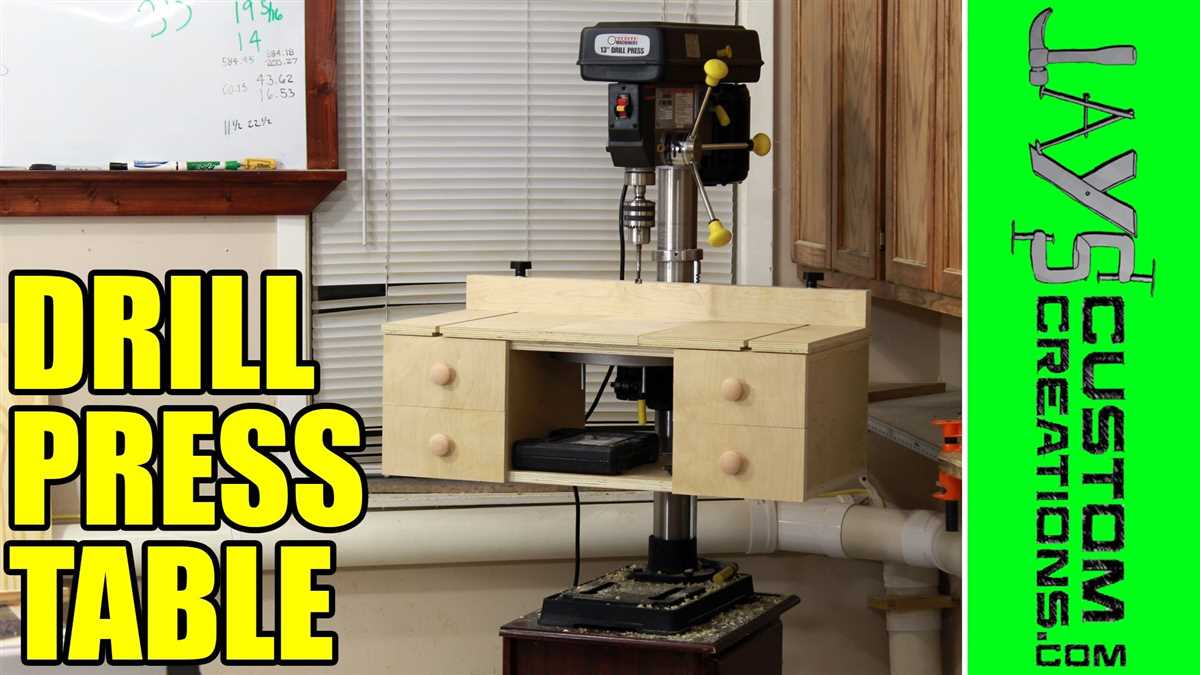
Step-by-Step Guide: How to Make a DIY Drill Press at Home

Have you ever found yourself working on a project that required precise drilling, but you didn’t have the funds to invest in a full-size drill press? Well, fear not! With a little creativity and some basic tools, you can create your very own homemade drill press right at home.
Building your own drill press not only saves you money, but it also allows you to customize the design to fit your specific needs. Whether you’re a hobbyist looking to improve your crafting skills or a DIY enthusiast tackling a home improvement project, a DIY drill press can be an invaluable tool in your arsenal.
In this step-by-step guide, we’ll walk you through the process of creating your own DIY drill press from scratch. From selecting the right materials to assembling the components, we’ll cover all the necessary steps to help you build a reliable, functional drill press without breaking the bank.
So, roll up your sleeves and get ready to embark on a DIY adventure. With a bit of patience and some elbow grease, you’ll soon have your very own homemade drill press, ready to take on any drilling task that comes your way!
Gather the Necessary Tools and Materials
Before you start building your DIY drill press, make sure you have all the necessary tools and materials. Here is a list of what you will need:

- A drill machine
- A sturdy workbench or table
- Clamps
- Wood or metal for the drill press frame
- Basic hand tools (screwdriver, wrench, etc.)
- Measuring tape
- Drill bits
- Bolts, nuts, and washers
- Safety goggles
- Ear protection
- Paint or finish (optional)
Make sure you have all these tools and materials readily available before you begin the project. It’s important to use proper safety equipment, such as safety goggles and ear protection, throughout the construction process.
Design and Plan Your Drill Press
Before you start building your DIY drill press, it is important to carefully design and plan out your project. This will help you ensure that you have all the necessary materials and tools, and that the final product will meet your specific needs and requirements.
1. Determine the Purpose
- Consider what you will be using the drill press for. Will it be primarily for woodworking or metalworking? This will help you determine the size and power requirements of your drill press.
- Think about the specific tasks you will be using the drill press for. Will you be drilling holes of various sizes or performing more precise work such as mortising or sanding? This will help you decide on the appropriate accessories and attachments for your drill press.
2. Choose the Design
- Decide on the type of drill press design you want. There are many different designs to choose from, such as a floor-standing model or a benchtop model. Consider the available space in your workshop and your personal preferences.
- Look for existing DIY drill press designs online or in books and magazines. Take inspiration from these designs and modify them to fit your specific needs.
3. Sketch Your Design
- Start by making a rough sketch of the overall design of your drill press. This will help you visualize how the different components will fit together.
- Include measurements and dimensions in your sketch to ensure that everything will fit properly.
4. Create a Bill of Materials
- Make a list of all the materials you will need for your drill press. This may include wood, metal, screws, bolts, nuts, and other hardware.
- Research the availability and cost of these materials to ensure that they are within your budget and accessible to you.
- Consider any specialized tools you may need for the assembly of your drill press, such as a drill, saw, or welder.
5. Plan the Assembly Process
- Break down the assembly process into smaller steps. This will help you stay organized and ensure that you don’t miss any important steps.
- Consider any safety precautions you need to take during the assembly process, such as wearing protective clothing or using safety gloves and goggles.
By carefully designing and planning your DIY drill press, you can ensure that you have all the necessary materials and tools, and that the final product will meet your specific needs. This will help you save time and effort during the assembly process and result in a functional and reliable drill press.

Prepare the Base for Your Drill Press
Before you can start building your DIY drill press, you will need to prepare a sturdy base to support the weight of the drill press and provide stability while in use.
Materials:
- 1 sheet of plywood (¾ inch thick)
- 4 wooden or metal legs (adjustable, if possible)
- Wood screws
- Measuring tape
- Pencil
- Power drill
- Screwdriver
Step 1: Measure and Mark
- Measure the dimensions of your drill press base. This will help determine the size of the plywood base you need to cut.
- Using a measuring tape and pencil, mark the dimensions of the base on the sheet of plywood. Ensure that the marks are accurate and lined up straight.
Step 2: Cut the Base
- Using a power saw or a circular saw, carefully cut the plywood sheet according to the marked dimensions. Take your time and use caution to ensure a clean and accurate cut.
- If necessary, sand down the edges of the plywood base to remove any rough or sharp edges.
Step 3: Attach the Legs
- Place the plywood base on a flat and level surface.
- Position each leg at the corners of the base, ensuring they are evenly spaced and aligned.
- Using a power drill, attach each leg to the base using wood screws. Make sure the screws are securely fastened to provide stability and support.
- If using adjustable legs, adjust them to the desired height for your drill press setup.
Step 4: Test for Stability
- After securing the legs to the base, gently push and pull on the drill press to check for any wobbling or instability.
- If necessary, adjust the legs or tighten the screws to ensure a stable and sturdy base.
Once you have completed these steps, you will have a strong and stable base for your DIY drill press. Now you can proceed to the next steps of building your drill press to complete your homemade setup.

Assemble the Frame and Columns
To start building your DIY drill press, you will need to assemble the frame and columns. Follow these steps:
Materials:
- 4 pieces of sturdy wood or metal for the frame
- 2 pieces of sturdy wood or metal for the columns
- Screws or nails
- Drill
- Screwdriver or hammer
Instructions:
- Place the 4 pieces of wood or metal on a flat surface to form a rectangular frame. Make sure the pieces are aligned properly.
- Using screws or nails, attach the corners of the frame together. Make sure to drive the screws or nails firmly to ensure a sturdy frame.
- Measure the desired height for your drill press and cut the 2 pieces of wood or metal for the columns accordingly.
- Attach the columns to the frame. Position them evenly on opposite sides of the frame.
- Use screws or nails to secure the columns to the frame. Make sure they are tightly fastened.
Tips:
- Double-check the alignment and stability of the frame before attaching the columns. This will ensure a level working surface.
- Consider reinforcing the frame and columns with additional screws or bracing for added strength.
- Use a level to ensure that the columns are perfectly vertical. This will help with the accuracy of your drill press.
Once you have assembled the frame and columns, your DIY drill press is starting to take shape. In the next step, we will continue building the rest of the components.
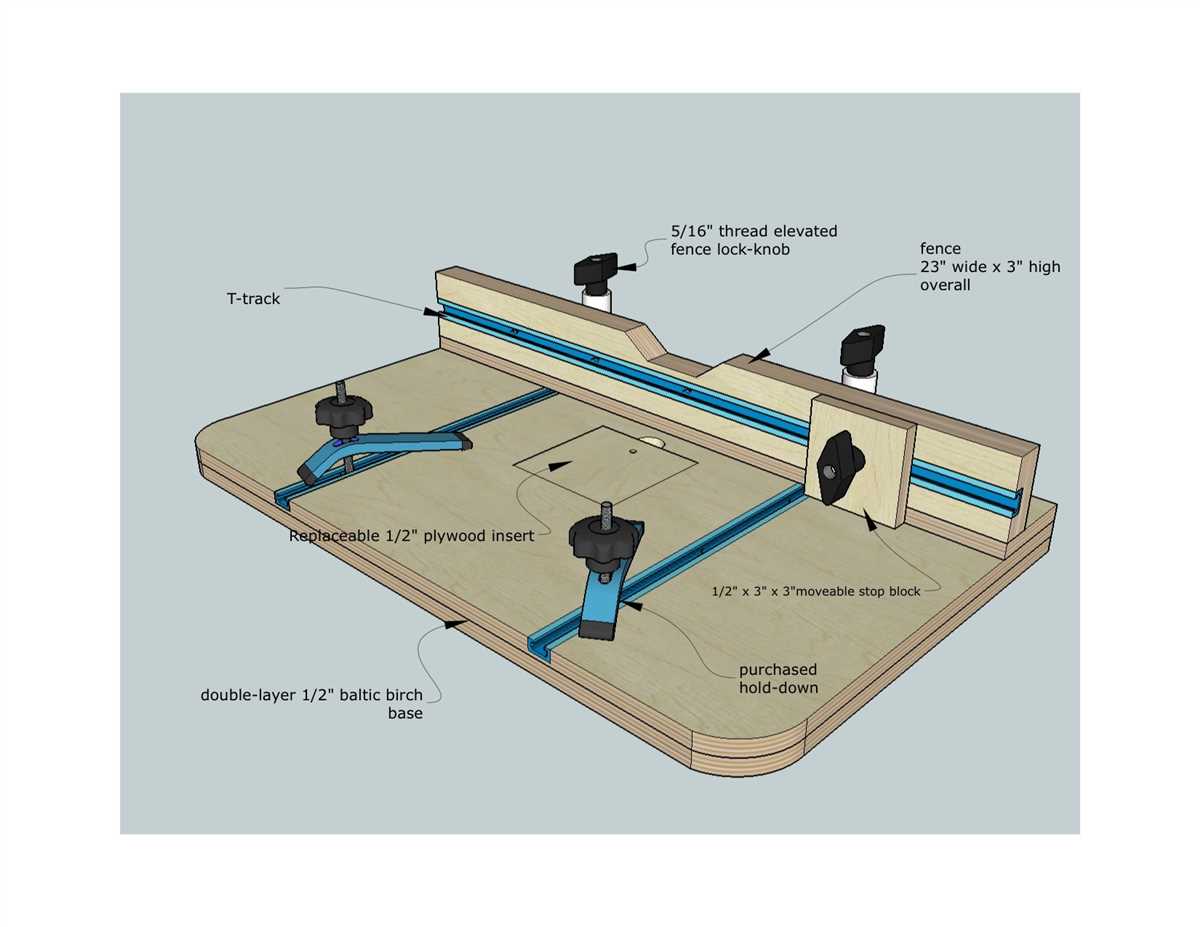
Build the Table and Attach it to the Frame
Before attaching the table to the frame, you need to build the table itself. Follow these steps to construct the table:
- Measure and cut a piece of plywood to the desired size for your table. Make sure it fits comfortably within the dimensions of the frame.
- Sand the edges of the plywood to ensure they are smooth and free from splinters.
- Drill holes in the corners of the plywood to attach it to the frame later on.
- Apply a coat of wood stain or paint to the plywood to protect it and give it a finished look. Let it dry completely.
- Once the plywood is dry, attach a rubber mat or non-slip material to the top surface of the table. This will help prevent materials from slipping during drilling operations.
With the table constructed, now it’s time to attach it to the frame. Follow these steps:

- Position the table on top of the frame so that the holes drilled in the corners of the plywood align with the corresponding holes in the frame.
- Insert bolts through the holes in the plywood and frame.
- Add washers and nuts to the bolts and tighten them securely. This will secure the table to the frame and keep it stable during drilling operations.
Once the table is securely attached to the frame, you can proceed with the remaining steps to complete your DIY drill press.
Install the Drill Head and Spindle
Once you have assembled the frame and motor mount, it is time to install the drill head and spindle. Follow these steps:
Step 1:
Position the drill head on top of the motor mount. Make sure it is centered and aligned with the hole in the motor mount.
Step 2:
Secure the drill head to the motor mount using bolts or screws. Tighten them securely to ensure stability.

Step 3:
Attach the spindle to the drill head. The spindle is the part that holds the drill bit in place.
Step 4:
Insert the drill bit into the spindle and tighten it using the appropriate mechanism. Make sure the drill bit is secure and properly aligned.
Step 5:
Test the drill press by turning it on and checking if the spindle rotates smoothly. Make any necessary adjustments if the spindle is misaligned or wobbles.
That’s it! You have successfully installed the drill head and spindle on your DIY drill press. Now you can start using it for your woodworking or metalworking projects.
Add the Motor and Power Supply System
Once you have built the basic frame and assembled the drill press components, it’s time to install the motor and power supply system. This will provide the necessary power to operate the drill press.

Materials Needed
- Electric motor
- Belt or pulley system
- Power supply unit
- Wires and connectors
- Switch
Instructions
- Choose an appropriate electric motor for your DIY drill press. Make sure it has enough power and speed for your needs.
- Position the motor on the frame, aligning the motor shaft with the chuck shaft.
- Secure the motor to the frame using bolts or clamps.
- Next, connect the motor shaft to the chuck, either using a belt or pulley system. This will transfer the rotational motion from the motor to the drill bit.
- Mount the power supply unit on the frame, making sure it is securely attached.
- Connect the motor to the power supply unit using appropriate wires and connectors. Follow the manufacturer’s instructions for proper wiring.
- Install a switch in the circuit between the power supply unit and the motor. This will enable you to turn the drill press on and off.
- Double-check all the connections and make sure everything is properly secured.
Power Supply Considerations
When choosing a power supply unit for your DIY drill press, make sure it can provide the necessary voltage and current to adequately power the motor.
Also, consider the power source. If you plan to use a standard electrical outlet, make sure the power supply unit is compatible with the voltage and frequency of your electrical system. Alternatively, you can use a battery power supply if you need a portable drill press.
Make sure to follow all safety precautions and consult with a professional if you are unsure about the electrical connections or power supply requirements.
Test and Calibrate Your DIY Drill Press
Once you have successfully built your DIY drill press, it’s crucial to test and calibrate it to ensure it functions properly and is safe to use. Follow these steps to test and calibrate your homemade drill press:
1. Verify Stability
First, ensure that your DIY drill press is stable and won’t wobble or tip over while in use. Place it on a sturdy workbench or table and check for any signs of instability. If necessary, adjust the base or add additional supports to improve stability.

2. Check Vertical Alignment
Next, check the vertical alignment of the drill press. Use a level to make sure that the drill bit is perfectly perpendicular to the work surface. Adjust the drill head if needed to achieve the correct alignment.
3. Test Runout
Runout refers to the amount of wobble or deviation of the drill bit as it rotates. To test runout, secure a dial indicator near the drill bit and slowly rotate it. The dial indicator will measure any movement or runout of the drill bit. If you notice excessive runout, check the chuck and spindle for any defects or misalignment.
4. Evaluate Depth Control
Next, check the depth control mechanism of your DIY drill press. Lower the drill bit to the desired depth and measure the distance from the tip of the drill bit to the work surface. Compare this measurement to the depth indicated on the depth gauge. If there is a significant discrepancy, adjust the depth control mechanism accordingly.
5. Test Speed Settings
Most drill presses have adjustable speed settings. Test each speed setting to ensure smooth and consistent operation. Pay attention to any unusual noises or vibrations that may indicate a problem with the motor or belt.
6. Verify Safety Features
Lastly, verify that all safety features of your DIY drill press are functioning properly. Check that the emergency stop button halts operation immediately and that the workpiece is securely clamped in place before drilling.
By following these steps, you can ensure that your DIY drill press is properly calibrated and safe to use. Regularly check and maintain your drill press to keep it in good working condition.
FAQ:
How difficult is it to make a DIY drill press at home?
Making a DIY drill press at home can be a moderately difficult task, depending on your level of experience with woodworking and metalworking. It requires a good understanding of tools and materials, as well as some basic engineering skills. However, with the right guidance and instructions, it is a feasible project for most DIY enthusiasts.
What materials do I need to make a DIY drill press?
To make a DIY drill press, you will need a variety of materials including a metal rod, a drill chuck, a base plate, a motor, a power transmission system, and various nuts, bolts, and screws. Additionally, you will need some woodworking tools such as a saw, a drill, and a sander. All these materials can be easily found at your local hardware store or ordered online.
Can I use any motor for a DIY drill press?
While you can technically use any motor for a DIY drill press, it is recommended to use a motor with adequate power and speed control to ensure optimal performance. A motor with at least 1/4 horsepower and variable speed control is generally recommended for most drilling tasks. However, the specific motor you choose will depend on your individual needs and preferences.
Is it safe to make a DIY drill press?
When done correctly and with proper precautions, making a DIY drill press can be safe. However, it is important to follow safety guidelines and use appropriate protective equipment, such as safety glasses and gloves, throughout the construction process. It is also crucial to double-check the stability and functionality of the drill press before using it, and to always operate the machine with caution and awareness.
What are the advantages of making your own drill press?
There are several advantages to making your own drill press. Firstly, it allows you to customize the design and features of the drill press to suit your specific needs and preferences. Secondly, it can be a cost-effective alternative to buying a ready-made drill press, as you can often find or repurpose materials at a lower cost. Lastly, building your own drill press can be a satisfying and rewarding DIY project that allows you to develop new skills and knowledge.
Video:


Meet Harrison Clayton, a distinguished author and home remodeling enthusiast whose expertise in the realm of renovation is second to none. With a passion for transforming houses into inviting homes, Harrison's writing at https://thehuts-eastbourne.co.uk/ brings a breath of fresh inspiration to the world of home improvement. Whether you're looking to revamp a small corner of your abode or embark on a complete home transformation, Harrison's articles provide the essential expertise and creative flair to turn your visions into reality. So, dive into the captivating world of home remodeling with Harrison Clayton and unlock the full potential of your living space with every word he writes.


