Step-by-Step Guide: How to Insert a Drill Bit into a Drill

Inserting a drill bit into a drill is a simple process that is essential for any DIY enthusiast or professional. Whether you need to drill holes in wood, metal, or other materials, knowing how to properly insert a drill bit into your drill is crucial for achieving accurate and efficient results. In this step-by-step guide, we will walk you through the process of inserting a drill bit into a drill, ensuring that you are ready to tackle your next drilling project with confidence.
Before you begin, it is important to gather the necessary tools and materials. These include the drill, the drill bit, and safety equipment such as safety glasses and gloves. It is also important to ensure that the drill is turned off and unplugged before starting the process.
First, locate the chuck on the front of the drill. The chuck is the part of the drill that holds the drill bit in place. It typically consists of three adjustable jaws that grip the drill bit. To open the chuck, hold the drill with one hand and rotate the chuck counterclockwise with your other hand. This will loosen the jaws and allow you to insert the drill bit.
Next, choose the appropriate drill bit for your project. Drill bits come in a variety of sizes and types, each designed for specific materials and applications. It is important to select the correct drill bit for the job to ensure optimal results. Once you have selected the appropriate drill bit, hold it with one hand and insert it into the chuck, ensuring that it is seated firmly and straight.
Once the drill bit is inserted into the chuck, tighten the chuck by rotating it clockwise with your hand. This will secure the drill bit in place and prevent it from slipping or coming loose during use. It is important to tighten the chuck firmly, but not too tight, as overtightening can damage the drill bit or the chuck. To check if the drill bit is secured properly, gently tug on it to ensure that it does not slide or wobble.

With the drill bit securely in place, you are now ready to use your drill for your intended project. Remember to always wear appropriate safety gear, such as safety glasses and gloves, when operating a drill. Additionally, make sure to read and follow the manufacturer’s instructions for your specific drill model to ensure safe and effective use. By following these steps and guidelines, you will be able to confidently insert a drill bit into your drill and tackle your drilling projects with ease.
Gather the Necessary Tools
- A drill bit
- A drill
- A chuck key or drill key
- A secure work surface
- Safety goggles
- Gloves
Before you begin inserting a drill bit into a drill, it’s important to gather all the necessary tools to ensure a safe and successful process.
The first tool you’ll need is a drill bit. Choose a drill bit that is appropriate for the task at hand, such as a twist bit for general drilling or a spade bit for larger holes.
Next, you’ll need a drill. Make sure the drill is in good working condition and has a secure chuck mechanism to hold the drill bit in place.

To secure the drill bit in the chuck, you’ll need a chuck key or drill key. This tool is used to tighten or loosen the chuck, allowing you to insert or remove drill bits.
It’s also important to have a secure work surface, such as a workbench or table, where you can safely place the drill and work on your project.
For your safety, always wear safety goggles to protect your eyes from any flying debris during the drilling process. Additionally, wearing gloves can provide extra protection and help improve grip and control while handling the drill and drill bit.
Choose the Right Drill Bit
- Match the drill bit to the material: Different drill bits are designed for different materials. It’s important to choose the right drill bit that matches the material you’re working with. For example, wood drill bits are designed for drilling in wood, while masonry drill bits are designed for drilling in concrete or brick.
- Consider the size: The size of the hole you need to drill will also determine the size of the drill bit you should use. Most drill bits are labeled with their size in inches or millimeters. Make sure to choose a drill bit that is suitable for the size of the hole you need to create.
- Look for special features: Some drill bits come with special features that can enhance their performance. For example, there are drill bits with a titanium coating that can increase their lifespan and reduce friction. If you have specific needs or requirements, consider looking for drill bits with specific features that can help you achieve your desired results.
It’s important to choose the right drill bit for the task at hand in order to ensure accuracy, efficiency, and safety. Taking the time to select the appropriate drill bit will help you achieve better results and avoid potential issues during drilling.

Prepare the Drill
- Make sure the drill is turned off and unplugged before starting.
- Inspect the drill for any damage or loose parts. If you notice any issues, do not use the drill and consult the manufacturer’s instructions or contact customer support.
- Choose the appropriate drill bit for your project. Consider the type of material you will be drilling into and the size hole you need to create.
- Gather any additional accessories you may need, such as a drill chuck key or a drill bit set.
- Prepare your work area by clearing away any debris or obstructions.
- Put on safety goggles and work gloves to protect yourself from any potential flying debris or sharp edges.
Locate the Chuck
The chuck is the part of the drill where the drill bit is inserted. It is usually located at the front of the drill, right above the trigger. The chuck is typically adjustable and can open and close to hold different-sized drill bits.
Before inserting the drill bit, make sure the drill is turned off and unplugged if it is a corded drill. If it is a cordless drill, remove the battery to ensure safety.
Once you have located the chuck, inspect it to determine if it is a keyless chuck or a keyed chuck:
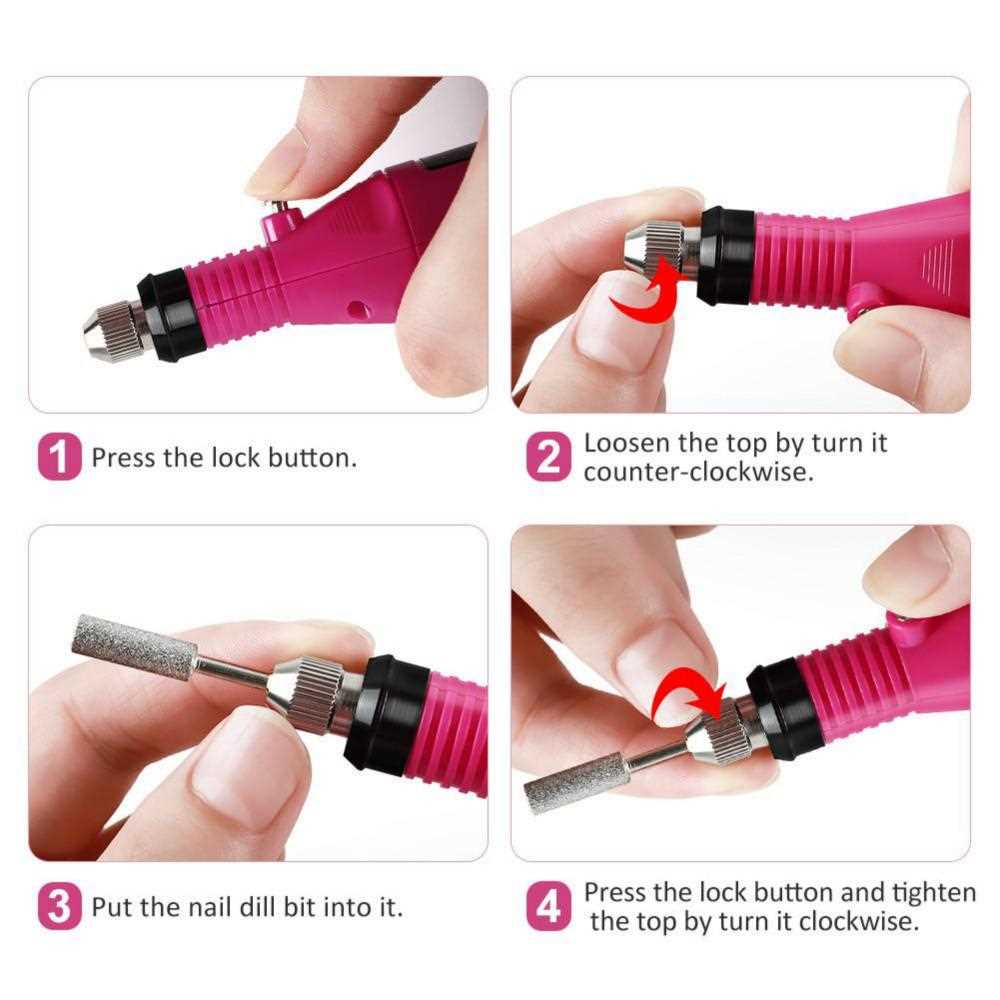
- A keyless chuck can be tightened or loosened by hand. It usually has three or four metal grips that can be opened or closed by twisting the chuck sleeve. This type of chuck is more common in modern drills.
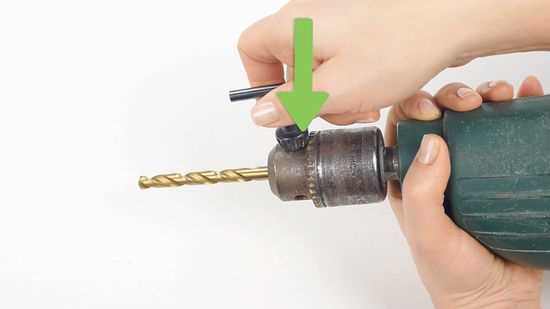
- A keyed chuck requires the use of a chuck key to tighten or loosen the chuck. It has teeth that correspond to the holes in the chuck, allowing you to secure the chuck in place using the key. This type of chuck is more common in older drills.
Identifying the type of chuck your drill has is important because it will determine how to insert and secure the drill bit.
Open the Chuck

Before inserting a drill bit into a drill, you need to open the chuck. The chuck is the part of the drill that holds the bit in place. To open the chuck, follow these steps:
- Make sure the drill is turned off and unplugged, or if you are using a cordless drill, ensure that the battery is removed.
- Locate the chuck, which is typically located at the front end of the drill.
- Look for a ring or collar around the chuck, known as the chuck collar.
- Hold the drill with one hand and rotate the chuck collar counterclockwise using your other hand. Some drills have a chuck key that needs to be inserted into the collar for rotation.
- Continue rotating the chuck collar until it loosens and opens up.
- Once the chuck is fully open, you can now proceed to insert the drill bit.
Insert the Drill Bit
Inserting the drill bit into your drill is a straightforward process. Follow these steps to get started:
- Make sure your drill is turned off and unplugged from the power source.
- Locate the chuck on the front end of your drill. The chuck is a cylindrical component that holds the drill bit in place.
- Rotate the chuck counterclockwise to loosen it.
- Once the chuck is loose, open it wide enough to accommodate the size of the drill bit you will be using.
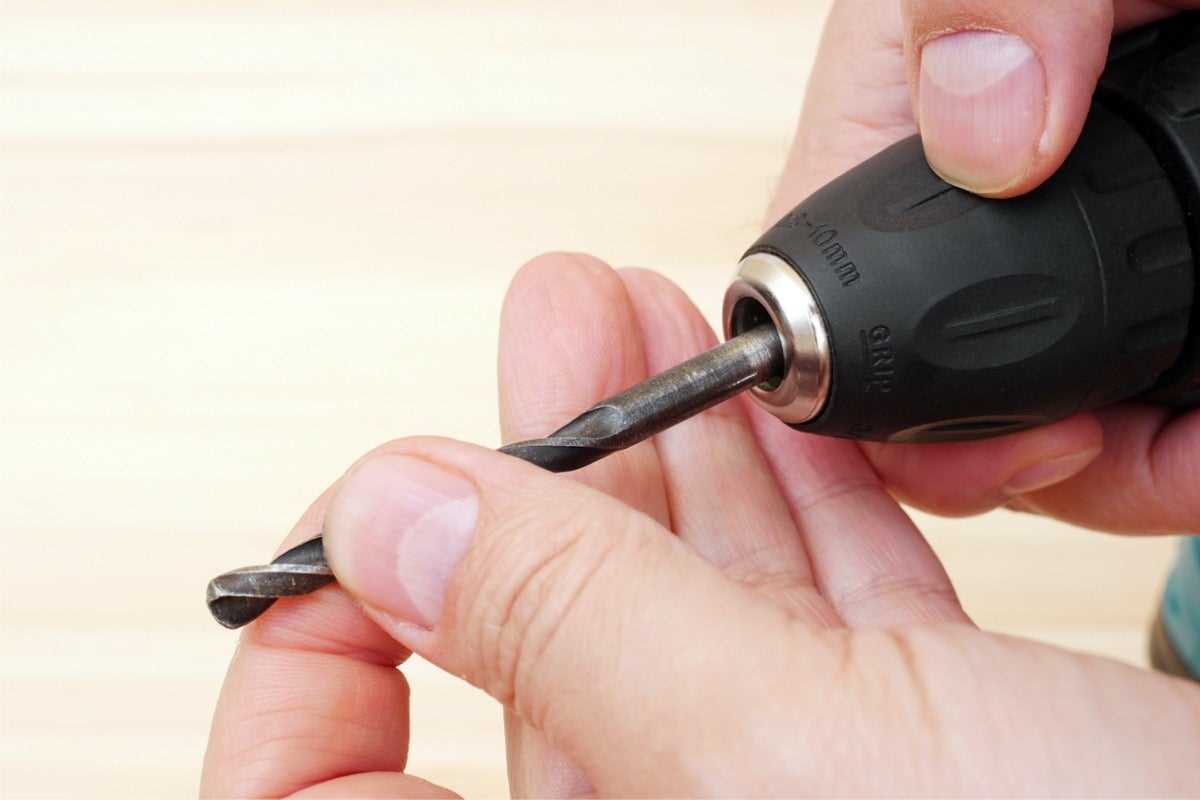
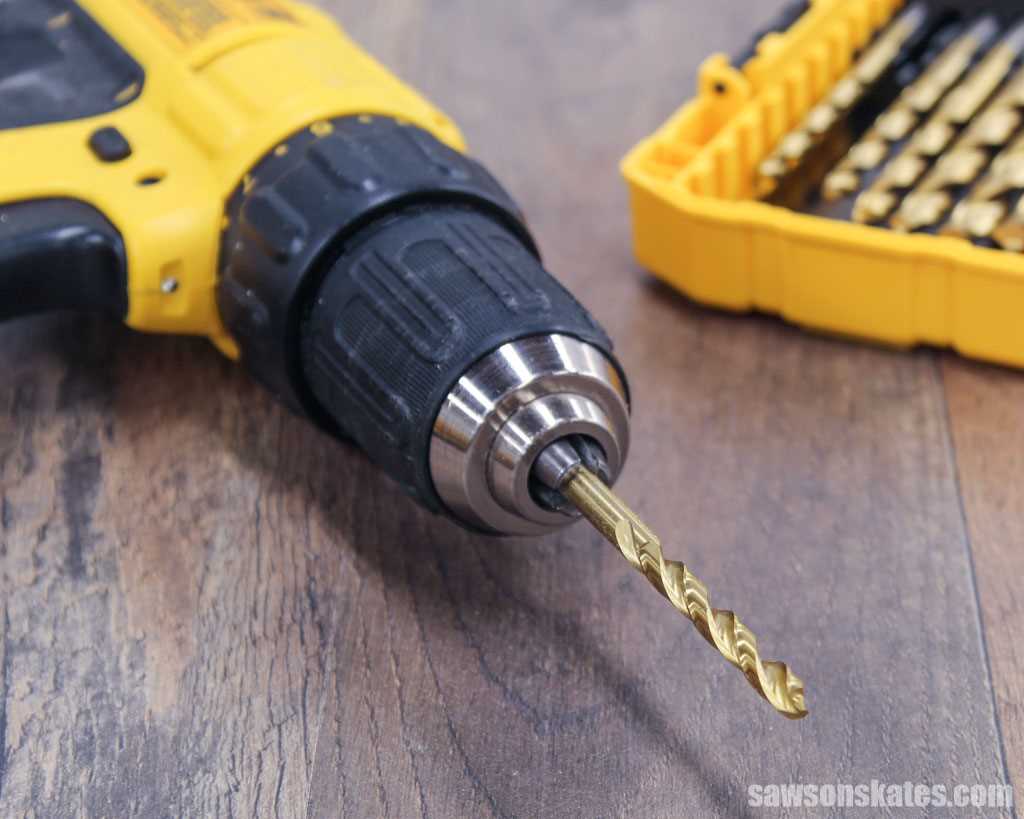
- Take the drill bit and insert it into the chuck. Make sure it is aligned properly with the jaws of the chuck.
- Tighten the chuck by turning it clockwise. You can use your hand to tighten it initially, but it is recommended to use a chuck key or chuck keyless system to ensure a secure grip on the drill bit.
- Continue tightening until the drill bit is firmly secured in the chuck.
- Give the chuck a final twist to ensure it is fully tightened.
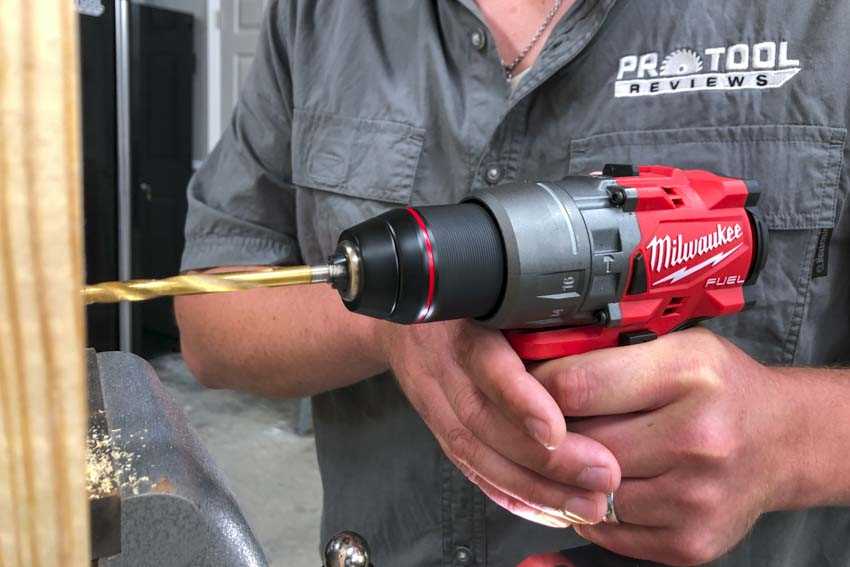
Once you have inserted the drill bit and tightened the chuck, your drill is ready to use. Just make sure to double-check that the drill bit is securely held in place before operating the drill.
Tighten the Chuck

After selecting the appropriate drill bit for your project, you are ready to insert it into the drill. The first step is to tighten the chuck to secure the drill bit in place. Follow these steps:
- Locate the chuck on the front of the drill. The chuck is the part that holds the drill bit.
- Rotate the chuck counterclockwise to loosen it. This will allow you to insert the drill bit.
- Insert the shank of the drill bit into the chuck. The shank is the smooth, cylindrical part of the drill bit that fits into the chuck.
- Tighten the chuck by rotating it clockwise. Use your hand to grip the chuck and turn it to secure the drill bit.
- Continue tightening the chuck until it is snug and the drill bit is secure.
It is important to ensure that the chuck is tightened properly to prevent the drill bit from slipping while in use. A loose chuck can lead to inaccurate drilling and potential injury. Take the time to tighten the chuck securely before starting your project.
Test the Drill Bit
Before using the drill bit, it is important to test it to ensure that it is properly inserted and ready for use. Follow the steps below to test the drill bit:
- Secure the drill: Place the drill on a stable surface or secure it in a vise.
- Power on the drill: Turn on the drill and adjust the speed setting according to the material you will be drilling into.
- Select a test material: Choose a scrap piece of material that is similar to the material you will be drilling into.
- Align the drill bit: Position the drill bit at a 90-degree angle to the surface of the test material.
- Apply light pressure: Apply light pressure to the drill and slowly start drilling into the test material.
- Observe the drilling process: Pay attention to the sound and feel of the drill. If the drill bit is properly inserted, it should drill smoothly and evenly without any wobbling or excessive noise.
- Inspect the drilled hole: Once you have completed drilling, examine the drilled hole to ensure that it is clean and without any signs of damage.
If the drill bit passes the test and drills smoothly into the test material, it is ready for use. If you experience any issues or notice any problems during the testing process, remove the drill bit, inspect it for damage or improper insertion, and reinsert it following the steps outlined in this guide.
FAQ:
What is a drill bit?
A drill bit is the cutting tool that is attached to a drill to create holes in various materials.
What types of drill bits are there?
There are many types of drill bits, such as twist bits, spade bits, hole saws, step drill bits, and masonry bits, each designed for specific applications.
How do I choose the right drill bit for my project?
To choose the right drill bit, consider the material you are drilling into and the size of the hole you need. Different drill bits are designed for different materials, such as wood, metal, or concrete, and come in various sizes.
Can I use any drill bit with any drill?
No, not all drill bits are compatible with all drills. Make sure to check the drill’s chuck size and the shank size of the drill bit to ensure they match before attempting to insert the drill bit into the drill.
What is the correct way to insert a drill bit into a drill?
The first step is to loosen the chuck of the drill by rotating it counterclockwise. Then, insert the shank of the drill bit into the chuck and tighten it by rotating the chuck clockwise. Finally, check that the drill bit is securely in place before using the drill.
Video:


Meet Harrison Clayton, a distinguished author and home remodeling enthusiast whose expertise in the realm of renovation is second to none. With a passion for transforming houses into inviting homes, Harrison's writing at https://thehuts-eastbourne.co.uk/ brings a breath of fresh inspiration to the world of home improvement. Whether you're looking to revamp a small corner of your abode or embark on a complete home transformation, Harrison's articles provide the essential expertise and creative flair to turn your visions into reality. So, dive into the captivating world of home remodeling with Harrison Clayton and unlock the full potential of your living space with every word he writes.


