Step-by-Step Guide: How to Drill into a Brick Wall

If you’re looking to hang a picture frame, mount a shelf, or install a curtain rod in your home, you may need to drill into a brick wall. While drilling into brick can seem intimidating, with the right tools and technique, it can be a relatively simple process. This step-by-step guide will walk you through the process of drilling into a brick wall, ensuring your project goes smoothly and successfully.
Step 1: Gather the Necessary Materials
Before you begin drilling into a brick wall, make sure you have all the necessary materials on hand. You will need a power drill with a masonry bit, a tape measure, a pencil, a level, a hammer, a vacuum or brush for clean-up, and, of course, the item you plan to hang or install.
Step 2: Mark the Spot
Using a tape measure and pencil, mark the spot on the brick wall where you want to drill. Use a level to ensure that your mark is straight and accurate.

Step 3: Protect Yourself and the Area
Put on safety goggles and mask to protect your eyes and lungs from dust and debris. Additionally, lay down a drop cloth or old sheet to catch and contain any dust or debris that may fall during the drilling process.
Step 4: Drill Pilot Holes
Start by drilling pilot holes into the marked spot on the brick wall. This will make it easier to drill the larger hole and will help prevent the brick from cracking or crumbling.
“blockquote” Pro Tip: Apply steady, even pressure as you drill, using a slow speed to prevent overheating the drill bit.

Step 5: Drill the Larger Hole
Once the pilot holes are drilled, switch to a masonry bit that is slightly larger than the screws or anchors you will be using. Drill the larger hole into the brick wall, using the pilot holes as guides.
Step 6: Clean up and Install
Finally, use a vacuum or brush to remove any dust or debris from the drill holes. Insert screws or anchors into the holes and use a screwdriver or power drill to secure your item to the wall.
With these steps, you can confidently drill into a brick wall and complete your home improvement projects with ease. Remember to always use caution and take your time, and you’ll be able to hang, mount, or install anything you need on your brick walls.

Step 1: Gather the necessary tools and materials
- Drill: Ensure you have a power drill with a masonry drill bit that is suitable for drilling into brick. This bit should be designed to handle the hard surface of the brick.
- Safety Glasses: Protect your eyes from any debris or dust that may be generated during the drilling process.
- Protective Gloves: Wear gloves to protect your hands from potential injury while handling the tools and materials.
- Pencil or Marker: Use a pencil or marker to mark the drilling points on the brick wall where you want to place the holes.
- Tape Measure or Ruler: Use a tape measure or ruler to measure and mark precise distances between the drilling points.
- Dust Mask: Optionally, wear a dust mask to prevent inhaling any dust particles that may be produced.
- Vacuum Cleaner with brush attachment: Use a vacuum cleaner with a brush attachment to clean up any dust or debris that is generated while drilling into the brick.
- Masonry Anchors and Screws: If you plan to hang something on the brick wall, gather the appropriate masonry anchors and screws.
Step 2: Choose the right drill bit
Choosing the right drill bit is crucial for drilling into a brick wall. Using the wrong drill bit can lead to inefficient drilling or even damage to the brick. Here are some factors to consider when choosing a drill bit:
- Type of drill bit: There are different types of drill bits available, such as masonry drill bits, carbide-tipped bits, and diamond-tipped bits. Masonry drill bits are specifically designed for drilling into brick, concrete, and other masonry materials. They are made of hardened steel and have a sharp tip to penetrate the hard surface of the brick. Carbide-tipped bits and diamond-tipped bits are more expensive, but they offer increased durability and can handle tougher materials.
- Size of the drill bit: The size of the drill bit you choose will depend on the size of the hole you need to drill. Measure the diameter of the wall plug or anchor you plan to use and select a drill bit that matches this size. It’s important to use a drill bit that is slightly smaller than the wall plug or anchor to ensure a snug fit.
- Length of the drill bit: The length of the drill bit should be chosen based on the thickness of the brick wall. Measure the thickness of the wall and select a drill bit that is long enough to penetrate the entire depth without going too far beyond it.
- Quality of the drill bit: Investing in a high-quality drill bit is essential for a smooth and efficient drilling process. Cheap drill bits are more likely to dull quickly and can be easily damaged when drilling into hard materials like brick. Look for drill bits made from high-speed steel or carbide for long-lasting performance.
Take your time to choose the right drill bit for the job. A quality drill bit will make a significant difference in the success and ease of drilling into a brick wall.
Step 3: Mark the drilling position
Before you start drilling into the brick wall, it’s important to mark the exact position where you want to drill. This will help ensure that your holes are placed accurately and that you achieve the desired result. Here’s how you can mark the drilling position:
- Carefully measure and determine the exact location where you want to drill. Use a tape measure or ruler to measure the distance from any nearby objects or edges to ensure accuracy.
- Using a pencil or marker, make a small dot or mark on the brick surface at the desired drilling position. If you’re drilling multiple holes, make sure to mark each one separately.
- If you’re drilling into a specific spot on the brick wall based on a pre-measured space or object, use a level to ensure that your mark is perfectly horizontal, vertical, or at the desired angle.
- If you’re drilling multiple holes in a straight line, you can use a straightedge or a piece of masking tape to create a guide for your marks. Align the straightedge or tape with the first mark and make additional marks along its length.
By taking the time to accurately mark your drilling position, you’ll ensure that your holes are placed precisely where you want them. This will help prevent any mistakes or damage to the brick wall and allow you to achieve professional-looking results.
Step 4: Put on safety gear
Before you start drilling into a brick wall, it’s important to protect yourself by wearing the appropriate safety gear. This will help prevent any injuries and ensure a safe working environment.

Safety gear checklist:
- Safety glasses: Protect your eyes from any flying debris or dust that may be generated while drilling.
- Dust mask: Prevent inhaling any fine particles or dust that may be released during the drilling process.
- Gloves: Protect your hands from any sharp edges or rough surfaces.
- Hearing protection: If you are using a power drill, it’s recommended to wear earplugs or earmuffs to protect your hearing from the loud noise.
Make sure to properly wear and adjust all safety gear before starting the drilling process. This will help minimize any potential risks and ensure a safe and successful drilling experience.
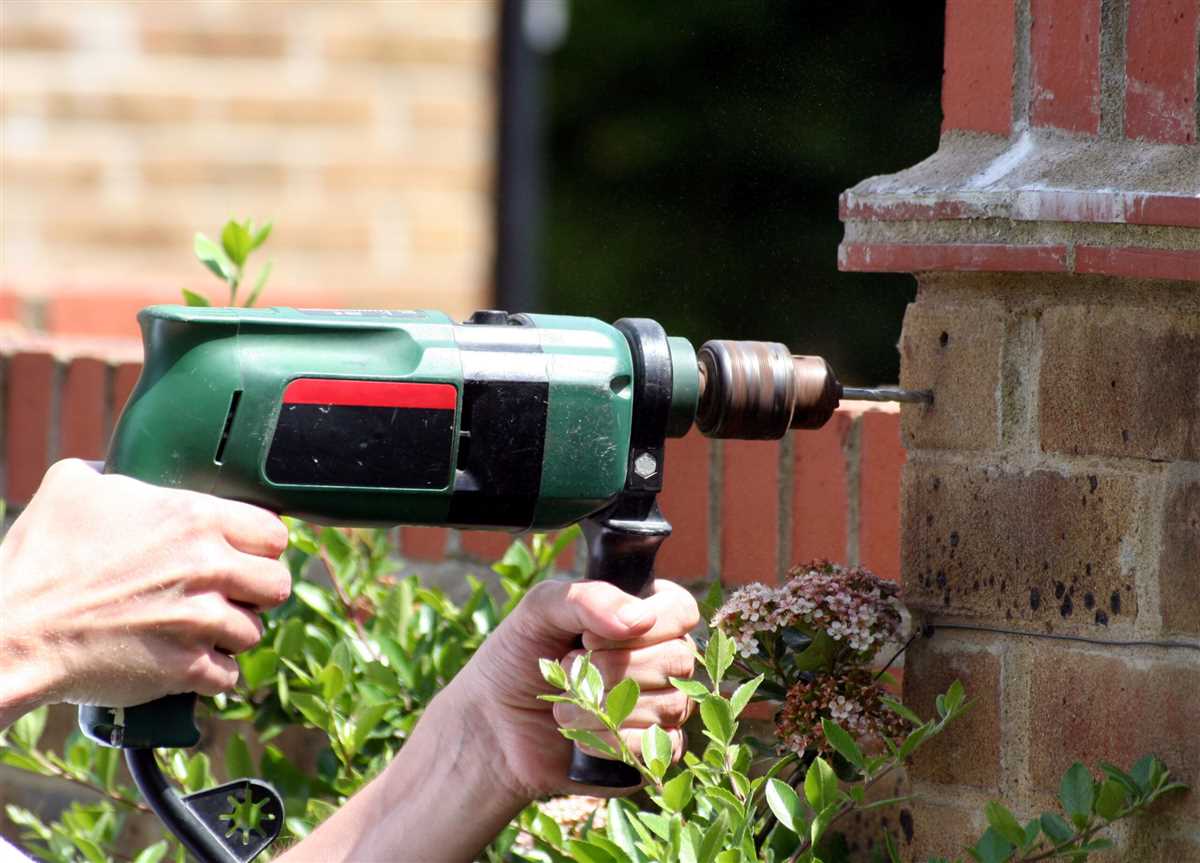
Step 5: Start drilling
Now that you’re ready and have taken all the necessary precautions, it’s time to start drilling into the brick wall. Follow these steps to ensure a successful drilling process:
- Choose the right drill bit: Select a masonry drill bit that matches the size of the anchor or screw you will be using. The drill bit should be designed to cut through brick or concrete.
- Secure the drill bit: Insert the chosen drill bit into the drill chuck and tighten it securely. Make sure it is centered and straight.
- Mark the drilling spot: Use a pencil or marker to mark the exact spot on the brick where you want to drill. Double-check the mark for accuracy.
- Hold the drill firmly: Grip the drill with both hands, ensuring a firm and steady hold. Align the drill bit with the marked spot on the brick.
- Start drilling: Begin drilling at a slow speed, applying steady and even pressure. Let the drill bit do the work and avoid pushing too hard. Maintain control and keep the drill as straight as possible.
- Clear away debris: Periodically stop drilling to remove any dust or debris from the hole. This will help prevent the drill bit from getting clogged and ensure a smooth drilling process.
- Monitor progress: As you continue drilling, pay attention to the depth of the hole. Use a depth gauge or mark the desired depth on the drill bit to track your progress and prevent drilling too deep.
- Take breaks if needed: Drilling into brick can be a physically demanding task. If you start to feel tired or fatigued, take short breaks to rest and regain your strength.
Remember to be patient and take your time while drilling. Rushing the process can lead to mistakes or damage to the brick. Keep in mind that drilling into brick may produce a lot of dust, so wearing protective goggles and a dust mask is recommended. Once the drilling is complete, you can move on to the next step of installing the anchor or screw.
Step 6: Use a vacuum to clean up the dust
After drilling into the brick wall, it is important to clean up the dust that has been created. This will not only keep your work area tidy but also help to ensure that dust does not get in the way of your next steps.

Using a vacuum with a brush attachment, gently suck up the dust around the drilled holes. Be sure to cover the entire area to make sure that all the dust is removed.
Take your time and be thorough in your cleaning to avoid leaving any debris behind. By doing this, you will create a clean surface for further work, such as installing anchors or attaching fixtures.
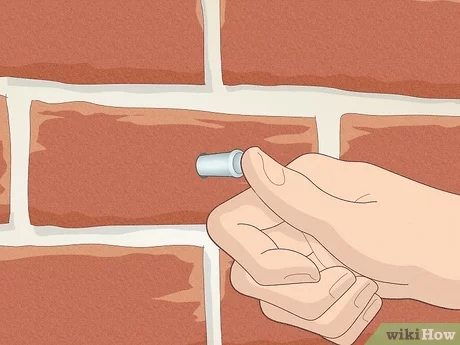
Step 7: Insert the anchor
Once you have drilled the hole in the brick wall, it’s time to insert the anchor. The anchor will provide stability and support for the screw or bolt that you will be using to hang your object.
- Take the anchor and make sure it fits snugly into the hole you drilled. The anchor should be slightly larger than the hole to ensure a tight fit.
- Insert the anchor into the hole by gently tapping it with a hammer. Make sure it goes all the way in, leaving only a small portion of it visible on the surface of the wall.
- If the anchor doesn’t go in easily, you can use a screwdriver to twist it into place. Hold the anchor with one hand and use the screwdriver to slowly turn it clockwise until it is fully inserted.
- Check that the anchor is secure by giving it a gentle tug. It should not move or wiggle in the hole.
Once the anchor is securely in place, you are ready to move on to the next step of attaching your object to the wall.
Step 8: Attach the desired object
After drilling the holes and inserting the wall plugs, it’s time to attach the object you want to hang on the wall. Follow these steps to ensure a secure and sturdy attachment:
1. Gather the necessary tools and materials
- Screws or hooks appropriate for your object
- Screwdriver or drill with a screwdriver bit
- Level
2. Position the object on the wall
Hold the object against the wall in the desired position and use the level to ensure it is straight. Adjust the position as needed.
3. Mark the screw or hook locations

Using a pencil or marker, make small marks on the wall through the holes or hooks in the object. This will indicate where you need to insert the screws or hooks.
4. Attach the object
Using a screwdriver or drill, insert the screws or hooks into the marked locations. Make sure to use the appropriate size and type of screws or hooks for the weight and size of the object you are hanging. Tighten them securely but be careful not to overtighten, as this can damage the object or the wall.
5. Check the object’s stability
Once the screws or hooks are in place, gently wiggle or tug on the object to ensure it is securely attached to the wall. If it feels loose or unstable, remove the screws or hooks and try again, adjusting the placement if necessary.
6. Clean up
Dispose of any debris from drilling or packaging materials, and clean up the work area.
Congratulations! You have successfully drilled into a brick wall and attached your desired object. Enjoy your newly decorated space!
FAQ:
What tools do I need to drill into a brick wall?
To drill into a brick wall, you will need a hammer drill, masonry drill bits, a level, a tape measure, a pencil, a dust mask, safety glasses, and ear protection.
Do I need to use a special type of drill bit for brick walls?
Yes, you will need to use masonry drill bits specifically designed for drilling into hard materials like brick. These bits have a carbide tip that allows them to effectively drill into the brick.
How do I determine the right drill bit size for drilling into a brick wall?
The drill bit size you need depends on the diameter of the screws or anchors you plan to use. Measure the diameter of the screw or anchor and choose a drill bit that is slightly larger to allow for proper installation.
What safety precautions should I take when drilling into a brick wall?
When drilling into a brick wall, it is important to wear a dust mask to protect your lungs from any dust or debris. You should also wear safety glasses to protect your eyes and ear protection to protect your hearing from the loud noise of the drill.
How do I drill into a brick wall without damaging it?
To drill into a brick wall without damaging it, start by marking the drilling spot with a pencil. Use a level to ensure the mark is straight. Then, slowly drill into the brick with a hammer drill, applying steady pressure. Use a vacuum or brush to remove any dust or debris from the hole.
Video:


Meet Harrison Clayton, a distinguished author and home remodeling enthusiast whose expertise in the realm of renovation is second to none. With a passion for transforming houses into inviting homes, Harrison's writing at https://thehuts-eastbourne.co.uk/ brings a breath of fresh inspiration to the world of home improvement. Whether you're looking to revamp a small corner of your abode or embark on a complete home transformation, Harrison's articles provide the essential expertise and creative flair to turn your visions into reality. So, dive into the captivating world of home remodeling with Harrison Clayton and unlock the full potential of your living space with every word he writes.


