Step-by-Step Guide: How to Drill Holes in Acrylic Sheet

Acrylic sheets are a versatile material commonly used in various applications such as signs, displays, and even as a substitute for glass in windows. If you’re working with acrylic sheets and need to create holes for mounting or other purposes, it’s important to know the proper steps to avoid cracking or damaging the material. In this step-by-step guide, we’ll walk you through the process of drilling holes in acrylic sheets.
Step 1: Gather the Necessary Tools
Before you begin, make sure you have all the tools and materials you’ll need. This includes an acrylic sheet, a drill with a variable speed setting, drill bits specifically designed for acrylic, masking tape, a ruler or measuring tape, a marker or pencil, a C-clamp or other means of securing the sheet, and safety equipment such as safety glasses and gloves.
Step 2: Mark the Hole Locations
Using a ruler or measuring tape, carefully measure and mark the desired locations for the holes on the acrylic sheet. Double-check your measurements to ensure accuracy. Then, use a marker or pencil to clearly mark the center point of each hole.

Step 3: Secure the Acrylic Sheet
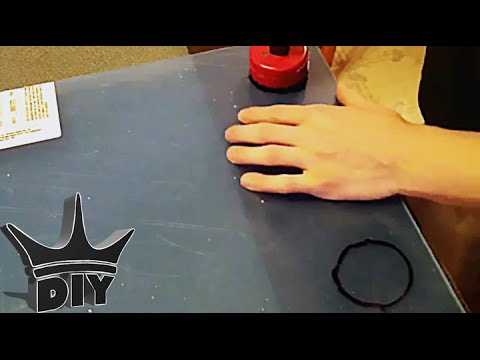
To prevent the acrylic sheet from cracking or warping during the drilling process, it’s important to secure it properly. Place the sheet on a flat and stable surface, and use masking tape to tape down the edges of the sheet to the surface. This will help reduce vibrations and stabilize the sheet.
Step 4: Start Drilling
Attach the appropriate drill bit to your drill and set the drill to a low speed setting. Closely align the tip of the drill bit with the marked center point of the first hole. Apply steady and even pressure to start drilling. It’s important not to force the drill through the acrylic sheet. Let the drill bit do the work and slowly drill through the material.
Step 5: Continue Drilling

Once the drill bit has penetrated the acrylic sheet, gradually increase the drill speed to help prevent the plastic from melting. Take your time and continue drilling until the hole is complete. Work slowly and avoid excessive heat buildup, as it can lead to cracking or other damage to the material.
Step 6: Repeat the Process
After drilling the first hole, repeat the process for any additional holes needed. Remember to measure and mark the hole locations accurately each time and take the necessary precautions to secure the acrylic sheet to avoid cracking or warping.
By following this step-by-step guide, you’ll be able to drill holes in acrylic sheets with confidence and precision. Remember to always prioritize safety and take your time to ensure the best results.
Materials and Tools

- Acrylic sheet
- Drill (corded or cordless)
- Drill bits specifically designed for acrylics or plastics
- Masking tape or painter’s tape
- Center punch or nail
- Ruler or measuring tape
- Pencil or marker
- Clamps or a vise
- Safety glasses or goggles
- Dust mask or respirator
- Clean cloth or rag
- Water or coolant
Preparing the Acrylic Sheet
Before drilling holes in an acrylic sheet, it is important to properly prepare the surface and take necessary precautions to avoid cracking or shattering the material. Follow the steps below to ensure a smooth drilling process:
- Choose the right acrylic sheet: Select an acrylic sheet that is suitable for your project. Consider the thickness, size, and transparency of the sheet based on your specific requirements.
- Gather the necessary tools: To prepare the acrylic sheet, you will need the following tools:
- Acrylic sheet
- Measuring tape
- Marker or pencil
- Masking tape
- Clamps or vice grips
- Safety goggles
- Drill
- Drill bits
- Lubricant (such as water or WD-40)
- Sandpaper (optional)
- Measure and mark the hole locations: Use a measuring tape to determine the exact locations where you want to drill the holes. Mark these locations on the acrylic sheet using a marker or pencil. Make sure the marks are clear and visible.
- Secure the acrylic sheet: Before drilling, it is important to secure the acrylic sheet to prevent it from moving. Place the sheet on a stable surface and use clamps or vice grips to hold it firmly in place. This will ensure stability and prevent the sheet from cracking during the drilling process.
- Apply masking tape: To further protect the acrylic sheet from cracking, apply masking tape over the areas where you will be drilling the holes. This will help reduce the chances of the material chipping or splintering.
- Put on safety goggles: Whenever working with tools or machinery, it is crucial to prioritize safety. Put on a pair of safety goggles to protect your eyes from any potential debris or flying particles that may occur during the drilling process.
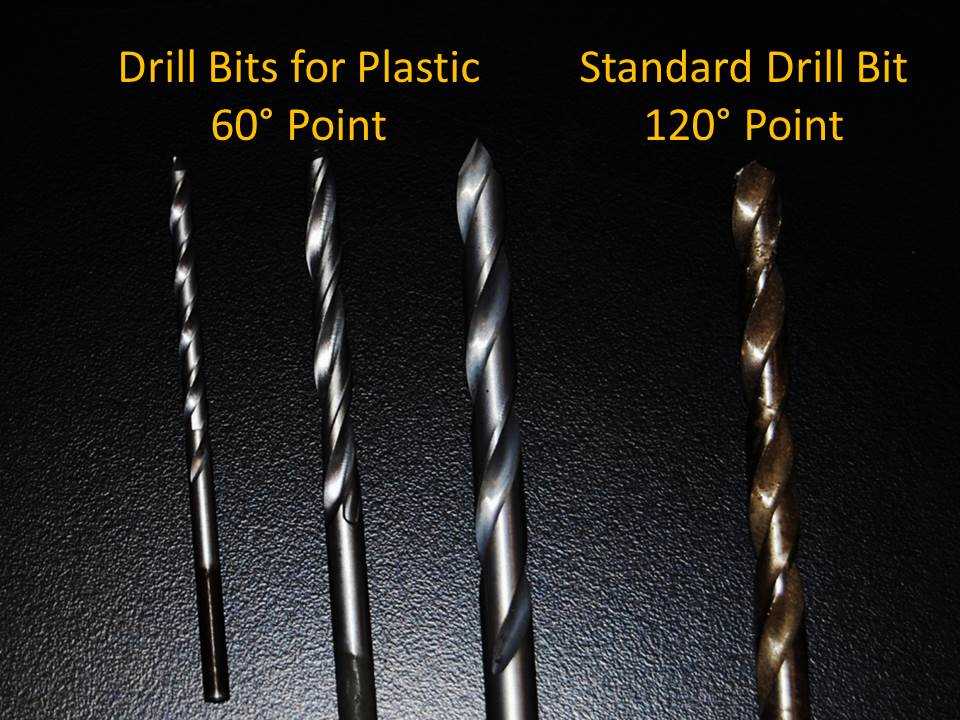
- Choose the right drill bit: Select the appropriate drill bit for your project. For drilling holes in acrylic, it is recommended to use a twist drill bit or a brad point drill bit. These types of drill bits are specially designed for drilling plastic materials and will help prevent cracking or chipping.
- Apply lubricant: Lubricating the drill bit with water or a specific acrylic lubricant like WD-40 can help reduce friction and heat during the drilling process. This will prevent the acrylic from melting or cracking and result in a cleaner hole.
- Start drilling: Place the drill bit on one of the marked hole locations and begin drilling. Apply firm and steady pressure, but avoid excessive force, as this can cause the acrylic to crack or shatter. Work slowly and ensure the drill bit is perpendicular to the acrylic sheet to create straight and precise holes.
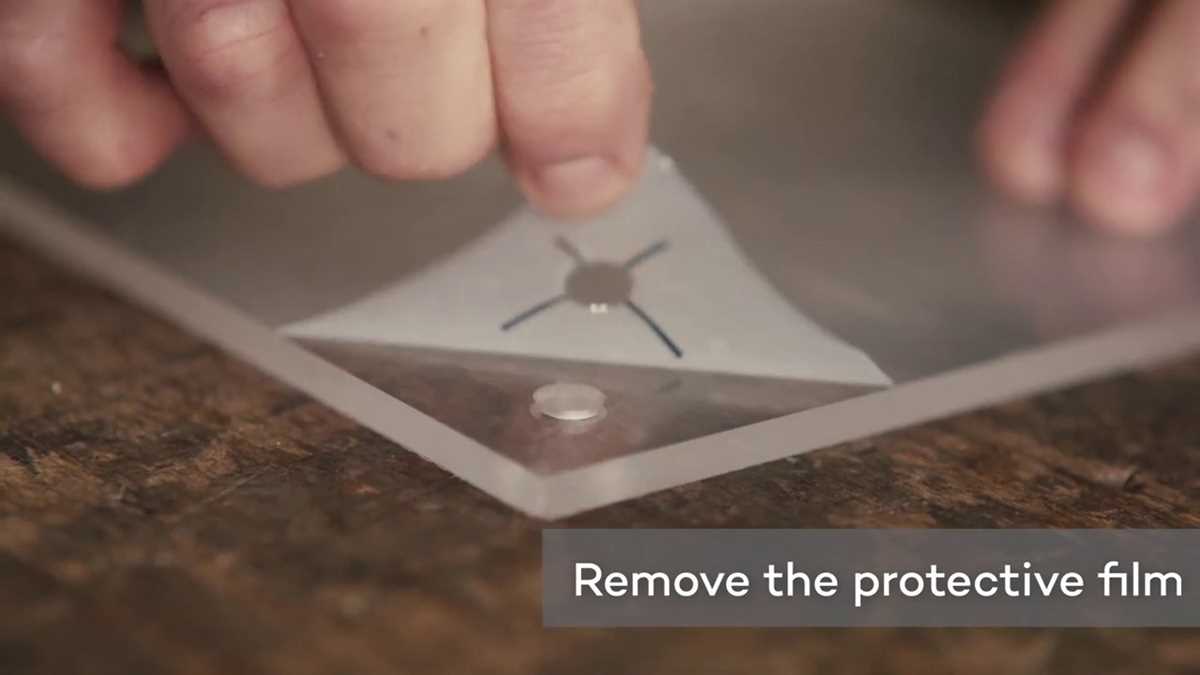
- Clean up: Once you have drilled all the desired holes, remove the masking tape and clean the acrylic sheet with a mild soap and water solution. This will remove any debris or residue from the drilling process and leave your acrylic sheet in a clean and pristine condition.
By following these steps, you’ll be well-prepared to drill holes in an acrylic sheet without damaging or compromising its structure.
Clamping and Marking
Before drilling holes in acrylic sheets, it is important to properly clamp and mark the sheet to ensure accurate and precise holes. This step is crucial to avoid cracking or chipping the acrylic.

- Clamping:
- Marking:
- For simple hole placements, you can use a center punch or a nail to create a small indentation at the marked spot. This will help guide the drill bit and prevent it from slipping.
- For more complex hole patterns, you can create a drilling template by placing a piece of paper or cardboard over the acrylic sheet and marking the hole locations. Then, transfer the hole positions onto the acrylic sheet using the template.
Securely clamp the acrylic sheet to a work surface using bar clamps or C-clamps. The clamps should be placed on the edges of the sheet, ensuring that it is firmly held in place. This will prevent the sheet from moving or vibrating during the drilling process.
Next, mark the desired locations for the holes on the acrylic sheet. Use a ruler or measuring tape to measure and mark the positions accurately. It is recommended to use a marker or a grease pencil that is easily visible on the acrylic surface.
Once the acrylic sheet is clamped and marked, you are ready to proceed with the drilling process.
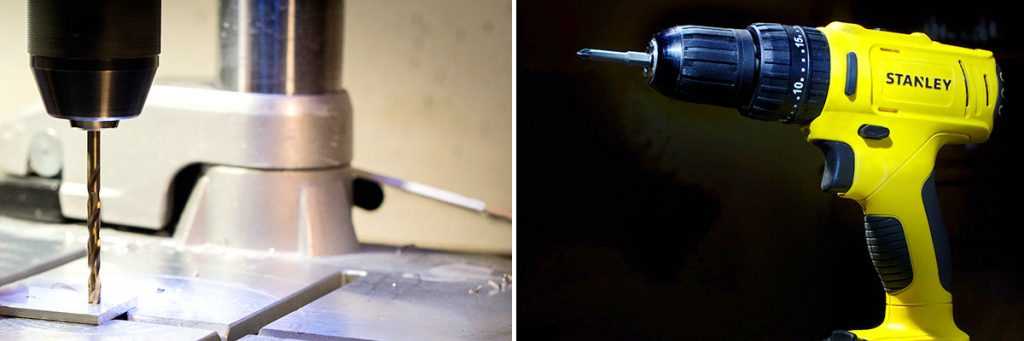
Selecting the Right Drill Bit
When it comes to drilling holes in acrylic sheets, selecting the right drill bit is crucial. Using the wrong one can result in cracking or shattering of the material. Here are a few factors to consider when choosing the appropriate drill bit:

Material
The first consideration is the material of the drill bit. High-speed steel (HSS) or carbide drill bits are recommended for drilling acrylic sheets. These types of drill bits are specifically designed to handle the unique properties of acrylic and provide clean, precise holes.
Size
The size of the drill bit is another important factor. The hole you need to drill will dictate the size of the drill bit required. It is important to choose a drill bit that is slightly larger than the diameter of the hole you want to create, as this will help prevent cracking and provide a more accurate hole.
Drill Bit Type
There are several types of drill bits available, including twist drill bits, brad-point drill bits, and spade bits. Twist drill bits are the most common and can be used for acrylic sheets. Brad-point drill bits have a small point on the tip that helps prevent the drill bit from wandering, making them a good choice for more precise drilling. Spade bits are not recommended for drilling acrylic sheets as they can cause excessive tearing and chipping.
Speed and Cooling
The speed at which you drill can also affect the outcome. It is recommended to use a slow drill speed when drilling acrylic sheets to minimize heat buildup. High speeds can cause the acrylic to melt or crack. Additionally, it is important to keep the drill bit cool during the drilling process. You can use a lubricant or coolant specifically designed for acrylic to ensure that the bit stays cool and prevent any damage to the material.
By considering these factors and selecting the right drill bit, you can successfully drill holes in acrylic sheets with minimal risk of damage or cracking. Remember to always wear appropriate safety gear and take necessary precautions when working with power tools.
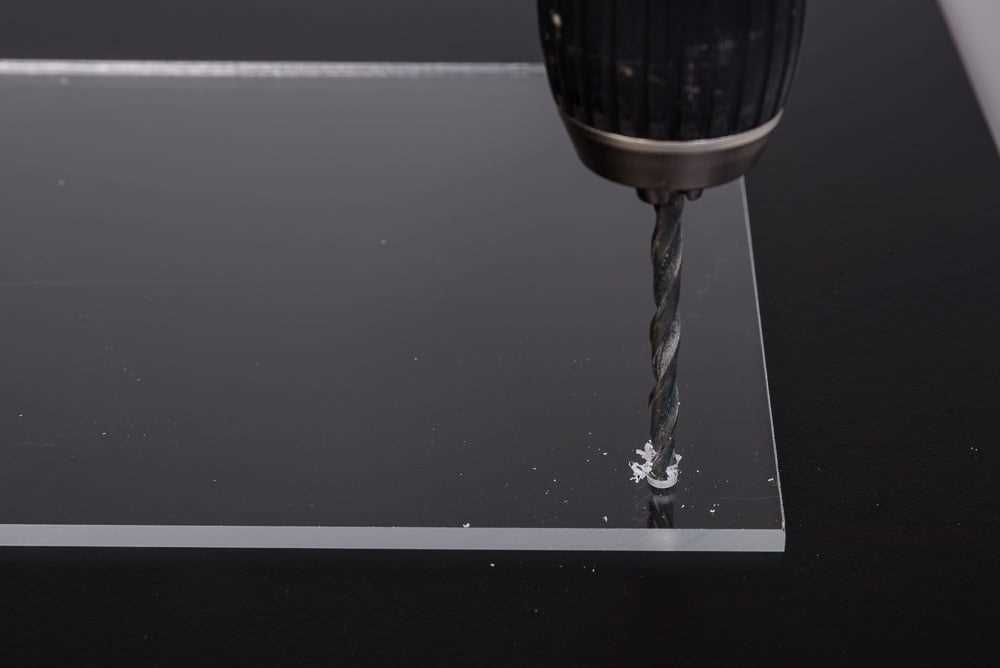
Drilling the Holes
Step 1: Begin by marking the location of the holes on the acrylic sheet using a pencil or permanent marker. Make sure to measure and double-check the placement before proceeding.
Step 2: Prepare the drill bit by inserting it into the drill chuck. Choose a drill bit that is specifically designed for drilling acrylic, as this will help prevent cracking or chipping.
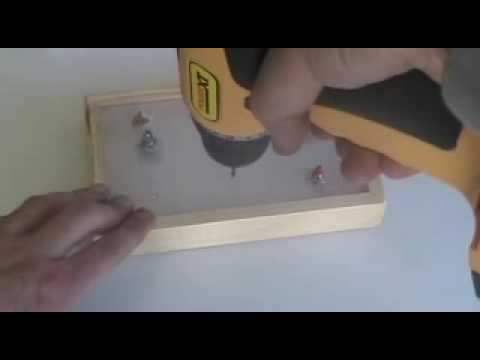
Step 3: Place the acrylic sheet on a sturdy work surface, with a scrap piece of wood or a backup material underneath it to prevent the drill bit from damaging the surface below.
Step 4: Start drilling at a slow speed to prevent the acrylic from cracking. Apply light pressure and steady the sheet with your free hand if necessary. Allow the drill bit to do the work and avoid forcing it through the acrylic.
Step 5: As you drill, periodically stop and clear away any acrylic chips or debris from the hole. This will help prevent the bit from clogging or jamming.
Step 6: Continue drilling until you have reached the desired depth or all the way through the acrylic sheet, depending on your specific project needs.
Step 7: Once you have finished drilling the holes, use a file or sandpaper to smooth out the edges if necessary. This will help prevent any sharp or rough edges.
Step 8: Clean the acrylic sheet with a mild soap and water solution to remove any dust or residue from the drilling process. Dry it thoroughly before proceeding with your project.
Step 9: Repeat the process for any additional holes you need to drill in the acrylic sheet.
Note: Always wear safety goggles and gloves when drilling acrylic to protect yourself from flying debris or sharp edges.
Cleaning and Finishing
Once you have drilled the holes in the acrylic sheet, it is important to clean and finish it properly to ensure a polished and professional look.
Cleaning the Acrylic Sheet
Before applying any finishing touches, you should clean the acrylic sheet to remove any dust or debris that may have accumulated during the drilling process. Use a mild soap or acrylic cleaner and a soft cloth or sponge to gently wipe down the surface of the sheet.
Be sure to avoid using any harsh chemicals or abrasive materials, as these can cause damage to the acrylic. Instead, opt for non-abrasive cleaning solutions and materials to preserve the integrity of the sheet.
Finishing Options
After cleaning the acrylic sheet, you can choose to apply a finishing touch to enhance its appearance. Here are a few options to consider:
- Polishing: To achieve a glossy finish, you can polish the surface of the acrylic sheet using a plastic polish or a polishing compound specifically designed for plastic materials. Apply the polish to a soft cloth and gently buff the surface in circular motions until it is smooth and shiny.
- Sanding: If you prefer a matte or textured finish, you can use sandpaper to lightly sand the surface of the acrylic sheet. Start with a low grit sandpaper and gradually work your way up to a finer grit to achieve the desired level of smoothness. Be sure to sand in one direction to avoid creating scratches.
- Flame Polishing: For a more advanced finishing technique, you can use a flame to polish the edges of the acrylic sheet. This method involves carefully passing the flame of a torch over the edges of the sheet to create a smooth, polished look. However, this technique requires caution and should only be attempted by experienced individuals.
Remember to always follow the manufacturer’s guidelines and recommendations when using any finishing products or techniques on acrylic sheets. Test a small area first to ensure compatibility and avoid any potential damage.
By cleaning and finishing the acrylic sheet after drilling the holes, you can achieve a professional and polished look for your project.
FAQ:
What type of drill bit should I use to drill holes in acrylic sheet?
You should use a twist drill bit specifically made for drilling acrylic sheet. Avoid using regular drill bits as they can cause the acrylic to crack or chip.
What diameter of drill bit should I use for drilling holes in acrylic sheet?
The diameter of the drill bit will depend on the size of the hole you want to create. It is recommended to use a drill bit size slightly larger than the diameter of the hole you need, to prevent any cracking or chipping of the acrylic sheet.
What speed should I set my drill to when drilling acrylic sheet?
You should set your drill to a low speed when drilling acrylic sheet. High speeds can generate excess heat, which can cause the acrylic to melt or crack. Start with a low speed and gradually increase if necessary, being careful not to put too much pressure on the acrylic sheet.
Is it necessary to secure the acrylic sheet to a surface before drilling?
Yes, it is highly recommended to secure the acrylic sheet to a stable surface before drilling. This will help prevent any movement or vibrations that can cause the drill bit to slip and damage the acrylic sheet.
Do I need to use lubrication when drilling acrylic sheet?
It is not necessary to use lubrication when drilling acrylic sheet. However, if you prefer to use some type of lubricant, you can use water or a silicone lubricant to reduce friction and heat buildup.
Can I use a regular drill for drilling acrylic sheet?
You can use a regular drill to drill acrylic sheet, but it is recommended to use a drill specifically designed for working with acrylic. Regular drills can generate too much heat and cause the acrylic to melt or crack. A drill for acrylic will have a slower speed setting and a twist drill bit made for acrylic.
How do I prevent the acrylic sheet from cracking or chipping when drilling?
To prevent the acrylic sheet from cracking or chipping when drilling, make sure to use a drill bit specifically made for acrylic sheet. Set your drill to a low speed and apply steady, even pressure while drilling. It is also important to secure the acrylic sheet to a stable surface to prevent any movement that can cause the drill bit to slip.
Video:

How To Choose A Tig Welder

Meet Harrison Clayton, a distinguished author and home remodeling enthusiast whose expertise in the realm of renovation is second to none. With a passion for transforming houses into inviting homes, Harrison's writing at https://thehuts-eastbourne.co.uk/ brings a breath of fresh inspiration to the world of home improvement. Whether you're looking to revamp a small corner of your abode or embark on a complete home transformation, Harrison's articles provide the essential expertise and creative flair to turn your visions into reality. So, dive into the captivating world of home remodeling with Harrison Clayton and unlock the full potential of your living space with every word he writes.


