Step-by-Step Guide: How to Drill Holes for Cabinet Hinges

If you’re looking to update or install new cabinet hinges, drilling the perfect holes is essential for a seamless installation. Whether you’re a beginner or a seasoned DIY enthusiast, this step-by-step guide will walk you through the process of drilling holes for cabinet hinges.
Step 1: Measure and Mark
The first step is to measure and mark where you want your cabinet hinges to be placed. Use a tape measure to determine the exact placement, ensuring that the hinges are aligned and level. Make small pencil marks on the cabinet door and frame to indicate where the holes need to be drilled.
Pro tip: It’s important to measure twice and mark once to ensure accurate placement.
Step 2: Prepare your Drill

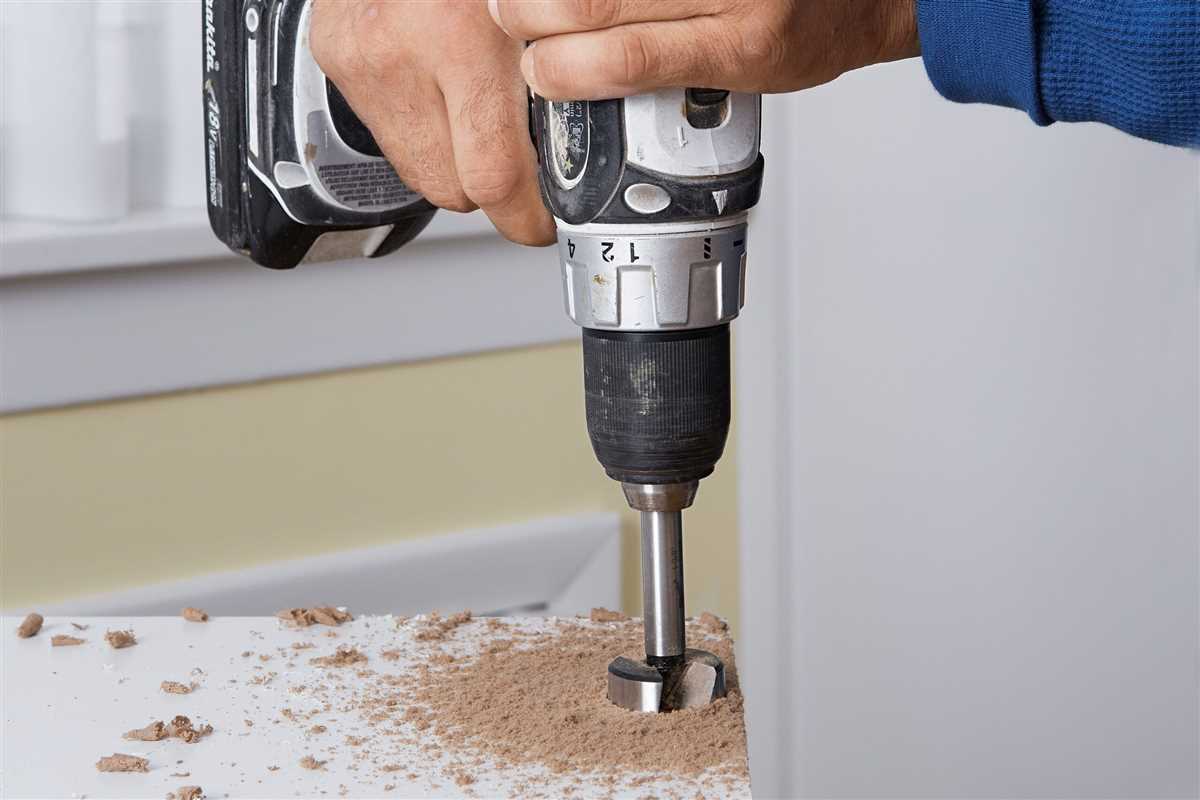
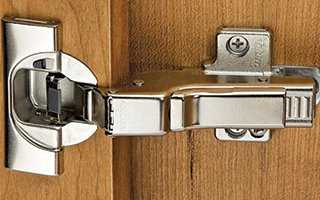
Before drilling, make sure you have the right tools and drill bits for the job. Most cabinet hinges require a 35mm hole, so choose a drill bit that matches this size. Attach the drill bit securely to your drill, and make sure it is tightened properly.
Don’t forget to wear protective eyewear and gloves to ensure your safety.
Step 3: Drill the Holes
Position the drill bit on one of the pencil marks and apply steady pressure as you drill into the wood. Keep the drill perpendicular to the surface and avoid tilting or angling it. Drill through the door and frame until you reach the desired depth, usually around 1/2 inch.
Pro tip: If you’re drilling into a hard material like metal or thick wood, it may be helpful to use a pilot hole or lubricate the drill bit for smoother drilling.
Step 4: Repeat for Remaining Hinges

Once you’ve drilled the first hole, repeat the process for the remaining hinges, ensuring they are evenly spaced and aligned. Measure and mark each location, and then drill the holes following the same steps as before. Take your time and double-check your measurements to ensure accuracy.
By following this step-by-step guide, you can successfully drill holes for cabinet hinges and achieve a professional-looking installation. Remember to take your time, measure accurately, and use the proper tools and safety gear for the job. With a little patience and attention to detail, your cabinet hinges will be securely and neatly attached in no time.
Step 1: Gather Necessary Tools
Before you start drilling holes for cabinet hinges, make sure you have all the necessary tools. Having the right tools will ensure that the job is done correctly and efficiently.
Here are the tools you will need:
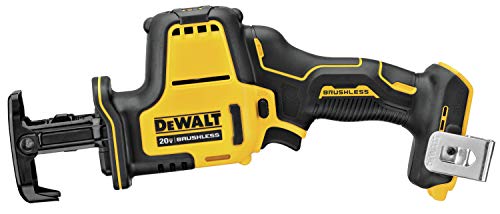
- Power drill: A power drill is essential for drilling the holes. Make sure it is charged and ready to use.
- Drill bits: Choose the drill bits that are appropriate for the size of the holes you need to drill for the cabinet hinges.
- Measuring tape: Accurate measurements are key when drilling holes for cabinet hinges. Use a measuring tape to mark the correct spots for drilling.
- Masking tape: Applying masking tape on the cabinet surface can help prevent any scratches while drilling.
- Pencil or marker: Use a pencil or marker to mark the exact spots where the holes need to be drilled. This will ensure accuracy.
- Clamps: Clamps can help secure the cabinet doors in place while drilling the holes.
- Screwdriver: A screwdriver will be needed to attach the hinges to the cabinet doors.
- Cabinet hinges: Make sure you have the appropriate hinges for the cabinet doors. Check the size and type before beginning the drilling process.
Having these tools ready before you start drilling holes for cabinet hinges will make the process smoother and more efficient.

What tools do I need to drill holes for cabinet hinges?
- Power drill: To drill the holes, you will need a power drill. Make sure to choose a drill with sufficient power and a suitable drill bit size for the type of screw you will be using.
- Tape measure or ruler: It is important to measure and mark the placement of the hinge holes accurately. A tape measure or ruler will help you achieve precise measurements.
- Marker or pencil: A marker or pencil is used to mark the spot where the holes will be drilled. Make sure to use a color that is easily visible on the surface of the cabinet.
- Center punch: A center punch is a tool used to create a small indentation in the wood, which helps to guide the drill bit and prevent it from slipping as you drill. It is especially useful when drilling holes in hardwood or dense materials.
- Forstner or hinge bore bit: A forstner or hinge bore bit is specifically designed for drilling clean and precise holes for cabinet hinges. It typically has a flat bottom and a sharp cutting edge, making it ideal for creating the recessed holes required for hinge installation.
- Clamps: Clamps can be useful for holding the cabinet securely in place while drilling. This ensures stability and prevents the cabinet from moving or shifting during the drilling process.
- Safety glasses and ear protection: When using power tools, it is essential to wear safety glasses to protect your eyes from flying debris. Additionally, using ear protection can help prevent hearing damage from the noise generated by the drill.
Having these tools on hand will make the process of drilling holes for cabinet hinges much easier and more efficient. Make sure to read the manufacturer’s instructions for your specific hinge type to ensure you have the correct tools and measurements.
Step 2: Measure and Mark Hinge Placement
Before drilling the holes for the cabinet hinges, it is important to carefully measure and mark the correct placement for each hinge. This will ensure that the hinges are aligned properly and the cabinet doors function smoothly.
Follow these steps to measure and mark the hinge placement:
- Start by measuring the width of the cabinet door and determining the desired gap between the door and the cabinet frame. This gap is typically around 1/8 inch, but you may adjust it based on your preference.
- Divide the total width of the cabinet door by the number of hinges to determine the spacing between each hinge. For example, if the door is 18 inches wide and you have three hinges, the spacing would be 6 inches.
- Mark the placement of the first hinge by measuring from the top or bottom edge of the door and making a small mark at the desired hinge height. Most cabinet hinges are typically placed 3-4 inches from the top or bottom of the door.
- Measure the distance between the top or bottom of the door and the mark made for the first hinge. Use this measurement to mark the placement of the remaining hinges, evenly spacing them along the height of the door.
- Double-check the measurements and marks to ensure accuracy before proceeding to drill the holes.
Note: It is important to use a level to ensure that the marks for the hinge placement are vertical and aligned with the cabinet frame.

By accurately measuring and marking the hinge placement, you will be ready to move on to the next step in drilling the holes for the cabinet hinges.
How do I measure and mark the placement of cabinet hinges?
Properly measuring and marking the placement of cabinet hinges is essential for ensuring that your cabinet doors open and close smoothly. Follow these steps to measure and mark the placement of cabinet hinges:
- Gather the necessary tools and materials, including a measuring tape, pencil, and cabinet hinges.
- Start by determining the desired height placement of the cabinet hinges. Typically, the top hinge is placed 2 to 4 inches from the top of the cabinet door, while the bottom hinge is placed 2 to 4 inches from the bottom of the door.
- Use the measuring tape to measure and mark the desired height placement of the top hinge. Make a small pencil mark on the inside edge of the door and the inside edge of the cabinet frame or side panel.
- Measure and mark the desired height placement of the bottom hinge using the same method as step 3.
- Next, determine the desired width placement of the hinges. This will depend on the size of the cabinet door and the recommended placement by the hinge manufacturer. Generally, the hinges should be placed about 3 to 4 inches from the top and bottom edges of the door.
- Measure and mark the desired width placement of the hinges on the inside edge of the door and the inside edge of the cabinet frame or side panel.
- Once you have marked the desired height and width placements for the hinges, connect the marks to create a straight line using a ruler or straight edge.
- Repeat steps 3-7 for any additional cabinet doors that require hinges.
- Finally, double-check all the measurements and marks to ensure accuracy before proceeding with drilling the holes for the hinges.
By following these steps, you can accurately measure and mark the placement of cabinet hinges, ensuring that your cabinet doors function properly and look professional.
Step 3: Prepare the Cabinet Door
Before you can drill the holes for the cabinet hinges, you need to prepare the cabinet door. This involves removing any existing hardware, measuring and marking the hinge placement, and ensuring that the door is stable and secure.

1. Remove any existing hardware

Start by removing any hardware that is currently attached to the cabinet door, such as handles or knobs. This will give you a clear surface to work with and ensure that the hinges can be properly installed.
2. Measure and mark the hinge placement
Measure the distance from the top and bottom edges of the cabinet door to the desired location of the hinges. Use a pencil to mark these measurements on the edge of the door, making sure to keep the marks consistent and accurate.
3. Ensure the door is stable and secure
Before drilling the holes for the hinges, check that the door is stable and secure. If the door is loose or wobbly, tighten any screws or hardware that may be causing the issue. This will ensure that the hinges are properly aligned and the door will function smoothly.
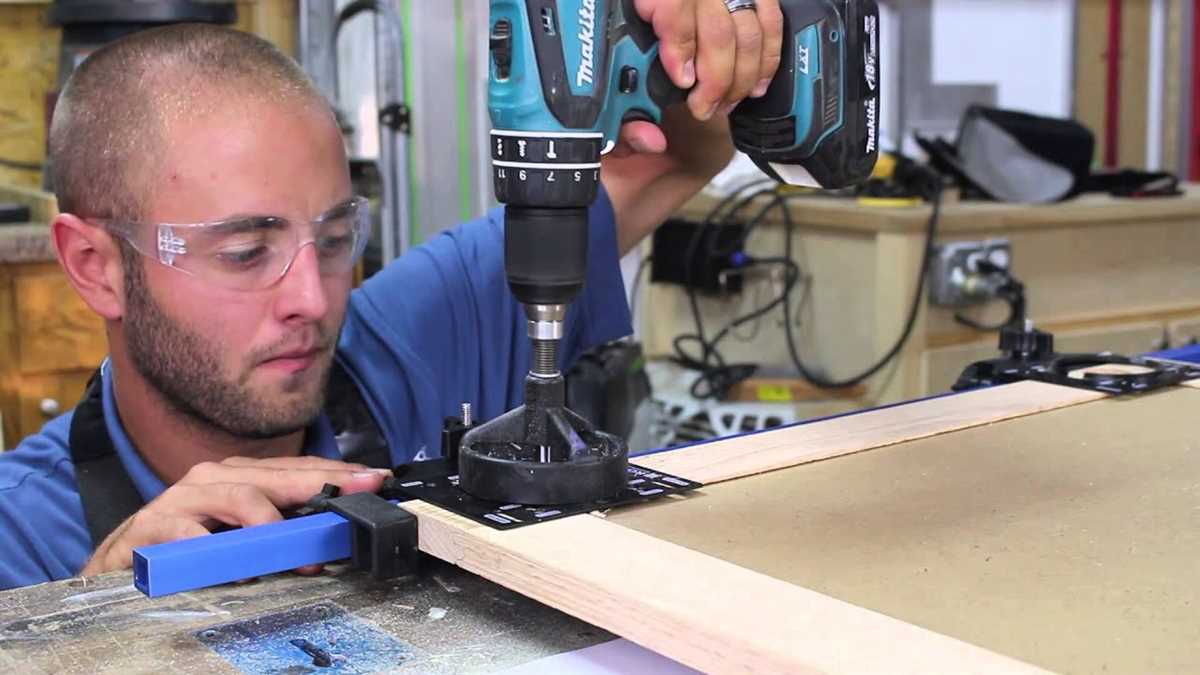
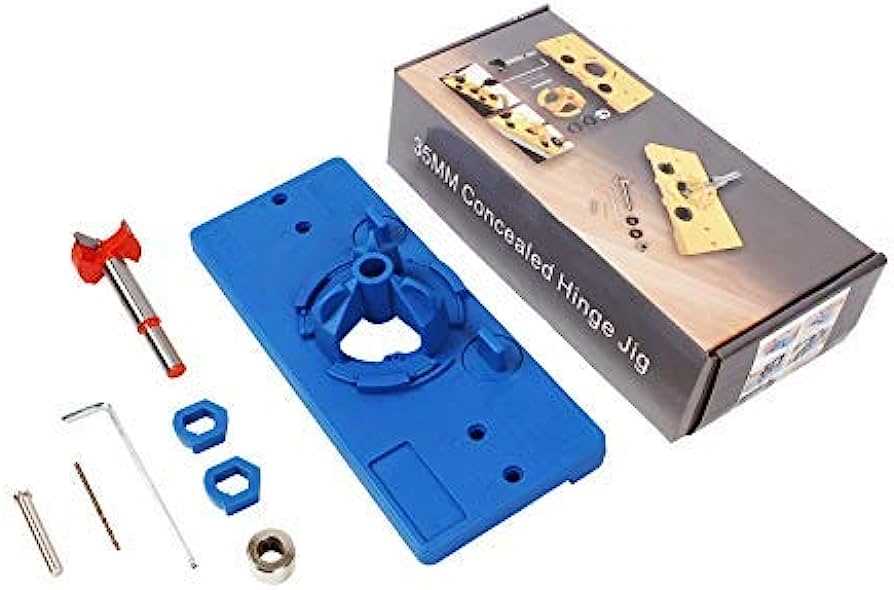
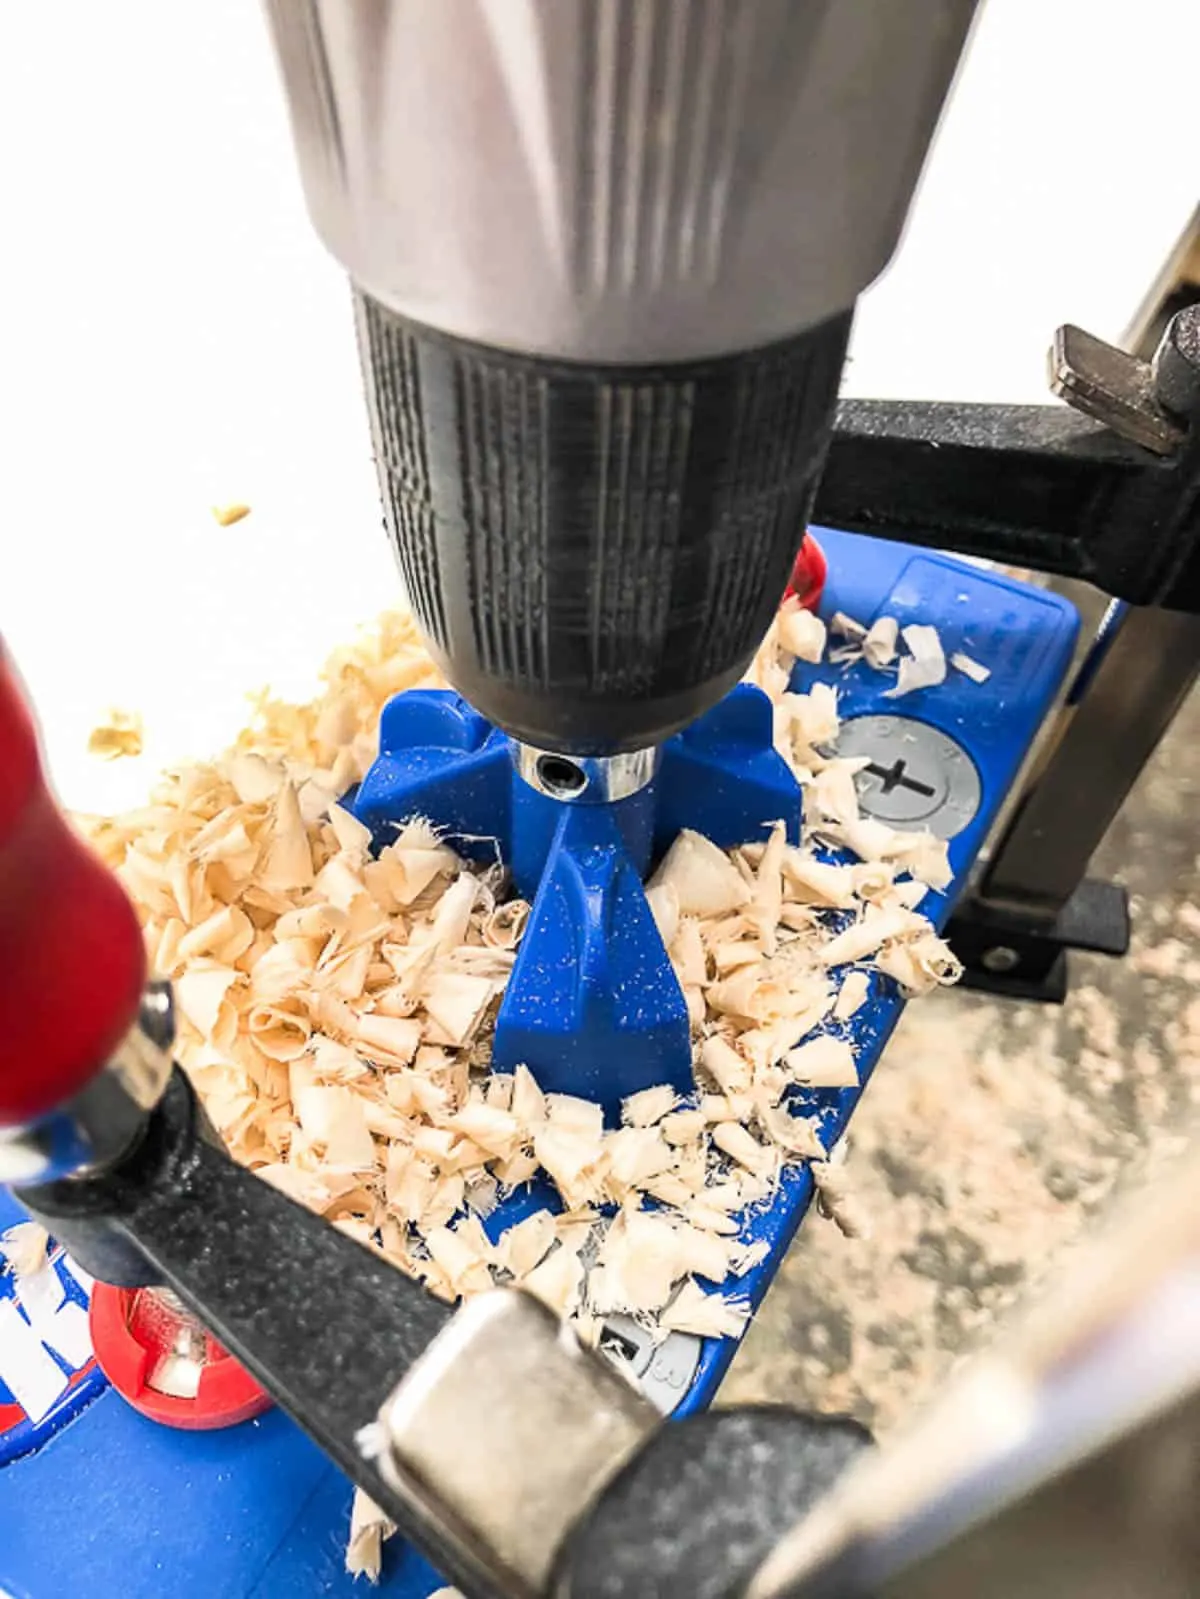
4. Consider using a drilling template
If you are new to drilling or want to ensure precise hinge placement, consider using a drilling template. These templates can be easily attached to the door and provide pre-marked holes for drilling. This will help to ensure that the hinges are evenly spaced and properly aligned.
5. Protect the surface of the door
Before drilling the holes, it’s a good idea to protect the surface of the door. Place a piece of scrap wood or a drilling block behind the area where the holes will be drilled. This will help prevent splintering or damage to the door surface.
By following these steps to prepare the cabinet door, you will be ready to move on to drilling the holes for the cabinet hinges in the next step.
What steps do I need to take to prepare the cabinet door?
Before drilling holes for cabinet hinges on your cabinet door, there are a few steps you will need to take to properly prepare the door. Follow these steps to ensure a successful installation:
- Remove the cabinet door: Start by removing the cabinet door from the cabinet using a screwdriver or drill. This will make it easier to work on the door without any obstructions.
- Measure and mark the hinge placement: Take accurate measurements to determine where the hinges will be installed on the door. Use a pencil to mark these measurements on the edge of the door.
- Arrange the hinge and door: Position the hinge onto the door where it will be mounted. Make sure it is aligned with the pencil marks you made in the previous step. This will provide a visual guide when drilling the holes.
- Pre-drill pilot holes: Use a drill bit that is slightly smaller than the screws provided with the hinges. This will create pilot holes for the screws and prevent the wood from splitting. Carefully drill the pilot holes through the holes in the hinge.
- Attach the hinges: Secure the hinges to the door using the screws provided. Make sure they are tight, but be cautious not to overtighten them, as this may cause damage to the door or hinge.
- Check the alignment: Close and open the door to ensure it aligns properly with the cabinet frame. If necessary, make adjustments by loosening the screws and repositioning the hinge before tightening them back up.
- Repeat for additional hinges: If your cabinet door requires multiple hinges, repeat the above steps for each hinge, ensuring proper spacing and alignment.
- Reattach the cabinet door: Once all hinges are securely installed, reattach the cabinet door to the cabinet frame using the screwdriver or drill.
By following these steps, you will be well-prepared to drill holes for cabinet hinges and successfully install them on your cabinet door.
Step 4: Set Up the Drill
Before you begin drilling the holes for your cabinet hinges, it’s important to properly set up your drill for the task. Here are the steps to follow:
- Secure the drill: Place your drill on a stable surface, such as a workbench or table, and make sure it is firmly secured. This will prevent any accidental movement while you are drilling.
- Attach the appropriate drill bit: Choose a drill bit that matches the size and type of the screws that came with your cabinet hinges. You can refer to the instructions provided by the hinge manufacturer for this information. The drill bit should be securely attached to the drill.
- Adjust the drill depth: Most drill models have a depth stop or depth control feature that allows you to set the drill to a specific depth. This is important because you want to drill the holes to the exact depth required for your hinges. Use a measuring tape or the depth markings on your drill to set the depth correctly.
- Secure the material: If you’re drilling into a thin or delicate material, such as plywood or particleboard, it’s a good idea to secure it with clamps or a vice to prevent it from moving or splintering during drilling.
Once you have set up your drill properly, you are ready to move on to the next step, which is marking the hole locations on your cabinet doors.
How do I set up the drill for drilling holes for cabinet hinges?
- Step 1: Choose the right drill bit
- Step 2: Attach the drill bit to the drill
- Step 3: Adjust the drill speed
- Step 4: Secure the cabinet door
- Step 5: Mark the drilling points
- Step 6: Start drilling
- Step 7: Clean up the holes
- Step 8: Test the hinge fit
When setting up a drill for drilling holes for cabinet hinges, it is important to choose the right drill bit. Most cabinet hinges require a 35mm hole, so a 35mm forstner or spade bit is typically the best choice.
Once you have selected the appropriate drill bit, attach it to your drill. Most drills have a chuck that enables you to easily attach and detach drill bits. Ensure that the bit is securely tightened in the chuck to prevent any wobbling or slippage during drilling.
Depending on the material you are drilling into, adjust the speed of your drill. For most cabinet materials like wood or particle board, a medium speed setting should suffice. If you are drilling into harder materials like metal, you may need to adjust the speed to a higher setting.
Before you start drilling, it is important to secure the cabinet door to prevent any movement or damage. You can use clamps or hold the door firmly in place with your hand. This will ensure that the holes are drilled accurately and that the hinge will be properly aligned.
Using a pencil or a marking tool, mark the exact points where you will be drilling the holes. Measure and mark the center point for each hinge on both the cabinet and the door.
Place the point of the drill bit on one of the marked points and start drilling. Apply gentle pressure and keep the drill perpendicular to the surface. Slowly drill into the material until you have reached the desired depth for the hinge. Repeat this step for each marked point.
After drilling all the holes, clean up any excess debris or wood chips using a brush or vacuum. This will ensure that the hinge can be inserted easily and securely.
Once you have drilled all the holes, test the fit of the hinges by inserting them into the holes. Make any necessary adjustments or corrections if the hinges do not fit properly.
Step 5: Drill Pilot Holes
Before drilling the final holes for your cabinet hinges, it’s a good idea to start with pilot holes. Pilot holes will help prevent the wood from splitting or cracking when you drill the final holes.
- Measure and mark the pilot hole locations: Use a measuring tape to find the correct placement for the pilot holes. Mark the locations with a pencil or a marker.
- Select the appropriate drill bit: Choose a drill bit that is slightly smaller in diameter than the screws you will be using for the hinges. This will ensure a tight fit.
- Clamp the workpiece: If necessary, secure the piece of wood in place using clamps. This will prevent it from moving or shifting while you drill the pilot holes.
- Set the drill depth: Adjust the depth setting on your drill to match the length of the screws. This will help you drill the pilot holes to the correct depth.
- Drill the pilot holes: Position the drill bit on the marked locations and drill the pilot holes to the desired depth. Apply steady pressure, but be careful not to apply too much force, as it can cause the drill bit to slip or damage the wood.
- Remove any wood shavings: After drilling each pilot hole, use a brush or a cloth to remove any wood shavings or debris from the hole. This will ensure a clean and smooth surface for inserting the screws.
Once you have drilled the pilot holes, you are ready to proceed to the next step and drill the final holes for your cabinet hinges.
What is the process for drilling pilot holes for cabinet hinges?
Drilling pilot holes for cabinet hinges is an important step in ensuring that the hinges are properly installed and the cabinet doors operate smoothly. Here is a step-by-step guide on how to drill pilot holes for cabinet hinges:
- Measure and mark: Start by measuring and marking the location where you want to install the hinge on the cabinet door. Use a pencil to make a small mark at the desired position.
- Align the hinge: Place the hinge on the mark, ensuring that it is positioned correctly according to the manufacturer’s instructions. The hinge should be flush with the edge of the door.
- Secure the hinge: Once the hinge is aligned, use a clamp to hold it in place. This will prevent any movement while drilling the pilot holes.
- Select the drill bit: Choose a drill bit that matches the diameter of the screws that will be used to secure the hinge. It is recommended to use a slightly smaller drill bit to create a pilot hole.
- Drill the pilot holes: Place the tip of the drill bit on the mark and drill into the door. Make sure to apply even pressure and keep the drill perpendicular to the surface. Drill to a depth slightly shorter than the length of the screw.
- Repeat for other screw holes: If the hinge has multiple screw holes, repeat steps 2-5 for each hole.
- Test the fit: Once all the pilot holes are drilled, remove the clamps and test the fit of the hinge. The screws should go in smoothly, and the hinge should be secure.
- Repeat for other hinges: If you are installing multiple hinges on the cabinet door, repeat steps 2-7 for each hinge.
Following this process will ensure that the cabinet hinges are properly installed and the cabinet doors function correctly.
FAQ:
What tools do I need to drill holes for cabinet hinges?
To drill holes for cabinet hinges, you will need a drill, a drill bit, a tape measure, a pencil, and a marking template or a jig.
What size drill bit should I use for drilling cabinet hinge holes?
The size of the drill bit you should use for drilling cabinet hinge holes depends on the size of the screws that came with your hinges. Typically, a 1/8-inch or 3/32-inch drill bit is used for smaller screws, while a 3/16-inch or 7/64-inch drill bit is used for larger screws.
How do I measure and mark the position for the cabinet hinge holes?
To measure and mark the position for the cabinet hinge holes, you can use a tape measure and a pencil. Start by measuring the distance from the top or bottom edge of the cabinet door to the center of the hinge. Mark this measurement on the edge of the cabinet door. Repeat this process for each hinge position.
Should I use a marking template or a jig to drill the hinge holes?
Using a marking template or a jig can help ensure that the hinge holes are drilled in the correct position and at the correct depth. A marking template is a piece of plastic with holes that match the hole pattern of the hinge. A jig is a guide that holds the drill bit in place while drilling the holes. Both options can make the process easier and more accurate.
Video:

Meet Harrison Clayton, a distinguished author and home remodeling enthusiast whose expertise in the realm of renovation is second to none. With a passion for transforming houses into inviting homes, Harrison's writing at https://thehuts-eastbourne.co.uk/ brings a breath of fresh inspiration to the world of home improvement. Whether you're looking to revamp a small corner of your abode or embark on a complete home transformation, Harrison's articles provide the essential expertise and creative flair to turn your visions into reality. So, dive into the captivating world of home remodeling with Harrison Clayton and unlock the full potential of your living space with every word he writes.


