Step-by-Step Guide: How to Drill a Well for Water

Drilling a well for water is an essential process for obtaining clean and reliable water in areas where municipal water sources are unavailable or unreliable. Whether you’re a homeowner or a farmer, having your own well can provide a sustainable solution for your water needs. In this step-by-step guide, we will walk you through the process of drilling a well for water, from understanding the necessary permits to selecting the right drilling equipment.
Step 1: Research and Planning
Before starting the drilling process, it’s crucial to gather all the necessary information and permits. Research the legal requirements and regulations in your area regarding well drilling, as they can vary from location to location. Make sure to obtain any necessary permits and licenses before proceeding. Additionally, you should assess the water needs of your household or farm to determine the appropriate well size and depth.
Pro tip: Consult a professional well driller or a hydrogeologist to help you with the planning process, especially if you’re new to well drilling.
Step 2: Choosing the Drilling Method and Equipment

There are several drilling methods available for water well construction, including cable tool drilling, rotary drilling, and hydraulic percussion drilling. Each method has its own advantages and challenges, so it’s important to choose the one that suits your specific needs and budget. Furthermore, select the appropriate drilling equipment based on the chosen method and the geological conditions of the site.
Tip: Consider the depth of the water table, soil composition, and rock layers in your area when selecting the drilling equipment.
Step 3: Preparing the Site
Once you have determined the drilling method and acquired the necessary equipment, it’s time to prepare the drilling site. Clear any vegetation or obstacles from the site, ensuring there is enough space for the drilling equipment and any accompanying vehicles. Make sure to mark the exact location where the well will be drilled.
Pro tip: Before drilling, contact local utility companies to mark any underground utility lines to avoid accidents during the drilling process.
Select the Location
Choosing the right location for drilling a well is crucial for several reasons. Here are some factors to consider when selecting the location:

- Water Source: Look for areas that are likely to have a sufficient underground water source. This can include areas near rivers, lakes, or aquifers.
- Geological Surveys: Conducting geological surveys can help determine the potential depth and quality of the water source in a particular area. Consulting with a professional geologist can provide valuable information.
- Accessibility: Consider the accessibility of the location. It is important to ensure that drilling equipment and materials can easily reach the site.
- Legal Requirements: Familiarize yourself with any legal requirements or permits needed for drilling a well in your area. Contact local authorities or consult with a professional to ensure compliance.
- Distance to Pollution Sources: Avoid locating the well near potential sources of pollution, such as industrial sites, septic tanks, or agricultural areas that use pesticides or fertilizers.
- Terrain: Consider the terrain of the location and its impact on drilling. Uneven or rocky terrain may present challenges during the drilling process.
- Potential Hazards: Identify any potential hazards in the area, such as underground utility lines or existing wells, to avoid accidents during drilling.
Once you have considered these factors and identified a suitable location, you can proceed with the next steps of drilling a well for water.
Check for Permits and Regulations
Before starting the process of drilling a well for water, it is important to check for any permits and regulations that may be required in your area. This step is crucial to ensure that you are in compliance with local laws and regulations.
1. Research Local Regulations
Contact your local city or county government office to find out about any permits or regulations related to drilling a well. They can provide you with information on any zoning restrictions, setback requirements, or environmental regulations that you need to be aware of.
2. Obtain Necessary Permits
Once you have researched the local regulations, determine if any permits are required for drilling a well on your property. Depending on your location, you may need to obtain permits from different agencies, such as the health department, environmental protection agency, or water management district.

Make sure to fill out all necessary permit applications and provide any required documentation, such as property surveys or drilling plans. Pay attention to any fees that may be associated with the permit applications and be prepared to cover these costs.
3. Comply with Setback Requirements
Setback requirements dictate how far the well must be located from certain structures or property lines. These requirements are in place to protect water sources and ensure the safety of nearby structures.
Measure the distances as required by your local regulations and ensure that the location you have chosen for drilling the well meets these setback requirements. Make any necessary adjustments to the well location if needed.
4. Consider Environmental Regulations
In some areas, there may be specific regulations related to drilling a well in environmentally sensitive areas. These regulations may require additional precautions or restrictions to be followed during the drilling process.
Consult with local environmental agencies or experts to understand any specific environmental regulations that may apply to your well drilling project. Follow any necessary guidelines or recommendations to minimize any potential impact on the environment.

5. Keep Records
Throughout the well drilling process, it is important to keep records of any permits, applications, approvals, or inspections that are obtained. These records not only help you stay organized, but they also serve as proof of compliance if any questions or issues arise in the future.
Keep a file with all relevant documents related to the well drilling project, including permits, correspondence with authorities, and any inspection reports. This file will come in handy if you ever need to demonstrate your compliance with regulations.
By checking for permits and regulations before proceeding with the well drilling process, you can ensure that you are in compliance with all applicable laws and regulations. This will help you avoid potential fines or penalties and ensure that your well drilling project is carried out safely and responsibly.
Gather the Necessary Tools and Equipment
- Drilling rig
- Drill bit
- Pipe casing
- Water pump
- Well screen
- Drill pipe
- Drill mud
- Tape measure
- Level
- Wrenches
- Hammer
- Chisel
- Tarp or plastic sheeting
- Sand and gravel
- Bucket
- Hose
- Water supply
- Safety goggles
- Gloves
- Ear protection
- First aid kit
Before you begin drilling a well for water, it is important to gather all the necessary tools and equipment. Having the right tools will make the drilling process easier and more efficient. Here is a list of the essential tools and equipment you will need:

A drilling rig is the main tool used to drill the well. It typically consists of a motor, a drill bit, and a pipe casing. The drilling rig is responsible for creating the hole in the ground to access the water source.
The drill bit is attached to the drilling rig and is used to cut through the ground and rock. The type and size of the drill bit you need will depend on the type of soil and rock in your area.
The pipe casing is inserted into the hole to prevent it from collapsing. It also helps to keep the well clean and free from contaminants.
A water pump is used to extract the water from the well once it has been drilled. The type of water pump you need will depend on the depth and flow rate of the water in your well.
A well screen is used to filter out any sediment or debris that may be present in the water. It helps to ensure that the water is clean and safe to use.
Drill pipe is used to connect the drill bit to the drilling rig. It provides stability and allows for the drilling process to be carried out smoothly.
Drill mud is a mixture of water and drilling fluids that is used to lubricate the drill bit and cool down the drilling equipment. It helps to prevent the drill bit from overheating and wearing out.
A tape measure and level are used to measure and ensure that the well is drilled straight and level.
Wrenches are used to tighten and loosen the various components of the drilling rig and other equipment.
A hammer and chisel are used to break up any large rocks or obstacles that may be encountered during the drilling process.
A tarp or plastic sheeting is used to cover and protect the drilling area from dirt and debris.
Sand and gravel are used to fill in the space between the pipe casing and the well hole. This helps to stabilize the pipe casing and prevent it from shifting.
A bucket and hose are used to remove any excess water or debris from the well hole.
A water supply is needed to provide water for the drilling process and to clean the equipment.
Safety goggles, gloves, and ear protection should be worn at all times to protect against any potential hazards.
A first aid kit should be kept on hand in case of any accidents or injuries.
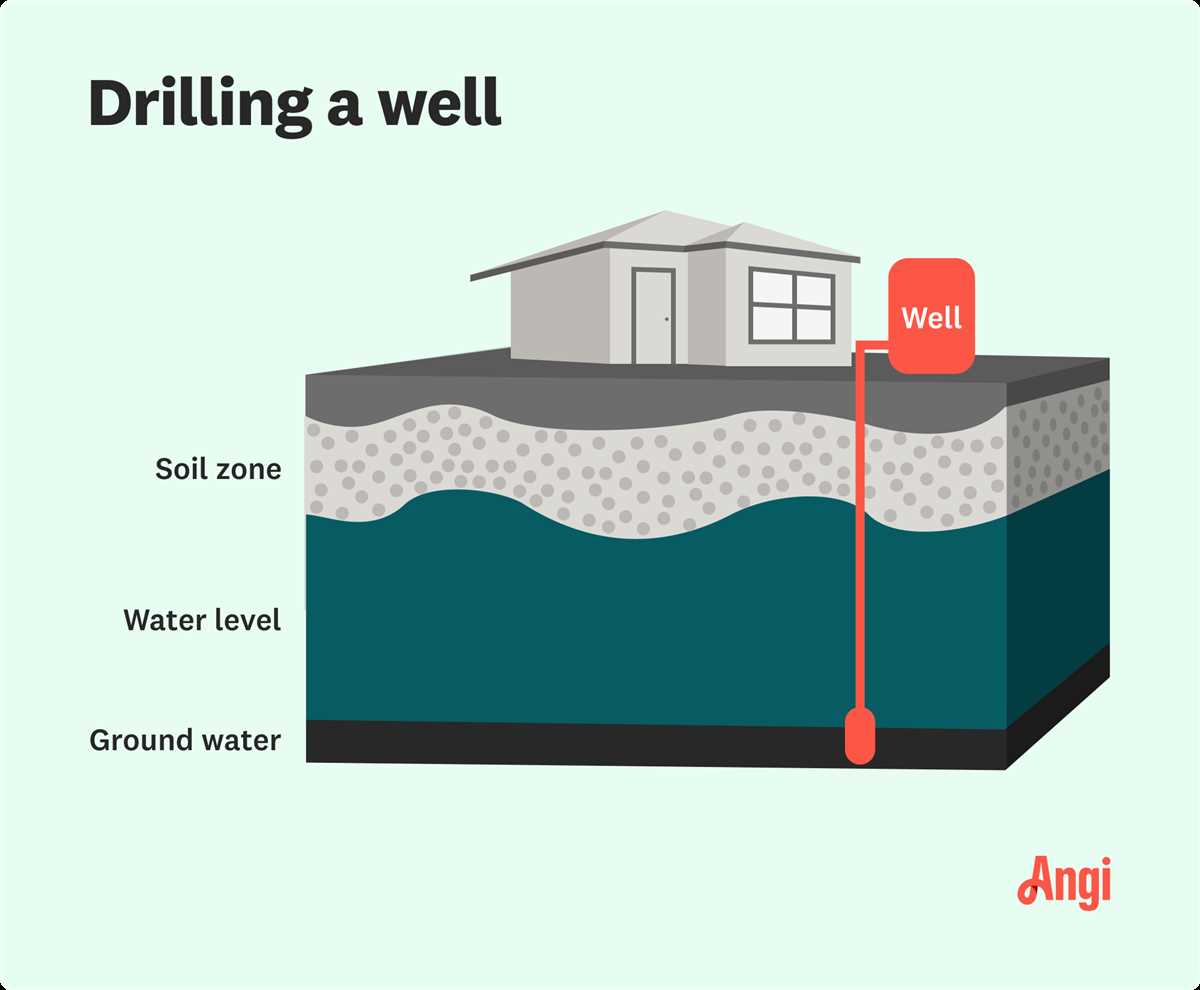
Mark the Drilling Spot
Before you start drilling a well for water, it is important to accurately determine the location where you will drill. Marking the drilling spot is crucial in ensuring that you drill in the right place and avoid any potential obstacles or hazards.
1. Research
Start by conducting thorough research to identify the potential water sources in your area. This can include examining geological maps, studying the local water table levels, and consulting with local experts or well drillers. Identify promising areas that have a high probability of containing water.
2. Survey the Land
Survey the land where you plan to drill the well. Look for signs of natural water sources, such as streams, swamps, or surface depressions. These can indicate potential underground water reservoirs. Additionally, consider the contour of the land, as higher elevations are more likely to have water-bearing formations.
3. Obtain Permits
Check with the local authorities or water management agencies to determine if you need any permits or permissions to drill a well. Some areas have regulations and restrictions on well drilling to protect water resources or prevent groundwater depletion. Ensure that you have all the necessary permits before proceeding.
4. Engage a Professional
Consider hiring a professional geologist or hydrologist to assess the potential drilling site. These experts have the knowledge and tools to conduct a thorough analysis of the geology and hydrology of the area. They can provide valuable insights and recommendations on the best drilling spot.
5. Stake the Drilling Location
Once you have chosen the drilling spot, carefully mark it on the ground using stakes or flags. Make sure the markings are clearly visible and can withstand any weather conditions. This will help guide the drilling team and ensure they drill in the designated area.
6. Communicate with Utilities
Before drilling, contact the local utilities or service providers to locate any buried utility lines or pipes in the vicinity of the drilling spot. This is important to avoid damaging any existing infrastructure and ensure the safety of the drilling operation.
7. Consider Environmental Factors
Take into account any environmental factors that may affect the drilling process. For example, consider any nearby wetlands or protected areas that may have regulations regarding well drilling. Ensure you comply with all environmental regulations and take steps to minimize any potential impact on the environment.
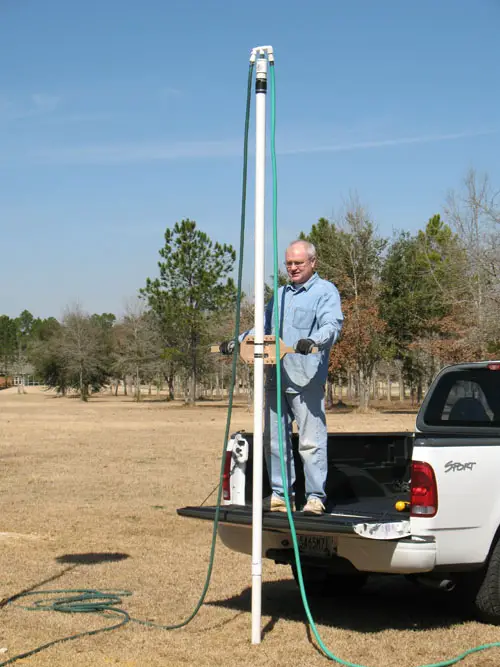
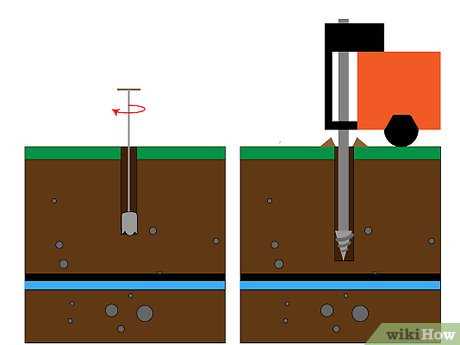
Start the Drilling Process
Once you have selected a suitable location for your well and have obtained all necessary permits and permissions, you can begin the drilling process. Here is a step-by-step guide on how to start drilling a well for water:
1. Gather the necessary equipment
Before starting the drilling process, make sure you have all the necessary equipment. This may include a drilling rig, drill bits, pipes, casings, a mud pump, and other supporting tools.
2. Mark the drilling spot
Use a surveyor’s tape or marking flags to mark the exact spot where you want to drill the well. This will ensure accuracy throughout the drilling process.
3. Set up the drilling rig
Set up the drilling rig at the marked spot. Make sure the rig is stable and secured to prevent accidents during drilling. Follow the manufacturer’s instructions for proper rig set up.
4. Start drilling
Attach the appropriate drill bit to the drilling rig and begin the drilling process. Start slowly and steadily, gradually increasing the drilling speed. Pay attention to the depth and ensure you are drilling straight down.
5. Flush the well periodically
During the drilling process, it is important to periodically flush the well to remove drilling debris and maintain the integrity of the hole. This can be done by injecting water or drilling mud into the well.
6. Install casing pipes
Once you have reached the desired depth, it’s time to install casing pipes to protect the well and prevent it from collapsing. Lower the casing pipes into the hole and secure them using cement or grout.
7. Test the well
After the casing pipes are installed, conduct a well test to ensure it is functioning properly. This may involve pumping water into the well and checking the flow rate, as well as conducting water quality tests.
8. Complete the well construction
Once the well has been tested and deemed suitable for water supply, complete the well construction by sealing and finishing the area around the casing pipes. This may involve backfilling the well, installing a well cap, and adding a protective cover.
By following these steps, you can properly start the drilling process for your well and ensure a safe and reliable water source for your needs.
Monitor the Progress
Once you have started drilling the well, it is important to closely monitor the progress to ensure everything is going smoothly. This will help you identify any potential issues or deviations from the drilling plan.
Important Steps to Monitor the Progress:
- Measure the drilling depth: Use a depth gauge to measure the depth of the well at regular intervals. This will help you keep track of how deep you have drilled and determine whether you are reaching the desired depth.
- Observe drilling speed: Pay attention to the drilling speed and make note of any significant changes. Sudden changes in drilling speed may indicate problems such as equipment malfunction or encountering hard rock formations.
- Check drilling fluid: Monitor the quality and volume of drilling fluid being used. Ensure that the drilling fluid is properly circulating and removing cuttings from the wellbore. If the drilling fluid becomes contaminated or loses its ability to carry cuttings, it may hinder the drilling progress.
- Inspect drilling equipment: Regularly inspect the drilling equipment for any signs of wear or damage. Faulty equipment can lead to drilling delays or accidents, so it is crucial to address any issues promptly.
- Monitor water supply: Keep an eye on the water supply needed for drilling. Make sure the water source provides an adequate volume and maintains a consistent flow. Insufficient or interrupted water supply can cause drilling inefficiencies and delay the overall progress.
By diligently monitoring the drilling progress, you will be able to address any challenges or deviations in a timely manner. This will help ensure the successful completion of your well drilling project.
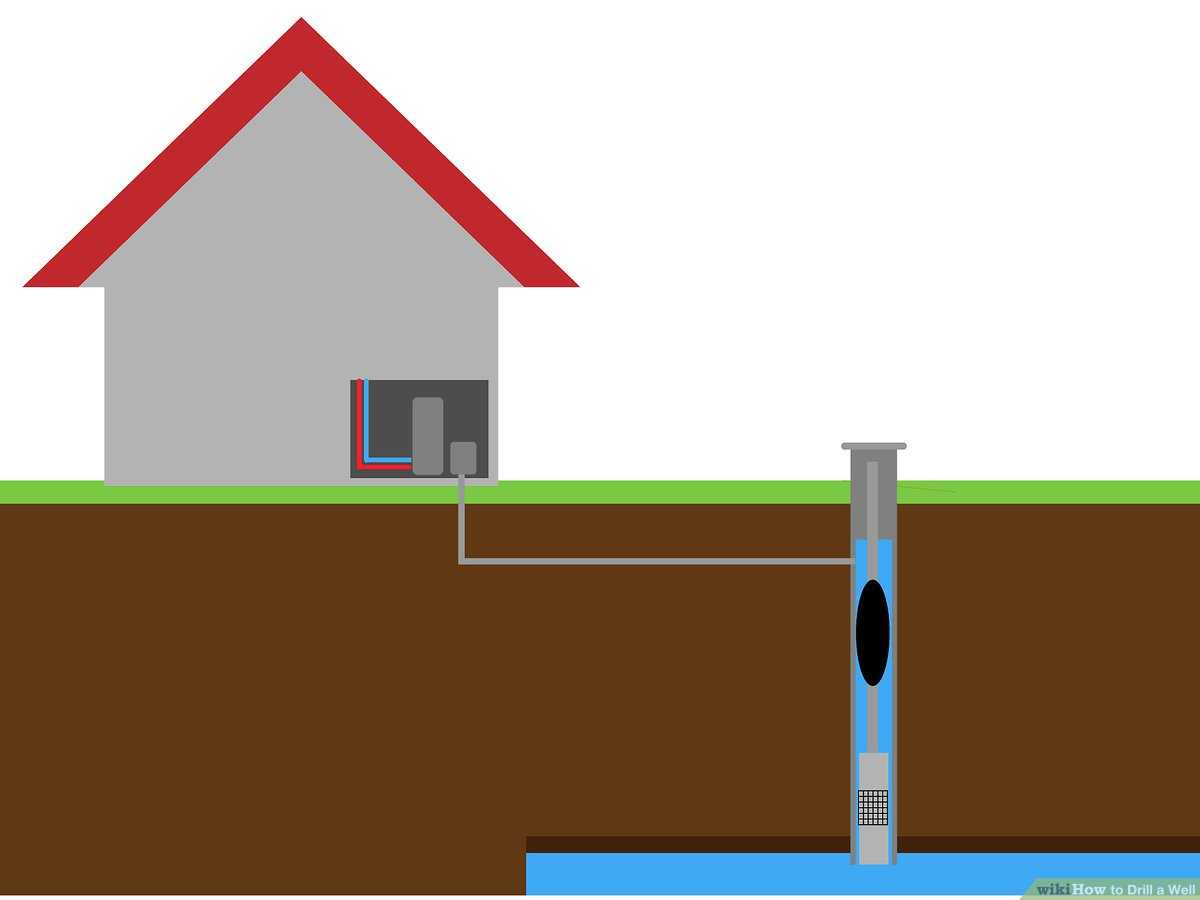
Install the Pump and Well Casing
Once the well has been drilled and the well bore has been cleared of debris, it is time to install the pump and well casing. This step is crucial for ensuring that the well functions properly and that the water is safe to use.
1. Select the appropriate pump
Before installing the pump, it is important to select the right type of pump for your well. Consider factors such as the depth of the well, the water volume needed, and the power source available. There are various types of pumps to choose from, including submersible pumps, jet pumps, and hand pumps.
2. Attach the pump to the well casing
Once you have chosen the appropriate pump, it can be attached to the well casing using the necessary fittings and connectors. Follow the manufacturer’s instructions for your specific pump model to ensure proper installation.
3. Lower the pump into the well
With the pump attached to the well casing, carefully lower the pump into the well. Make sure the pump is securely fastened and positioned at the appropriate depth. The depth at which the pump should be placed will depend on factors such as the water table and the pump’s specifications.
4. Secure the well casing
With the pump in place, secure the well casing to ensure that it is stable and properly sealed. This will help prevent contamination of the well water and maintain the structural integrity of the well. Use appropriate clamps, couplings, or cement to secure the well casing as needed.
5. Test the pump and well system
Once the pump and well casing are installed, it is important to test the system to ensure that it is functioning correctly. Prime the pump if necessary and turn it on to check for proper water flow and pressure. Monitor the system for any leaks or other issues that may need to be addressed.
6. Maintain the pump and well
Regular maintenance is essential for keeping the pump and well in good working condition. Follow the manufacturer’s recommendations for maintenance tasks such as lubrication, filter cleaning or replacement, and periodic inspections. Additionally, be aware of any changes in water quality or quantity that may indicate a problem with the well or pump.
By following these steps and taking proper care of your well and pump, you can ensure a reliable source of water for your property.
Test and Maintain the Well
Once the well has been drilled and water is flowing, it is important to test and maintain the well to ensure its continued functionality and water quality. Here are some steps you can take:
1. Water Quality Testing
Regularly test the water for quality parameters such as pH levels, temperature, turbidity, and the presence of any contaminants. This can be done using test kits or by sending samples to a laboratory for analysis. Monitoring the water quality will help identify any potential issues or changes in the water supply.
2. Well Inspection
Periodically inspect the well for any signs of damage or deterioration. Look for cracks or holes in the well casing, seals, or other components. Ensure that the well cap or cover is intact and properly sealed. Any damage to the well can lead to contamination of the water supply.
3. Pump Maintenance
Maintain the well pump and associated equipment as per the manufacturer’s recommendations. This may include regular inspections, cleaning, and lubrication of the pump. Keep an eye out for any signs of mechanical issues, such as unusual noises or reduced water flow. Address any problems promptly to avoid further damage to the pump.
4. Well Cleaning
If the well becomes contaminated or experiences a decrease in water quality, consider cleaning the well. This process involves removing any debris, sediments, or bacterial buildup from the well. Consult a professional well driller or technician for proper cleaning techniques and equipment.
5. Establish a Maintenance Schedule
Create a maintenance schedule to ensure regular testing and inspection of the well. This will help you stay on top of any potential issues and prevent them from becoming major problems. Keep records of maintenance activities and water quality test results for future reference.
6. Protect the Wellhead
Take measures to protect the wellhead from potential sources of contamination. Keep the area around the well clean and free from chemicals, pesticides, or other hazardous materials. Properly dispose of any wastewater, sewage, or chemicals as per the local regulations to prevent groundwater pollution.
7. Professional Assistance
If you are unsure about any aspect of well testing or maintenance, it is always best to seek professional assistance. Well drillers, technicians, or water quality experts can provide guidance and services to ensure the safe and efficient operation of the well.
Following these steps will help you maintain the functionality and water quality of your well, providing you with a reliable source of water for years to come.
FAQ:
What equipment do I need to drill a well for water?
To drill a well for water, you will need several pieces of equipment including a drilling rig, drilling mud, drill pipes, a drill bit, casing pipes, and a pump.
How deep should I drill a well for water?
The depth at which you should drill a well for water depends on various factors such as the water table in your area and the amount of water you need. It is recommended to consult with a professional or a hydrogeologist to determine the appropriate depth for your specific situation.
Can I drill a well for water on my own?
Drilling a well for water requires specialized knowledge and equipment. It is not recommended to attempt drilling a well on your own unless you have prior experience and knowledge in well drilling. It is advisable to hire a professional drilling company to ensure the well is drilled correctly and safely.
How long does it take to drill a well for water?
The time it takes to drill a well for water can vary depending on various factors such as the depth of the well, geological conditions, and the availability of equipment. On average, it can take anywhere from a few days to several weeks to complete the drilling process.
What are the potential risks and challenges in drilling a well for water?
There are several potential risks and challenges in drilling a well for water. These include encountering unexpected geological formations, the possibility of drilling dry wells, the risk of equipment failure, and the presence of contaminants in the water. It is essential to assess these risks and take appropriate measures to mitigate them.
How much does it cost to drill a well for water?
The cost of drilling a well for water can vary depending on various factors such as the depth of the well, the location, the type of equipment used, and any additional services required. On average, drilling a well can cost anywhere from $5,000 to $15,000 or more. It is advisable to obtain quotes from multiple drilling companies to get an accurate estimate for your specific situation.
Video:


Meet Harrison Clayton, a distinguished author and home remodeling enthusiast whose expertise in the realm of renovation is second to none. With a passion for transforming houses into inviting homes, Harrison's writing at https://thehuts-eastbourne.co.uk/ brings a breath of fresh inspiration to the world of home improvement. Whether you're looking to revamp a small corner of your abode or embark on a complete home transformation, Harrison's articles provide the essential expertise and creative flair to turn your visions into reality. So, dive into the captivating world of home remodeling with Harrison Clayton and unlock the full potential of your living space with every word he writes.


