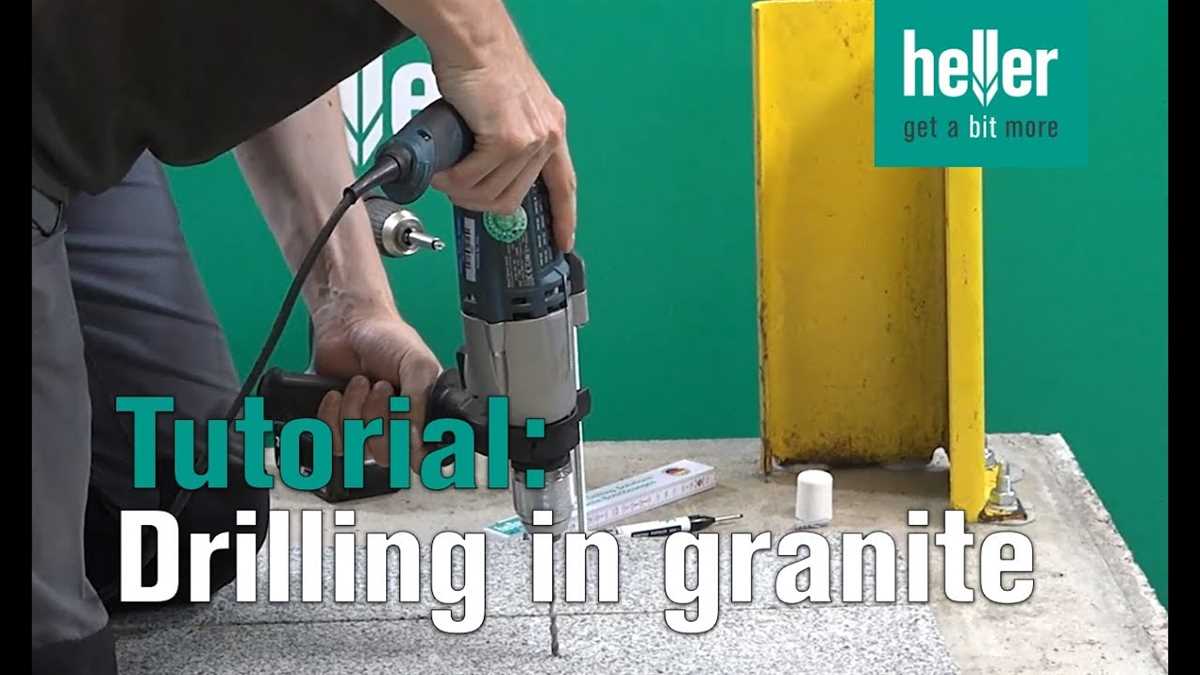
Step-by-Step Guide: How to Drill a Small Hole in Granite

Granite is a durable and beautiful stone often used for countertops and other home installations. Sometimes, however, you may need to drill a small hole in granite for mounting hardware or other purposes. Drilling into granite can be intimidating, but with the right tools and techniques, it can be done effectively and safely.
1. Gather Your Tools
Before you begin, gather all the necessary tools and materials. You will need a diamond-tipped drill bit specifically designed for drilling through granite, a drill with variable speed settings, masking tape, a spray bottle filled with water, safety glasses, and a sturdy work surface.
2. Mark Your Hole
Using a piece of masking tape, mark the spot on the granite where you want to drill your hole. This will help prevent the drill bit from slipping and ensure that your hole is accurately placed. Make sure the tape is securely adhered to the granite to avoid any movement while drilling.

3. Set Up Your Work Area
Find a stable and secure work surface where you can drill the hole in the granite. It could be a workbench or a piece of plywood placed on top of sawhorses. Make sure the surface is level and won’t shift or move during the drilling process.
4. Begin Drilling
With your safety glasses on, start drilling into the marked spot on the granite. Use a slow and steady motion, applying firm but gentle pressure. Remember to keep the drill level and perpendicular to the surface of the granite to ensure a straight and clean hole.
5. Cool and Clean the Drill Bit

As you drill, the bit and granite may heat up. To prevent overheating and damage, periodically spray the drill bit with water from the spray bottle to keep it cool. After a few seconds of drilling, remove the drill bit from the hole and clean away any debris or dust that has accumulated.
By following these simple steps and taking your time, you can successfully drill a small hole in granite. Remember to always wear safety glasses and work in a well-ventilated area. With the right tools and proper technique, you can achieve your desired result without damaging the granite.
Tools and Materials Required to Drill a Small Hole in Granite
Before you begin drilling a small hole in granite, it is important to gather all the necessary tools and materials. Here is a list of what you will need:
- Diamond Drill Bit: A diamond drill bit is essential for drilling through hard materials like granite. Make sure to choose a drill bit specifically designed for use on granite.
- Drill: You will need a drill to power the diamond drill bit. Make sure the drill you use has variable speed settings and a torque control feature.
- Clamp or Vice Grip: To secure the granite slab in place while drilling, you will need a clamp or vice grip. This will prevent the slab from moving and ensure accurate drilling.
- Water Source: Drilling through granite produces a lot of heat, so it is important to keep the drill bit cool. A water source, such as a spray bottle or water pump, is needed to continuously cool the drill bit while drilling.
- Safety Gear: Granite drilling can create dust and debris, so it is important to use safety gear. Wear safety goggles to protect your eyes from flying particles and a dust mask to prevent inhalation of dust.
- Marker or Tape: Before drilling, mark the desired location of the hole on the granite slab using a marker or tape. This will help guide your drilling and ensure accuracy.
Make sure to have all these tools and materials on hand before beginning to drill a small hole in granite. Having the right equipment will make the drilling process easier and safer.
Step 1: Marking the Hole Location on the Granite Surface

Before drilling a hole in the granite surface, you need to accurately mark the location where you want the hole to be. This will ensure that the hole is drilled in the correct spot and prevent any mistakes or damage to the granite.
Here are the steps to follow:
- Measure and mark the exact spot where you want the hole to be drilled using a tape measure and a pencil. Make sure to double-check your measurements to ensure accuracy.
- If you need to drill multiple holes, use a template or a guide to mark the locations for each hole. This can be especially useful when you need to create evenly spaced holes.
- To mark the hole location, place a piece of masking tape over the spot where you want to drill. This will help prevent the drill bit from slipping and provide a visible marker.
- Use a pencil or a marker to trace the outline of the hole onto the masking tape. This will give you a clear visual reference when drilling the hole.
Once you have marked the hole location on the granite surface, you are ready to proceed to the next step of the drilling process.
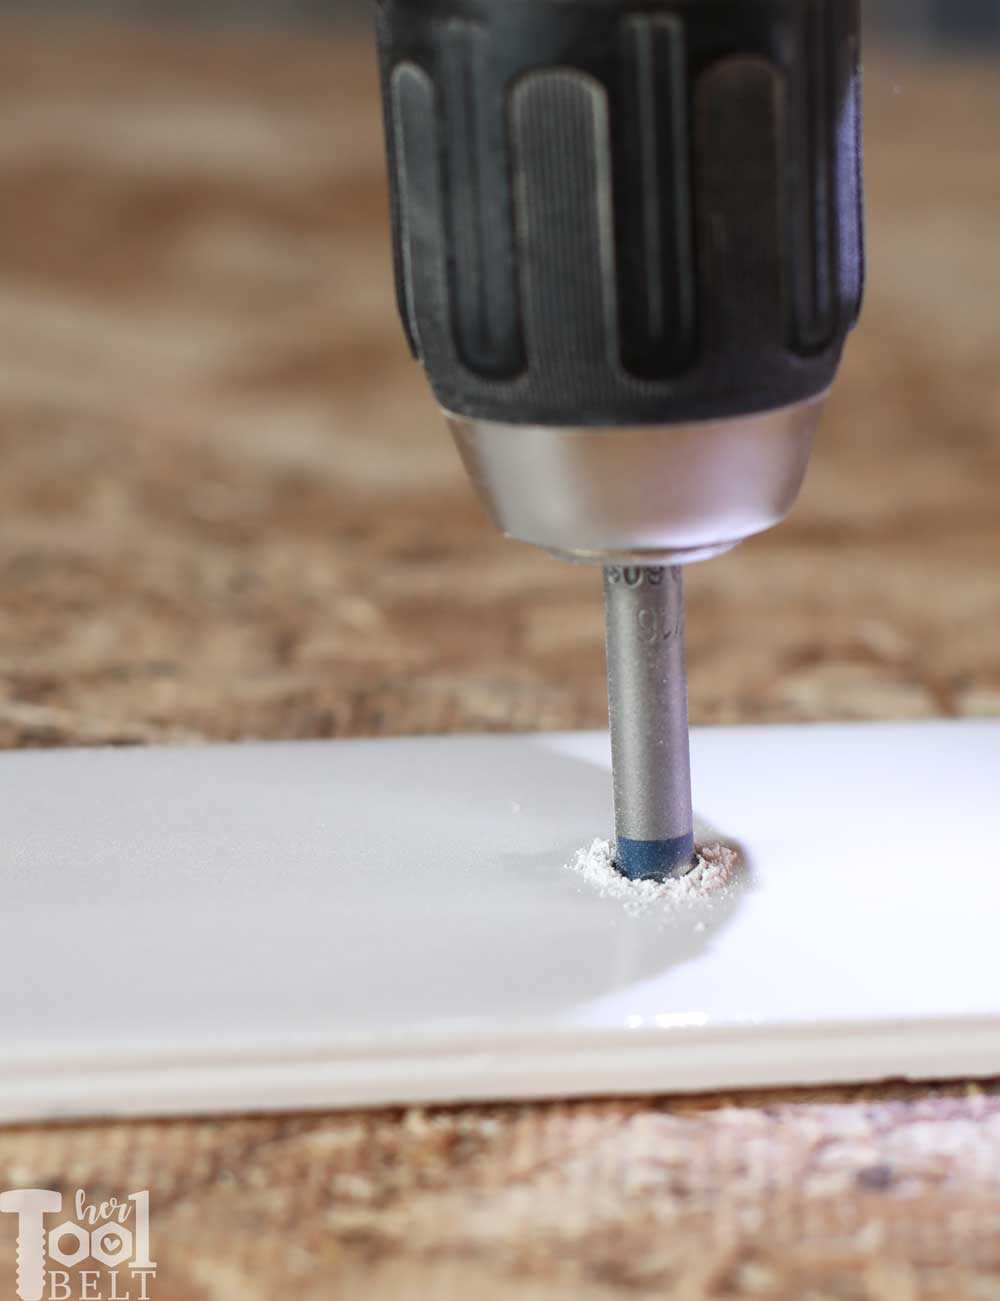
Step 2: Choosing the Right Drill Bit for Granite
When drilling a small hole in granite, it is essential to choose the right drill bit. Granite is an extremely hard and dense material, so using a regular drill bit may not be effective. Here are a few factors to consider when selecting a drill bit for granite:
- Diamond-Tipped Drill Bit: Diamond-tipped drill bits are the most suitable for drilling into granite. The diamond coating on the bit allows for effective drilling through the hard material. Ensure that the drill bit you choose is specifically designed for drilling into granite.
- Size of the Drill Bit: The size of the drill bit will depend on the diameter of the hole you want to drill. Smaller holes may require thinner drill bits, while larger holes will need thicker ones. Make sure to choose a drill bit that matches the size of the hole you need.
- Drill Bit Speed: Another factor to consider is the speed at which your drill bit can operate. Granite requires a slower drilling speed compared to other materials. Check the drill bit’s speed specifications and make sure it is suitable for drilling into granite.
- Water Cooling System: Granite is prone to overheating during drilling, which can cause the material to crack or chip. To prevent this, consider using a drill bit with a water cooling system. Some drill bits have built-in holes or channels for water flow, keeping the bit and granite cool during drilling.
By choosing the right drill bit for granite, you can ensure a smoother drilling process and achieve the desired results without damaging the material. Remember to wear safety goggles and work in a well-ventilated area when drilling into granite.

Step 3: Preparing the Drill and Granite Surface for Drilling
Before you begin drilling into the granite surface, it is important to properly prepare both the drill and the granite to ensure a successful drilling process. Follow these steps to get ready:
1. Choose the Right Drill Bit
When drilling into granite, it is essential to use a diamond-tipped drill bit specifically designed for drilling into hard materials like stone. These drill bits are more durable and can withstand the tough surface of granite without getting damaged.
2. Secure the Drill Bit
Insert the diamond-tipped drill bit into the chuck of the drill. Make sure it is tightened securely to prevent any wobbling or movement while drilling.
3. Mark the Drilling Location
Use a pencil or marker to mark the exact spot where you want to drill the hole on the granite surface. This will help you ensure accuracy and precision during the drilling process.

4. Secure the Granite Surface
Place a piece of scrap wood or a rubber mat underneath the granite surface to provide stability and prevent any damage to the surface. This will also prevent the drill bit from slipping or moving around while drilling.
5. Apply Water or Lubricant
Drilling into granite creates a lot of heat and friction, which can damage both the drill bit and the granite surface. To minimize heat and friction, you should apply water or a lubricant (such as cutting oil) to the drilling area.
Following these steps will help ensure that both your drill and the granite surface are properly prepared for drilling a small hole. Now you can proceed to the next step to begin the drilling process.
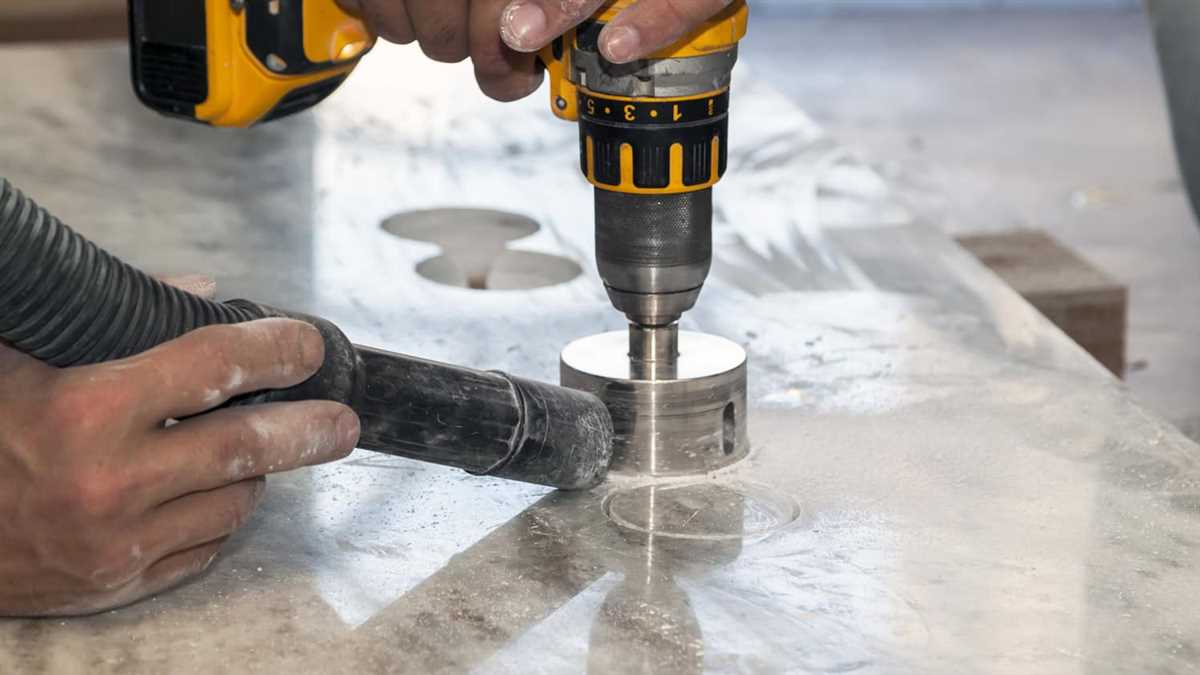
Step 4: Drilling the Small Hole in Granite
Now that you have prepared the granite slab and marked the drilling spot, it’s time to drill the small hole. Follow the steps below carefully to ensure smooth and accurate drilling.
- Attach the diamond drill bit: Choose a diamond drill bit suitable for the size of the hole you want to drill. Attach the drill bit securely to your drill, making sure it is centered and properly tightened.
- Set the drill to a low speed: Granite is a hard and dense material, so drilling at high speed can cause heat and damage the slab. Set your drill to a low speed setting to avoid this and ensure better control.
- Apply water as a lubricant: Pour some water on the marked spot on the granite slab to act as a lubricant and coolant. This will prevent overheating and help flush away the debris created during drilling.
- Start drilling: Position the drill bit on the marked spot and apply gentle pressure. Begin drilling slowly and steadily, using a straight motion. Remember to apply constant pressure but avoid pushing too hard as it can cause the drill bit to snag or overheat.
- Monitor your progress: Keep an eye on the drilling process to ensure that the hole is being drilled correctly and at the desired angle. Make sure to periodically add water to prevent the granite from overheating and to clear away debris for better visibility.
Drilling through granite can take time, especially if you are drilling a small hole. Take breaks as needed and be patient throughout the process to achieve the best results.

Note: Always wear safety goggles and a dust mask to protect yourself from flying debris and dust particles while drilling.
Step 5: Cleaning and Checking the Hole
After drilling the small hole in the granite, it’s important to clean the debris and check the hole for any defects or issues. This step ensures that your hole is clean and ready for further use.
1. Cleaning the Hole
Use a small brush or a compressed air canister to clean out the hole. This will remove any remaining dust, granite particles, or debris that may have been left behind during the drilling process. Cleaning the hole will also help improve the overall quality of the hole and prevent future issues.
2. Checking for Defects
After cleaning the hole, inspect it for any defects or issues. Look for cracks, chips, or uneven surfaces that may affect the stability or appearance of your project. If you notice any defects, you may need to fill them with a suitable filler or consider drilling a new hole in a different location.

3. Verifying Hole Size
Measure the diameter and depth of the hole to ensure it meets your requirements. Use a caliper or ruler to accurately measure the dimensions. If the hole is not the desired size, you may need to redrill it using a larger or smaller drill bit.
By cleaning and checking the hole, you can ensure that it is in optimal condition for your project. This step is an important part of the drilling process and should not be skipped.
Step 6: Sealing and Finishing the Drilled Hole in Granite
After successfully drilling a small hole in your granite surface, it is important to properly seal and finish the hole to ensure its durability and prevent any potential moisture or dirt from entering.
Here are the steps to seal and finish the drilled hole in granite:
- Clean the hole: Use a clean cloth or brush to remove any debris or dust from the drilled hole. This will ensure a clean surface for the sealing process.
- Select a granite sealer: Choose a high-quality granite sealer that is suitable for your specific type of granite. Read the instructions provided by the manufacturer to ensure proper application.
- Apply the sealer: Using a brush or cloth, apply a thin layer of the selected granite sealer around the edges and inside the drilled hole. Be sure to follow the manufacturer’s instructions for application techniques and drying times.
- Allow the sealer to dry: Give the sealer enough time to dry and properly adhere to the granite. This typically takes a few hours, but make sure to consult the instructions provided by the manufacturer for the recommended drying time.
- Check for proper sealing: After the sealer has dried, inspect the drilled hole to ensure that it has been adequately sealed. Look for any areas that may need additional sealing or touch-up.
- Finish the hole: Once the sealer has dried and you are satisfied with the level of sealing, you can finish the drilled hole by applying a color-matching granite filler. This will help blend the hole with the surrounding granite and provide a seamless appearance.
Remember to follow the instructions provided by the manufacturer for the granite sealer and filler products, as each may have specific recommendations for application and drying times. By properly sealing and finishing the drilled hole in your granite surface, you can ensure its long-lasting durability and maintain the overall aesthetic appeal of your countertop or other granite installations.
Step 7: Safety Precautions and Tips for Drilling Granite
When drilling into granite, it is important to take certain safety precautions to avoid injury and damage to the material. Follow these tips to ensure a safe and successful drilling process:
- Wear Safety Gear: Always wear safety goggles to protect your eyes from flying debris. Additionally, wear a dust mask to prevent inhaling granite dust, which can be harmful.
- Work Area Preparation: Clear the work area of any obstacles and ensure there is ample space to work comfortably. Remove any nearby objects that could be damaged by the drill or granite dust.
- Secure the Granite: Use clamps or a non-slip mat to secure the granite piece in place. This will prevent the material from moving and causing accidents during drilling.
- Choose the Right Drill Bit: Select a high-quality carbide-tipped masonry drill bit specifically designed for drilling into granite. Using the correct bit will ensure clean and precise holes.
- Use Proper Drilling Technique: Start drilling at a slow speed and gradually increase the speed as you penetrate the granite. Apply consistent pressure to avoid the drill bit from overheating and prevent the granite from cracking.
- Cooling and Lubrication: To prevent overheating and extend the life of the drill bit, use a constant spray of water or apply a lubricant to the drilling area. This will also help to flush away debris and keep the drill bit clean.
- Take Breaks: If drilling multiple holes or drilling for an extended period, take breaks to allow the drill bit to cool down. This will prevent overheating, which can lead to reduced drilling performance and damage to the granite.
- Inspect and Clean: After drilling, inspect the hole to ensure it meets your requirements. Remove any debris or dust from the hole using compressed air or a brush. This will ensure a clean and presentable finish.
By following these safety precautions and tips, you can successfully drill a small hole in granite without risking your safety or damaging the material.
FAQ:
What tools do I need to drill a small hole in granite?
To drill a small hole in granite, you will need a diamond-tipped drill bit, a drill with a variable speed option, water or a coolant to keep the drill bit cool, and a clamp or vice to secure the granite in place.
Can I use a regular drill bit to drill a hole in granite?
No, regular drill bits are not suitable for drilling into granite. Granite is a hard and dense material, so you will need a diamond-tipped drill bit specifically designed for drilling into stone or granite.
How do I prevent the drill bit from overheating while drilling into granite?
To prevent the drill bit from overheating, you need to continuously cool it with water or a coolant. You can either pour water over the drill bit while drilling or use a coolant spray to keep the temperature down.
What precautions should I take while drilling into granite?
When drilling into granite, it is important to wear safety goggles to protect your eyes from flying debris. You should also work in a well-ventilated area to avoid inhaling dust particles. Additionally, make sure to secure the granite firmly in place using a clamp or vice to prevent it from moving during drilling.
Video:


Harrison Clayton
Meet Harrison Clayton, a distinguished author and home remodeling enthusiast whose expertise in the realm of renovation is second to none. With a passion for transforming houses into inviting homes, Harrison's writing at https://thehuts-eastbourne.co.uk/ brings a breath of fresh inspiration to the world of home improvement. Whether you're looking to revamp a small corner of your abode or embark on a complete home transformation, Harrison's articles provide the essential expertise and creative flair to turn your visions into reality. So, dive into the captivating world of home remodeling with Harrison Clayton and unlock the full potential of your living space with every word he writes.


