Step-by-Step Guide: How to Drill a Shallow Well

If you live in an area where access to clean water is a challenge, drilling a shallow well can be a cost-effective solution. Shallow wells are typically dug by hand or with the help of simple drilling equipment, and can provide you with a reliable source of water for your household needs. In this step-by-step guide, we will walk you through the process of drilling a shallow well, from choosing the right location to installing a hand pump.
Step 1: Choosing the Right Location
Before you start drilling, it’s important to select a suitable location for your shallow well. Look for an area that is away from potential sources of contamination, such as septic tanks or chemical storage areas. Consider the depth of the water table in your area to determine how deep you need to drill. You may want to consult with a local hydrologist or well driller to get an idea of the optimal depth for your well.
Pro tip: In some regions, you may need to obtain a permit or license to drill a well. Check with your local authorities to ensure compliance with any regulations.
Step 2: Gathering the Right Tools and Equipment

Once you have chosen the location for your well, gather the necessary tools and equipment. You will need a shovel or a post hole digger to excavate the hole, a portable drilling rig or a hand auger to penetrate the ground, and a water bailer or a pump to remove the water from the well. Additionally, you may need PVC pipe and fittings, well screens, and gravel for lining and sealing the well.
Expert tip: To avoid any potential accidents or injuries, make sure to wear protective gear, such as gloves and safety goggles, while drilling and handling the equipment.
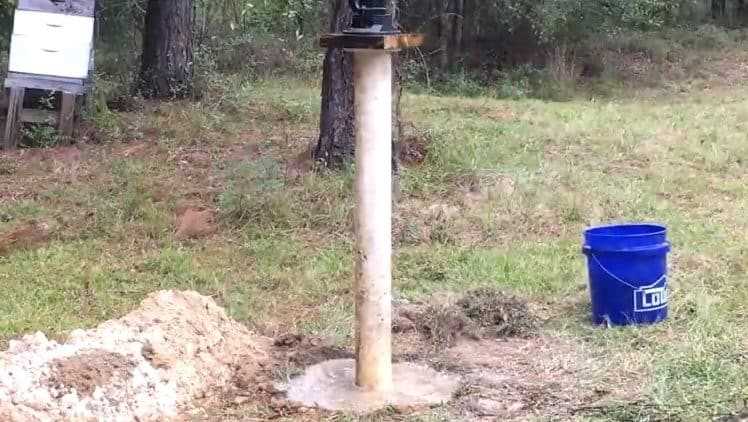
Step 3: Drilling the Well
Begin by digging a hole in the selected location. The size of the hole will depend on the diameter of the PVC pipe you are planning to use for your well. Dig deep enough to reach the water table, but make sure to leave enough space for the well screen and gravel.
Once the hole is excavated, attach the drilling rig or hand auger to the PVC pipe and start drilling. Lower the rig into the hole and rotate it clockwise to penetrate the ground. Be patient and apply steady pressure to allow the drill bit to chew through the soil or rock. Stop drilling periodically to remove the cuttings and check the depth of the hole.
Remember: Always follow the manufacturer’s instructions and take necessary safety precautions while operating the drilling equipment.

Choosing the Right Location
Choosing the right location for drilling a shallow well is crucial for ensuring optimal water supply and accessibility. Here are some factors to consider when selecting a location for your well:
1. Topography
The topography of the area plays a significant role in the drilling process. It is important to choose a location that is relatively flat and free from any obstructions. Steep slopes or rocky terrain can make it difficult to drill and access water.
2. Proximity to Water Sources
The proximity to existing water sources is another important consideration. If possible, choose a location that is close to natural water bodies such as rivers, lakes, or streams. This can increase the chances of finding water and reduce the depth at which you need to drill.
3. Soil Type
The soil type in the area can affect the drilling process and the quality of water you can expect to find. Conduct a soil test to determine the composition of the soil. Sandy or loamy soils are generally better for water infiltration and can provide a more reliable water supply.
4. Access to Equipment
Consider the accessibility of the chosen location for drilling equipment. Ensure that there is enough space for the drilling rig and other required equipment to maneuver during the drilling process. Also, check for any potential obstacles such as trees or buildings that may hinder the drilling process.

5. Distance to Property
Consider the distance between the well location and your property. It is important to choose a location that provides easy access to the water source for maintenance, repairs, and daily use. Shorter distances can also reduce the cost of installing plumbing and water distribution systems.
6. Legal and Regulatory Requirements
Before drilling a well, check with your local authorities for any legal or regulatory requirements. Some areas may require permits or have restrictions on well drilling. It is important to comply with these regulations to avoid any legal issues in the future.
7. Consult with Professionals
If you are unsure about choosing the right location, it is best to consult with professionals such as geologists or well drilling experts. They can assess the geological conditions of the area and provide guidance on selecting the most suitable location for your well.
By carefully considering these factors, you can choose the right location for your shallow well, ensuring a reliable and accessible water supply for your needs.
Obtaining Permits and Permissions
Before you start drilling a shallow well, it is important to obtain the necessary permits and permissions from the appropriate authorities. This ensures that you are complying with local regulations and guidelines regarding water well drilling.

Contact Local Government Authorities
The first step in obtaining permits and permissions is to contact the local government authorities responsible for overseeing well drilling in your area. This may include the local environmental department, water resources board, or health department. They will be able to provide you with information on the specific permits and permissions required for drilling a shallow well.
Research Local Regulations
Next, it is important to thoroughly research the local regulations and guidelines regarding well drilling in your area. This may include setbacks from property lines and water sources, depth limitations, and requirements for sealing and disinfecting the well. Understanding these regulations will help ensure that you are in compliance and avoid any potential issues during the drilling process.
Submit Permit Applications
Once you have gathered all the necessary information, you will need to complete and submit the required permit applications. These applications may include details such as the location of the well, drilling methods, and any planned water use. Be sure to provide all the required documentation and pay any associated fees.
Wait for Approval
After submitting your permit applications, you will need to wait for approval from the relevant authorities. It is important to note that the processing time can vary depending on the jurisdiction and the complexity of the project. It is recommended to check the status of your application periodically and follow up if necessary.
Comply with Conditions
Once you receive approval for your permit, it is essential to carefully review any conditions or restrictions that may have been imposed. These conditions may include requirements for water testing, periodic inspections, or adherence to specific drilling techniques. It is important to adhere to these conditions to ensure the safe and legal operation of your shallow well.

Gathering the Necessary Equipment
Before you start drilling a shallow well, it is important to gather all the necessary equipment and tools. Here is a list of items you will need:
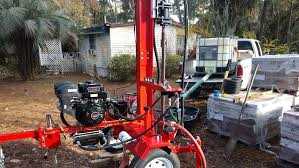
1. Drilling Rig
A drilling rig is the main equipment you will need for drilling a shallow well. There are different types of drilling rigs available, such as portable rigs, truck-mounted rigs, and trailer-mounted rigs. Choose a rig that is appropriate for the depth and diameter of the well you want to drill.
2. Drill Bit
A drill bit is the cutting tool that will be used to make the hole in the ground. It is important to choose the right size and type of drill bit for the type of soil or rock you will be drilling through. For softer soils, a regular twist bit or paddle bit can be used. For rocky terrain, a carbide-tipped bit or a diamond bit may be required.
3. Drill Pipe
The drill pipe is a long tubular structure that connects the drilling rig to the drill bit. It is made of sturdy materials such as steel or aluminum. The length and diameter of the drill pipe will depend on the depth and diameter of the well.
4. Water Pump
A water pump is necessary to provide water for the drilling process. It is important to have a reliable and powerful pump that can deliver sufficient water pressure and volume. The pump can be powered by electricity or a gasoline engine.
5. Water Hose
You will need a water hose to connect the water pump to the drilling rig. Make sure the hose is long enough to reach the drilling site and has the appropriate diameter to deliver enough water to the drilling process.
6. Safety Gear
It is crucial to have the necessary safety gear to protect yourself during the drilling process. This includes gloves, safety glasses, safety boots, and a hard hat.
7. Other Tools and Equipment
In addition to the main equipment mentioned above, you may also need the following tools and equipment:
- Wrenches and pliers for assembling and disassembling the drilling rig
- Measuring tape or ruler for measuring the depth of the well
- Leveling tool for ensuring the drilling rig is properly aligned
- Shovels or a backhoe for digging the initial hole
- Bucket or bailer for removing drilling cuttings
8. Materials for Well Casing and Completion
Once the well is drilled, you will need materials for casing and completing the well. This includes PVC or steel pipes for lining the well, a well cap or seal, and a pump for extracting water from the well.
Make sure to gather all the necessary equipment and tools before starting the drilling process. This will ensure a smooth and successful drilling operation.
Marking and Preparing the Drill Site
Before you start drilling a shallow well, it’s important to properly mark and prepare the drill site. This will ensure that the drilling process goes smoothly and efficiently.
1. Choose the Location
The first step in marking the drill site is to choose the location where you want to drill the well. When selecting a location, consider the following factors:
- The distance from any existing structures or septic systems
- The proximity to a water source, such as a creek or pond
- The depth and type of soil in the area
Once you have selected a suitable location, mark the spot using stakes or markers.
2. Obtain Permits
Before drilling a shallow well, it is important to check with your local authorities to determine if you need any permits or approvals. The requirements vary depending on your location, so it’s important to do your research beforehand. Apply for any necessary permits and obtain approval before proceeding with the drilling.
3. Clear the Area
Clear the drill site of any vegetation or debris that may obstruct the drilling process. Remove rocks, roots, and any other obstructions from the area. This will ensure that the drilling equipment can operate smoothly and safely.
4. Provide Access
Make sure there is clear access to the drill site for the drilling equipment. Remove any obstacles such as fences, gates, or low-hanging branches. This will allow the drilling equipment to maneuver easily and avoid any potential hazards.
5. Prepare Safety Measures
Prior to drilling, it’s important to prepare safety measures to protect yourself and others. These may include wearing protective gear such as safety goggles and gloves, setting up barriers or warning signs around the drill site to prevent unauthorized access, and having a first aid kit readily available.
By following these steps to mark and prepare the drill site, you will be ready to start drilling your shallow well in a safe and efficient manner.
Drilling the Well Casing
Step 1: Choose the Well Casing Material
The first step in drilling a well casing is to choose the appropriate material for the casing. The most common materials used for well casing are PVC (polyvinyl chloride) and steel. PVC is a popular choice due to its affordability, corrosion resistance, and ease of installation. Steel casing, on the other hand, is more durable and can withstand higher pressure and temperature conditions. Consider the specific needs and requirements of your well before choosing the casing material.
Step 2: Determine the Casing Size
Once you have chosen the casing material, the next step is to determine the appropriate casing size. The casing size is typically determined by the diameter of the well bore. Common casing sizes range from 4 inches to 8 inches in diameter. The size of the casing will depend on the depth of the well, the type of pump or equipment that will be installed, and any local regulations or restrictions.
Step 3: Prepare the Well Site
Before drilling the well casing, it is important to prepare the well site. Clear the area of any obstructions or debris and ensure that it is level and stable. Make sure there are no underground utilities or obstacles that could interfere with the drilling process. It is also essential to obtain any necessary permits or permissions from local authorities before starting the drilling process.
Step 4: Drill the Well Casing
Now it’s time to begin drilling the well casing. This step involves using a drilling rig or equipment to bore a hole into the ground. The drilling equipment should be capable of reaching the desired depth for the well. As the drilling progresses, the casing is inserted into the hole to prevent the sides from caving in and to provide support to the well. The drilling process may take some time, depending on the depth and conditions of the well.
Step 5: Install the Casing
Once the drilling is complete, the casing is carefully lowered into the well. The casing should be installed to a depth that allows for a tight seal with the ground and prevents any contaminants from entering the well. The casing should also be properly aligned and secured to ensure its stability and integrity. This may involve using cement or grout to fill any gaps or voids between the casing and the surrounding ground.
Step 6: Finish the Well Casing
After the casing is installed, it is important to properly finish the well casing. This may involve backfilling the drilled hole with gravel or other suitable materials to provide additional support and stability to the casing. It is also essential to properly seal the top of the well casing to prevent any surface water or contaminants from entering the well.
Step 7: Test the Well Casing
Once the well casing is in place, it is crucial to test its integrity and functionality. This may involve conducting a pressure test or water flow test to ensure that the casing is able to withstand the anticipated pressure and that the water supply is adequate. Any issues or leaks should be promptly addressed and repaired to ensure the proper functioning of the well.
By following these steps, you can successfully drill the well casing and ensure a reliable and safe water supply for your property.
Installing the Well Screen
Once you have drilled your shallow well, it’s time to install the well screen. The well screen is a cylindrical pipe with a series of slots or perforations that allow water to enter while keeping out debris and sediments. Follow these steps to install the well screen:
- Measure the length of the well casing pipe to determine the appropriate length for the well screen. The well screen should be slightly longer than the well casing, typically around 1-2 feet longer.
- Place the well screen inside the well casing pipe. Ensure that the bottom of the well screen is resting on the bottom of the well.
- Secure the well screen to the well casing pipe using PVC cement or another adhesive suitable for well construction. Apply the adhesive to the inside of the well casing and slide the well screen into place.
- Allow the adhesive to dry and set according to the manufacturer’s instructions. This will ensure a secure and tight connection between the well screen and the well casing.
- Once the adhesive has dried, attach a coupling to the top of the well screen. This will allow you to connect additional sections of well casing, if necessary, to reach the desired depth.
- Lower the well screen and casing assembly into the well bore using a well rig or a DIY pulley system. Make sure the assembly is lowered straight and does not hit the sides of the well bore.
- Continue lowering the well screen and casing assembly until it reaches the desired depth. This will depend on the water table level and the specific requirements of your well.
- Secure the well screen and casing assembly in place by attaching a well cap or seal to the top of the well casing. This will prevent contaminants from entering the well and ensure the integrity of the well structure.
By following these steps, you can successfully install the well screen for your shallow well. Make sure to consult local regulations and guidelines to ensure compliance and safety during the installation process.
Dealing with Water Contamination
When drilling a shallow well, there is a risk of water contamination. Contaminated water can pose health risks and make the water unsuitable for drinking, cooking, or other household uses. It is important to take steps to detect and address water contamination to ensure the safety of your water source.
Identifying Water Contamination
The first step in dealing with water contamination is to identify its presence. Here are some common signs that your water may be contaminated:
- Unusual odor or taste
- Discoloration
- Sediment or particles in the water
- Presence of bacteria or other microorganisms
- Health issues after consuming the water
If you notice any of these signs, it is important to conduct further testing to determine the cause and extent of contamination.
Testing Water Quality
To determine if your water is contaminated and the specific contaminants present, you should conduct water quality testing. This can be done using a water testing kit or by sending a sample to a laboratory for analysis.
Common contaminants found in well water include bacteria, viruses, parasites, heavy metals, nitrates, and pesticides. Testing for these contaminants will help you understand the potential health risks associated with your water source.
Addressing Water Contamination
If your water tests positive for contaminants, there are several steps you can take to address the issue:
- Disinfection: If bacteria or viruses are present, disinfecting the water can help kill these microorganisms. Chlorination or ultraviolet (UV) light treatment are common methods of disinfection.
- Filtration: Installing a water filtration system can help remove sediment, particles, and some types of contaminants. Different types of filtration systems are available, including activated carbon filters, reverse osmosis systems, and distillation units.
- Water treatment: For more serious contamination, water treatment systems such as ion exchange, ozonation, or chemical oxidation may be necessary to remove or reduce the concentration of specific contaminants.
- Well maintenance: Regular inspection and maintenance of your well can help prevent contamination. This includes sealing any cracks or openings in the well casing, properly disposing of hazardous materials, and keeping the area around the well clean and free from potential sources of contamination.
Professional Assistance
If you are unsure about how to deal with water contamination or if the issue persists after taking corrective measures, it is recommended to seek professional assistance. A water treatment specialist or a local health department can provide guidance and assistance in addressing the contamination effectively.
By promptly identifying and addressing water contamination, you can ensure the safety and quality of your water supply, promoting the health and well-being of your household.
Testing and Maintaining the Well
After drilling a shallow well, it is important to test and maintain the well to ensure its efficiency and longevity. Here are some steps to follow:
1. Water Quality Testing
Test the water quality of the well periodically to ensure it is safe and free from contaminants. You can use water testing kits to check for bacteria, minerals, and other impurities. If any issues are detected, it is important to treat the water accordingly.
2. Water Flow Testing
Check the flow rate of the well periodically to make sure it is providing an adequate water supply. You can do this by using a flow meter or by measuring the time it takes to fill a known volume container. Low flow rates may indicate a problem with the well or the pump, and may require further investigation.
3. Well Maintenance
Regular maintenance of the well is crucial to keep it functioning properly. This may involve cleaning the well casing, conducting visual inspections, and checking for any signs of damage or deterioration. It is also important to maintain and service the pump regularly to ensure proper operation.
4. Well Protection
Take steps to protect the well from potential sources of contamination. Keep the area around the well clean and free from chemicals, debris, and other pollutants. Make sure the well cap is tightly sealed to prevent insects, rodents, and surface water from entering the well.
5. Record Keeping
Maintain detailed records of well testing results, maintenance activities, and any repairs or modifications made to the well system. This information will be valuable for future reference and can help identify any patterns or trends that may impact the well’s performance.
By following these testing and maintenance steps, you can ensure that your shallow well continues to provide a reliable source of water for years to come.
FAQ:
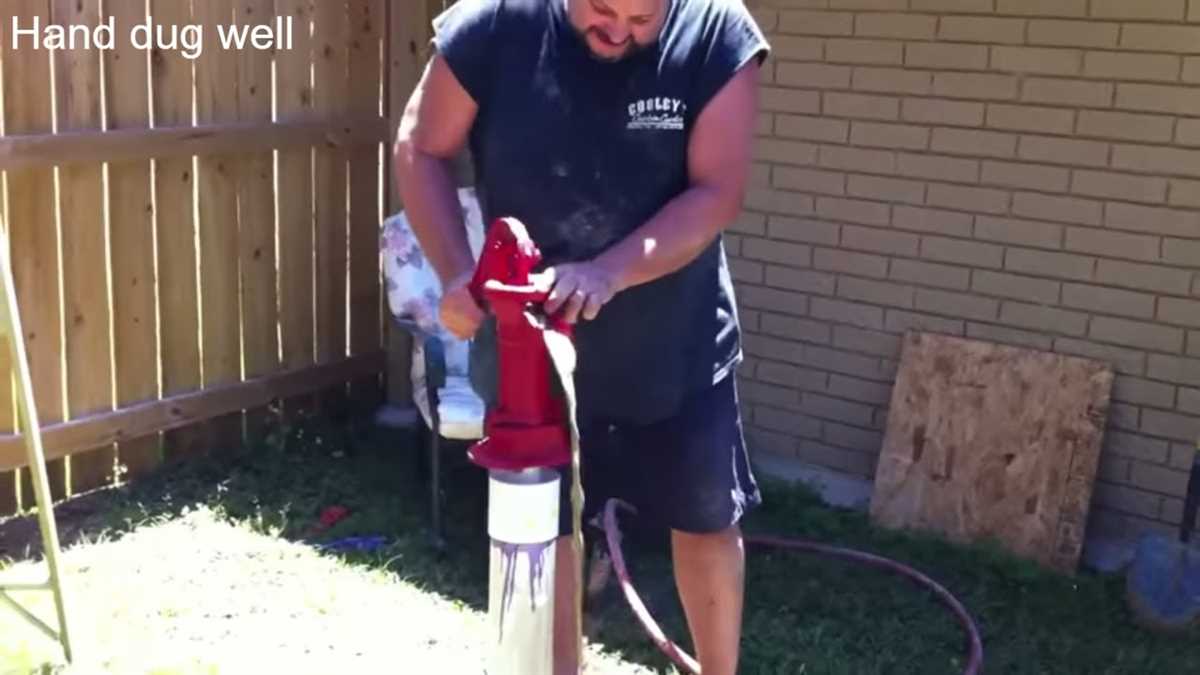
What is a shallow well?
A shallow well is a type of well that is drilled to access groundwater that is relatively close to the surface, typically less than 50 feet deep.
What materials do I need to drill a shallow well?
To drill a shallow well, you will need a drilling rig or an auger, PVC pipe or well casing, a pump, and various drilling tools such as wrenches and pipe cutters.
What is the process of drilling a shallow well?
The process of drilling a shallow well involves selecting a suitable location, setting up the drilling rig, drilling into the ground using the auger or rig, installing the PVC pipe or well casing, and attaching the pump to draw water from the well.
What are the advantages of drilling a shallow well?
Drilling a shallow well can provide access to a reliable and cost-effective source of water for various purposes such as household use, irrigation, and livestock watering. Additionally, shallow wells can often be drilled with relatively simple equipment and require less time and effort compared to drilling deeper wells.
Video:


Meet Harrison Clayton, a distinguished author and home remodeling enthusiast whose expertise in the realm of renovation is second to none. With a passion for transforming houses into inviting homes, Harrison's writing at https://thehuts-eastbourne.co.uk/ brings a breath of fresh inspiration to the world of home improvement. Whether you're looking to revamp a small corner of your abode or embark on a complete home transformation, Harrison's articles provide the essential expertise and creative flair to turn your visions into reality. So, dive into the captivating world of home remodeling with Harrison Clayton and unlock the full potential of your living space with every word he writes.


