Step-by-Step Guide: How to Drill a Hole Through a Rock

Drilling a hole through a rock may seem like a challenging task, but with the right tools and techniques, it can be accomplished with ease. Whether you want to create a unique piece of jewelry or install a decorative rock in your garden, drilling a hole through a rock is a useful skill to have. In this step-by-step guide, we will walk you through the process of drilling a hole through a rock.
Step 1: Gather the necessary tools and materials: Before you begin drilling, gather all the tools and materials you will need. You will need a power drill with a masonry drill bit, safety glasses, a dust mask, a water bottle or a hose, and a clamp or vice to hold the rock securely.
Step 2: Choose the right drill bit: It is important to use a masonry drill bit specifically designed for drilling through rocks. These drill bits are made of hardened steel and have a carbide tip, which allows them to bite into the rock and create a hole.
Step 3: Secure the rock: Place the rock securely in a clamp or vice to prevent it from moving while you drill. This will ensure that the drill bit stays on track and prevents any accidents.
Step 4: Put on safety gear: Put on safety glasses to protect your eyes from any chips or debris that may be produced while drilling. It is also recommended to wear a dust mask to prevent inhaling any dust or particles.
Step 5: Mark the drilling spot: Use a pen or marker to mark the spot where you want to drill the hole on the rock. Make sure the mark is clearly visible and centered on the desired location.
Step 6: Start drilling: Start the drill at a low speed to create a small indentation on the rock. This will prevent the drill bit from slipping and ensure that it stays on track. Slowly increase the speed and apply gentle pressure, allowing the drill bit to penetrate the rock.
Step 7: Use water for lubrication: While drilling, it is important to keep the drill bit lubricated to prevent overheating and extend its life. Use a water bottle or a hose to spray water onto the drilling spot as you work. The water will also help to flush away any debris and keep the drilling area clean.
Step 8: Keep a steady pace: Drill slowly and steadily, taking breaks if necessary. Applying too much pressure or drilling too quickly can cause the drill bit to break or the rock to crack. Take your time and let the drill bit do the work.
Step 9: Finish the hole: Once the drill bit has penetrated the rock completely, carefully remove the drill and inspect the hole. If necessary, use a file or sandpaper to smooth the edges of the hole.
Remember to always exercise caution and wear appropriate safety gear when drilling through rocks. If you are unsure or uncomfortable with the process, it is recommended to seek professional assistance. With practice and the right tools, you can become proficient in drilling holes through rocks and create beautiful crafts or installations.
Materials and Tools You’ll Need
- Rock
- Drill
- Drill bits
- Water source
- Safety goggles
- Gloves
- Mask
- Clamp or vice grip
- Marker or pencil
- Workbench or stable surface
Choose a rock that you want to drill a hole through. Ensure that the rock is sturdy and large enough for your desired hole size.
Use a power drill with a drill bit designed for drilling through rocks. Make sure the drill is in good working condition and has enough power for the job.
There are various types of drill bits you can use to drill through rocks, such as masonry bits, diamond-tipped bits, or carbide-tipped bits. Choose the appropriate drill bit for the type of rock you are working with.
Drilling through rocks generates heat, so it is important to keep the drill bit and the rock cool. You can use a spray bottle or a hose with a continuous flow of water to keep the drilling area wet.
Protect your eyes from flying pieces of rock and debris by wearing safety goggles or glasses.
Wearing gloves can protect your hands from sharp edges while drilling and handling the rock.
Avoid breathing in dust or particles by wearing a mask or respirator.
Securing the rock in place with a clamp or vice grip will prevent it from moving or spinning during drilling.
Use a marker or pencil to mark the desired location of the hole on the rock’s surface.
Find a stable surface, such as a workbench or table, to place the rock on while drilling.
Step 1: Choose the Right Drill Bit
Choosing the right drill bit is crucial when drilling a hole through a rock. The type of drill bit you need will depend on the type of rock you are drilling through and the size of the hole you want to create. Here are some factors to consider in selecting the right drill bit:
- Material: Different materials require different types of drill bits. For drilling through rocks, a carbide-tipped masonry drill bit is the most suitable option. It is designed specifically for hard materials like rocks and concrete.
- Size: Determine the size of the hole you want to drill. Common sizes range from 1/8 inch to 1 inch or larger. Make sure to choose a drill bit that matches the desired hole size.
- Type of Rock: Consider the type of rock you are drilling through. Some rocks are harder than others, so you may need a specific type of drill bit. For example, if you are drilling through granite, you may need a diamond-tipped drill bit for optimal results.
- Drill Compatibility: Check if the drill bit you choose is compatible with your drilling machine. Most drill bits have a standard shank size of 1/4 inch or 3/8 inch, but it’s always a good idea to double-check before purchasing.
Once you have considered these factors, you can confidently choose the right drill bit for your drilling project. It’s essential to have the correct drill bit to ensure success and to prevent damage to both your drilling machine and the rock.
Step 2: Mark the Spot on the Rock
Before you start drilling, it’s important to mark the exact spot where you want to drill the hole on the rock. This will help ensure precision and accuracy in the drilling process.
Materials Needed:
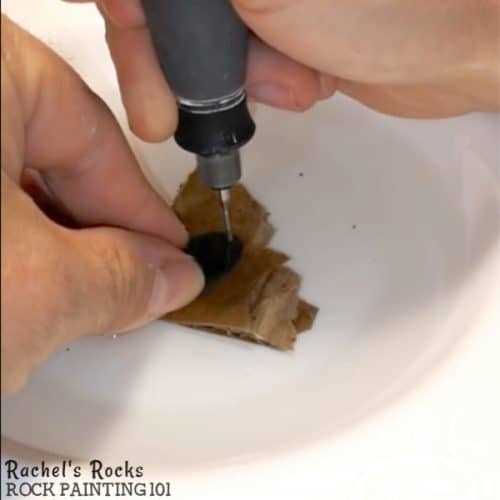
- Marker or pencil
- Measuring tape or ruler
Instructions:
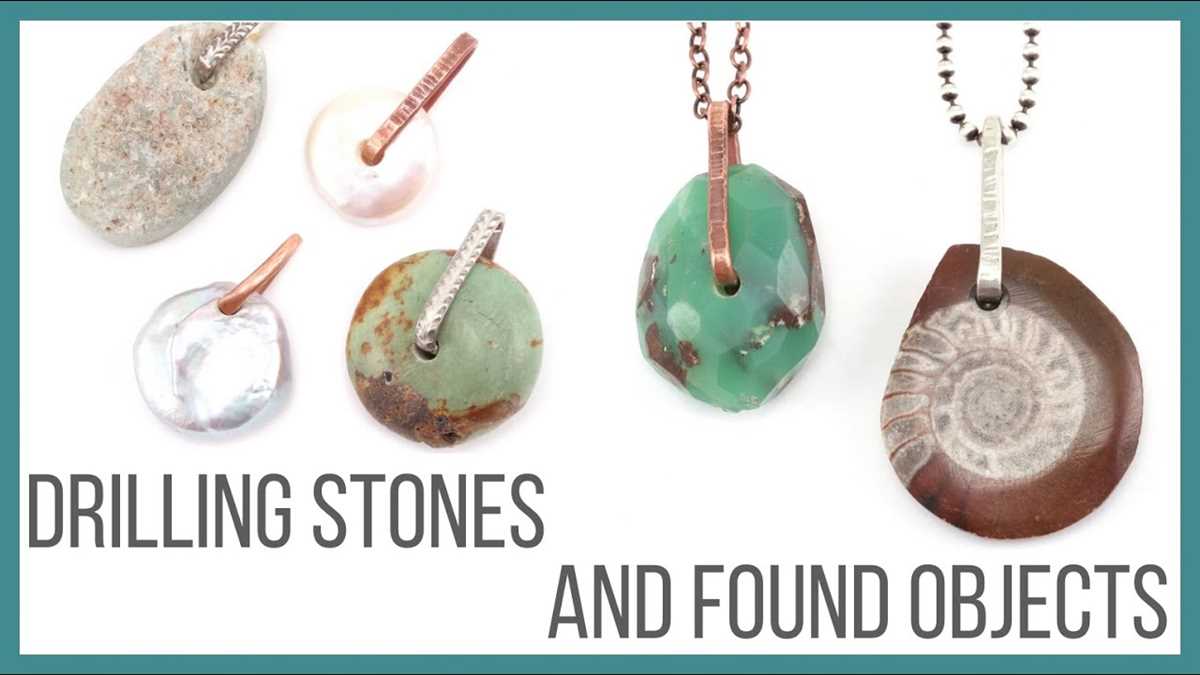
- Carefully examine the rock to determine the best location for drilling the hole. Consider factors such as the shape, size, and hardness of the rock.
- Use a measuring tape or ruler to measure the desired distance from the edge of the rock to the spot where you want to drill the hole.
- Once you have determined the correct position, use a marker or pencil to make a small dot or mark on the surface of the rock.
- Double-check the accuracy of the mark and make any adjustments if necessary.
By marking the spot on the rock, you will have a clear guideline to follow during the drilling process. This will help prevent any mistakes or deviations from the desired placement of the hole.
Step 3: Secure the Rock
Before drilling a hole through a rock, it is important to secure the rock in place to ensure stability and safety. Here are the steps to secure the rock:
- Select a stable surface: Choose a surface that is sturdy and will not move or wobble during the drilling process. A workbench or a solid outdoor surface can be good options.
- Place the rock: Position the rock on the chosen surface, making sure it is stable and does not move easily.
- Use clamps: If the rock is small enough, you can use clamps to hold it securely in place. Place the clamps on either side of the rock and tighten them to hold the rock firmly.
- Create a stable base: If the rock is too large or irregularly shaped to be held with clamps, you can create a stable base using sandbags or blocks. Position the rock on the base, ensuring it is well-supported and unlikely to move.
- Wear protective gear: Always wear protective gloves and safety goggles to protect yourself from any flying debris during the drilling process.
Once the rock is securely in place, you can proceed to the next step of drilling a hole through it.
Step 4: Start Drilling
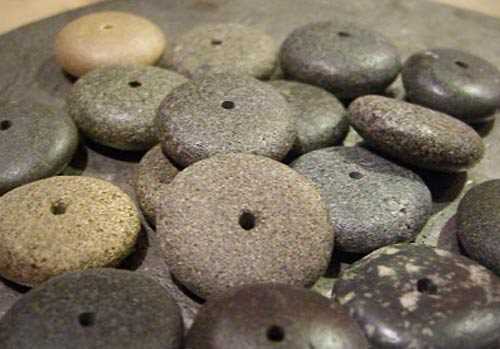
Now that you have prepared the rock and secured it in place, it’s time to start drilling. Follow these steps to begin drilling:
- Put on safety goggles to protect your eyes from flying debris.
- Insert the diamond core drill bit into the drill chuck.
- Tighten the drill chuck securely to hold the drill bit in place.
- Position the drill bit over the marked spot on the rock.
- Apply gentle pressure and turn on the drill.
- Begin drilling slowly and steadily, allowing the drill bit to do the work.
- Add more water to the drilling area as needed to keep the drill bit and rock cool.
- Continue drilling until you have reached the desired depth.
- Periodically pull the drill bit out of the hole to clear away debris and cool the bit.
Important note: Diamond core drill bits are designed to be used with a slow drilling speed and a constant water supply to keep cool. High speed or lack of water can damage the drill bit and even cause it to overheat. Always take breaks to allow the drill bit to cool down if it becomes too hot.
Remember to take your time and be patient while drilling through the rock. Rushing or applying too much pressure can lead to mistakes or cause the drill bit to break.
Step 5: Use a Coolant
Using a coolant while drilling through a rock is essential to prevent damage to your drill bit and to keep the rock cool. Heat generated by the drilling process can cause the rock to crack or the drill bit to become dull.
Here are a few options for coolants that you can use:
- Water: Water is a common coolant that is readily available. You can use a spray bottle to keep the rock and drill bit wet while drilling.
- Mineral Oil: Mineral oil is another coolant option to consider. It has a higher boiling point than water, which means it can help keep the drill bit cool for a longer period of time.
- Cutting Oil: Cutting oil is specifically designed for drilling applications. It helps lubricate the drill bit and reduces friction, making drilling through the rock easier.
When using a coolant, make sure to apply it regularly throughout the drilling process. This will help dissipate heat and extend the life of your drill bit.
It’s important to note that using a coolant may make the drilling process messier, so be prepared for some splashing or dripping.
Before you start drilling, make sure to read the manufacturer’s instructions for your chosen coolant and follow any safety precautions.
Step 6: Take Breaks
Drilling through a rock can be a physically demanding task, so it’s important to take breaks periodically to rest and avoid overexertion. Overexertion can lead to muscle strain or fatigue, increasing the risk of accidents or mistakes. Taking breaks allows you to recharge, refocus, and maintain a steady and controlled drilling motion.
Here are some tips for taking breaks while drilling a hole through a rock:
- Set a timer or schedule regular intervals for breaks. Depending on the difficulty of the rock and the intensity of the drilling, breaks can be taken every 15-30 minutes.
- During breaks, stretch your muscles and perform light exercises to maintain blood circulation and prevent muscle stiffness.
- Hydrate yourself by drinking water or electrolyte-rich beverages to replenish lost fluids and prevent dehydration.
- Take this time to reassess your drilling technique, adjust your grip, or change the position of the rock to avoid strain and fatigue.
Remember, taking breaks not only helps prevent physical strain but also ensures that you remain focused and alert throughout the drilling process. By incorporating regular breaks into your drilling routine, you can work efficiently and safely to achieve the desired results.
Step 7: Clean the Hole
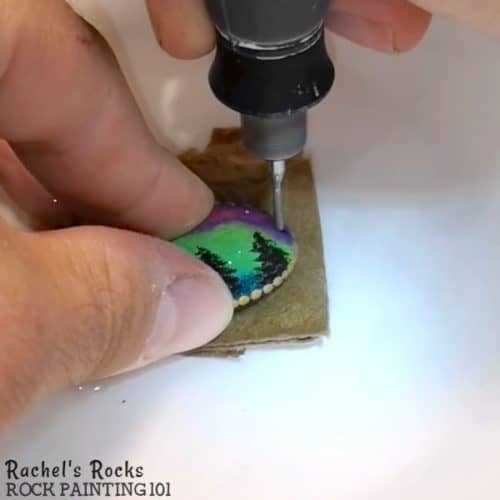
Once you have successfully drilled a hole through the rock, it is important to clean the hole to remove any debris or dust. Cleaning the hole will ensure that it is ready for any further use or application.
To clean the hole, you will need the following:
- Water
- Brush or small broom
- Bucket
Follow these steps to clean the hole:
- Fill a bucket with water.
- Pour the water into the hole, ensuring that it fills the entire space.
- Allow the water to soak in the hole for several minutes.
- Using a brush or small broom, scrub the sides of the hole to remove any debris.
- Continue scrubbing until the water in the hole appears clear.
- Once the hole is clean, pour out any remaining water and debris from the bucket.
- Inspect the hole to ensure that it is clean and free of any dirt or dust.
Note: It is important to clean the hole thoroughly as any debris left behind can affect the stability of any anchors or screws that will be inserted into the hole.
Step 8: Finish and Polish
Once you have successfully drilled a hole through the rock, the next step is to finish and polish it. This will give your rock a smooth and polished look, making it suitable for various types of jewelry or decorative purposes.
Materials needed:
- Water
- Sandpaper (various grits)
- Polishing compound
- Cloth or buffing wheel
Instructions:
- Start by rinsing the rock with water to remove any debris or dust that may have accumulated during the drilling process.
- Using sandpaper of a coarse grit, begin sanding the surface of the hole and the surrounding area. This will help to smooth out any rough edges and imperfections.
- Gradually work your way up to finer grit sandpaper, continuing to sand the hole and surrounding area. This will further refine the surface and remove any remaining roughness.
- Once the surface is smooth and even, apply a small amount of polishing compound to a cloth or buffing wheel.
- Using the cloth or buffing wheel, firmly rub the polishing compound onto the surface of the rock, focusing on the drilled hole and surrounding area.
- Continue buffing the rock in circular motions for several minutes, adding more polishing compound as needed.
- After buffing, rinse the rock with water to remove any excess polishing compound.
- Finally, use a clean cloth to gently dry and buff the rock until it achieves the desired shine.
This finishing and polishing process will enhance the appearance of your drilled hole, giving the rock a professional and polished finish. Your rock is now ready to be used in jewelry or displayed as a beautiful natural specimen.
FAQ:
What tools do I need to drill a hole through a rock?
You will need a drill with a diamond-tipped drill bit, safety goggles, a clamp or vice to hold the rock steady, and water to cool the drill bit.
Can I use a regular drill bit to drill a hole through a rock?
No, regular drill bits are not strong enough to drill through rocks. You need a diamond-tipped drill bit, which is specifically designed for drilling through tough materials like rocks.
How do I secure the rock while drilling?
You can use a clamp or a vice to hold the rock steady. Make sure it is tightly secured so that it does not move while you are drilling.
Do I need to wear safety goggles while drilling?
Yes, it is important to wear safety goggles to protect your eyes from flying debris. Make sure you have them on before you start drilling.
Why do I need to use water while drilling?
Water helps to cool down the drill bit and the rock, preventing overheating. It also helps to wash away the debris and keeps the drill bit lubricated for smooth drilling.
Video:


