Step-by-Step guide: How to drill a hole in porcelain tile

If you’ve ever tried to drill a hole in porcelain tile, you know just how challenging it can be. Porcelain tile is hard, dense, and prone to cracking and chipping when not handled properly. However, with the right tools and techniques, you can successfully drill a hole in porcelain tile without damaging it.
Firstly, it’s important to gather the necessary tools and materials. You’ll need a diamond-tipped drill bit specifically designed for drilling into porcelain tile. Regular masonry or carbide drill bits won’t cut it for this task. Additionally, you’ll need a variable speed drill, masking tape, a spray bottle filled with water, and safety glasses.
The next step is to mark the spot where you want to drill the hole. Use a pencil or marker to make a small dot on the tile surface. Then, cover the area with a strip of masking tape to help prevent the drill bit from slipping and to reduce the risk of cracking the tile.
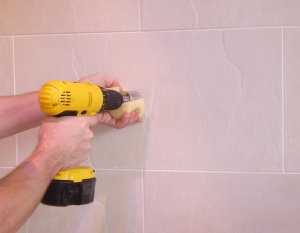
Before you start drilling, it’s important to keep the tile and drill bit cool. Spray a small amount of water onto the tile surface and onto the drill bit to lubricate and cool it. This will help to prevent overheating and reduce the risk of cracking the tile. It’s crucial to keep the drill bit in contact with the tile at all times while drilling. Apply gentle and consistent pressure, and avoid applying excessive force.
Continue drilling slowly and steadily, maintaining a low to medium speed. Be patient and let the drill bit do the work. It may take some time to drill through the porcelain, so don’t rush the process. As you approach completion, reduce the downward pressure to prevent any last-minute mishaps.

Learning how to drill a hole in porcelain tile can be a daunting task, but with the right tools, techniques, and patience, you can achieve professional-looking results. Remember to take your time, use plenty of water for lubrication and cooling, and always wear safety glasses to protect your eyes. Following these steps will ensure that you can successfully drill a hole in porcelain tile without damaging it.
Preparation: gather necessary tools and materials
Before you begin drilling a hole in porcelain tile, it’s important to gather all the necessary tools and materials. Having everything ready beforehand will make the process smoother and more efficient. Here are the tools and materials you’ll need:
Tools:
- Drill: Use a high-quality, variable speed drill that is suited for drilling into porcelain tile. A cordless drill is recommended for ease of use.
- Diamond drill bit: Choose a diamond-tipped drill bit specifically designed for drilling through porcelain tile. These drill bits have a carbide tip for extra hardness.
- Marker or pencil: Use a marker or pencil to mark the spot where you want to drill the hole.
- Masking tape: It is recommended to use masking tape to create a small “X” or “+” on the spot where you will drill the hole. This helps to prevent the drill bit from slipping.
- Safety goggles: Protect your eyes from flying debris by wearing safety goggles.
- Ear protection: Drilling can be noisy, so consider wearing ear protection to prevent hearing damage.
Materials:


- Porcelain tile: Make sure you have the porcelain tile that you want to drill the hole into.
- Water: Drilling into porcelain tile creates a lot of heat, so it’s important to have water on hand to cool down the drill bit. A spray bottle filled with water works well for this purpose.
- Rags: Have some rags or paper towels on hand to clean up any water or debris that may accumulate during the drilling process.
By gathering these tools and materials beforehand, you’ll be well-prepared to drill a hole in porcelain tile. This will help ensure a successful and hassle-free drilling experience.
Step 1: Mark the spot where you want to drill the hole
Before you begin drilling a hole in porcelain tile, it is important to mark the exact spot where you want the hole to be. This will help ensure accuracy and prevent any mistakes.
To mark the spot, you can follow these steps:
- Wear safety goggles and gloves to protect yourself during the process.
- Use a tape measure to measure the desired location for the hole.
- Mark the spot with a pencil or a masking tape.
- Double-check the measurements and make any necessary adjustments.
It is crucial to take your time during this step to avoid any errors. Once you have accurately marked the spot, you can proceed to the next step of drilling the hole.

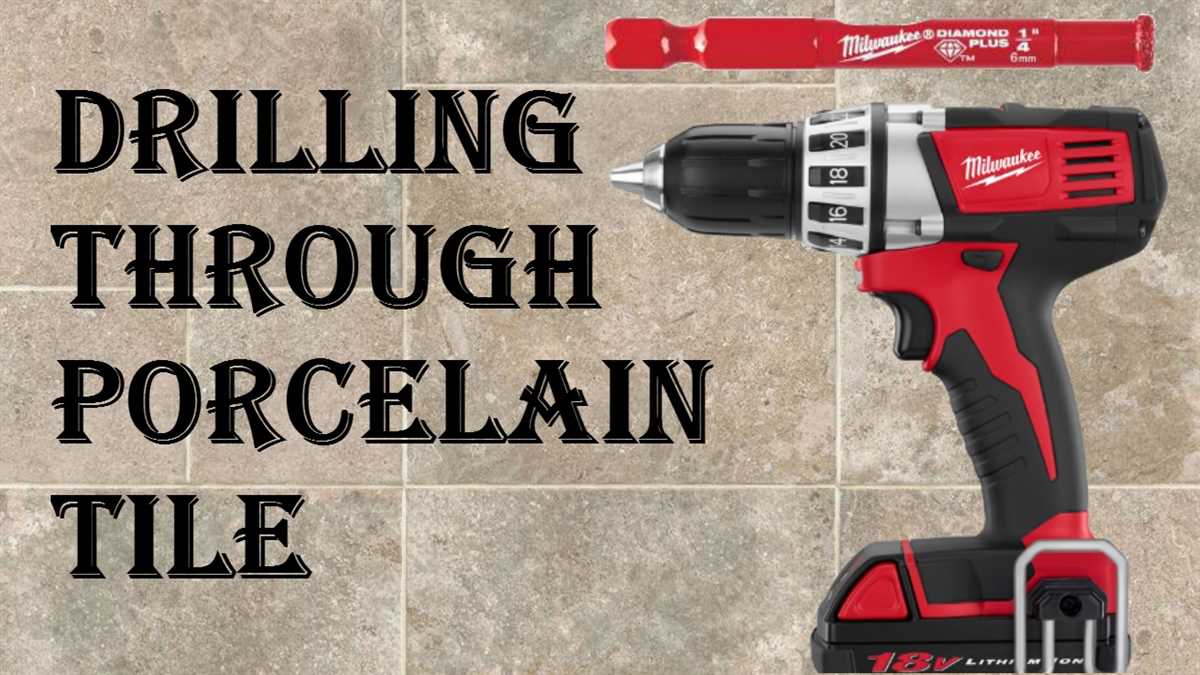
Step 2: Choose the right drill bit for porcelain tile
When drilling a hole in porcelain tile, it is crucial to use the right drill bit for the job. Porcelain is a hard material that can easily crack or chip if the wrong drill bit is used. Therefore, it is essential to choose a drill bit specifically designed for drilling through porcelain tile.
There are several types of drill bits that are suitable for drilling through porcelain tile. The most common ones include:
- Diamond-tipped drill bits: These drill bits are the best choice for drilling through porcelain tile. The diamond tip is extremely hard and can easily cut through the hard surface of porcelain. These drill bits are available in various sizes to accommodate different hole sizes.
- Carbide-tipped drill bits: Carbide-tipped drill bits are another option for drilling through porcelain tile. While not as efficient as diamond-tipped drill bits, they can still get the job done. These drill bits are a more affordable option compared to diamond-tipped ones.
It is important to note that regular drill bits or masonry bits are not suitable for drilling through porcelain tile. Using the wrong drill bit can result in damage to the tile or the drill bit itself.
Before purchasing a drill bit, make sure to check the packaging to ensure that it is specifically designed for drilling through porcelain tile. Additionally, consider the size of the hole you need to drill and choose a drill bit that matches that size.
Once you have chosen the right drill bit, proceed to the next step to learn how to prepare the tile for drilling.

Step 3: Secure the porcelain tile for drilling

Before you start drilling through the porcelain tile, it’s important to secure it properly to prevent it from moving or cracking during the process. Follow these steps to ensure the tile stays in place:
- Place a piece of masking tape over the area where you plan to drill the hole. This will help to reduce the chances of the drill bit slipping or scratching the tile surface.
- Use a pencil or marker to mark the exact spot where you want to drill the hole on the masking tape. Double-check the measurements to ensure accuracy.
- Prepare the work area by placing a piece of scrap wood or a rubber mat underneath the tile. This will provide stability and prevent any unwanted movement while drilling.
- If possible, secure the tile to the work surface using clamps or a vice. This will further ensure that the tile remains stable throughout the drilling process. Make sure to place protective padding between the clamps and the tile to avoid damaging the surface.
By taking these precautions and securing the porcelain tile before drilling, you’ll greatly reduce the risk of cracking or breaking the tile and increase the chances of a successful outcome.
Step 4: Apply water to the drilling area
Drilling into porcelain tile can generate a lot of heat and friction, which can cause the tile to crack or shatter. To prevent this, it is important to keep the drilling area cool by applying water. Here’s how to do it:

- Gather your materials: Before you begin, make sure you have a spray bottle filled with water nearby.
- Spray water on the surface: Before you start drilling, spray water on the area where you will be drilling. This will help to cool down the tile and reduce the risk of cracking.
- Continue to apply water as needed: As you drill, periodically spray water on the drilling area to keep it cool. This will prevent the tile from overheating and cracking.
Remember to use caution when drilling and always wear protective eyewear. The water will also help to minimize the production of dust, so it’s important to keep the area clean and safe.
Step 5: Start drilling at a slow speed
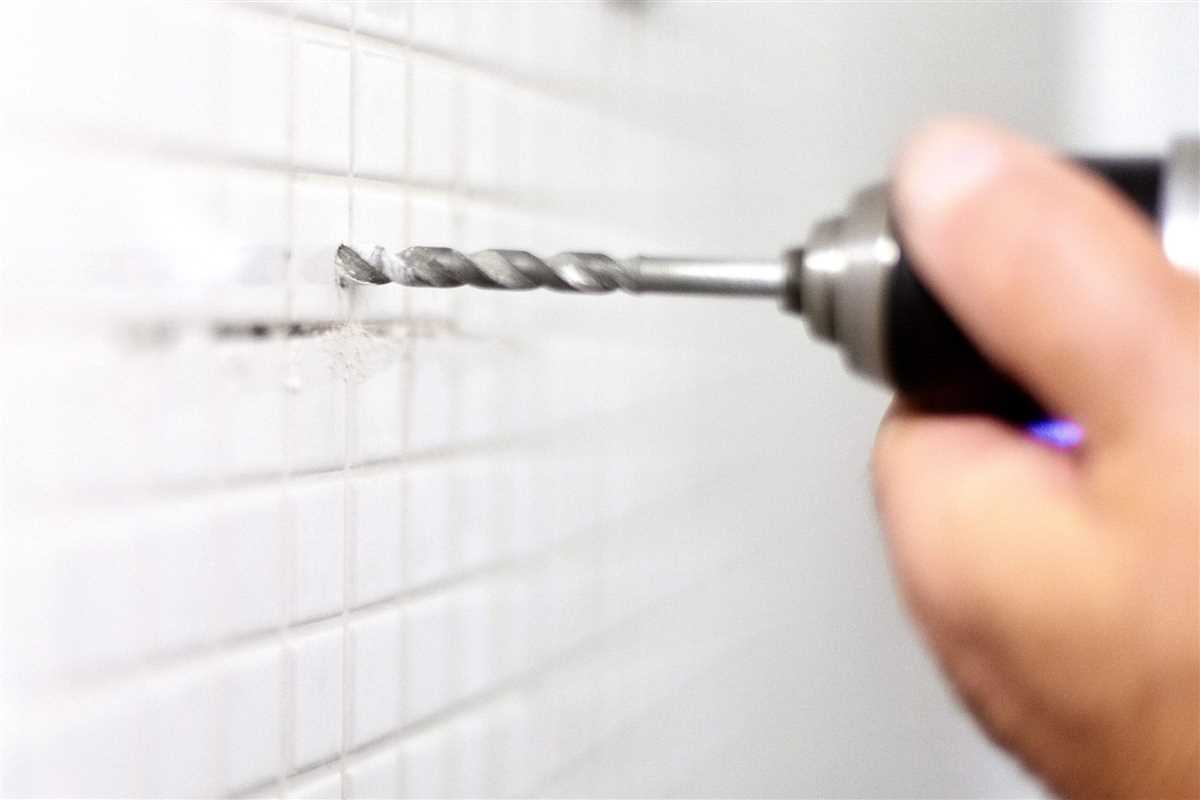
Once you have marked the spot where you want to drill the hole and have attached the masonry bit to your drill, it’s time to start drilling. It is important to begin drilling at a slow speed to prevent any damage to the porcelain tile.
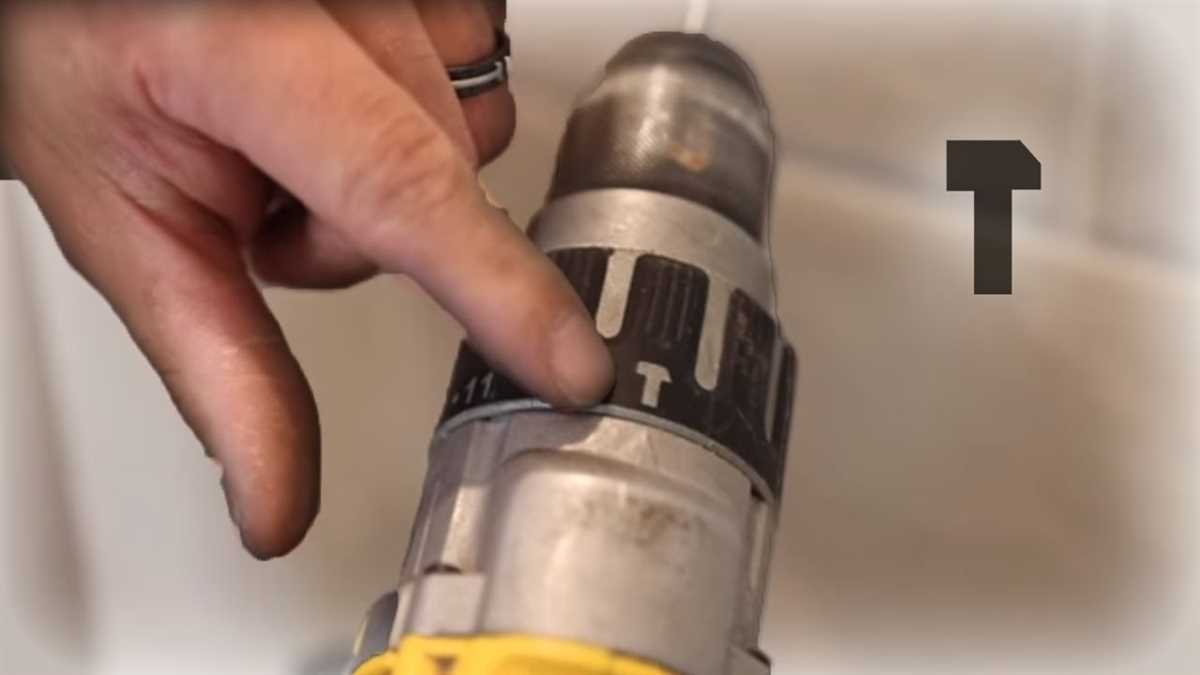
Set your drill to a slow speed setting, usually marked as the lowest speed on the drill’s dial. This will help prevent the drill from slipping and causing cracks in the tile surface. It also allows you to have more control over the drilling process.
Hold the drill perpendicular to the marked spot and apply gentle pressure. Start drilling slowly and steadily, using short bursts of drilling motion. Avoid applying too much force as it can lead to excessive heat and may cause the tile to crack.

As you drill, periodically remove the drill bit from the hole to clear away any debris. This will help to keep the drilling process smooth and prevent the bit from becoming clogged.
Continue drilling at a slow speed until you have reached the desired depth for your hole. Take your time and be patient, as drilling through porcelain tile requires a delicate touch.
Once you have completed drilling the hole, you can carefully remove the drill bit and wipe away any remaining debris from the tile surface. Now you are ready to proceed with your project, whether it be installing a towel rack, a shower curtain rod, or any other fixture that requires a hole in the porcelain tile.
Step 6: Increase the drilling speed
Once you have successfully created a small indent in the porcelain tile, it’s time to increase the drilling speed. This will help you to drill through the tile more efficiently.

Before increasing the drilling speed, make sure that your drill is set to a low speed. This will prevent any potential damage to the tile or the drill bit.
Here’s how to increase the drilling speed:
- Hold the drill with a firm grip and maintain a steady pressure.
- Activate the drill and gradually increase the speed by adjusting the speed control switch or trigger.
- Do not apply excessive force while increasing the speed, as this may cause the drill bit to break or the tile to crack.
- Continue drilling with a steady hand while maintaining the correct angle and pressure.
Remember to be patient and take your time while drilling through the porcelain tile. Rushing the process may lead to mistakes or damage to the tile.
If you notice any resistance or the drill bit starts to overheat, immediately stop drilling and reduce the speed to prevent any further damage.
By increasing the drilling speed gradually and carefully, you will be able to create a clean and precise hole in the porcelain tile.
Step 7: Remove the dust and debris
Tools and materials you will need:
- Shop vacuum cleaner
- Soft-bristle brush
- Clean cloth or towel
After drilling the hole in the porcelain tile, it’s important to clean up any dust and debris that may be left behind. This will ensure that the tile and surrounding area are free from any potential hazards or obstructions.
Here are the steps to remove the dust and debris:
- Turn off the power to any nearby electrical outlets to avoid the risk of shock.
- Using a shop vacuum cleaner, carefully vacuum the area around the drilled hole. Make sure to thoroughly remove any loose dust and debris.
- Next, use a soft-bristle brush to gently sweep away any remaining dust particles. Be careful not to scratch or damage the tile surface.
- Once you have removed all visible dust and debris, use a clean cloth or towel to wipe down the tile and surrounding area. This will help remove any remaining dust or residue.
- Dispose of the collected dust and debris in a proper waste container.
By properly cleaning up after drilling the hole, you will ensure a clean and safe surface for further tile installation or use.
FAQ:
What materials do I need to drill a hole in porcelain tile?
To drill a hole in porcelain tile, you will need a diamond-tipped drill bit, a power drill, masking tape, a spray bottle with water, and safety goggles.
Can I use a regular drill bit to drill a hole in porcelain tile?
No, you cannot use a regular drill bit to drill a hole in porcelain tile. Porcelain tile is a hard material, and it requires a diamond-tipped drill bit specifically designed for drilling through hard materials.
How do I mark the spot where I want to drill the hole in porcelain tile?
To mark the spot where you want to drill the hole in porcelain tile, you can use masking tape. Simply place a piece of masking tape on the tile and mark the center of the hole on the tape. This will help prevent the drill bit from slipping off the tile.
Do I need to use water while drilling a hole in porcelain tile?
Yes, it is important to use water while drilling a hole in porcelain tile. The water helps to keep the drill bit cool and lubricated, preventing it from overheating and potentially breaking. You can use a spray bottle to keep the area wet while drilling.
Video:

Meet Harrison Clayton, a distinguished author and home remodeling enthusiast whose expertise in the realm of renovation is second to none. With a passion for transforming houses into inviting homes, Harrison's writing at https://thehuts-eastbourne.co.uk/ brings a breath of fresh inspiration to the world of home improvement. Whether you're looking to revamp a small corner of your abode or embark on a complete home transformation, Harrison's articles provide the essential expertise and creative flair to turn your visions into reality. So, dive into the captivating world of home remodeling with Harrison Clayton and unlock the full potential of your living space with every word he writes.


