Step-by-Step Guide: How to Drill a Hole in Glass Tile

Drilling a hole in glass tile can be a daunting task, but with the right tools and techniques, it can be done safely and effectively. Whether you’re installing a new shower or adding a decorative touch to a kitchen backsplash, knowing how to drill a hole in glass tile is a valuable skill to have.
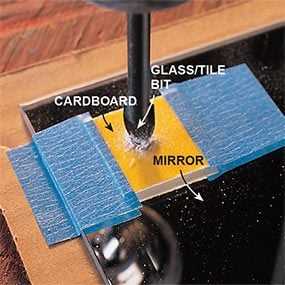
The first step in drilling a hole in glass tile is to gather the necessary tools. You’ll need a diamond drill bit, which is specifically designed for drilling through hard materials like glass. It’s important to use a diamond drill bit rather than a traditional drill bit, as it will help prevent the glass tile from cracking or chipping.
Next, you’ll want to determine the precise location of the hole and mark it with a pencil or a piece of masking tape. This will help guide your drill and ensure that you drill the hole exactly where you want it. It’s important to be precise and take your time during this step, as drilling in the wrong spot can be difficult to fix.
Now it’s time to start drilling. Begin by applying gentle, even pressure to the drill and turning it slowly. It’s important to start slow and gradually increase the speed to avoid damaging the glass tile. You’ll also want to periodically stop drilling to add water or a lubricant to the hole. This will help keep the drill bit cool and prevent it from overheating.
Choosing the Right Drill Bit
When drilling a hole in glass tile, it is important to choose the right drill bit to prevent cracking or shattering. Here are some factors to consider when selecting a drill bit for glass tile:

1. Type of drill bit
- Diamond-tipped drill bits: Diamond-tipped drill bits are the best choice for drilling through glass tile. The diamond coating on the tip allows for smooth and precise drilling without damaging the tile. These drill bits are more expensive than other types, but they offer the best performance.
- Carbide-tipped drill bits: Carbide-tipped drill bits are another option for drilling through glass tile. They are less expensive than diamond-tipped drill bits but still provide good performance. However, they may not last as long as diamond-tipped drill bits.
2. Size of the drill bit
The size of the drill bit you choose will depend on the size of the hole you need to drill. Make sure to measure the diameter of the hole you want to create before selecting a drill bit. Most glass tile drill bits come in various sizes, so choose the one that matches the diameter of the hole you require.
3. Shank size
Check the shank size of the drill bit to ensure it fits your drill. The shank is the cylindrical part of the drill bit that is inserted into the drill chuck. Make sure the shank size matches the chuck size of your drill to ensure compatibility.
4. Lubrication
Using a lubricant is recommended when drilling through glass tile to reduce friction and prevent heat buildup. Water-based lubricants or coolants are commonly used with diamond-tipped drill bits to keep them cool and prolong their lifespan.
By considering these factors and choosing the right drill bit, you can successfully drill a hole in glass tile without any cracking or damage.

Gathering the Necessary Tools
What You’ll Need
To successfully drill a hole in glass tile, you’ll need the following tools:
- A glass drill bit
- A power drill
- A spray bottle filled with water
- Painter’s tape
- A marker or pencil
- A sponge or cloth
- Safety glasses
- Gloves
Choosing the Right Glass Drill Bit
The most important tool you’ll need is a glass drill bit. When drilling a hole in glass tile, you’ll want to use a diamond-tipped or carbide drill bit specifically designed for glass or tile. These types of drill bits have a sharp point and are made with hard materials that can cut through glass without breaking it.
Using a Power Drill
You’ll also need a power drill to create the hole in the glass tile. Make sure your drill has a variable speed setting, as this will allow you to control the speed at which the drill bit spins. This is crucial when working with delicate materials like glass, as drilling too fast can cause the tile to crack or shatter.
Preparing the Work Area
Before you begin drilling, it’s important to prepare your work area. Start by cleaning the glass tile with a sponge or cloth to remove any dust or debris. Then, use painter’s tape to mark the spot where you want to drill the hole. This will help prevent the drill bit from slipping and provide a guide for drilling.
Ensuring Safety
Lastly, it’s essential to prioritize safety when drilling glass tile. Be sure to wear safety glasses to protect your eyes from any flying debris. Additionally, wearing gloves will help protect your hands from potential injury.

Preparing the Glass Tile
Before you begin drilling a hole in the glass tile, it is important to properly prepare the tile to ensure a clean and successful hole. Follow these steps to properly prepare the glass tile:
- Gather the necessary materials: Start by gathering all the materials you will need for drilling the hole in the glass tile. This includes safety goggles, a drill, a diamond drill bit, masking tape, and a spray bottle filled with water.
- Put on safety goggles: Safety goggles are essential to protect your eyes from any flying debris or shards of glass while drilling. Make sure to put on your safety goggles before you proceed.
- Mark the spot: Use a masking tape to mark the exact spot where you want to drill the hole. This will help prevent the drill bit from slipping and ensure accuracy.
- Secure the tile: Place the glass tile on a stable surface, such as a workbench or a piece of plywood. Make sure the tile is secure and won’t move or slide during the drilling process.
- Create a drilling guide: If you are drilling multiple holes or need to create a pattern, you can create a drilling guide by drawing or printing the desired pattern on a piece of paper. Tape the paper over the tile and use it as a guide for drilling.
- Wet the tile: Glass can easily crack or shatter when drilling, so it is important to keep it lubricated and cool. Spray water on the tile where you plan to drill the hole. This will help prevent heat buildup and minimize the risk of damage.
By following these steps to prepare the glass tile, you will ensure a smooth and successful drilling process. Taking your time to properly prepare the tile will help prevent any mistakes or accidents during the drilling.
Marking the Hole Location
Before you start drilling a hole in the glass tile, it’s important to mark the exact location where you want the hole to be. This will ensure accuracy and precision in the drilling process.
Here are the steps to mark the hole location:
- Clean the glass tile thoroughly to remove any dirt or debris that may interfere with the marking process.
- Place a strip of masking tape over the area where you want to drill the hole. This will help prevent the glass from cracking or chipping during the drilling process.
- Use a measuring tape or ruler to measure and mark the exact location for the hole on the masking tape. Double-check your measurements to ensure accuracy.
- Use a permanent marker or a fine-tipped pen to make a small dot at the center of your marked location. This dot will serve as a guide for the drill bit.
By following these steps, you will have a precise marking for the hole location on the glass tile, making it easier and safer to drill the hole without any damage.

Securing the Glass Tile
After you have marked the spot where you want to drill the hole, it’s important to secure the glass tile properly before you start drilling. This will help prevent the tile from cracking or breaking during the drilling process.
Materials:
- Masking tape
- Glass suction cup
Instructions:
- Cover the area where you will be drilling with a piece of masking tape. This will help protect the surface of the glass tile and provide some cushioning.
- Place a glass suction cup on the tile, as close to the drilling area as possible. This will help stabilize the tile and keep it from moving or sliding during drilling.
- Press down firmly on the suction cup to create a strong seal between the cup and the tile. Make sure it is securely in place.
- If the glass tile is too small or doesn’t have a suitable surface for a suction cup, you can also try using a clamp or a vise to hold the tile in place.
By securing the glass tile before drilling, you can ensure that it remains stable and reduce the likelihood of it cracking or breaking. This will also help you drill more accurately and safely.
Drilling the Hole
The key to successfully drilling a hole in glass tile is using the right tools and techniques. Here are the steps to follow:
Step 1: Gather the necessary tools
Before you begin, make sure you have the following tools:

- Diamond drill bit specifically designed for glass
- Power drill
- Masking tape
- Spray bottle filled with water
- Safety goggles
- Work gloves
Step 2: Prepare the glass tile
Before drilling, mark the spot where you want the hole with masking tape. The tape will help prevent the drill bit from slipping and protect the surface of the tile.
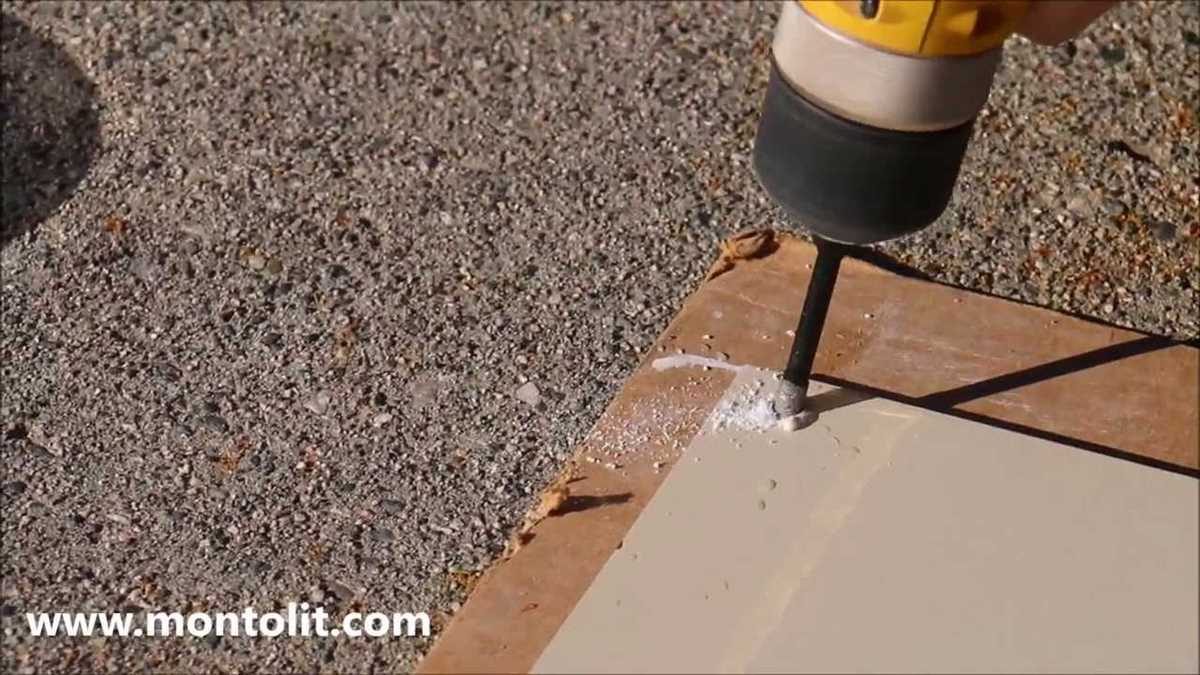
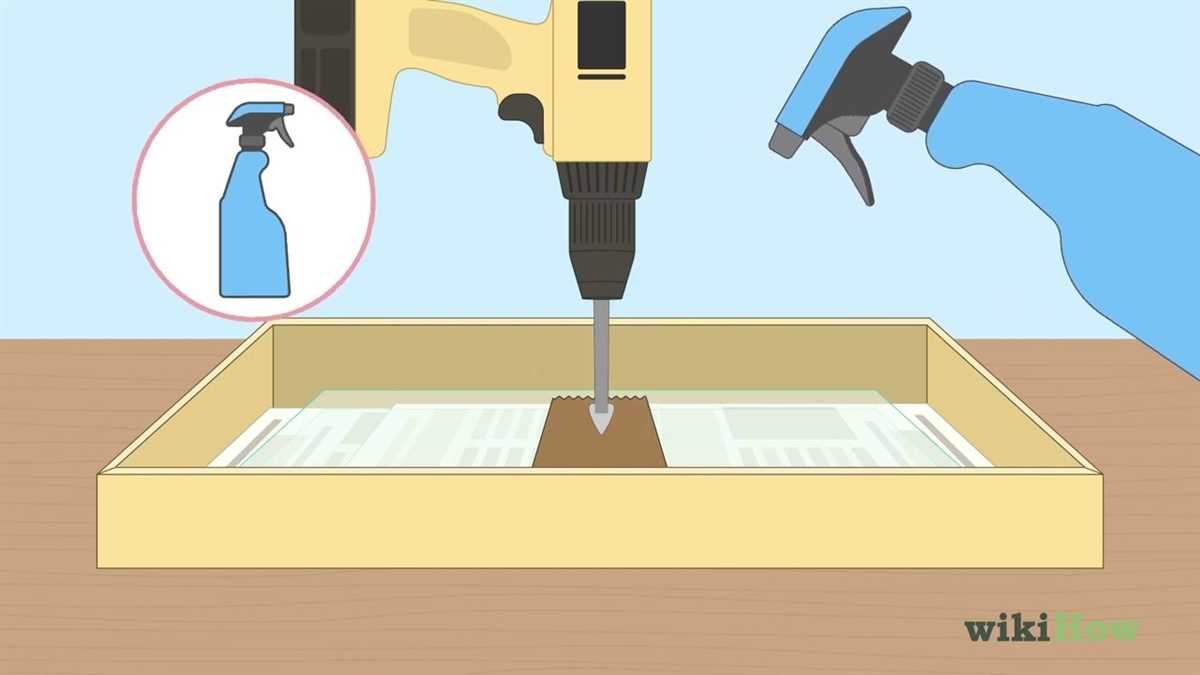
Step 3: Apply water as lubricant
Start by spraying water onto the glass tile where you’ll be drilling. This will help keep the temperature down and prevent the glass from cracking or shattering. It also acts as a lubricant to make drilling easier.
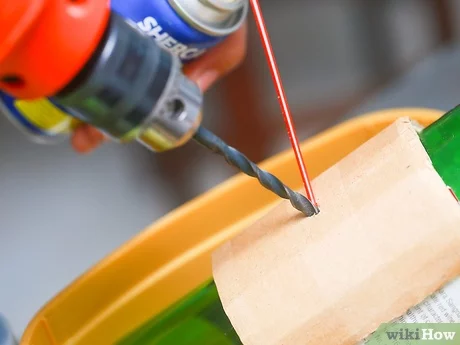
Step 4: Position the drill
Hold the drill perpendicular to the glass tile. Make sure it’s stable and secure before you start drilling.
Step 5: Begin drilling
Apply gentle but firm pressure and begin drilling at a slow speed. Let the drill do the work and avoid forcing it through the tile. Keep the area wet with water to prevent overheating.
Step 6: Keep the drill bit cool

If you notice the drill bit getting too hot, stop drilling and spray more water onto it. This will help keep it cool and prevent damage to the glass tile.
Step 7: Drill steadily
Continue drilling until you’ve achieved the desired depth. Be patient and take your time to avoid cracks or chips in the tile.
Step 8: Clean up
Once you’ve drilled the hole, remove the masking tape and clean up any debris or water from the surface of the tile.
Remember to always wear protective eyewear and gloves when drilling glass to prevent injury.
Using Water as a Lubricant
When drilling a hole in glass tile, it is important to use water as a lubricant. This helps to keep the drill bit cool and prevents the glass tile from cracking or shattering. Here is a step-by-step guide on how to use water as a lubricant when drilling into glass tile:

- Gather your materials: Before you begin, make sure you have all the necessary materials, including safety goggles, a drill with a diamond drill bit specifically designed for glass, a spray bottle filled with water, and masking tape.
- Prepare the glass tile: Clean the surface of the glass tile where you plan to drill the hole. If necessary, use a marker or tape to mark the exact spot where the hole will be drilled. This will help you maintain accuracy throughout the drilling process.
- Apply masking tape: Place a piece of masking tape over the area where you plan to drill the hole. This will help to reduce vibrations and prevent the drill bit from slipping on the smooth surface of the glass tile.
- Start drilling: Put on your safety goggles and position the diamond drill bit on the marked spot. Start the drill at a slow speed and gradually increase the speed as you make progress. Remember to apply gentle pressure and let the drill do the work.
- Use water as a lubricant: As you begin drilling, have someone spray water onto the drilling area. Alternatively, you can set up a drip system or use the spray bottle to continually wet the area. This will help to cool down the drill bit and prevent it from overheating.
- Continue drilling: Maintain a steady pace and continue drilling until you reach the desired depth. Keep the drill perpendicular to the glass surface to ensure a clean and accurate hole.
- Remove the masking tape and clean the hole: Once you have drilled the hole, carefully remove the masking tape. Use a damp cloth to clean any debris or residue from the hole.
- Finish up: Allow the glass tile to dry and inspect the drilled hole. If necessary, use sandpaper or a diamond file to smooth any rough edges.
By using water as a lubricant, you can successfully drill a hole in glass tile without causing any damage. Remember to take your time, use proper safety measures, and follow these step-by-step instructions for a clean and accurate result.
Cleaning and Finishing
Clean the Tile
After drilling the hole in the glass tile, it is important to clean the tile to remove any debris or dust that may have accumulated during the drilling process. Use a soft cloth or sponge to gently wipe away any residue from the surface of the tile. Be careful not to scratch the glass during this process.
Inspect the Hole
Once the tile is clean, take a close look at the hole you drilled. Check for any sharp edges or rough spots that may have been left behind. If necessary, use a fine-grit sandpaper or a diamond rotary tool bit to smooth out any imperfections. This will help prevent any injuries or damage to the tile in the future.
Apply a Finish
To give the freshly drilled hole a finished look, you can choose to apply a decorative finish. There are various options available, such as glass tile trim or adhesive-backed tiles. These finishes can be adhered around the hole to create a polished and seamless appearance. Follow the manufacturer’s instructions for applying the finish and allow it to dry completely before using or installing the tile.
Clean Up
Finally, once you have finished cleaning and applying any desired finishes, it is important to clean up your work area. Remove any remaining debris or dust and properly dispose of it. Store your tools and materials in a safe location until you are ready to use them again.
FAQ:
What tools do I need to drill a hole in glass tile?
You will need a drill with a diamond bit, a container filled with water, a marker or masking tape, and safety glasses.
Can I use a regular drill bit to drill a hole in glass tile?
No, you need to use a drill bit specifically designed for drilling glass, such as a diamond bit.
Do I need to wear safety glasses when drilling a hole in glass tile?
Yes, it is important to wear safety glasses to protect your eyes from any shards or debris that may fly off while drilling.
How do I mark the spot where I want to drill the hole?
You can use a marker or masking tape to mark the spot on the glass tile where you want to drill the hole.
Do I need to fill a container with water while drilling a hole in glass tile?
Yes, you should have a container filled with water to cool down the drill bit and reduce the risk of overheating the glass.
What is the best speed to drill a hole in glass tile?
It is recommended to drill at a low speed to avoid cracking or shattering the glass tile.
What precautions should I take when drilling a hole in glass tile?
Some precautions to take are wearing safety glasses, using water for cooling, drilling at a low speed, and applying gentle and steady pressure.
Video:


Harrison Clayton
Meet Harrison Clayton, a distinguished author and home remodeling enthusiast whose expertise in the realm of renovation is second to none. With a passion for transforming houses into inviting homes, Harrison's writing at https://thehuts-eastbourne.co.uk/ brings a breath of fresh inspiration to the world of home improvement. Whether you're looking to revamp a small corner of your abode or embark on a complete home transformation, Harrison's articles provide the essential expertise and creative flair to turn your visions into reality. So, dive into the captivating world of home remodeling with Harrison Clayton and unlock the full potential of your living space with every word he writes.