Step-by-Step Guide: How to Drill a Hole in a Mirror

Mirrors can add a touch of elegance and functionality to any room, but sometimes, you may find yourself needing to drill a hole in a mirror for various reasons. Whether you want to hang a mirror on the wall, install a mirror in a bathroom vanity, or create a unique piece of art, drilling a hole in a mirror requires precision and care. In this step-by-step guide, we will walk you through the process of drilling a hole in a mirror, ensuring that you achieve the desired result without damaging the mirror.
Before you begin, it is important to gather the necessary tools and materials. You will need safety goggles to protect your eyes, a glass drill bit specifically designed for drilling through mirrors or glass, masking tape, a spray bottle filled with water, a power drill, and a piece of scrap wood or a soft surface to support the mirror during the drilling process.
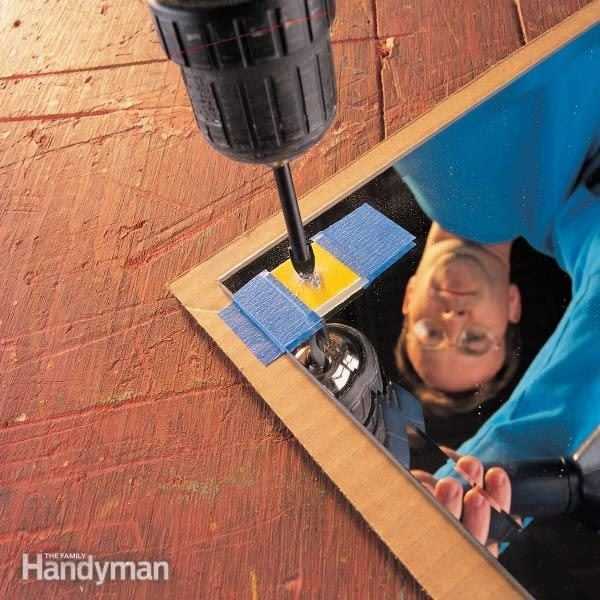
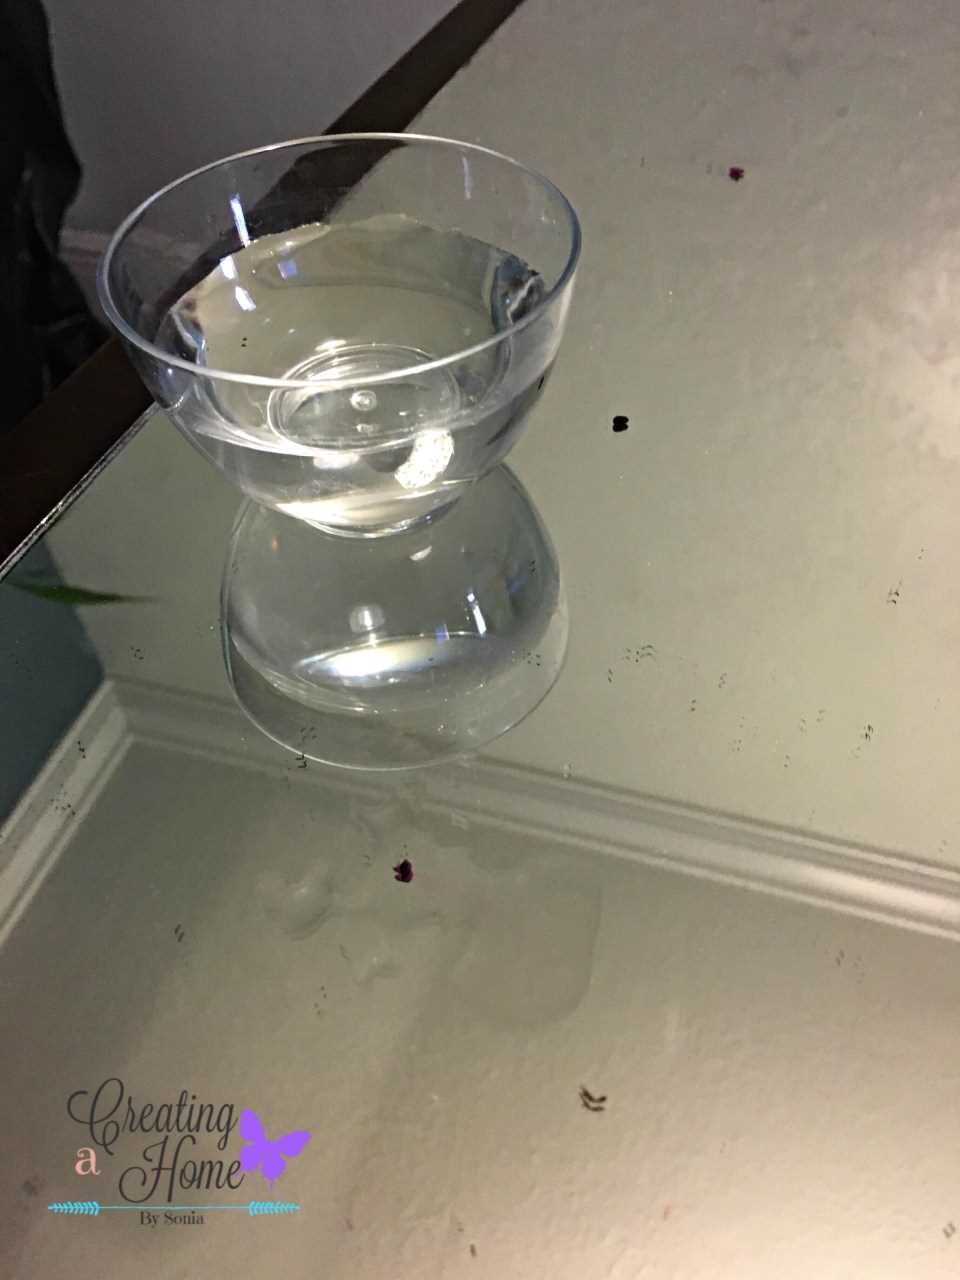
Once you have gathered your materials, begin by marking the spot on the mirror where you want to drill the hole. Place a piece of masking tape over the area to prevent the drill bit from slipping and to provide additional stability. Then, using a clean spray bottle filled with water, lightly mist the area to keep it cool and prevent overheating during the drilling process. It is important to ensure that the mirror remains cool to prevent cracking or shattering.
Next, secure the mirror on a soft surface or a piece of scrap wood to provide stability and minimize the risk of the mirror cracking or shattering. Hold the power drill perpendicular to the mirror and position the drill bit on the marked spot. Apply steady pressure and begin drilling slowly. Make sure to maintain a slow and steady pace, stopping periodically to add water to the area. Patience is key, as drilling too quickly or with excessive force can cause damage to the mirror.
As you approach the completion of the hole, decrease the pressure on the drill to avoid chipping or cracking the mirror. Once the hole is complete, remove the masking tape and wipe away any excess water or debris. Your hole is now ready for use, and you can proceed with the installation or any other desired purpose.

Drilling a hole in a mirror may seem like a daunting task, but by following this step-by-step guide and taking the necessary precautions, you can successfully achieve your desired result. Remember to always prioritize safety and take your time, ensuring that the mirror remains cool and intact throughout the drilling process. With patience and careful execution, you can add a hole to your mirror without fear of damage or breakage.
Gather the Materials
- Mirror
- Gloves
- Protective eyewear
- Masking tape
- Sharpie or marker
- Water-cooled glass drilling bit
- Drill with variable speed control
- Lubricating oil or water
- Ruler or tape measure
- Drop cloth or towel
Before you start drilling a hole in a mirror, it’s important to gather all the necessary materials. This will ensure that you have everything you need and can complete the task without any interruptions. Here is a list of the materials you will need:
- Mirror: Choose a mirror that you want to drill a hole in. Ensure that it is clean and free from any cracks or damage.
- Gloves: Wear gloves to protect your hands from any potential injuries while drilling.
- Protective eyewear: Safety glasses or goggles will protect your eyes from any glass shards or debris that may fly while drilling.
- Masking tape: Use masking tape to create a small target area on the mirror. This will help to prevent the drill bit from slipping and scratching the surface.
- Sharpie or marker: Use a marker to mark the exact spot where you want to drill the hole.
- Water-cooled glass drilling bit: Choose a drill bit specifically designed for drilling holes in glass or mirrors. This type of bit has a diamond or carbide tip and is cooled by water during drilling to prevent overheating.
- Drill with variable speed control: Use a drill that has adjustable speed settings. This will allow you to drill at a slower speed, which is ideal for drilling through glass or mirrors.
- Lubricating oil or water: Use either lubricating oil or water to cool the drill bit while drilling. Apply a small amount of oil or water to the target area before you start drilling.
- Ruler or tape measure: Use a ruler or tape measure to measure and mark the exact distance for the hole from the edge of the mirror.
- Drop cloth or towel: Place a drop cloth or towel beneath the mirror to catch any glass shards or debris that may fall during drilling.
Prepare the Work Area
Clean the Surface of the Mirror
Before you begin drilling, make sure that the surface of the mirror is clean and free from any dirt or debris. Use a glass cleaner and a soft cloth to wipe away any smudges or fingerprints. This will ensure that the drill bit does not get clogged or damaged during the drilling process.

Protect the Surrounding Area
Drilling a hole in a mirror can create small fragments and shards of glass, which can be dangerous if they get into your eyes or skin. Therefore, it is important to protect the surrounding area from any potential harm. Place a drop cloth or a towel underneath the mirror to catch any debris that may fall during the drilling process.
You may also want to cover any nearby furniture or objects with a plastic sheet or towel to protect them from any shattered glass. This will minimize the risk of damage or injury.
Gather the Necessary Tools and Materials
Before you start drilling, gather all the necessary tools and materials that you will need. This includes:

- A drill with a diamond or carbide-tipped drill bit
- A piece of masking tape
- A marker or pencil
- A spray bottle filled with water
- Safety goggles
- Work gloves
- A ruler or measuring tape
Ensure Proper Lighting
Good lighting is essential when drilling a hole in a mirror, as it will help you see the surface clearly and avoid any mistakes. Make sure that the work area is well-lit and that there are no shadows or obstructions that could hinder your vision.
If necessary, you can use additional task lighting or a flashlight to illuminate the area precisely where you plan to drill.
Mark the Hole Location
Before you start drilling the hole in the mirror, it is important to mark the exact location where you want to drill. This will ensure that the hole is placed correctly and prevent any potential damage to the mirror.
Materials Needed:
- Measuring tape or ruler
- Pencil or marker
- Masking tape
Instructions:
- Measure and mark the desired location for the hole on the mirror using the measuring tape or ruler.
- Using a pencil or marker, make a small dot at the center of the marked location. This will serve as the starting point for the drill bit.
- Place a strip of masking tape over the marked location. This will help to prevent the drill bit from sliding on the surface of the mirror and provide additional stability.
- Ensure that the tape is firmly pressed down and smooth, without any wrinkles or air bubbles.
By marking the hole location accurately and using masking tape, you can create a guide for drilling the hole in the mirror. This will help to ensure a precise and clean hole without causing any damage to the mirror surface.

Secure the Mirror
Before you start drilling a hole in the mirror, it is important to secure it properly to prevent any accidents or damage. Here are the steps to secure the mirror:
- Clean the area where you will be working on the mirror to remove any dust or debris. This will ensure that the mirror adheres properly.
- Place the mirror on a flat and sturdy surface, such as a workbench or table.
- Use masking tape to mark the area where you want to drill the hole. This will help prevent the drill bit from slipping and also reduce the risk of cracking or splintering the mirror.
- If you are drilling through a tile or glass surface behind the mirror, place a sacrificial piece of wood or cardboard behind the mirror to provide support and protect the surface from damage.
- Use clamps or weights to secure the mirror in place, especially if it is a large and heavy mirror. This will prevent it from moving or slipping during the drilling process.
By securing the mirror properly, you can ensure a safe and successful drilling process without any damage to the mirror or surrounding surfaces.
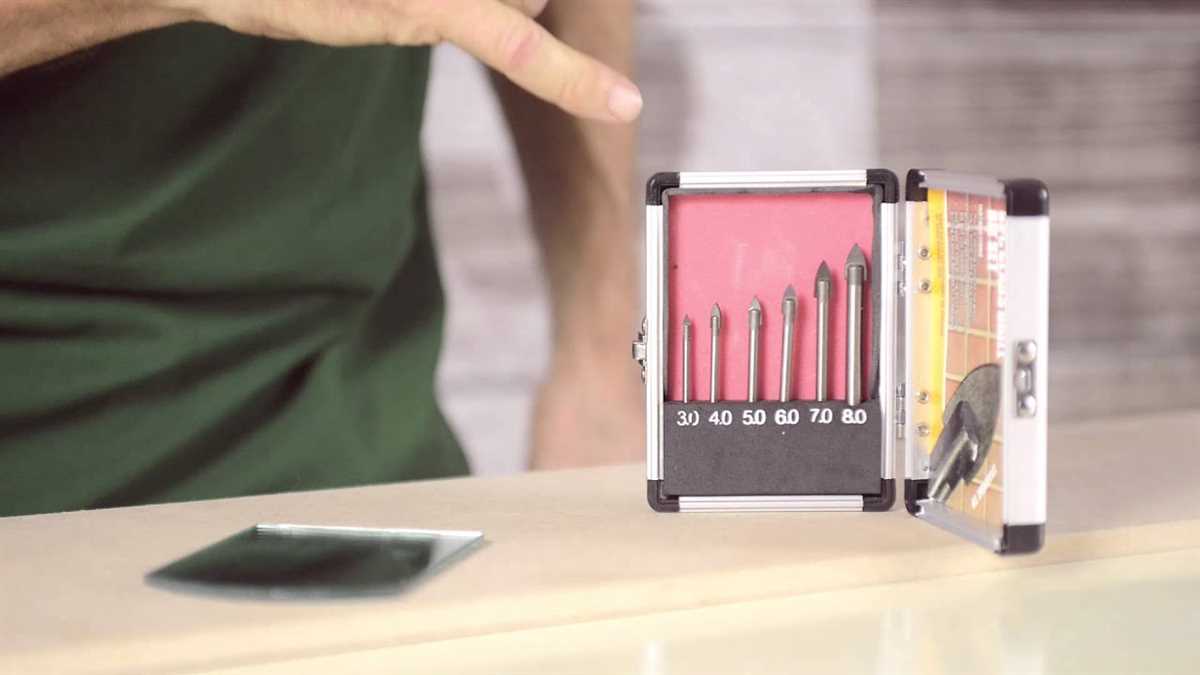
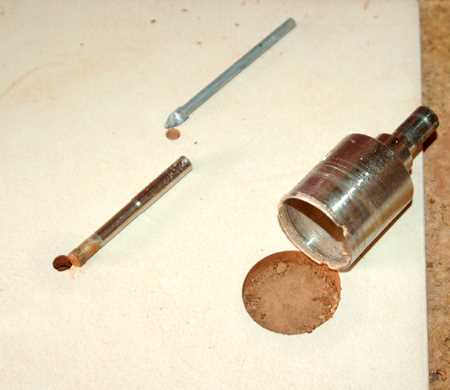
Choose the Right Drill Bit
When drilling a hole in a mirror, it’s important to choose the right drill bit to prevent the mirror from cracking or shattering. The ideal drill bit for this task is a diamond-tipped or carbide drill bit. These drill bits are specifically designed to cut through hard materials like glass, ceramic, and tile.
Diamond-tipped drill bits are known for their durability and precision. They feature a diamond coating that allows them to easily penetrate through tough materials without causing any damage. Diamond-tipped drill bits are an excellent choice for drilling holes in mirrors.

Carbide drill bits are another good option. Made from a combination of tungsten and carbon, carbide drill bits are extremely hard and can easily handle the pressure of drilling into glass or tile. They are a cost-effective alternative to diamond-tipped bits and provide excellent results.
When selecting a drill bit, make sure it is the right size for the hole you want to drill. Measure the diameter of the screw or anchor you will be using and choose a drill bit that matches that size. Using a drill bit that is too small or too large may result in a hole that is not the right size for your needs.
Additionally, it’s important to use a drill bit with a pointed tip rather than a flat one. A pointed tip will help to guide the drill bit through the glass more effectively and reduce the risk of cracks or shattering. Avoid using a flat-tipped drill bit as it may cause the glass to chip or break.
Before drilling, it’s always a good idea to practice on a scrap piece of glass or tile to ensure you have the right technique and that the drill bit is working properly. Once you’re confident in your drilling skills, you can proceed with drilling the hole in the mirror.
Start Drilling
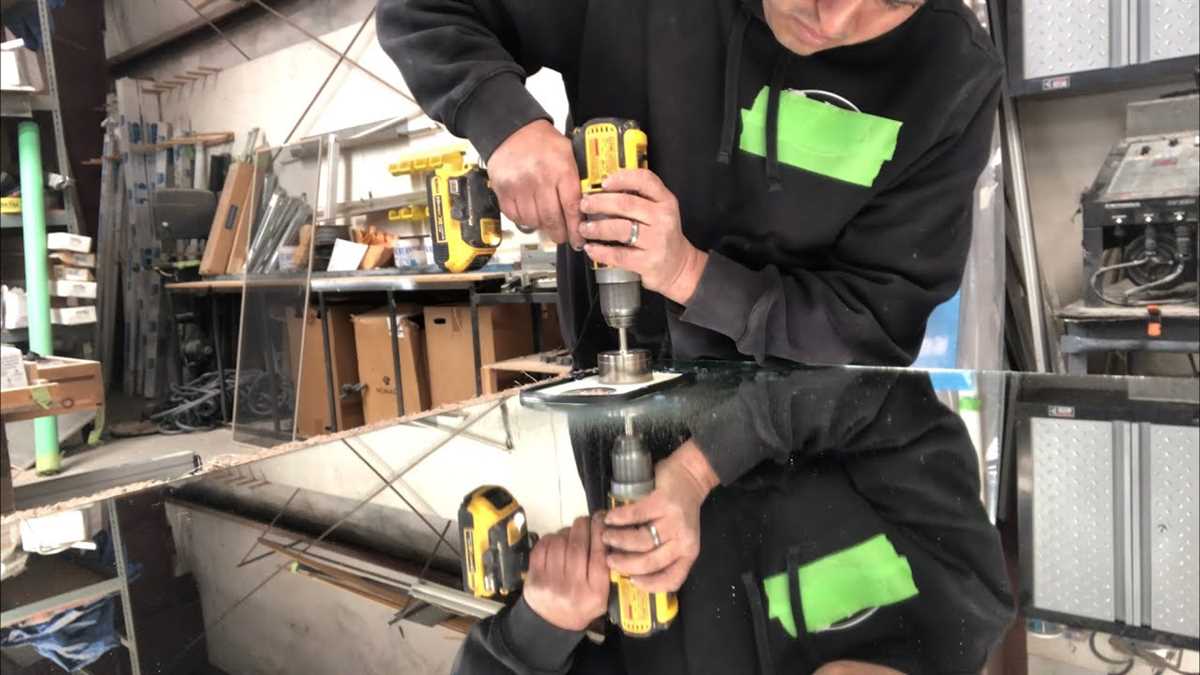

Once you have prepared the mirror and gathered all the necessary tools and safety equipment, it’s time to start drilling. Follow these steps:
- Mark the spot: Use a marker or a piece of tape to clearly mark the spot where you want to drill the hole. Double-check the location to ensure it’s in the right place.
- Secure the mirror: Place the mirror on a stable surface like a workbench or a table. Make sure it’s well supported and won’t move while drilling. You can use clamps or masking tape to hold it in place.
- Choose the right drill bit: Select a diamond or carbide-tipped drill bit that is specifically designed for drilling into glass or mirrors. These types of drill bits are more durable and can withstand the hardness of the material.
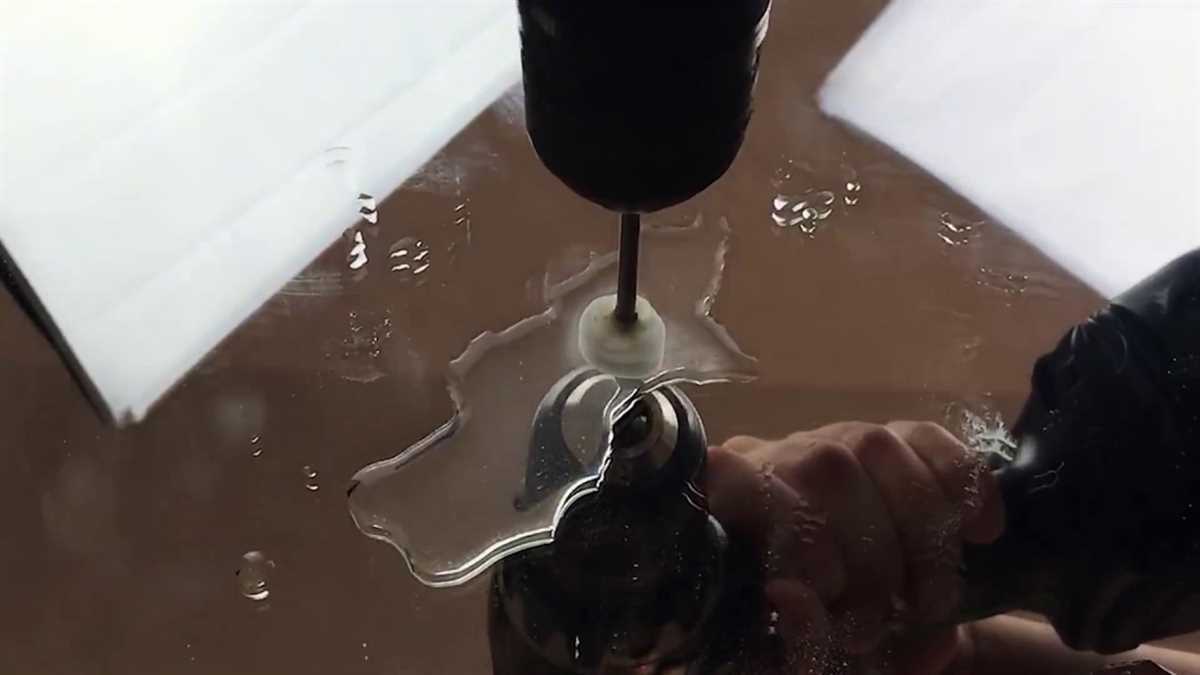
- Add lubrication: Apply a small amount of lubricant, such as water or glass oil, to the drill bit and the area you intend to drill. This will help reduce friction and prevent the mirror from cracking or shattering.
- Start drilling: Hold the drill perpendicular to the mirror and gently begin drilling at a slow speed. Apply a steady and even pressure, letting the drill bit do the work. Avoid excessive force or high speeds, as they can increase the risk of damage to the mirror.
- Take breaks: Periodically pause and remove the drill bit to cool it down and prevent overheating. This will also give you an opportunity to clear away any debris that may have accumulated.
- Continue drilling: Once you have made a small indent or groove in the mirror, you can gradually increase the drilling speed. Take your time and be patient, as drilling through a mirror may take longer than drilling through other materials.
- Clean the hole: Once you have drilled through the mirror, remove any remaining debris and clean the hole using a soft cloth or a brush. You can also use a small amount of glass cleaner to ensure it’s clear and free of any residue.
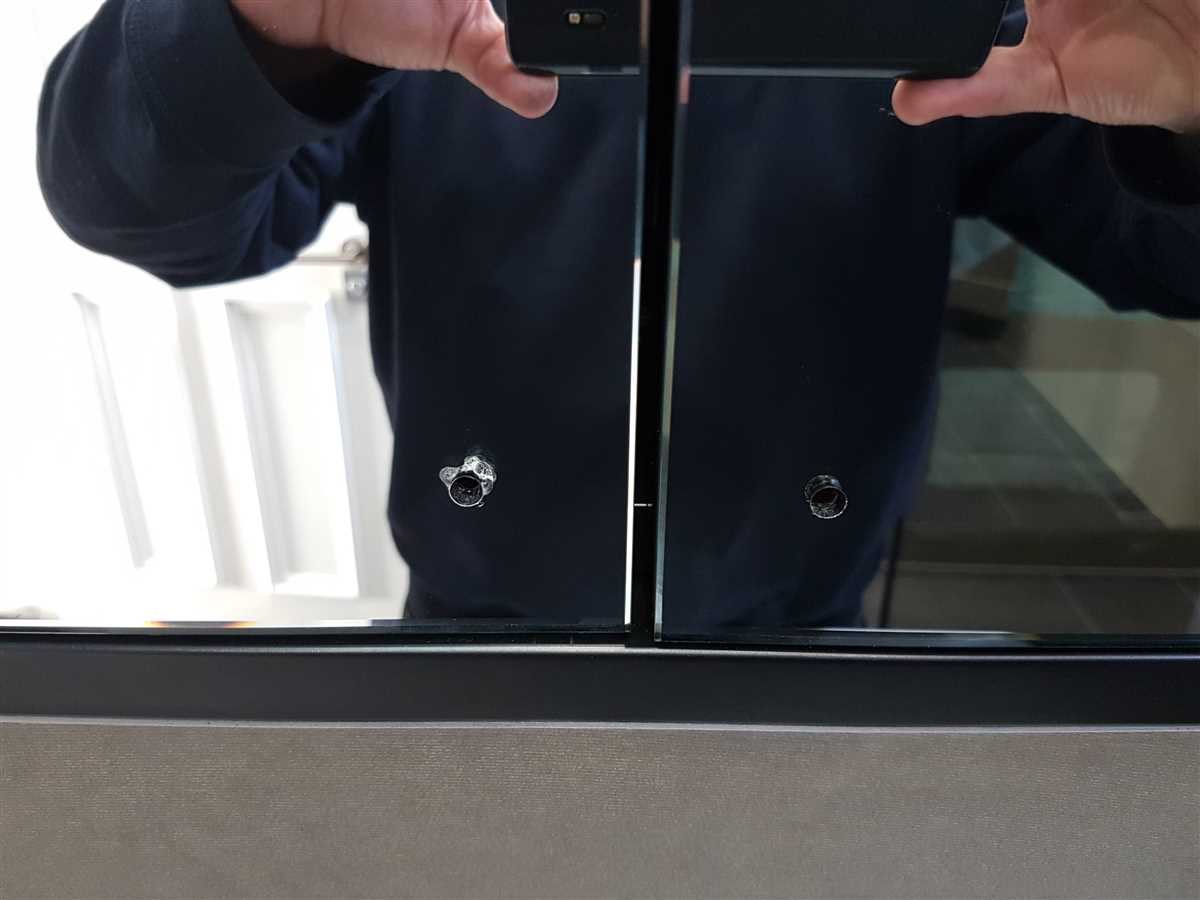
- Inspect the hole: Check the hole to make sure it’s the right size and shape. If necessary, use a file or sandpaper to smooth the edges or adjust the size.
By following these steps, you should be able to successfully drill a hole in a mirror without causing any damage. Always prioritize safety and take your time to ensure a clean and precise hole.
Use Water as Lubricant
When drilling a hole in a mirror, it is important to use water as a lubricant. This helps to cool down the drill bit and prevent it from overheating. Additionally, using water as lubricant helps to flush away debris and prevent it from scratching the mirror surface.
Here is how you can use water as a lubricant while drilling a hole in a mirror:

- Prepare the work area: Place the mirror on a flat surface and ensure it is secure. Place a towel or mat underneath to catch any water or debris.
- Mark the spot: Use a marker or a piece of tape to mark the spot where you want to drill the hole. Double-check the location to ensure accuracy.
- Create a water reservoir: Take a small container or a plastic cap and fill it with water. Place it near the drilling area to have easy access to water during the process.
- Start drilling: Put on safety goggles and gloves for protection. Use a drill bit specifically designed for glass or ceramic materials. Dip the tip of the drill bit into the water reservoir to wet it.
- Apply gentle pressure: Position the drill bit on the marked spot and start drilling at a slow speed. Apply consistent and gentle pressure, letting the drill bit do the work. Keep the drill bit wet by dipping it into the water reservoir periodically.
- Monitor the progress: Keep an eye on the drilling progress and adjust the pressure or speed as needed. Be patient and avoid rushing the process.
- Clean up the debris: As you drill, the water will help to flush away the debris. However, you may still need to wipe away any remaining debris using a cloth or paper towel. Ensure the drill bit is completely dry before proceeding.
- Finish the hole: Once the hole is drilled, remove the drill bit and clean the area with water and a cloth. Ensure there are no sharp edges or glass fragments around the hole.
By using water as lubricant and following these steps, you can safely drill a hole in a mirror without causing any damage to the surface.
Finish and Clean the Hole
Once you have successfully drilled the hole in the mirror, there are a few final steps to ensure a clean and finished result.
- Remove the tape: Carefully peel off the masking or painter’s tape from the mirror’s surface. Be cautious not to scratch or damage the surrounding area.
- Clean the area: Use a mild glass cleaner and a soft cloth to clean any debris or residue from the hole and the mirror’s surface. Make sure to remove any dust or shavings from the drilling process.
- Check for smoothness: Run your finger along the edges of the hole to ensure there are no sharp edges or burrs. If you feel any roughness, gently sand the edges with fine-grit sandpaper until they are smooth.
- Apply an edge sealant: To protect the exposed edges of the hole and prevent moisture or dirt from entering, you can apply a clear edge sealant. Follow the manufacturer’s instructions for application and drying time.
- Inspect the finished hole: Take a step back and visually inspect the finished hole for any imperfections or irregularities. If necessary, make any touch-ups or corrections to ensure a polished look.
Following these steps will help you achieve a professional and clean hole in your mirror. Remember to always exercise caution and use appropriate safety measures when drilling into any surface.
FAQ:
What tools do I need to drill a hole in a mirror?
You will need the following tools to drill a hole in a mirror: a glass drill bit, a power drill, masking tape, a spray bottle filled with water, lubricant (such as WD-40), and safety goggles.
Can I use a regular drill bit to drill a hole in a mirror?
No, you cannot use a regular drill bit to drill a hole in a mirror. You need a glass drill bit designed specifically for drilling through glass and mirrors.
What is the best way to mark the spot where I want to drill a hole in the mirror?
The best way to mark the spot where you want to drill a hole in the mirror is by using masking tape. Simply place a piece of masking tape over the desired spot and mark the center of the hole with a pen or marker.
Do I need to apply lubricant while drilling a hole in a mirror?
Yes, it is important to apply lubricant while drilling a hole in a mirror. The lubricant helps to keep the drill bit cool and reduces the chances of the glass cracking or shattering.
Should I drill the hole on the front or back side of the mirror?
You should drill the hole on the back side of the mirror. This will preserve the reflective surface of the mirror and prevent any damage or scratches from occurring on the front side.
What should I do if my mirror cracks while drilling?
If your mirror cracks while drilling, stop immediately and carefully remove the drill bit. Clean up any shards of glass and dispose of them properly. It is best to start over with a new mirror and take extra precautions to prevent cracking.
Video:

Meet Harrison Clayton, a distinguished author and home remodeling enthusiast whose expertise in the realm of renovation is second to none. With a passion for transforming houses into inviting homes, Harrison's writing at https://thehuts-eastbourne.co.uk/ brings a breath of fresh inspiration to the world of home improvement. Whether you're looking to revamp a small corner of your abode or embark on a complete home transformation, Harrison's articles provide the essential expertise and creative flair to turn your visions into reality. So, dive into the captivating world of home remodeling with Harrison Clayton and unlock the full potential of your living space with every word he writes.


