Step-by-Step Guide: How to Drill a Hole in a Golf Ball

Drilling a hole in a golf ball can be a useful skill to have, especially if you want to create a unique ball for practice or to use in specific golf games. While it may seem like a daunting task, with the right tools and technique, you can easily drill a hole in a golf ball. In this step-by-step guide, we will walk you through the process of drilling a hole in a golf ball, from gathering the necessary materials to safely completing the task.
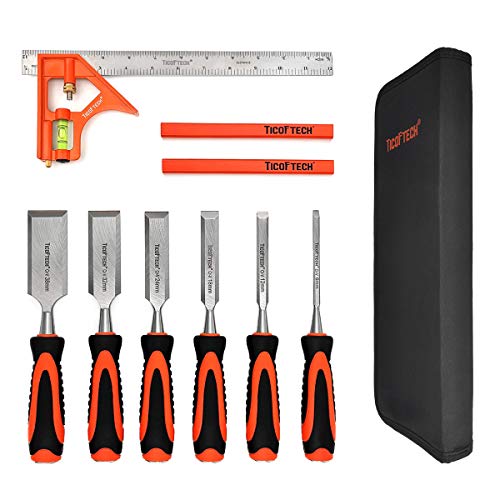
Materials You Will Need:
- A golf ball
- A power drill
- A small drill bit (3-4mm)
- A clamp or vise to secure the golf ball
- Safety goggles
Step 1: Prepare the Drill
Before you begin, ensure that you have a small drill bit (3-4mm) suitable for drilling through the cover of a golf ball. Attach the drill bit securely to the power drill, making sure it is centered and tightened. Safety goggles should also be worn at all times to protect your eyes from any debris.
Step 2: Secure the Golf Ball

Next, find a stable surface or secure the golf ball in a clamp or vise to prevent it from rolling or moving around while you drill the hole. This will help ensure accuracy and safety during the drilling process.
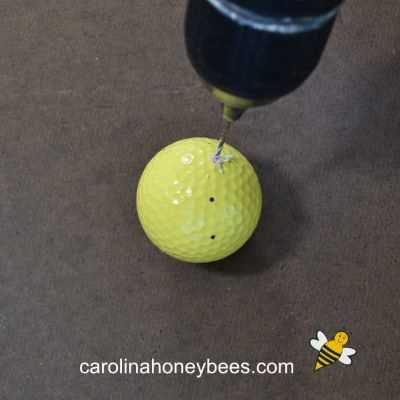
Step 3: Begin Drilling
With the golf ball secured, place the drill bit against the cover of the golf ball where you want to drill the hole. Apply gentle pressure and slowly start drilling into the ball. Take care to maintain a steady hand and avoid applying too much pressure, as this can crack the ball or cause the drill to slip.
Step 4: Complete the Hole
Continue drilling until you have reached the desired depth or have created a hole large enough for your intended purpose. It is important to work slowly and patiently, allowing the drill bit to do the majority of the work. Take breaks if needed to prevent overheating of the drill or damage to the golf ball.

Remember, safety should always be a priority when drilling a hole in a golf ball. Take your time, follow the steps carefully, and always wear protective gear. With practice and patience, you can master this skill and create your own customized golf balls.
Now that you have successfully drilled a hole in a golf ball, you can use it for practice, attach it to a keychain, or even create your own unique golf accessories. With this step-by-step guide, you have the knowledge and confidence to take on this DIY project and add a personal touch to your golfing experience.
Gather the necessary materials
Before you start drilling a hole in a golf ball, you will need to gather the necessary materials. Here is a list of items you will need:
- A golf ball
- A drill
- A drill bit (5/32 inch or 4mm)
- A vice or clamp to hold the golf ball securely
- Safety glasses
- Protective gloves
Make sure you have all these materials ready before you begin the drilling process. Having everything on hand will make the process smoother and more efficient.
Prepare the golf ball
Before drilling a hole in a golf ball, there are a few steps you need to take to prepare it.
1. Clean the golf ball
Start by thoroughly cleaning the golf ball to remove any dirt or debris. This will ensure that the drill goes smoothly and the hole is clean.

2. Mark the desired drill spot

Next, use a marker or a small piece of tape to mark the spot where you want to drill the hole. Make sure the spot is clear and easily visible.
3. Secure the golf ball
To prevent the golf ball from rolling or moving during the drilling process, it is important to secure it in place. You can use a vise or clamp to hold the golf ball securely.
4. Wear safety gloves and goggles

Drilling into a golf ball can be a potentially dangerous task. To protect yourself, always wear safety gloves and goggles to minimize the risk of injury.
5. Prepare the drilling equipment
Make sure you have the necessary drilling equipment ready. This includes a drill with a small drill bit suitable for drilling through a golf ball, as well as any other tools or accessories you may need.
6. Gather a clean workspace
Set up a clean and well-lit workspace where you can comfortably drill the hole in the golf ball. Having a clutter-free area will make the process easier and safer.
7. Take your time
Finally, take your time and proceed with caution when drilling a hole in a golf ball. Rushing the process can lead to mistakes or accidents, so be patient and careful.
Mark the drilling spot
Before you start drilling, it’s important to mark the exact spot where you want to drill the hole on the golf ball. This will ensure that the hole is placed in the desired location.

To mark the drilling spot, follow these steps:
- Choose the desired location: Decide where you want to drill the hole on the golf ball. This will usually depend on your personal preference and the type of customization you want to achieve.
- Use a marker or pencil: Take a marker or pencil and gently mark the drilling spot on the surface of the golf ball. Make sure the mark is clearly visible and will not smudge or fade during the drilling process.
- Double-check the position: Once you have marked the drilling spot, take a moment to double-check its position. Ensure that the mark is aligned with your intended location and that it is clear and easy to see.
By marking the drilling spot before you start drilling, you can ensure that the hole is placed exactly where you want it on the golf ball.
Secure the golf ball

Before you start drilling the hole in your golf ball, it’s important to securely hold it in place to ensure stability and prevent it from moving around. Here are a few methods you can use:
1. Use a vice grip
One of the most common methods is to use a vice grip to hold the golf ball securely in place. You can clamp the vice grip around the ball, applying enough pressure to hold it firmly without damaging it. Make sure the ball is positioned so that the area you want to drill is accessible.
2. Utilize a golf ball holder

If you do not have a vice grip or want a more stable option, you can use a golf ball holder. These holders are designed to hold a golf ball in place while you work on it. They typically have a rubber or plastic base with pins or spikes that hold the ball securely.
3. Create a makeshift holder
If you don’t have a vice grip or golf ball holder, you can create a makeshift holder using materials around your home. One option is to use a block of wood with a hole drilled in it that matches the size of the golf ball. Place the ball in the hole, and it should stay in place. You can also use a piece of clay or playdough to create a stable base for the ball.
4. Use a friend’s help
If you are unable to secure the golf ball on your own, you can ask a friend for assistance. They can hold the ball steady while you drill the hole.
Once you have securely fastened the golf ball using one of these methods, you can proceed to the next step of drilling the hole.
Select the appropriate drill bit
When drilling a hole in a golf ball, it is important to select the appropriate drill bit. A golf ball has a hard outer shell, so using the wrong drill bit could result in damage to the ball or injury to yourself. Here are some factors to consider when choosing the right drill bit:
Type of material
Golf balls are typically made of a hard, durable material such as Surlyn or urethane. These materials require a drill bit that is capable of drilling through tough surfaces. Carbide or cobalt drill bits are recommended for drilling through golf balls, as they are designed to handle hard materials.
Size of hole
Consider the size of the hole you want to drill in the golf ball. Drill bits come in various sizes, and you need to choose one that will accommodate the size of the shaft or object you plan to insert into the ball. It is best to measure the diameter of the shaft or object and select a drill bit that is slightly larger to ensure a snug fit.
Drill bit speed
Drilling through a golf ball requires precision and control. Using a drill bit at a high speed can cause the ball to overheat, which can weaken the material or even melt it. It is recommended to use a drill with variable speed control and set it to a lower speed when drilling through the golf ball. This will help prevent overheating and allow for better control throughout the drilling process.
Sharpness of the drill bit
A sharp drill bit is essential for drilling through a golf ball effectively. Dull drill bits can cause the ball to crack or shatter, ruining it completely. Before starting the drilling process, check the sharpness of the drill bit and replace it if necessary. A sharp drill bit will create clean, precise holes without damaging the ball.
By considering these factors and selecting the appropriate drill bit, you can ensure a successful drilling process and avoid any damage to the golf ball. Take your time, use proper technique, and enjoy the ability to customize your golf equipment!
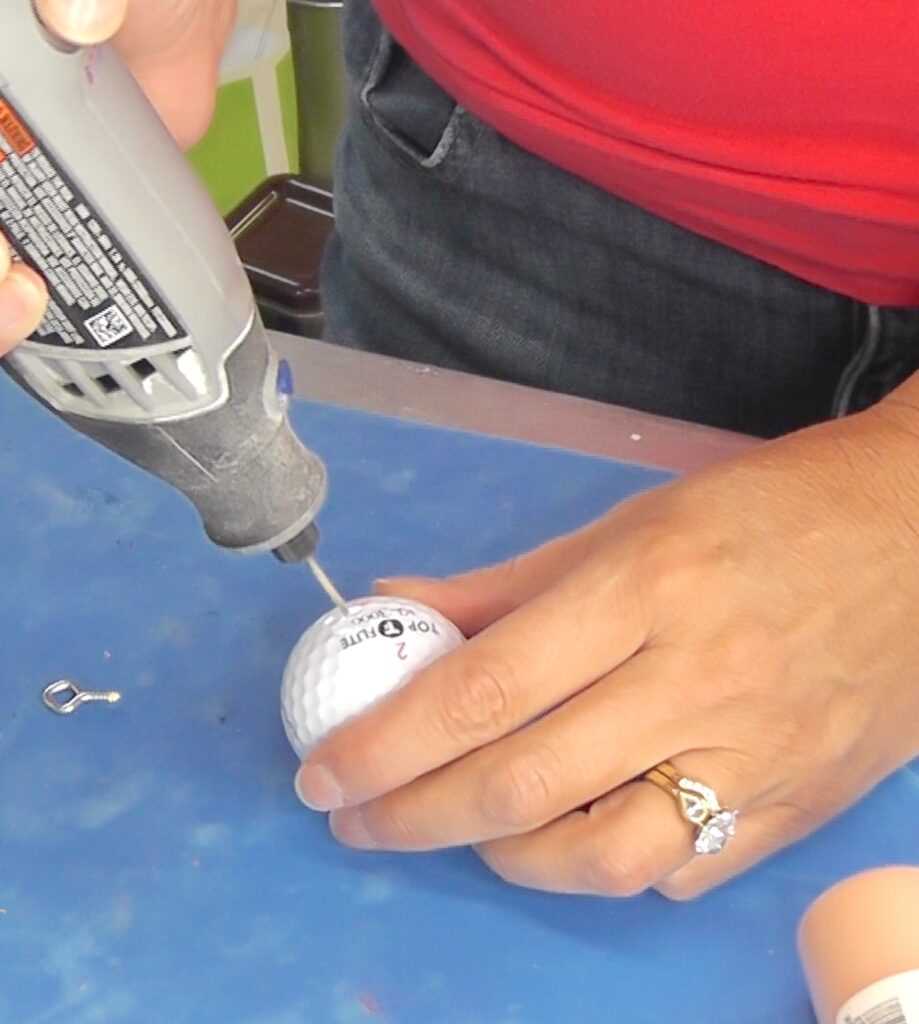
Drill the hole
Once you have prepared your golf ball by freezing it and marking the spot where you want to drill the hole, it’s time to begin the drilling process. Follow these steps:
- Secure the golf ball: Place the golf ball in a vice or clamp to hold it securely in place. This will prevent the ball from moving around while you drill.
- Choose the right drill bit: Select a drill bit that is slightly larger than the size of the hole you want to create. Make sure the drill bit is suitable for drilling into hard materials, such as golf balls.
- Position the drill: Align the drill bit with the marked spot on the golf ball. Make sure the drill is perpendicular to the surface of the ball.
- Start drilling: Begin drilling slowly, applying gentle pressure. Let the drill do the work, and avoid pushing too hard to prevent cracking or damaging the ball. Continue drilling until the desired depth and size of the hole is achieved.
- Remove the golf ball: Release the golf ball from the vice or clamp after you have completed the drilling process.
Now that you have successfully drilled a hole in your golf ball, you can use it for various purposes, such as creating a golf ball keychain or creating unique golf ball art.
Smooth the edges
After drilling a hole in the golf ball, it’s important to smooth the edges to prevent any injuries or damage. Here are the steps to smooth the edges:
- Gather the necessary materials: In order to smooth the edges of the drilled hole in the golf ball, you will need sandpaper, preferably in a fine or medium grit, and a small file. These tools will help you achieve a smooth and safe finish.
- Begin with sandpaper: Take a piece of sandpaper and fold it into a small square. This will make it easier to handle and apply pressure evenly. Hold the golf ball with the drilled hole facing upward and gently rub the sandpaper around the edges of the hole in a circular motion. Apply light pressure and be mindful of not removing too much material.
- Switch to a file: Once you have smoothed the edges with sandpaper, switch to a small file to further refine the edges. Gently file down any rough or uneven areas around the hole. Remember to work slowly and carefully to avoid accidentally damaging the golf ball.
- Inspect the edges: After using the file, carefully examine the edges of the hole to ensure they are smooth and free from any sharp or jagged areas. If you notice any areas that still need further smoothing, use the sandpaper again until you achieve the desired result.
- Clean the golf ball: Once you are satisfied with the smoothness of the edges, wipe the golf ball clean with a soft cloth to remove any dust or debris. This will ensure that the ball is ready for use.
By following these steps, you will be able to drill a hole in a golf ball and then successfully smooth the edges, creating a safe and functional golf ball for your intended purpose.
Clean and polish the golf ball
Before you begin drilling a hole in a golf ball, it’s important to clean and polish the ball to ensure the best results. Follow these steps to prepare your golf ball:
- Fill a bowl or container with warm water and a small amount of mild dish soap.
- Place the golf ball in the soapy water and let it soak for a few minutes.
- Using a soft cloth or sponge, gently scrub the golf ball to remove any dirt or debris.
- Rinse the golf ball under warm water to remove any soap residue.
- Dry the golf ball completely with a clean towel.
- Inspect the golf ball for any remaining marks or blemishes. If necessary, you can use a golf ball cleaner or a mild abrasive cleaner to remove stubborn stains.
- Once the ball is clean, you can use a golf ball polish to give it a shiny finish. Apply a small amount of polish to a clean cloth and rub it onto the surface of the golf ball in a circular motion.
- Continue polishing the golf ball until you achieve the desired shine.
By cleaning and polishing your golf ball before drilling a hole, you’ll ensure that the ball is in its best condition and will be easier to work with.
FAQ:
What tools do I need to drill a hole in a golf ball?
To drill a hole in a golf ball, you will need a power drill, a small drill bit (1/8 inch or smaller), a vise or clamp to hold the golf ball securely, and some duct tape or a rubber band to prevent the ball from rolling.
Can I drill a hole in a golf ball without a power drill?
While a power drill is the most efficient tool for drilling a hole in a golf ball, it is possible to do it without one. You can use a hand drill or a rotary tool with a small drill bit. However, it may require more time and effort compared to using a power drill.
What should I do to prevent the golf ball from cracking while drilling?
To prevent the golf ball from cracking while drilling, it’s important to apply gentle and consistent pressure. Start with a small pilot hole, then gradually increase the drill bit size to the desired diameter. You can also use a lubricant, such as water or oil, to keep the ball cool during drilling.
What’s the best way to secure the golf ball before drilling?
The best way to secure the golf ball before drilling is to use a vise or clamp. Place the ball in the vise or clamp, making sure it is held firmly in place. Alternatively, you can use duct tape or a rubber band to attach the ball to a stable surface, such as a workbench or table.
Can I use a regular drill bit to drill a hole in a golf ball?
It is possible to use a regular drill bit to drill a hole in a golf ball, but it is not recommended. Regular drill bits are designed for drilling through wood, metal, or other materials, and may cause the golf ball to crack or shatter. It’s best to use a small drill bit specifically designed for drilling into soft materials like rubber or plastic.
What is the purpose of drilling a hole in a golf ball?
Drilling a hole in a golf ball can serve various purposes. Some golfers drill holes in their golf balls to reduce air resistance and increase distance. Others use the hole to attach the ball to a keychain or create a custom design. Additionally, drilling a hole can allow for the insertion of a weighted plug to change the ball’s balance and trajectory.
Are there any safety precautions I should take while drilling a hole in a golf ball?
Yes, there are several safety precautions you should take while drilling a hole in a golf ball. First, always wear safety goggles to protect your eyes from any debris that may fly off while drilling. Second, secure the golf ball properly to prevent it from slipping or rolling. Third, be mindful of your grip on the drill and maintain control throughout the drilling process. Finally, take breaks if needed to prevent overheating of the drill or the golf ball.
Video:


Meet Harrison Clayton, a distinguished author and home remodeling enthusiast whose expertise in the realm of renovation is second to none. With a passion for transforming houses into inviting homes, Harrison's writing at https://thehuts-eastbourne.co.uk/ brings a breath of fresh inspiration to the world of home improvement. Whether you're looking to revamp a small corner of your abode or embark on a complete home transformation, Harrison's articles provide the essential expertise and creative flair to turn your visions into reality. So, dive into the captivating world of home remodeling with Harrison Clayton and unlock the full potential of your living space with every word he writes.