Step-by-Step Guide: How to Drill a Hole in a Ceramic Bowl

Drilling a hole in a ceramic bowl can be a daunting task, but with the right tools and techniques, it can be accomplished with ease. Whether you’re looking to add drainage to a planter or create a beautiful centerpiece, this step-by-step guide will walk you through the process.
Step 1: Gather the necessary tools and materials
Before you begin, make sure you have all the tools and materials you’ll need. This includes a ceramic drill bit, water, tape, safety goggles, and a power drill. The ceramic drill bit is specially designed to penetrate the hard surface of the ceramic while minimizing the risk of cracks or breakage.
Step 2: Mark the spot
Next, use tape to mark the spot where you want the hole to be drilled. Measure and mark the center of the bowl, and place a piece of tape over the spot. This will help prevent the drill bit from slipping and ensure that the hole is drilled in the right place.

Step 3: Wet the surface
Once you have the spot marked, wet the surface of the ceramic with water. This helps to keep the drill bit cool and reduces the risk of cracking or chipping. Apply a small amount of water to the area where the hole will be drilled and keep it moist throughout the drilling process.
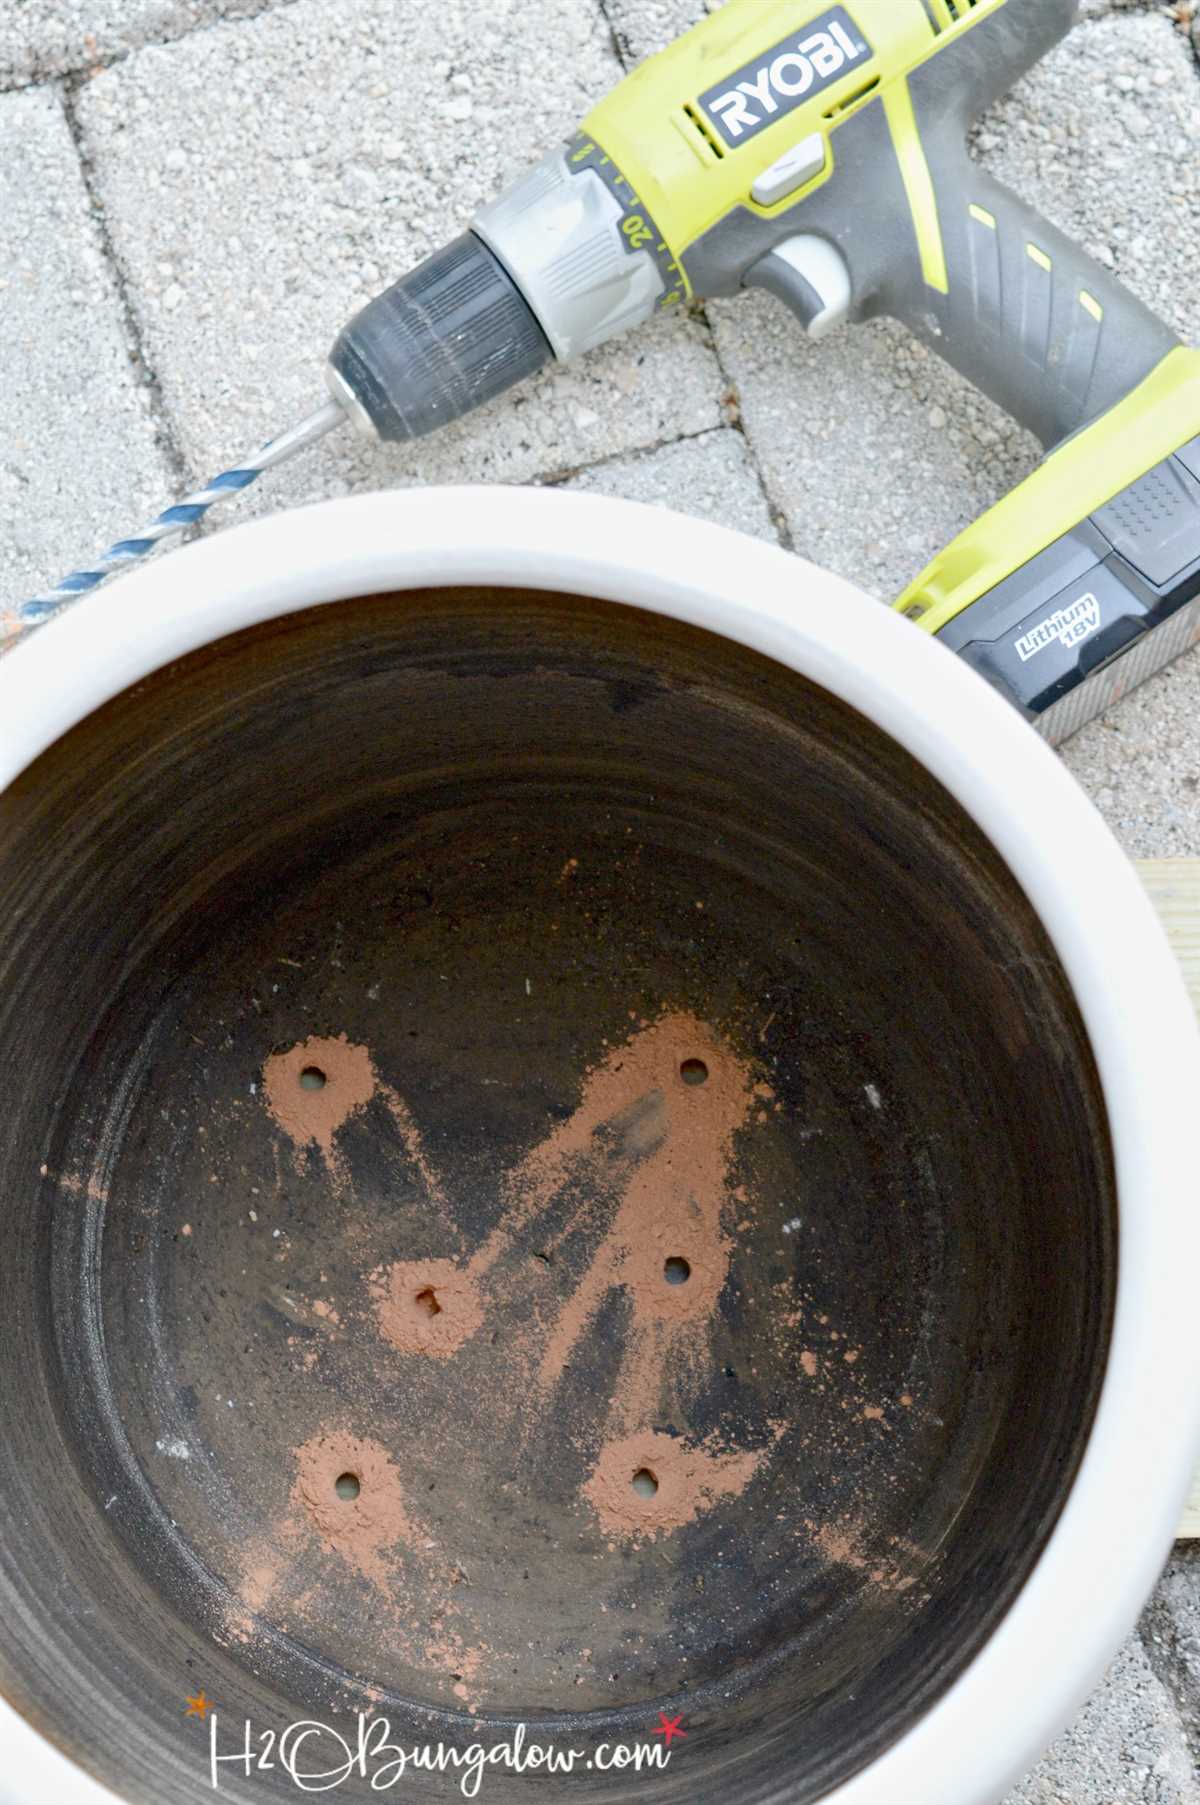
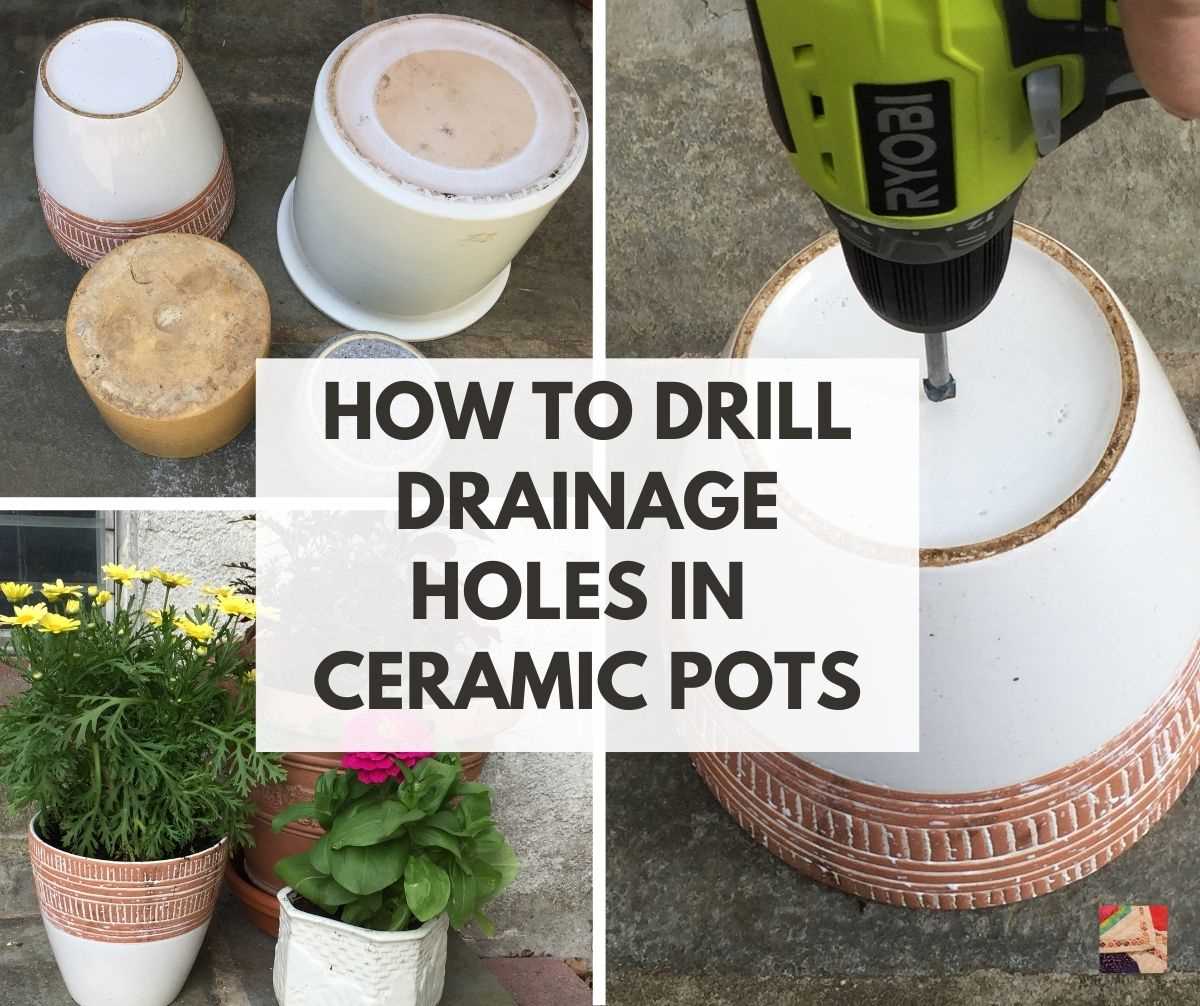
Step 4: Start drilling
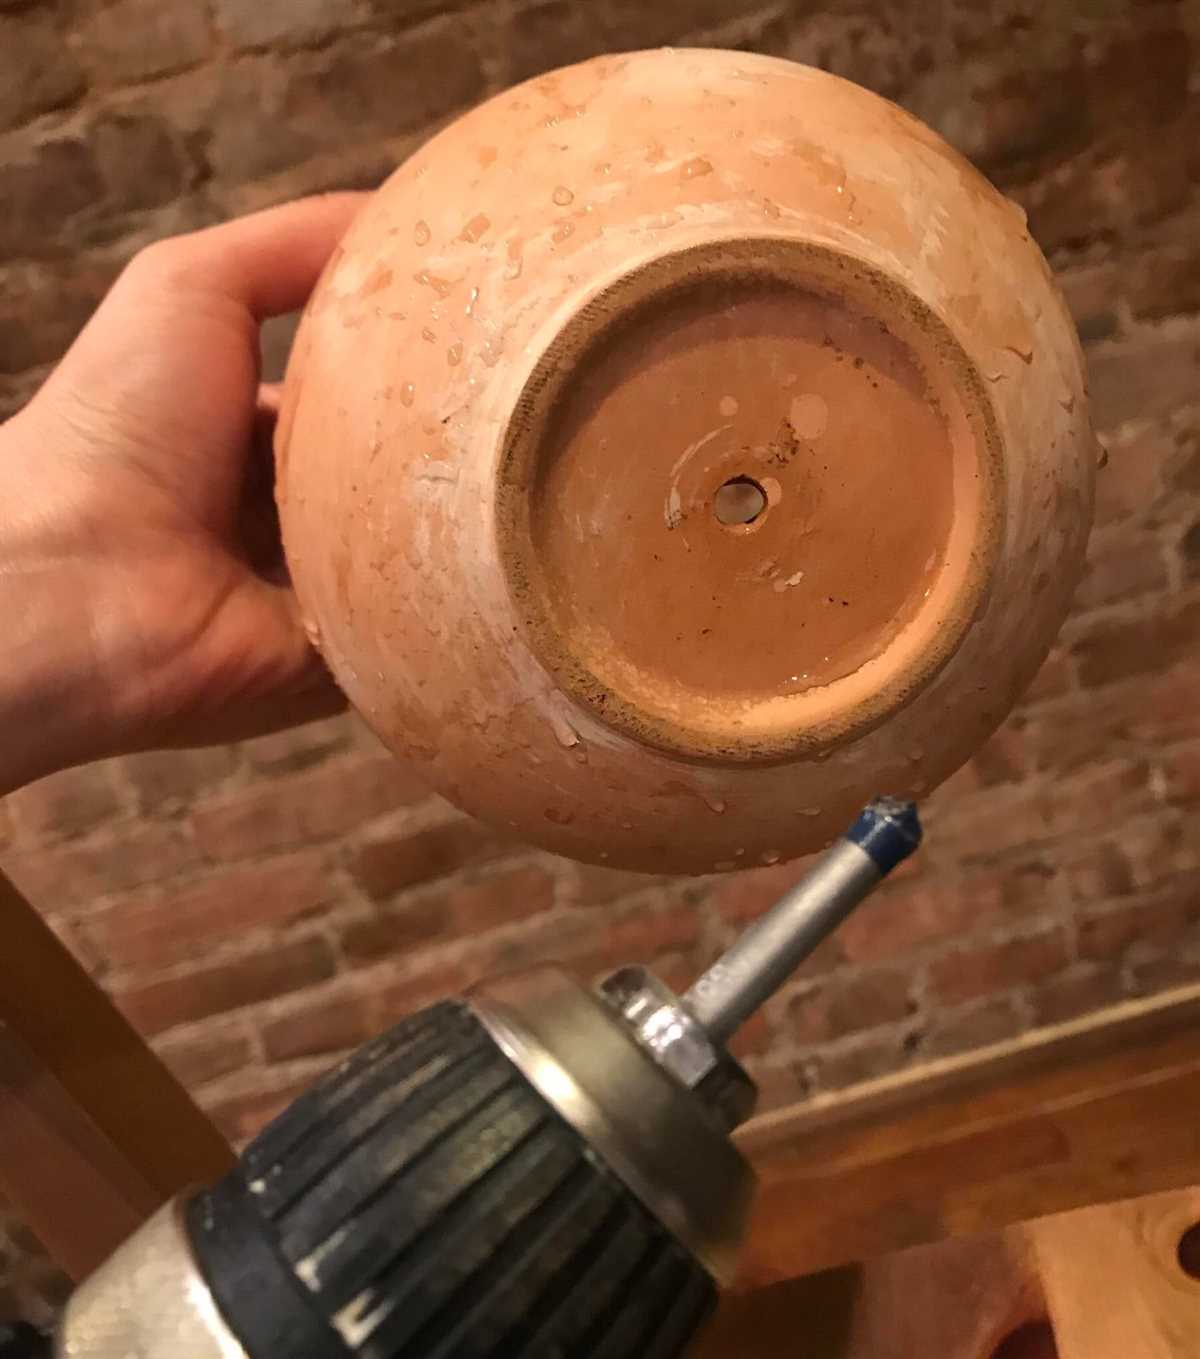
Put on your safety goggles and start drilling. Hold the drill perpendicular to the surface of the ceramic and start drilling at a slow speed. Apply gentle pressure and let the drill do the work. Continue drilling until the hole is complete, periodically reapplying water to keep the surface wet.
Step 5: Clean up and finish

After the hole is drilled, carefully remove the tape and clean up any debris. You can use sandpaper to smooth the edges of the hole if desired. Once the bowl is clean and dry, you’re ready to use it for your desired purpose.
Remember to always exercise caution when working with power tools and ceramics. It’s important to wear appropriate safety gear and work in a well-ventilated area.
With this step-by-step guide, drilling a hole in a ceramic bowl is a simple and rewarding DIY project. Whether you’re a beginner or an experienced DIYer, you can achieve professional-looking results with a little patience and the right tools. So why not give it a try and unleash your creativity?
Step-by-Step Guide on How to Drill a Hole in a Ceramic Bowl
Materials You’ll Need:
- Ceramic bowl
- Marker or pencil
- Drill
- Drill bit suitable for ceramic
- Duct tape
- Safety goggles
- Clamp or vise
- Water
Step 1: Mark the Spot
Using a marker or pencil, locate and mark the exact spot where you want to drill the hole on the ceramic bowl. Make sure the mark is visible and accurate.
Step 2: Prepare the Drill

Choose a drill bit suitable for use on ceramic surfaces. Attach it securely to your drill. Make sure the drill bit is sharp and in good condition.
Step 3: Secure the Bowl
Place the ceramic bowl on a stable surface, such as a workbench or table. To prevent the bowl from sliding or spinning, use a clamp or vise to secure it in place. This will ensure stability and prevent accidents.
Step 4: Apply Duct Tape
To prevent the drill bit from slipping or scratching the surface of the ceramic bowl, apply a piece of duct tape over the marked spot. This will provide traction and protect the bowl during drilling.
Step 5: Put on Safety Gear

Prior to drilling, put on safety goggles to protect your eyes from any flying debris.
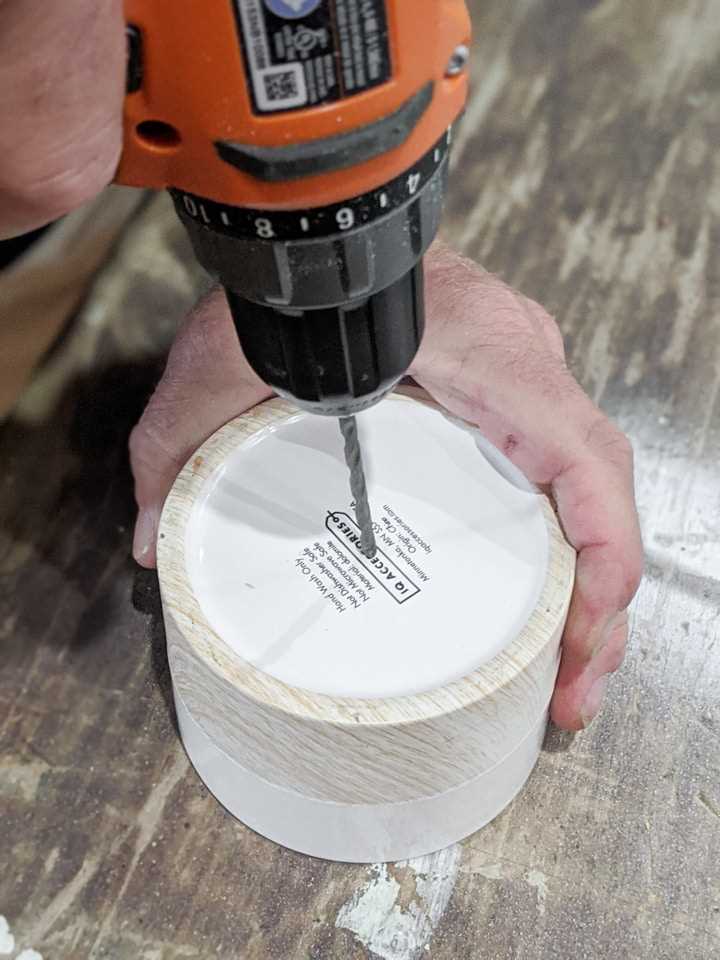
Step 6: Drilling
Slowly start drilling at a low speed, applying steady pressure to the drill. Keep the drill perpendicular to the ceramic bowl surface. It’s important to go slow and steady to avoid cracking or damaging the ceramic.
Step 7: Apply Water
To keep the drill bit and ceramic cool, periodically apply water to the drilling area. This will help prevent overheating and cracking. You can do this by dipping the drill bit in water or using a spray bottle to moisten the area.
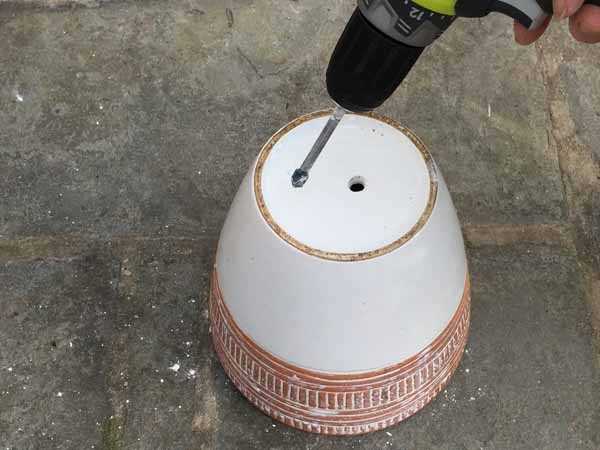
Step 8: Complete the Hole
Continue drilling until you fully penetrate the ceramic bowl. Be patient and take breaks if needed to prevent overheating or damaging the bowl. Once the hole is complete, carefully remove any excess dust or debris.
Step 9: Clean up

After drilling, clean the ceramic bowl to remove any remaining dust or debris. Use a damp cloth or sponge to wipe the surface, ensuring the bowl is clean and ready for use.
Congratulations! You have successfully drilled a hole in a ceramic bowl. Now you can use the bowl for various purposes, such as planting, drainage, or creating a decorative piece.
Gather the Necessary Tools
- Drill
- Carbide-tipped hole saw
- Masking tape
- Water
- Marker or pencil
- Clamps or vise
- Safety glasses
- Gloves
- Drilling guide (optional)
Before you start drilling a hole in a ceramic bowl, make sure you have all the necessary tools and equipment. These tools will help you achieve clean and precise results without damaging the bowl. Here is a list of the tools you will need:
- Drill: Choose a drill with variable speed settings and a compatibility with the carbide-tipped hole saw.
- Carbide-tipped hole saw: This type of hole saw is specifically designed for drilling through ceramic materials.
- Masking tape: Use masking tape to create a barrier and prevent the drill bit from slipping or sliding on the surface of the bowl.
- Water: Drilling into ceramic generates heat, so it’s important to keep the drill bit and the ceramic cool by using water as a lubricant.
- Marker or pencil: Mark the intended location of the hole on the ceramic bowl. This will serve as a guide and help you drill accurately.
- Clamps or vise: Secure the ceramic bowl in place to prevent it from moving or sliding while you drill.
- Safety glasses: Protect your eyes from any flying debris or shards that may be generated during the drilling process.
- Gloves: To protect your hands from any sharp edges or heat, wear gloves while drilling.
- Drilling guide (optional): A drilling guide can help you stabilize the drill bit and ensure that the hole is drilled at the desired angle and position.
Choose the Right Drill Bit
Choosing the right drill bit is crucial when drilling a hole in a ceramic bowl. The wrong drill bit can cause the bowl to crack or shatter, ruining the bowl and potentially causing injury. Follow these steps to ensure you choose the right drill bit for your ceramic bowl:
- Consider the Material: Ceramic bowls are made from a variety of materials, such as porcelain, earthenware, or stoneware. Each material may require a different type of drill bit. Determine the material of your bowl before selecting a drill bit.
- Choose a Carbide or Diamond-Tipped Bit: For most ceramic bowls, a carbide-tipped or diamond-tipped drill bit will work best. These bits are designed specifically for drilling into hard materials like ceramic and will provide clean, precise holes.
- Check the Bit Size: The size of the hole you need to drill will determine the size of the drill bit you should choose. Measure the diameter of the hole you want to create and select a drill bit that matches that size.
- Consider the Shank: The shank of the drill bit is the part that attaches to the drill. Make sure the shank of the drill bit you choose matches the chuck size of your drill.
- Choose a Bit with a Pointed Tip: A drill bit with a pointed or sharp tip will help to guide the bit into the ceramic bowl and prevent slipping or sliding.
It’s important to note that drilling into a ceramic bowl can be challenging, even with the right drill bit. It’s recommended to practice on a scrap piece of ceramic before attempting to drill a hole in your bowl. This will help you get a feel for the drilling process and ensure you use the correct technique.

Remember to wear safety goggles and work in a well-ventilated area when drilling. Ceramic dust can be harmful if inhaled, so take appropriate precautions to protect yourself while drilling.
Mark the Spot
Before you start drilling, it’s important to determine the exact spot where you want the hole to be. Here’s how you can mark the spot:
- Measure and plan: Use a ruler or measuring tape to decide where you want to drill the hole. Take into consideration the size and shape of the ceramic bowl and the purpose of the hole.
- Mark the spot: Use a pencil or a removable marker to make a small dot on the ceramic surface at the desired location. Make sure the dot is clearly visible.
- Double-check: Take a step back and make sure the marked spot aligns with your initial plan. Make any necessary adjustments before proceeding.
By marking the spot beforehand, you’ll ensure that your hole is precisely where you want it to be. This step will help you avoid mistakes and ensure a successful drilling process.
Prepare the Surface
The first step in drilling a hole in a ceramic bowl is to prepare the surface of the bowl. This involves gathering the necessary materials and ensuring that you have a clean and steady work area.

Materials needed:
- Ceramic bowl
- Drill with diamond-tipped drill bit
- Masking tape
- Water
- Safety goggles
- Work gloves
Once you have gathered all the necessary materials, you can begin preparing the surface of the ceramic bowl.
1. Clean the bowl:
Start by cleaning the bowl thoroughly. Use a mild detergent and warm water to remove any dirt or grease. Dry the bowl completely before proceeding.
2. Mark the drilling location:
Decide where you want to drill the hole on the ceramic bowl. Use a piece of masking tape to mark the exact location. This will help prevent the drill bit from slipping and keep the drilling process accurate.
3. Secure the bowl:
Place the ceramic bowl on a stable surface. Make sure it is secure and will not move or wobble during the drilling process. You may want to use a non-slip mat or a piece of cloth to provide additional stability.
4. Wear protective gear:
Put on safety goggles to protect your eyes from any flying debris or shards. Wear work gloves to protect your hands during the drilling process.
Once you have prepared the surface of the ceramic bowl, you are ready to move on to the next step: drilling the hole.
Secure the Bowl
Before you start drilling, it’s important to secure the ceramic bowl to prevent it from moving or slipping during the drilling process. This will ensure that the hole is drilled accurately and prevent any accidents.
Here are a few methods you can use to secure the bowl:
- Place a towel or rubber mat under the bowl: This will provide grip and stability, making it less likely to slide or move while you drill.
- Use clamps or a vise: If the bowl has a flat or straight surface, you can use clamps or a vise to hold it securely in place. Make sure the clamps or vise are tight enough to hold the bowl firmly without damaging it.
- Create a jig or guide: If you need to maintain a specific angle or position while drilling, you can create a jig or guide using scrap wood or other materials. This will help keep the bowl steady and ensure accurate drilling.
- Ask for assistance: If you’re finding it difficult to secure the bowl on your own, consider asking someone to help you hold it in place while you drill. This can provide extra stability and ensure your safety.
Choose the method that works best for you based on the size and shape of your ceramic bowl. Remember to take necessary precautions and always prioritize your safety during the drilling process.
Start Drilling
Now that you have prepared your ceramic bowl and gathered all the necessary tools, it’s time to start drilling. Follow these step-by-step instructions to safely drill a hole in your ceramic bowl:
- Put on safety goggles and gloves to protect your eyes and hands while drilling. Ceramic shards can be sharp and may cause injury.
- Make sure your drill’s battery is fully charged or that you have a power source nearby if using a corded drill.
- Attach a diamond-tipped drill bit to your drill. Diamond-tipped drill bits are specifically designed for drilling through hard materials like ceramic.
- Adjust the drill’s speed settings to a low speed. Ceramic is delicate and drilling at a high speed may cause the bowl to crack or shatter.
- Place a small piece of duct tape or masking tape over the area where you want to drill. This will help prevent the drill bit from slipping and scratching the surface of the bowl.
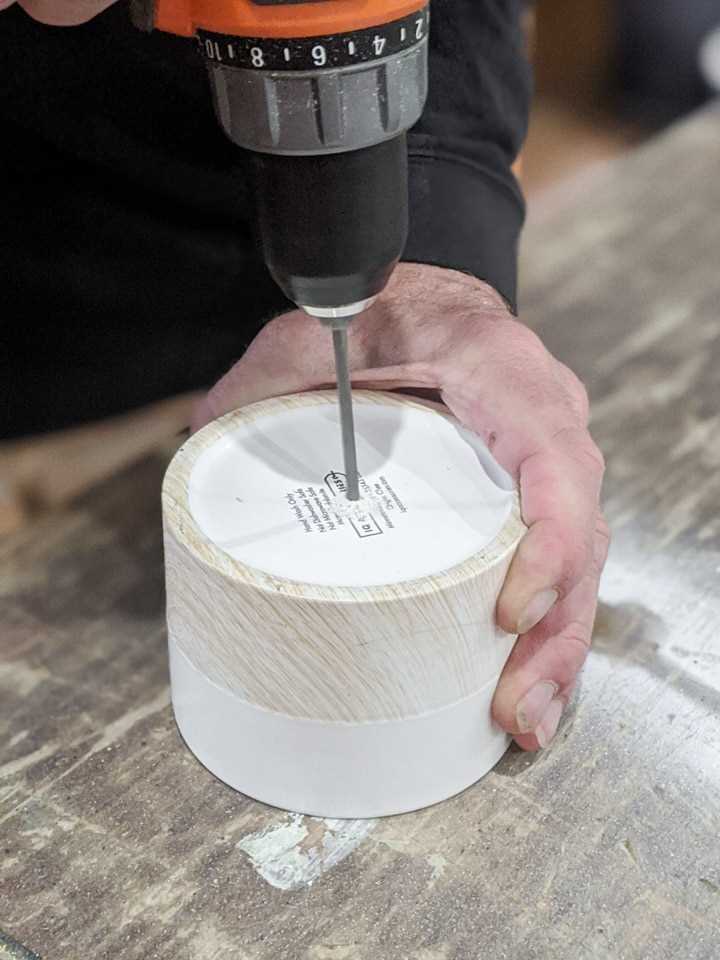
- Hold the drill perpendicular to the surface of the ceramic bowl and apply gentle pressure. Begin drilling at a slow and steady pace.
- Continue drilling, periodically pausing to spray water onto the drill bit and the surface of the bowl. The water acts as a lubricant and helps to cool down the drill bit, preventing it from overheating and damaging the ceramic.
Note: Do not apply excessive pressure while drilling, as this can also cause the bowl to crack. Let the drill do the work and allow it to gradually penetrate the ceramic.
Continue drilling until the drill bit has completely penetrated the ceramic bowl. Once the hole is drilled, carefully remove any remaining ceramic dust or debris from the surface of the bowl.
Congratulations! You have successfully drilled a hole in your ceramic bowl. Now you can use the hole for various purposes, such as inserting a plant or creating a drainage hole for a planter.
Use Water as Lubrication
Using water as a lubricant while drilling a hole in a ceramic bowl can help reduce friction and prevent cracking or shattering of the bowl. Here’s how to use water as lubrication:
- Fill a small container with water.
- Place the ceramic bowl on a stable surface, such as a workbench or table.
- Make sure the bowl is securely positioned to prevent it from moving while drilling.
- Begin drilling the hole in the desired location on the bowl, applying light pressure.
- Periodically dip the drill bit into the container of water to cool it down and lubricate the area being drilled.
- Continue drilling, keeping the drill bit and the ceramic surface wet with water.
- Drill at a slow speed to reduce the risk of overheating or damaging the bowl.
- After drilling the hole, wipe away any excess water with a clean cloth.
Note: Using water as a lubricant may not be suitable for all types of ceramic bowls. It is recommended to test a small, inconspicuous area of the bowl first to ensure it can withstand the drilling process.
Finishing Touches and Safety Precautions
1. Clean the Ceramic Bowl
Before proceeding with drilling the hole, it is important to ensure that the ceramic bowl is clean. Any dirt or debris on the surface may interfere with the drilling process and may also damage the drill bit. Use a mild detergent and warm water to clean the bowl thoroughly. Rinse it well and let it dry completely before moving on to the next step.
2. Mark the Drill Point
Using a washable marker or a piece of removable tape, mark the exact spot where you want to drill the hole on the ceramic bowl. This will help you maintain accuracy and precision during the drilling process. Double-check the placement of the mark to ensure it is in the desired location.
3. Wear Safety Gear
Drilling into ceramic can create a lot of dust and debris, so it is important to wear proper safety gear to protect yourself. Put on safety goggles to protect your eyes from any flying fragments. Additionally, wear a dust mask to prevent inhaling any harmful particles or dust generated during the drilling process.
4. Secure the Bowl
Place the ceramic bowl on a stable surface and make sure it is securely held in place. You can use clamps or a vise to hold the bowl firmly in place. This will prevent any unintended movement during drilling and help maintain stability and accuracy.
5. Start Slowly
When you begin drilling, apply gentle pressure and start the drill at a slow speed. Drilling too quickly or with excessive force can cause the ceramic to crack or chip. Take your time and allow the drill bit to do the work, gradually increasing the speed as you go.
6. Use a Cooling Agent
Ceramic can heat up quickly during the drilling process. To prevent overheating and potential damage to the bowl, it is recommended to use a cooling agent. This can be as simple as spraying water on the drill point as you work. The cooling agent helps to dissipate heat and keeps the ceramic cool throughout the drilling process.
7. Take Breaks
Drilling into ceramic can be a time-consuming process, especially if you are using a smaller drill bit. To avoid overheating the drill bit and the ceramic, it is important to take breaks periodically. This allows the drill bit to cool down and reduces the risk of damaging the bowl.
8. Clean Up Properly
Once you have successfully drilled the hole in the ceramic bowl, clean up any debris or dust that may have accumulated during the drilling process. Use a damp cloth or a vacuum cleaner with a brush attachment to remove any remaining particles. This will help you maintain a clean and safe working environment.
Following these finishing touches and safety precautions will help you drill a hole in a ceramic bowl effectively and safely. Remember to always exercise caution and wear appropriate safety gear throughout the process.
FAQ:
What tools do I need to drill a hole in a ceramic bowl?
To drill a hole in a ceramic bowl, you will need the following tools: a drill, a ceramic or porcelain drill bit, masking tape, water, and a marker or pencil.
How do I choose the right drill bit for drilling in ceramic?
When choosing a drill bit for drilling in ceramic, it is important to select a ceramic or porcelain drill bit specifically designed for this purpose. These drill bits are made of hard materials such as tungsten carbide, which allow them to penetrate the ceramic surface without causing any damage.
What precautions should I take while drilling a hole in a ceramic bowl?
While drilling a hole in a ceramic bowl, there are a few precautions you should take. First, make sure to wear safety goggles to protect your eyes from any flying ceramic fragments. It is also advisable to wear gloves to protect your hands. Additionally, keep the area well-ventilated to avoid breathing in any dust and use a stable surface to secure the bowl.
Can I use a regular drill for drilling in ceramic?
You can use a regular drill for drilling in ceramic, but it is recommended to use a drill with variable speed settings. This will allow you to control the drilling speed and apply the right amount of pressure. It is also important to use a ceramic or porcelain drill bit specifically designed for drilling in ceramic surfaces.
What is the best method for cooling the drill bit while drilling in ceramic?
The best method for cooling the drill bit while drilling in ceramic is to have a continuous flow of water on the drill bit. You can either use a spray bottle to keep the drill bit wet or create a small water reservoir near the drilling area. This will help to prevent overheating and prolong the life of the drill bit.
Video:


Meet Harrison Clayton, a distinguished author and home remodeling enthusiast whose expertise in the realm of renovation is second to none. With a passion for transforming houses into inviting homes, Harrison's writing at https://thehuts-eastbourne.co.uk/ brings a breath of fresh inspiration to the world of home improvement. Whether you're looking to revamp a small corner of your abode or embark on a complete home transformation, Harrison's articles provide the essential expertise and creative flair to turn your visions into reality. So, dive into the captivating world of home remodeling with Harrison Clayton and unlock the full potential of your living space with every word he writes.


