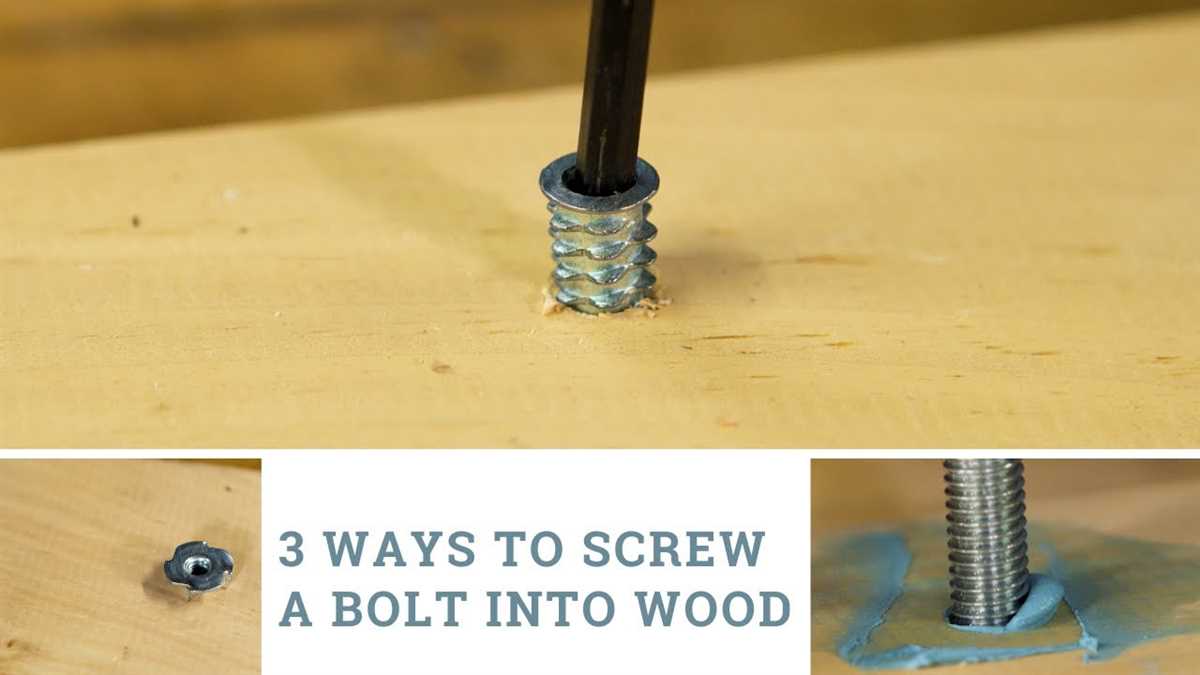
Step-by-Step Guide: How to Drill a Bolt into Wood

Drilling a bolt into wood may seem like a simple task, but it’s important to do it correctly to ensure a secure and lasting connection. Whether you’re hanging a shelf, building furniture, or working on a woodworking project, knowing how to drill a bolt into wood is a valuable skill. In this step-by-step guide, we’ll walk you through the process and provide helpful tips along the way.
Before you begin, gather the necessary tools and materials. You’ll need a power drill with a drill bit that matches the size of the bolt you’ll be using. Additionally, you’ll need a wrench or socket wrench to tighten the bolt once it’s drilled into the wood. It’s also a good idea to have a tape measure, pencil, and safety goggles on hand.
Start by marking the exact spot where you want to drill the bolt. Use a tape measure to ensure accuracy and make a small mark with a pencil. Next, insert the appropriate drill bit into the power drill. If you’re unsure which drill bit to use, choose one slightly smaller than the diameter of the bolt. This will allow for a tight fit.
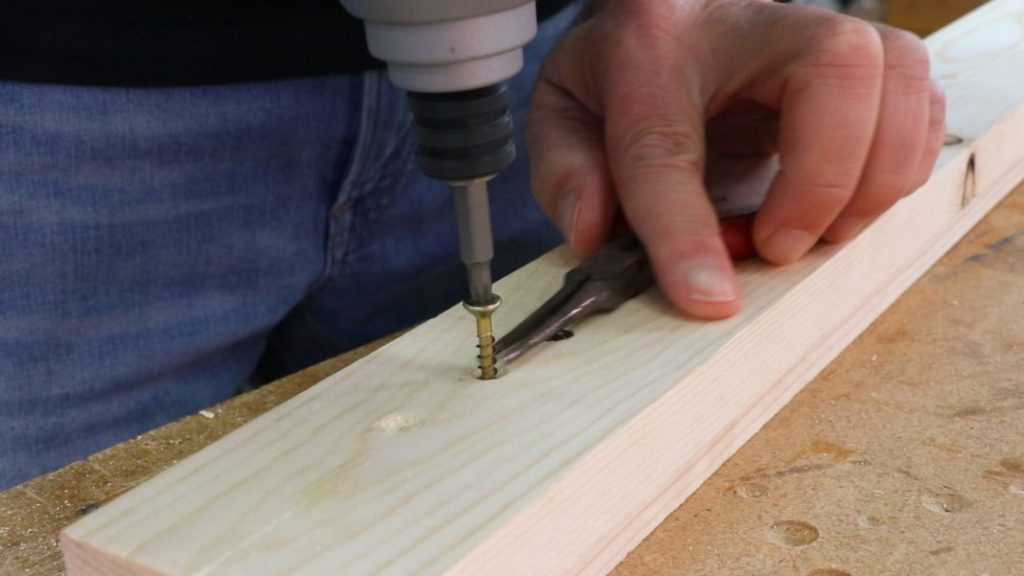
Put on your safety goggles, position the drill bit on the marked spot, and apply gentle downward pressure as you turn on the power drill. Start drilling slowly to create a clean hole. Keep the drill level and perpendicular to the wood surface to prevent any wobbling or angled drilling. As you drill, periodically pull back slightly to remove wood chips or sawdust and prevent the drill bit from getting stuck.
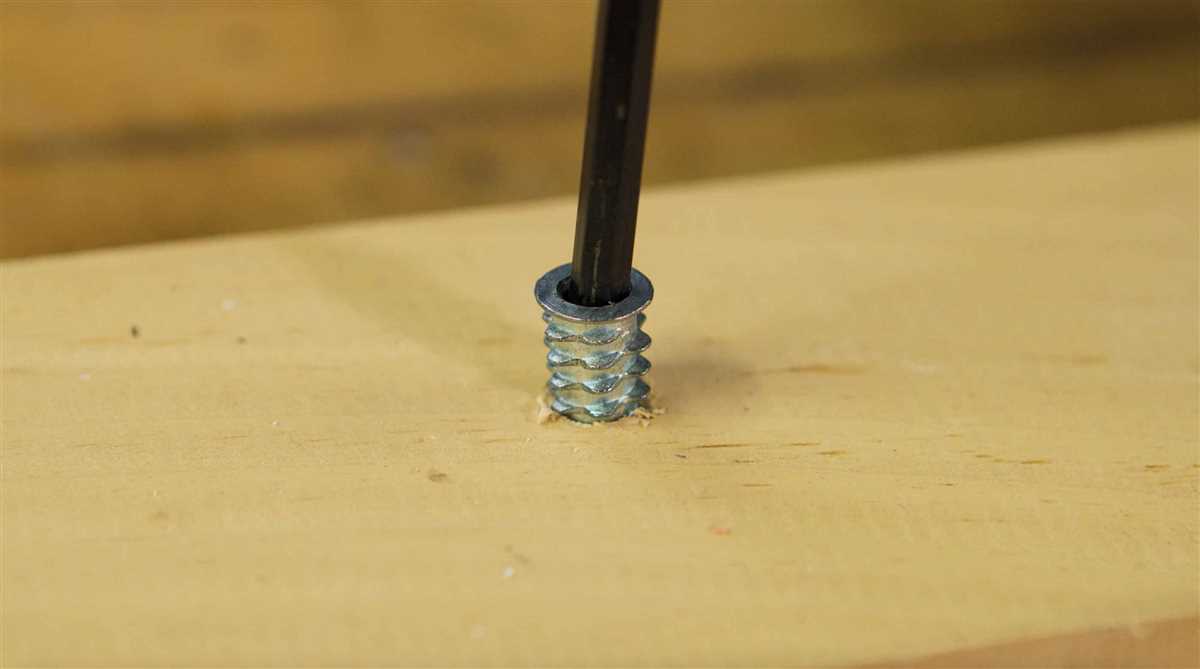
Once the hole is deep enough for the bolt to fit snugly, stop drilling and remove the drill bit. Clean out any debris from the hole and prepare the bolt by putting a washer and nut on the end. Insert the bolt into the hole and use a wrench or socket wrench to tighten the nut, ensuring a secure connection. Avoid overtightening, as this can strip the threads of the bolt or damage the wood.

Now you know how to drill a bolt into wood! Remember to always exercise caution and follow safety guidelines when using power tools. With this skill, you’ll be able to confidently tackle a variety of projects that require securing bolts in wood.
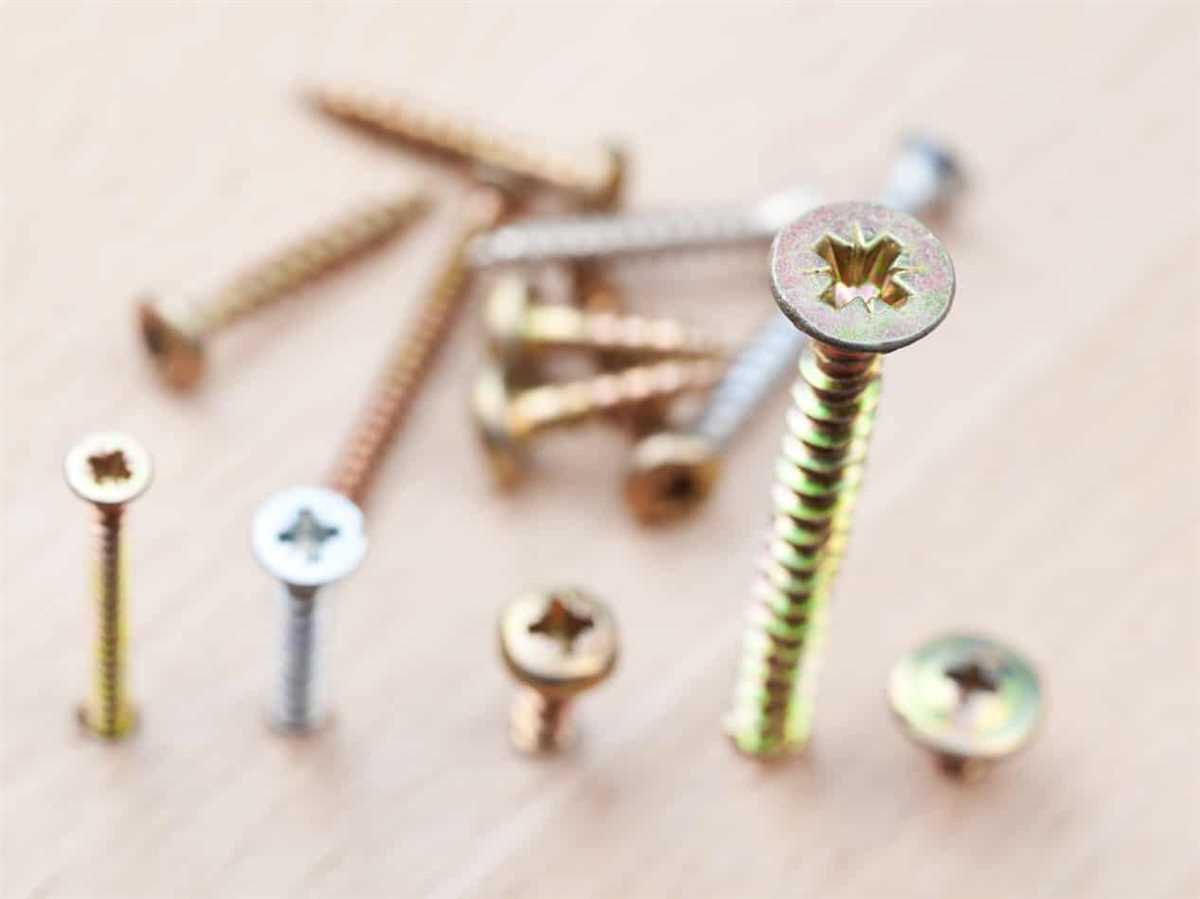
Choosing the Right Equipment
Before drilling a bolt into wood, it is important to gather the right equipment to ensure successful and accurate results. Here are the tools and materials you will need:
- Drill: Choose a drill with enough power to penetrate the wood and drive the bolt effectively. A cordless drill or a drill with a power cord can be used depending on your preferences.
- Drill bits: Select the appropriate drill bits based on the size of the bolt you are using. Drill bits are available in different diameters and lengths, so make sure to choose the correct size for your project.
- Bolts: Determine the specific type and size of bolt needed for your project. Consider the length, diameter, and threading of the bolt to ensure a secure fit in the wood.
- Wrench or socket set: Depending on the type of bolt you are using, you may need a wrench or socket set to tighten the bolt securely into the wood.
- Measuring tools: Use a tape measure, ruler, or marking gauge to accurately measure and mark the drilling locations on the wood.
- Protective equipment: Always wear safety glasses to protect your eyes from wood chips or debris that may fly off during the drilling process. Additionally, consider wearing gloves to protect your hands.
By ensuring you have the correct equipment, you can proceed with confidence knowing that you have everything you need to complete your drilling project successfully.
Preparing the Wood
Before you begin drilling a bolt into wood, it is important to properly prepare the wood surface to ensure a secure and successful installation.

1. Gather your supplies
Before starting, gather all the necessary supplies, including:
- Wooden surface
- Drill
- Bolt
- Drill bits
- Measuring tape
- Pencil or marker
- Clamps or vise
- Safety glasses
2. Measure and mark the drilling points
Using a measuring tape and pencil or marker, mark the drilling points on the wood surface where you want to install the bolt. Make sure to measure and mark accurately to ensure proper alignment.
3. Secure the wood
If the wood is large or prone to movement, you may want to secure it using clamps or a vise. This will prevent the wood from moving or shifting during the drilling process, ensuring accurate and precise holes.
4. Select the appropriate drill bit
Choose a drill bit that matches the size of the bolt you will be using. The drill bit should be slightly smaller than the diameter of the bolt to create a tight fit.
5. Mark the drilling depth
Measure the length of the bolt and use a piece of tape or a marker to mark the drilling depth on the drill bit. This will ensure that you do not drill too deep or too shallow.

6. Put on safety glasses
Before you start drilling, it is important to protect your eyes by wearing safety glasses. This will prevent any potential debris or wood chips from getting into your eyes.
7. Start drilling
Now that the wood is properly prepared, you can begin drilling the holes for the bolts. Start the drill at a slow speed and gradually increase the speed as you drill. Apply steady pressure and keep the drill bit aligned with the marked drilling points.
Measuring and Marking the Hole
Before drilling a bolt into wood, it is important to accurately measure and mark the location of the hole. This will ensure that the bolt is properly aligned and secure.
Here are the steps to measure and mark the hole:

- Gather the necessary tools such as a ruler or measuring tape and a pencil.
- Place the wood on a flat and stable surface.
- Identify the location where you want to drill the hole.
- Measure the diameter of the bolt using a ruler or measuring tape. This will be the size of the hole.
- Using the ruler or measuring tape, measure the distance from the edge of the wood to the center of the hole. Mark this point with a pencil.
- Using a square or straight edge, draw a straight line from the marked point to the edge of the wood. This will serve as a guide for drilling the hole.
- Double-check your measurements and markings to ensure accuracy.
By taking the time to measure and mark the hole properly, you will be able to drill the bolt into wood with precision and ensure a secure attachment.
Selecting the Proper Drill Bit
Choosing the right drill bit is crucial for successful drilling into wood. The type and size of the drill bit will depend on the size of the bolt you are using and the type of wood you are drilling into. Here are some steps to help you select the proper drill bit:
1. Determine the size of the bolt
Measure the diameter of the bolt you will be using. This will help you determine the size of the drill bit you will need. The drill bit should be slightly smaller than the bolt to ensure a snug fit.
2. Identify the type of wood
Consider the type of wood you will be drilling into. Hardwoods, such as oak or maple, will require a different drill bit than softwoods, such as pine or cedar. Hardwoods may require a spade or auger bit, while softwoods may require a twist bit.
3. Choose the appropriate drill bit
Based on the size of the bolt and the type of wood, select the appropriate drill bit. Here are some common types of drill bits for drilling into wood:

- Twist drill bits: Suitable for most woodworking projects, these bits have a pointed tip and spiral flutes.
- Spade bits: These flat, paddle-shaped bits are ideal for drilling large holes in wood.
- Auger bits: Designed for drilling deep, clean holes in hardwoods, these bits have a spiral shape and a screw tip.
Choose the drill bit that matches your needs for the specific project you are working on.
4. Consider the length of the drill bit
Make sure the chosen drill bit is long enough to drill through the entire thickness of the wood. The length of the drill bit should be equal to or slightly longer than the length of the bolt.
5. Safety precautions
Remember to always wear safety goggles and gloves when drilling to protect yourself from flying debris.
By selecting the proper drill bit, you can ensure a smooth and secure drilling process when inserting a bolt into wood.

Setting Up the Drill
Before you begin drilling a bolt into wood, it’s important to properly set up the drill to ensure accuracy and safety. Follow these steps to set up your drill:
- Choose the right drill bit: Select a drill bit that is appropriate for the size of the bolt you will be using. The diameter of the drill bit should match the diameter of the bolt or slightly smaller if you want a tighter fit.
- Secure the drill bit: Insert the chosen drill bit into the chuck of the drill. Tighten the chuck securely to ensure that the drill bit is held firmly in place.
- Adjust the clutch setting: If your drill has a clutch feature, adjust the setting to the appropriate level for the type of wood you are drilling into. A lower clutch setting will provide less torque, which is ideal for softer woods, while a higher setting is suitable for harder woods.
- Attach a depth stop: If you want to control the depth of the hole, attach a depth stop to the drill bit. This will prevent you from drilling too deep and ensure consistent hole depth.
- Secure the wood: Place the piece of wood you will be drilling into on a stable surface. Make sure it is positioned securely and won’t move or slip during the drilling process.
By following these steps, you will properly set up your drill for drilling a bolt into wood, ensuring accuracy in your drilling and preventing any potential accidents or damage to the wood or the drill.
Drilling the Hole
Before drilling the hole, it’s important to choose the right drill bit size for your bolt. The drill bit should be slightly smaller than the diameter of the bolt to ensure a tight fit.
Here are the step-by-step instructions on drilling the hole:
- Mark the spot where you want to drill the hole using a pencil or a marker. Make sure the mark is visible and accurate.
- Put on your safety goggles and gloves to protect yourself from any flying debris.
- Secure the piece of wood you’re drilling into to a stable surface using clamps.
- Select the appropriate drill bit size for your bolt and insert it into your drill. Make sure it is securely tightened.
- Position the drill bit on the marked spot. Hold the drill with a firm grip and maintain a steady pressure.
- Start drilling slowly by applying gentle pressure. Increase the speed gradually as the bit begins to penetrate the wood.
- Continue drilling until the desired depth is reached. You can use a piece of tape wrapped around the drill bit as a depth guide.
- Release the trigger to stop the drill and carefully remove it from the hole.
- Inspect the hole to ensure it is clean and free of any debris. Use a brush or compressed air to remove any wood chips or dust.
Congratulations! You have successfully drilled the hole for your bolt. Now you can proceed to the next step of securing the bolt into the wood.

Inserting the Bolt
Once you have drilled the hole and prepared the wood, it’s time to insert the bolt.
Step 1: Choose the Right Bolt
Make sure you have the correct size and type of bolt for your project. Consider the material and size of the wood, as well as the load the bolt will bear.
Step 2: Apply Lubricant (optional)
If you’re working with hardwood or a dense wood, applying some lubricant to the bolt and the hole can make the insertion easier. This is especially important if you’re using a large bolt.
Step 3: Align the Bolt
Hold the bolt perpendicular to the hole and align it with the drilled hole. Make sure it sits flush against the wood surface.
Step 4: Start Inserting
Using moderate pressure, start turning the bolt clockwise to insert it into the hole. Use a wrench or socket to provide additional leverage if needed.
Step 5: Tighten the Bolt
Continue turning the bolt until it is fully inserted into the wood. Use a wrench or socket to tighten it further if necessary.
Step 6: Test Stability
Once the bolt is inserted and tightened, test the stability by applying pressure or pulling on the bolt. It should be securely attached to the wood and not move or loosen.
Step 7: Trim Excess Thread (optional)
If there is excess thread sticking out from the nut, you can use a hack saw or file to trim it down to the desired length. Be careful to protect the wood surface.
Step 8: Final Inspection
Inspect the bolt and the surrounding wood for any signs of damage or instability. Make any necessary adjustments or repairs before proceeding with your project.
Step 9: Continue with Your Project
Now that the bolt is securely inserted into the wood, you can proceed with your project, whether it’s building furniture, installing shelves, or any other woodworking project.
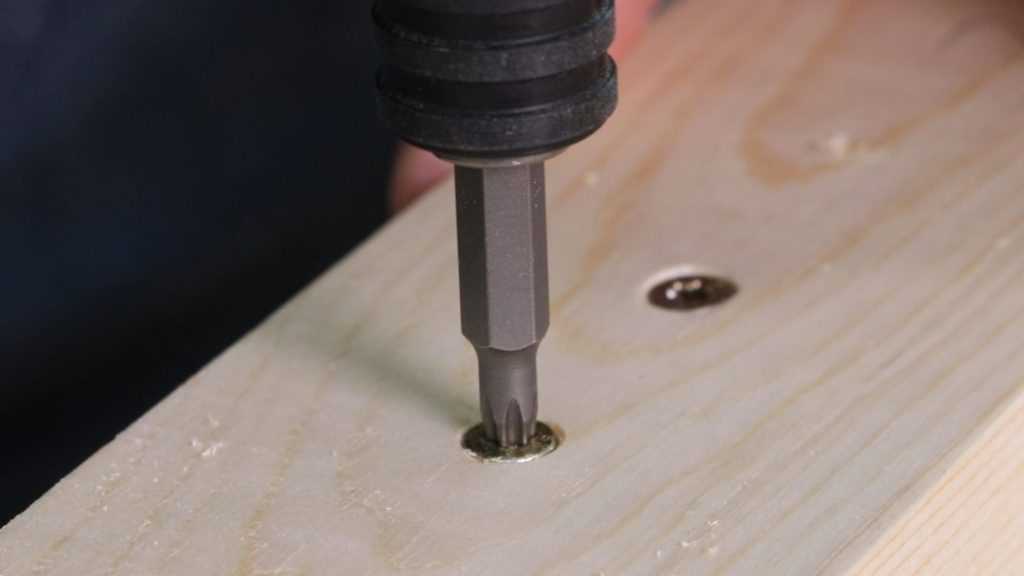
Securing the Bolt in Place
Once you have drilled the hole for the bolt, the next step is to secure the bolt in place. This will ensure that the bolt stays in position and does not wiggle or come loose.
Here are the steps to secure the bolt in place:
- Insert the bolt through the hole from one side of the wood.
- If necessary, place a flat washer on the end of the bolt to provide additional support.
- On the opposite side of the wood, screw on a nut onto the threaded end of the bolt.
- Using a wrench, tighten the nut until it is snug against the wood.
- If desired, you can add a lock washer between the nut and the wood for extra security. The lock washer will help prevent the nut from loosening over time.
It’s important not to overtighten the nut, as this can cause the wood to split or crack. Simply tighten it enough to secure the bolt in place.
| Tools | Materials |
|---|---|
|
|
By following these steps, you can successfully secure the bolt in place and ensure a secure and sturdy connection between the wood and the bolt. This is crucial for any woodworking or construction project which requires a strong and reliable fastening solution.
FAQ:
What equipment do I need to drill a bolt into wood?
To drill a bolt into wood, you will need a drill, a drill bit that matches the size of your bolt, a bolt, and a wrench or socket set to tighten the bolt.
How do I choose the right drill bit size for my bolt?
To choose the right drill bit size for your bolt, you can either measure the diameter of the bolt with calipers or use a drill bit sizing chart. The drill bit should be slightly smaller than the diameter of the bolt to ensure a snug fit.
What precautions should I take when drilling a bolt into wood?
When drilling a bolt into wood, it is important to wear safety goggles to protect your eyes from flying debris. You should also ensure that the wood is securely clamped or held in place to prevent it from moving while drilling. Additionally, it is a good idea to start with a pilot hole slightly smaller than the bolt diameter to prevent splitting the wood.
What if the wood is too hard to drill a bolt into?
If the wood is too hard to drill a bolt into, you may need to pre-drill a hole with a smaller drill bit, gradually increasing the size until you reach the desired diameter. You can also try using a drill press or applying more pressure while drilling. If all else fails, you may need to use a different type of fastener or consider using a stronger drill bit.
Video:


Meet Harrison Clayton, a distinguished author and home remodeling enthusiast whose expertise in the realm of renovation is second to none. With a passion for transforming houses into inviting homes, Harrison's writing at https://thehuts-eastbourne.co.uk/ brings a breath of fresh inspiration to the world of home improvement. Whether you're looking to revamp a small corner of your abode or embark on a complete home transformation, Harrison's articles provide the essential expertise and creative flair to turn your visions into reality. So, dive into the captivating world of home remodeling with Harrison Clayton and unlock the full potential of your living space with every word he writes.


