Step-by-Step Guide: How to Change Drill Bit on Makita Drill

Whether you are a professional or a DIY enthusiast, knowing how to change a drill bit on your Makita drill is an essential skill. While it may seem like a daunting task at first, with a step-by-step guide, you can easily master this process and save yourself time and frustration.
Step 1: Power off the drill and unplug it from the power source. Safety should always be your top priority, so make sure the drill is completely turned off and disconnected from any power source before attempting to change the drill bit.
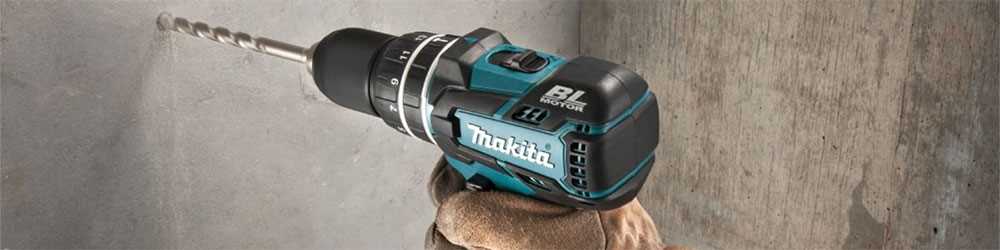
Step 2: Locate the chuck and release it. The chuck is the part of the drill that holds the drill bit in place. It typically consists of three jaws that grip the drill bit tightly. To release the chuck, grip the chuck and rotate it counterclockwise. This will loosen the jaws and allow you to remove the drill bit.
Step 3: Remove the old drill bit. Once the chuck is loosened, pull out the old drill bit from the chuck. Be careful not to touch the sharp end of the drill bit to avoid injury. You can use pliers or your fingers to grasp the drill bit and pull it straight out.
Step 4: Insert the new drill bit. Take the new drill bit and align the shank with the chuck jaws. Make sure the drill bit is inserted straight and fully into the chuck. Once in place, grip the chuck and rotate it clockwise to tighten the jaws around the drill bit.

Step 5: Test the new drill bit. After tightening the chuck, power on the drill and test the new drill bit on a scrap piece of material. Make sure it is securely held in place and functions properly before starting any drilling projects.
Remember to always use the appropriate drill bit for your specific project and follow the manufacturer’s instructions for your Makita drill model. With practice and attention to detail, changing a drill bit on your Makita drill will become a quick and effortless task.
Overview of Makita Drill
Makita is a well-known and respected brand in the power tool industry, and their drills are highly regarded for their quality and performance. The Makita drills are designed to be powerful, durable, and user-friendly, making them a popular choice among professionals and DIY enthusiasts alike.
Key Features
- Powerful Motor: Makita drills are equipped with powerful motors that provide high torque and fast drilling speeds. This allows for efficient drilling in various materials, including wood, metal, and concrete.
- Ergonomic Design: Makita drills are ergonomically designed to provide comfort and reduce user fatigue during prolonged use. They feature a comfortable grip handle and a well-balanced body, ensuring optimal control and stability.
- Variable Speed Control: Many Makita drill models offer variable speed control, allowing users to adjust the drilling speed according to the task at hand. This feature is especially beneficial when working with different materials that require different drilling speeds.
- Quick Bit Change System: Makita drills feature a quick bit change system that allows for easy and hassle-free bit changes. This saves time and ensures a smooth workflow, especially when working on projects that require frequent bit changes.
Types of Makita Drills
Makita offers a wide range of drills to cater to different needs and preferences. Some of the popular types of Makita drills include:
- Hammer Drills: Hammer drills are designed for heavy-duty drilling tasks, such as drilling into masonry and concrete. They feature a hammering action that provides additional force for easier and faster drilling.
- Driver Drills: Driver drills are versatile tools that can be used for drilling holes and driving screws. They are suitable for a wide range of applications and materials.
- Impact Drills: Impact drills are specifically designed for fastening applications, such as driving screws and tightening bolts. They deliver high levels of torque, making them ideal for tough and demanding tasks.
Conclusion
Makita drills are renowned for their performance, reliability, and user-friendly features. Whether you are a professional tradesperson or a DIY enthusiast, a Makita drill is a reliable tool that can help you tackle a wide range of drilling tasks with ease. With their powerful motors, ergonomic design, and quick bit change system, Makita drills provide convenience, efficiency, and durability for all your drilling needs.
Importance of Changing Drill Bit
Changing the drill bit on your Makita drill is an important maintenance task that every DIY enthusiast and professional should know how to do. Here are a few reasons why regularly changing drill bits is important:

- Optimal Performance: Over time, drill bits can become dull or damaged. By changing the drill bit, you can ensure that your drill is performing at its best. A sharp drill bit will cut through materials more efficiently and reduce the time and effort required for each task.
- Improved Safety: Worn-out or damaged drill bits can increase the risk of accidents. Dull drill bits tend to slip and can cause the drill to twist or kick back unexpectedly. By changing the drill bit regularly, you can minimize the risk of injuries and maintain a safe working environment.
- Versatility: Different projects require different types of drill bits. By changing the drill bit, you can adapt your Makita drill to suit various tasks and materials. Whether you need a bit for metal, wood, concrete, or other materials, having a variety of drill bits on hand will allow you to tackle any project that comes your way.
- Longer Drill Bit Lifespan: Regularly changing the drill bit can help extend its lifespan. By properly maintaining your drill bits and swapping them out as needed, you can prevent excessive wear and tear, prolonging their overall useful life.
Overall, changing the drill bit on your Makita drill is a simple yet essential maintenance task that can greatly impact performance, safety, versatility, and the lifespan of your drill bits. By incorporating this task into your regular maintenance routine, you can ensure that your Makita drill is always ready to tackle any project with ease and efficiency.
Step 1: Gather Necessary Tools
Before you begin changing the drill bit on your Makita drill, it’s important to gather all the necessary tools. Having the right tools on hand will make the process easier and more efficient. Here are the tools you will need:
- Makita drill: Make sure you have the drill you will be working with.
- Replacement drill bit: Have the new drill bit ready to be installed.
- Drill chuck key: This is a specially designed key that is used to loosen and tighten the chuck.
- Protective gloves: It is always a good idea to wear gloves to protect your hands during the process.
- Safety glasses: Safety glasses are essential for protecting your eyes from any flying debris.
Make sure you have all these tools ready before moving on to the next step.
Step 2: Power Off the Drill
Before changing the drill bit on your Makita drill, it’s important to ensure that the power is turned off to prevent any accidents or injuries. Following these steps will help you power off the drill safely:

- Find the power switch on the drill. It is typically located near the handle or trigger.
- Switch the power button to the “off” position. This will ensure that the drill is not accidentally turned on while you are changing the bit.
- Make sure the drill is not connected to any power source, such as an electrical outlet or a battery pack.
Double-checking that the drill is completely powered off will provide a safe working environment for the next steps of changing the drill bit. Remember to always prioritize safety when handling power tools.
Step 3: Release the Chuck

Now that you have the drill bit locked in place, it’s time to release the chuck. The chuck is the part of the drill that holds the drill bit in place. To release the chuck, follow these steps:
- Locate the chuck release button on the drill. It is usually located near the top of the drill, close to the chuck.
- Press and hold the chuck release button.
- While holding the chuck release button, rotate the chuck counterclockwise. This will loosen the chuck and allow you to remove the drill bit.
It’s important to note that some drills may have a keyless chuck, while others may require the use of a chuck key to release the chuck. If your Makita drill has a chuck key, you will need to insert the key into the holes on the chuck and rotate it counterclockwise to release the chuck.
Once the chuck is released, you can remove the old drill bit from the chuck and replace it with a new one. Make sure to choose the correct size and type of drill bit for your intended task.

Step 4: Remove the Old Drill Bit
Now that you have gathered all the necessary tools and have prepared the drill, it’s time to remove the old drill bit. Follow these steps:
- Make sure the drill is turned off and unplugged for safety.
- Locate the chuck, which is the cylindrical part at the front of the drill that holds the drill bit in place.
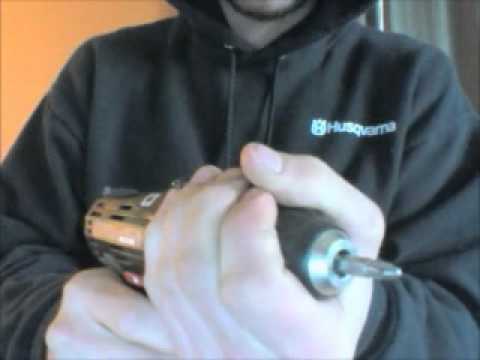
- Look for the chuck key that came with your drill. It is a small T-shaped tool that fits into the holes on the sides of the chuck.
- Insert the chuck key into one of the holes on the chuck and firmly hold the handle of the chuck key with one hand.
- With your other hand, rotate the chuck key counterclockwise to loosen the jaws of the chuck.
- Continue rotating the chuck key counterclockwise until the jaws are fully open and you are able to remove the old drill bit.
- Once the old drill bit is removed, set it aside in a safe place.
Now that you have successfully removed the old drill bit, you are ready to move on to the next step: inserting a new drill bit.
Step 5: Install the New Drill Bit
Once you have removed the old drill bit from your Makita drill, it’s time to install the new one. Follow these steps:

- Make sure the chuck of the drill is fully opened by rotating the collar in a counterclockwise direction.
- Select the appropriate drill bit for your project.
- Insert the shank of the drill bit into the chuck, making sure it is aligned with the jaws of the chuck.
- Tighten the chuck by rotating the collar in a clockwise direction. Use your hand to secure it initially, and then use the chuck key to tighten it further, if necessary.
- Gently pull on the drill bit to make sure it is securely held in place.
Now that the new drill bit is installed, you are ready to continue with your drilling or driving task.
FAQ:
What tools do I need to change the drill bit on a Makita drill?
To change the drill bit on a Makita drill, you will need a few tools. First, you will need a chuck key or an adjustable wrench to loosen and remove the chuck. You will also need the new drill bit that you want to install. Additionally, having a clean cloth or rag and some lubricating oil can be helpful for cleaning and lubricating the chuck and drill bit.
Can I change the drill bit without a chuck key?
Yes, you can change the drill bit on a Makita drill without a chuck key. Instead of a chuck key, you can use an adjustable wrench to loosen and remove the chuck. Make sure to adjust the wrench to fit the chuck securely and then turn it counterclockwise to loosen the chuck. Once the chuck is loosened, you can remove the old drill bit and install the new one.
How do I remove the chuck from a Makita drill?
To remove the chuck from a Makita drill, you will first need to loosen the chuck. If your drill has a chuck key, insert the chuck key into one of the holes on the chuck and turn it counterclockwise to loosen the chuck. If your drill has a keyless chuck, use an adjustable wrench to hold the chuck in place and turn the drill in reverse mode to loosen the chuck. Once the chuck is loosened, it can be unscrewed from the drill by turning it counterclockwise.
How do I install a new drill bit on a Makita drill?
To install a new drill bit on a Makita drill, start by making sure the chuck is completely open. You can do this by turning the chuck counterclockwise until it is fully opened. Then, insert the new drill bit into the chuck and make sure it is centered. Tighten the chuck by turning it clockwise, making sure to hold the drill bit in place as you tighten. Once the chuck is tight, give it a final twist to ensure it is securely holding the drill bit, and you’re ready to use your Makita drill with the new bit.

Video:


Meet Harrison Clayton, a distinguished author and home remodeling enthusiast whose expertise in the realm of renovation is second to none. With a passion for transforming houses into inviting homes, Harrison's writing at https://thehuts-eastbourne.co.uk/ brings a breath of fresh inspiration to the world of home improvement. Whether you're looking to revamp a small corner of your abode or embark on a complete home transformation, Harrison's articles provide the essential expertise and creative flair to turn your visions into reality. So, dive into the captivating world of home remodeling with Harrison Clayton and unlock the full potential of your living space with every word he writes.


