Step-by-Step Guide: Drilling a Grommet Hole in a Desk

Drilling a grommet hole in a desk can be a great way to improve the functionality and aesthetics of your workspace. This simple process allows you to easily organize and manage cables and wires, keeping them neat and out of sight. Whether you’re setting up a home office or revamping your current workspace, drilling a grommet hole is a DIY project that anyone can tackle.
Step 1: Measure and mark the desired location
The first step in drilling a grommet hole is to determine the ideal location for it. Consider factors such as the placement of your computer, desk layout, and the length of cables you need to accommodate. Once you’ve figured out where you want the grommet hole to be, use a measuring tape and a pencil to mark the center point. This will ensure a precise and balanced hole.
Pro Tip: If you’re unsure about the location, you can use a temporary adhesive grommet to test different positions before committing to drilling.
Step 2: Secure the desk

Before you start drilling, make sure your desk is securely positioned and won’t move around during the process. Use clamps or a vice to hold the desk firmly in place. This will prevent any accidental slips and ensure that the hole is drilled exactly where you want it.
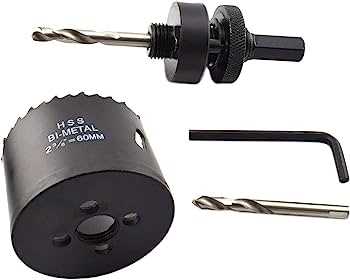
Step 3: Choose the right drill bit
Choosing the right drill bit is essential for clean and accurate holes. Measure the diameter of the grommet you plan to use and select a drill bit with a slightly smaller diameter. This will allow the grommet to fit snugly in the hole without falling through. Using a drill bit with a larger diameter may result in a loose hole, compromising the stability and functionality of the grommet.
Pro Tip: If you’re unsure about the size of the grommet hole, it’s always better to start with a smaller hole and gradually enlarge it if necessary.
Step 4: Begin drilling
With the desk secured and the right drill bit in place, it’s time to start drilling. Apply gentle pressure and slowly work your way through the desk material. It’s important to maintain a steady hand and keep the drill perpendicular to the surface to ensure a clean and even hole. Take breaks if needed to prevent overheating of the drill or material.

Follow these steps carefully, and you’ll have a perfectly drilled grommet hole in your desk. Remember, safety should always be a priority; wear protective eyewear, gloves, and follow the manufacturer’s instructions for your tools and equipment. Once the hole is complete, you can install the grommet and enjoy a clutter-free and organized workspace.
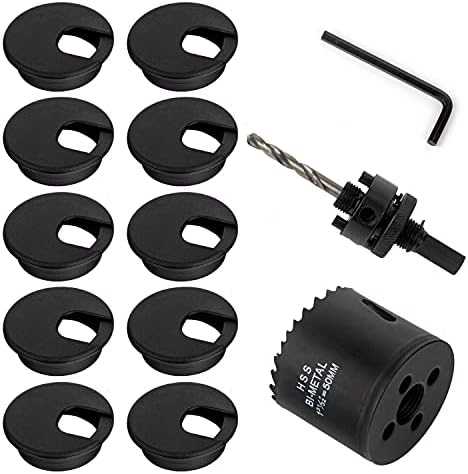
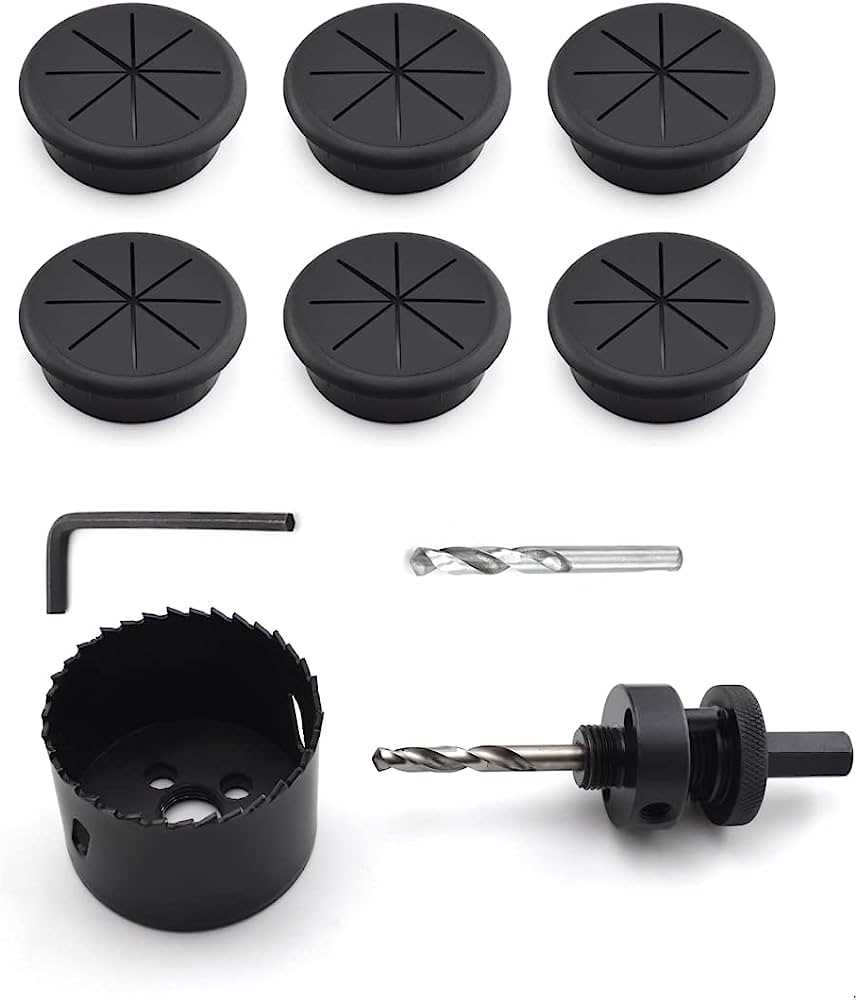
Gather the Necessary Tools
Before you begin drilling a grommet hole in your desk, make sure you have all the necessary tools and equipment. Here is a list of items you will need:
- Electric drill: You will need a power drill with a drill bit suitable for the size of the grommet you plan to install.
- Drill bit: Choose a drill bit that matches the size of the grommet you want to install. The most common sizes for grommet holes are 2 inches and 3 inches, but you can find grommets in various sizes.
- Masking tape: Use masking tape to mark the area where you want to drill the hole. This will help prevent any potential damage to the desk’s surface and provide guidance for drilling.
- Ruler or measuring tape: Measure the diameter of the grommet and mark the center point on the desk surface using a ruler or measuring tape.
- Clamps: If you have clamps, they can be helpful to secure the desk in place while drilling. This will ensure that the surface remains stable and immovable during the drilling process.
- Eye protection: Safety goggles or glasses are essential to protect your eyes from any debris or fragments that may be released during drilling.
- Dust mask: If you are concerned about inhaling dust particles, wearing a dust mask can help protect your respiratory system.
- Flashlight: A flashlight can be useful for illuminating the drilling area, especially if it is in a dimly lit space.
- Vacuum cleaner or brush: To clean up any debris or dust that accumulates during the drilling process, have a vacuum cleaner or brush nearby.
- Marker pen or pencil: Use a marker pen or pencil to make the necessary markings on the desk’s surface. This will ensure accurate drilling.
Having these tools ready and easily accessible will make the process of drilling a grommet hole in your desk quick and efficient. Additionally, make sure you are familiar with the manufacturer’s instructions for the specific grommet you are installing. Always prioritize safety and take necessary precautions when working with power tools.
Measure and Mark the Hole Placement
Before you start drilling the grommet hole in your desk, it’s important to measure and mark the exact placement for the hole. This step will ensure that the grommet is positioned correctly and that it aligns with any existing holes or cutouts in your desk.

Here’s how you can measure and mark the hole placement:
- Start by determining the desired location for the grommet hole. Consider factors such as accessibility, proximity to power outlets, and personal preference.
- Use a measuring tape to determine the diameter of the grommet that you will be using. This measurement will help you determine the size of the hole you need to drill.
- Once you have chosen the location and determined the grommet size, mark the center point of the hole using a pencil or marker. This will be the starting point for drilling.
- Take into account any existing holes or cutouts in your desk. If you want the grommet hole to align with these features, measure the distance between the center point of the existing hole or cutout and the center point of your desired grommet hole.
- Transfer this measurement to your marked center point and adjust the location if necessary to ensure alignment.
By taking the time to measure and mark the hole placement accurately, you can ensure that your grommet hole is positioned correctly and meets your needs. This step will help make the drilling process smoother and prevent any unnecessary mistakes.
Prepare the Drill and Attach the Correct Bit
Before you begin drilling the grommet hole in your desk, it is essential to make sure that your drill is properly prepared and that you have the correct bit attached. Follow the steps below to get your drill ready:
Step 1: Gather the necessary tools
Make sure to gather all the tools you will need for this project:
- A power drill
- A drill bit with a diameter suitable for your grommet size
- A ruler or measuring tape
- A pencil or marker
Step 2: Choose the correct drill bit
Depending on the size of the grommet you are using, select the appropriate drill bit. It is essential to match the diameter of the bit to the size of the grommet to ensure a proper fit. Refer to the instructions provided by the grommet manufacturer to determine the correct drill bit size.

Step 3: Attach the drill bit to your power drill
Most modern power drills have a quick-release chuck mechanism that allows for easy bit changes. If your drill has this feature, simply open the chuck, insert the drill bit into the chuck jaws, and tighten it securely. If your drill has a keyless chuck, you may need to hold the shaft of the drill bit with one hand while turning the chuck with the other hand to secure it.
Once the drill bit is properly attached, give it a gentle tug to ensure it is securely in place.
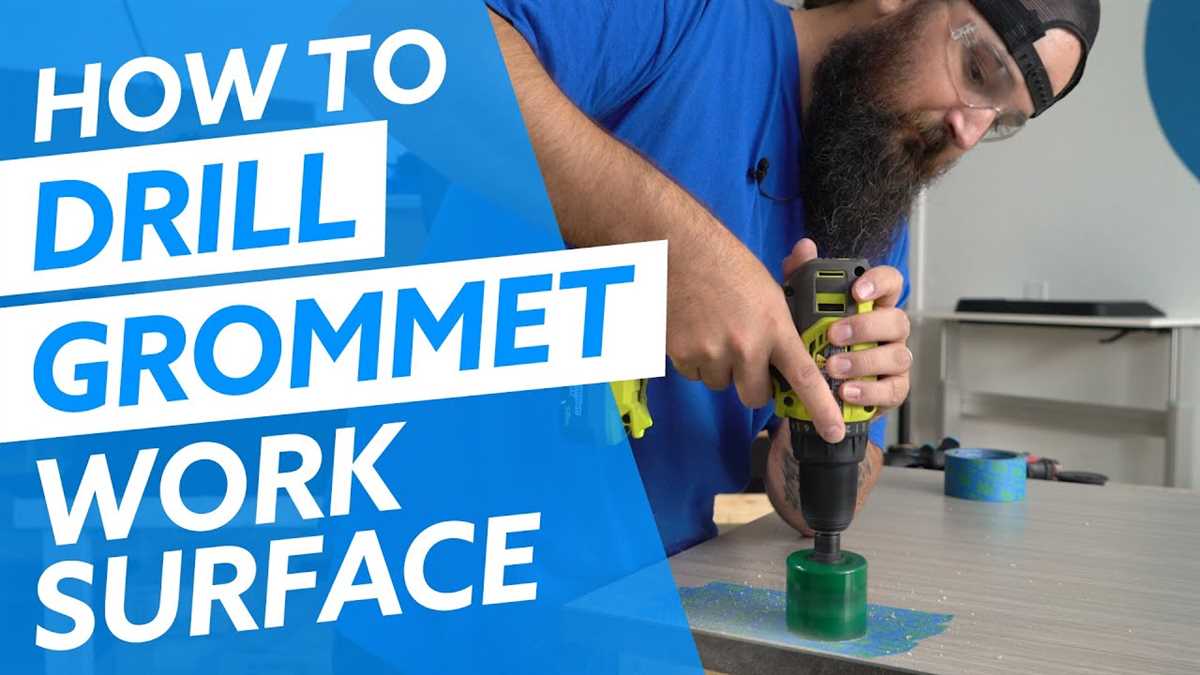
Secure the Desk and Position the Drill
Before starting the drilling process, it’s important to secure the desk and position the drill correctly to ensure safety and accuracy. Follow the steps below:
1. Clear the Workspace
Remove any items from the desk that may obstruct the drilling process or could be damaged by debris.

2. Find a Stable Surface
Place the desk on a stable surface, such as a workbench or sawhorse. Make sure the surface is sturdy and can support the weight of the desk.
3. Attach a Clamp
If necessary, use a clamp to secure the desk to the workbench or sawhorse. This will prevent the desk from moving or shifting during drilling.
4. Mark the Hole Position
Using a measuring tape or ruler, determine the desired location for the grommet hole on the desk surface. Mark the center of the hole with a pencil or marker.
5. Choose the Right Drill Bit

Select a drill bit that matches the size of the grommet you will be using. Check the packaging or instructions of the grommet for the recommended drill bit size.

6. Attach the Drill Bit
Insert the chosen drill bit into the chuck of the drill. Tighten the chuck securely to ensure the drill bit is held firmly in place.
7. Secure the Drill
If necessary, secure the drill to the workbench or sawhorse using a clamp or vice. This will provide stability and control while drilling.
8. Position the Drill
Position the drill directly over the marked hole on the desk surface. Make sure the drill is perpendicular to the desk and aligned with the center mark.
9. Adjust the Depth
If your drill has depth adjustment settings, adjust the depth of the drill bit to match the thickness of the desk. This will prevent drilling too deeply or not deep enough.
10. Prepare for Drilling
Double-check that everything is secure and aligned properly. Hold the drill with both hands and prepare to start drilling the grommet hole.

Once you have secured the desk and positioned the drill correctly, you are ready to start drilling the grommet hole. Proceed to the next step of the guide for instructions on drilling the hole.
Start Drilling the Hole
Now that you have marked the spot for the grommet hole and gathered all the necessary tools and safety gear, it’s time to start drilling the hole.
Step 1: Attach the spade bit or hole saw to your drill. Make sure it is securely tightened.
- For a wooden desk, use a spade bit that is slightly larger in diameter than the grommet.
- For a metal desk, use a hole saw that matches the diameter of the grommet.
Step 2: Put on your safety goggles and gloves to protect yourself from any debris or metal shavings.
Step 3: Position the tip of the drill bit at the center of the marked spot for the grommet hole.
Step 4: Apply steady pressure and start drilling the hole. Keep the drill perpendicular to the surface of the desk to ensure a straight hole.
Step 5: Use a slow and controlled motion while drilling, allowing the drill bit to do the work. Avoid applying too much force or drilling too quickly, as this can lead to splintering or damaging the desk material.
Step 6: If you are using a spade bit, you may need to periodically remove the drill bit from the hole to remove wood shavings.
Step 7: Continue drilling until you have reached the desired depth for the grommet hole.
Step 8: Once you have drilled the hole, remove the drill and brush away any debris or shavings from the surface of the desk.
Step 9: Take a moment to inspect the hole and ensure that it is clean and free from any obstructions.
Note: If you are drilling a hole in a metal desk, you may need to use cutting fluid or lubricant to reduce heat and friction during drilling.
Caution: Always exercise caution when using power tools. Follow the manufacturer’s instructions for your specific drill and wear appropriate safety gear to protect yourself from any potential hazards.
Use a Jigsaw to Widen the Hole (if necessary)
If the grommet hole you drilled in your desk is not wide enough to accommodate your cable or cord, you may need to widen it. One way to do this is by using a jigsaw.
Before you begin, make sure you have the following items:
- Jigsaw
- Blade suitable for cutting through your desk material
- Safety glasses
- Clamps (optional, but helpful for securing the desk)
Step 1: Prepare your workspace
Clear your workspace of any obstructions and ensure you have enough room to work comfortably.
Step 2: Put on safety glasses
Protect your eyes by wearing safety glasses throughout the process.
Step 3: Secure the desk (optional)
If you have clamps, use them to secure the desk to a stable surface. This will help prevent it from moving or vibrating while you are cutting.
Step 4: Insert the jigsaw blade
Insert the appropriate blade into the jigsaw according to the manufacturer’s instructions. Make sure the blade is securely in place.
Step 5: Start cutting
Position the jigsaw blade at the edge of the existing hole. Gradually guide the jigsaw along the edge of the hole, allowing the blade to cut through the desk material. Take your time and follow the line you want to cut.
Step 6: Apply steady pressure
Apply steady pressure to the jigsaw as you guide it through the desk material. Let the saw do the work, and avoid forcing it too quickly or applying excessive pressure.
Step 7: Check the fit
Once you have widened the hole, check the fit of your cable or cord. If necessary, continue cutting and widening the hole until the cable or cord can comfortably pass through.
Step 8: Clean up
Remove any wood shavings or debris left by the jigsaw. Use a brush or vacuum cleaner to clean the area and ensure the surface is smooth.
Step 9: Test the hole
Before you finish, test the hole by passing your cable or cord through it to ensure a proper fit. If everything looks good, you’re finished!
Using a jigsaw can be an effective way to widen a grommet hole in your desk. Just remember to take your time, wear safety glasses, and always follow the manufacturer’s instructions for your specific jigsaw model.
Clean Up the Hole and Remove any Debris
After drilling the grommet hole in your desk, it is important to clean up any debris and make sure the hole is smooth and clean. This will help ensure that the grommet fits securely and functions properly.
Follow these steps to clean up the hole and remove any debris:
- Use a brush or vacuum cleaner to remove any loose dust or wood shavings from the hole. This will make it easier to clean the hole thoroughly.
- Take a damp cloth or sponge and wipe around the edges of the hole to remove any remaining debris or sawdust. Make sure to get into the corners and crevices to ensure a clean surface.
- Inspect the hole to ensure it is smooth and free of any obstructions. If you notice any rough edges or burrs, use a file or sandpaper to carefully smooth them out.
- If there is any stubborn debris or adhesive residue in or around the hole, you can use a mild cleaning solution and a soft cloth to gently scrub it away. Be careful not to damage the desk surface or grommet.
- Once the hole is clean and free of debris, wipe it dry with a clean cloth or allow it to air dry before continuing with the installation of your grommet.
By properly cleaning up the hole and removing any debris, you will ensure a secure and functional grommet installation. This will help prevent any issues such as grommet movement or damage to your desk surface.
Install the Grommet and Secure it in Place
Once you have drilled the grommet hole in your desk, it’s time to install the grommet itself. Follow these steps to ensure a secure installation:
- Clean the hole: Before installing the grommet, make sure to clean out any debris or wood chips from the hole. This will ensure a smooth fit for the grommet.
- Apply adhesive: Apply a small amount of adhesive around the edge of the hole. This will help to secure the grommet in place and prevent it from shifting or coming loose over time.
- Insert the grommet: Carefully insert the grommet into the hole. Press it firmly to ensure a tight fit. The adhesive will help to hold it in place.
- Secure with screws: Once the grommet is in place, use screws to further secure it to the desk. Position the screws around the edge of the grommet and tighten them until they are secure but not overtightened.
- Test the grommet: Give the grommet a gentle tug to make sure it is securely installed. It should not move or rotate in the hole. If it feels loose, you may need to reapply adhesive or tighten the screws further.
By following these steps, you can ensure that your grommet will stay securely in place and provide a neat and organized solution for managing cables on your desk.
FAQ:
What tools do I need to drill a grommet hole in my desk?
To drill a grommet hole in your desk, you will need a power drill, a hole saw drill bit, a ruler or measuring tape, a marker or pencil, masking tape, a hammer, and a grommet kit.
How do I choose the right size of a grommet for my desk?
To choose the right size of a grommet for your desk, measure the diameter of the cables or wires you plan to pass through the hole. Add 1/8 inch to this measurement to determine the size of the grommet you need.
Can I drill a grommet hole in a glass desk?
No, drilling a grommet hole in a glass desk is not recommended. Glass is a brittle material and drilling could cause it to crack or shatter. It is better to look for alternative options such as using adhesive grommet strips or cable management solutions designed for glass surfaces.
What is the purpose of using masking tape when drilling a grommet hole?
Using masking tape when drilling a grommet hole helps to prevent splintering or chipping of the desk surface. By applying the tape over the area where you plan to drill the hole, you create a barrier that reduces the likelihood of damage.
Video:


Meet Harrison Clayton, a distinguished author and home remodeling enthusiast whose expertise in the realm of renovation is second to none. With a passion for transforming houses into inviting homes, Harrison's writing at https://thehuts-eastbourne.co.uk/ brings a breath of fresh inspiration to the world of home improvement. Whether you're looking to revamp a small corner of your abode or embark on a complete home transformation, Harrison's articles provide the essential expertise and creative flair to turn your visions into reality. So, dive into the captivating world of home remodeling with Harrison Clayton and unlock the full potential of your living space with every word he writes.


