Simple steps to remove a rusted screw: A practical guide

Dealing with rusted screws can be a frustrating experience. Whether you’re attempting a DIY project or simply trying to fix something around the house, a stubborn rusty screw can quickly derail your plans. However, with the right tools and techniques, removing a rusted screw can be a simple task.
First and foremost, it’s important to have the right tools on hand. A sturdy screwdriver or drill with a screwdriver bit is essential. Additionally, you may need a pair of pliers or vice grips for added leverage. If the screw is particularly stubborn, a penetrating oil or rust dissolver can also be helpful to loosen the rusted threads.
Once you have your tools ready, the first step is to ensure that you have a secure grip on the screw head. Using a screwdriver or drill, apply firm pressure and turn counterclockwise. If the screw doesn’t budge, try tapping the screwdriver or drill lightly with a hammer to help loosen any rust that may be binding the threads.
Gather necessary tools
Before attempting to remove a rusted screw, it’s important to gather the necessary tools. Having the right tools on hand will make the process easier and more efficient. Here are some of the tools you’ll need:
- Screwdriver or drill: Depending on the type of screw, you may need a screwdriver or a drill to remove it. Make sure you have the appropriate tool for the job.
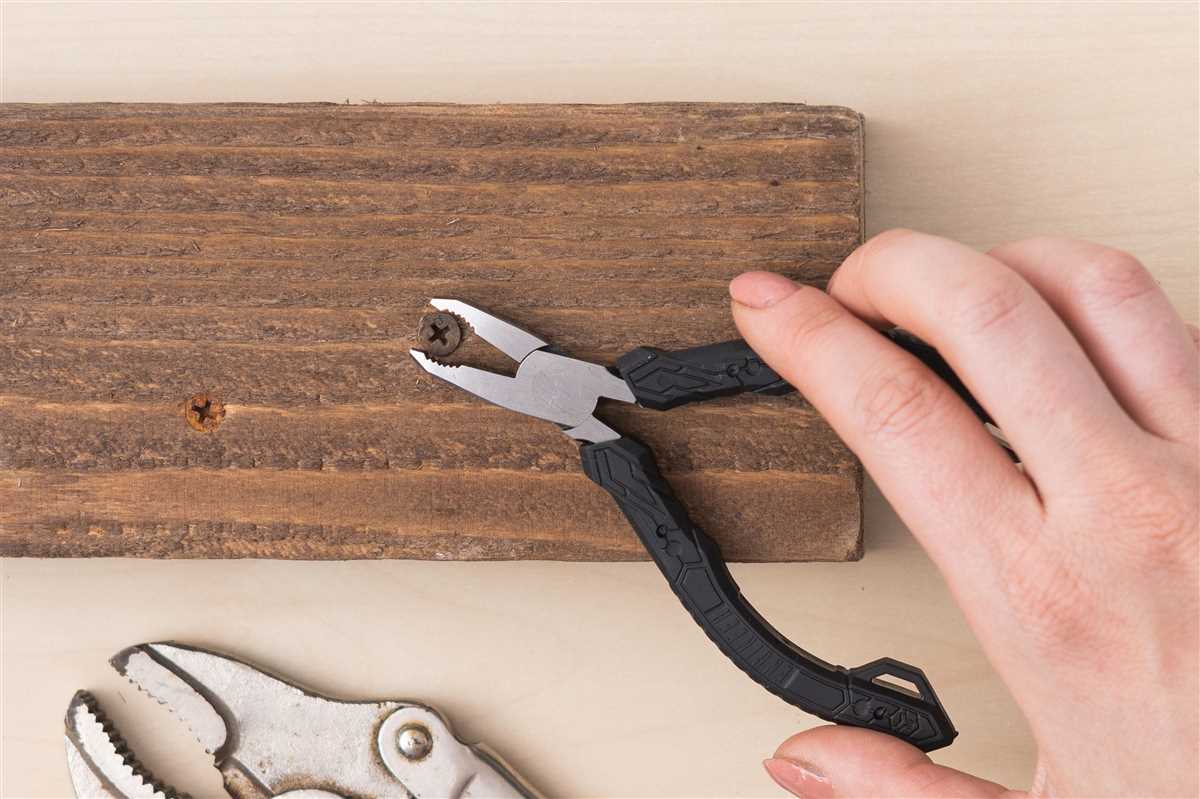
- Pliers: Pliers can come in handy if the screw head is damaged or stripped. They can provide extra grip and leverage to help remove the screw.
- Hammer: A hammer can be useful for tapping the screwdriver or pliers to loosen the rust or break through any corrosion.
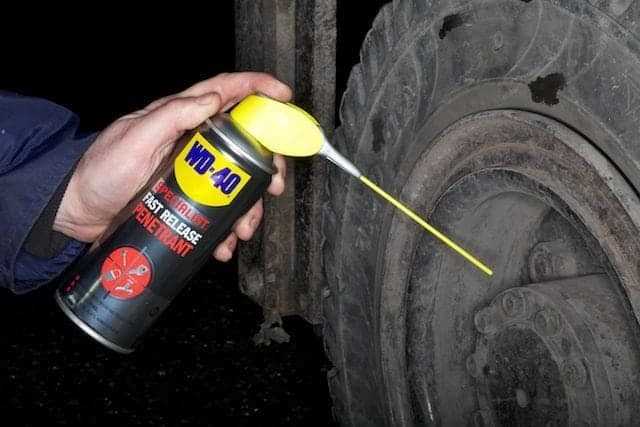
- Penetrating oil: Applying a penetrating oil, such as WD-40, can help loosen the rust and make it easier to remove the screw. Be sure to have a can of penetrating oil on hand.
- Wire brush or sandpaper: To clean off any rust or corrosion and improve the grip on the screw, a wire brush or sandpaper can be used.
- Safety goggles and gloves: It’s always important to protect yourself when working with tools. Safety goggles and gloves can help prevent any injuries while removing the rusted screw.
By gathering these necessary tools before starting the process, you’ll have everything you need to effectively remove a rusted screw.

Apply lubricant to the screw
Applying lubricant to the rusted screw is a crucial step in the removal process. Lubricants help to loosen the rust and make it easier to unscrew the stubborn fastener.
Here are some steps to follow when applying lubricant:
- Clean the surrounding area: Before applying lubricant, clean the area around the rusted screw to remove any dirt or debris. This will ensure better penetration of the lubricant.
- Choose the right lubricant: There are various types of lubricants available, such as penetrating oils, WD-40, or multipurpose lubricants. Choose a lubricant that is specifically designed to loosen rust and penetrate tight spaces.
- Apply the lubricant: Carefully spray or apply the lubricant onto the rusted screw, making sure to fully cover the area. Allow the lubricant to sit for a few minutes or as per the manufacturer’s instructions.
- Wait for the lubricant to work: The lubricant needs time to penetrate the rust and loosen it. Wait for at least 10-15 minutes to allow the lubricant to do its job.
- Use a screwdriver or wrench: After the lubricant has had enough time to work, attempt to unscrew the rusted screw using a suitable screwdriver or wrench. Apply steady pressure while turning counterclockwise.
- Repeat if necessary: If the screw remains stuck, repeat the process by applying more lubricant and waiting for it to work. Sometimes, multiple applications may be required to completely remove the rusted screw.
By following these steps and applying lubricant effectively, you increase your chances of successfully removing a rusted screw without causing any damage or further rusting.
Use a screwdriver or drill

If the rusted screw is large or stubborn, using a screwdriver or drill may be necessary to remove it. Follow these steps to use a screwdriver or drill:
- Choose the appropriate tool: Depending on the type of screw, you can use either a manual screwdriver or a power drill. A power drill can provide more torque and make the removal process easier, especially for stubborn rusted screws.
- Select the proper bit: Ensure that the screwdriver or drill bit matches the size and type of screw head. Using the wrong bit can damage the screw, making removal more difficult.
- Apply downward pressure: Place the screwdriver or drill bit securely into the screw head. Apply firm downward pressure to prevent slipping and ensure a better grip.
- Turn counterclockwise: With the tool properly engaged in the screw head and applying steady pressure, turn the screwdriver or drill counterclockwise to loosen the rusted screw. Take care not to strip or break the screw.
- Use incremental force: If the screw is particularly stubborn, you may need to apply incremental force. Start with gentle pressure and gradually increase it until the screw begins to turn.
- Reverse the drill direction: If using a power drill, ensure it is set to reverse mode to unscrew the rusted screw. Pay attention to the speed settings to avoid damaging the screw or surrounding material.
- Remove the screw: Once the screw is loosened, continue turning until it is fully removed from the material.
Using a screwdriver or drill can make the task of removing a rusted screw easier and quicker. However, it is important to use caution to avoid damaging the screw or surrounding material during the process.
Try heat
If rust has made a screw impossible to turn, applying heat can be a effective method to break the bond between the screw threads and the rust. Here are the steps to follow:
Materials needed:
- Heat source (e.g. propane torch or heat gun)
- Protective gloves
- Fire extinguisher (as a safety precaution)
Instructions:
- Put on the protective gloves to protect your hands from the heat.
- Ensure you have a clear working area and keep flammable materials away.
- If using a propane torch, attach it to a propane tank and adjust the flame to a medium-high setting. If using a heat gun, set it to the highest heat setting.
- Direct the flame or heat gun onto the rusted screw, applying heat evenly over the surface for about 30-60 seconds.
- Using a screwdriver or a pair of pliers, try to turn the screw while it is still hot.
- If the screw doesn’t budge, repeat the process of applying heat and trying to turn the screw until it loosens.
- Once the screw is loose, let it cool down before handling it.
Caution: Be extremely careful when working with heat sources, as they can cause burns or start fires. A fire extinguisher should be nearby as a safety precaution. Always follow the safety instructions provided by the heat source manufacturer.

Use a power tool
Using a power tool is another effective method to remove a rusted screw. Power tools provide more torque and speed, allowing you to exert greater force on the screw and potentially break up the rust holding it in place. Here are some power tools you can use:
- Power drill: Attach a screwdriver bit suitable for your screw and use the drill in reverse to loosen the screw.
- Impact driver: Similar to a power drill, an impact driver delivers a high amount of rotational force to remove screws.
- Angle grinder: Use a cutting disk or a grinding wheel to cut a slot in the head of the screw. This will allow you to use a flathead screwdriver to remove it.
- Rotary tool: With the appropriate attachment, a rotary tool can be used to cut a slot or grind down the head of the screw.
When using power tools, it is important to wear the appropriate safety gear, such as safety glasses and gloves, to protect yourself from flying debris. Also, be cautious when operating power tools and follow the manufacturer’s instructions to prevent accidents.
Apply pressure and twist
Once you have used the right penetrating oil and given it enough time to work its magic, it’s time to apply pressure and twist the rusted screw. Here are the steps to follow:
- Use a suitable screwdriver or a pair of pliers to grasp the screw firmly.
- Apply downward pressure on the screw while trying to turn it counterclockwise.
- If the screw starts to turn, continue applying pressure and twisting until it is completely removed.
- If the screw doesn’t budge, try tapping the screwdriver or pliers gently with a hammer to break loose any remaining rust.
Remember to use caution when applying pressure and twisting, as excessive force can strip the screw or cause it to break.
Once the rusted screw is successfully removed, take a moment to inspect the surrounding area and clean up any remaining rust particles. This will help prevent future rusting and make it easier to use the screw hole again.

Consider alternative methods
If the previous methods do not work for removing the rusted screw, you may need to consider alternative methods:
- Use a penetrating oil: Apply a penetrating oil, such as WD-40, to the rusted screw. Let it sit for a few minutes to allow the oil to penetrate the rust and loosen the screw. Then, try removing the screw with a screwdriver or pliers.
- Apply heat: Heat can help to expand metal and break the bond between the screw and the surrounding material. Use a propane torch or heat gun to apply heat to the area around the rusted screw. Be cautious when using heat, as excessive heat can damage the surrounding material.
- Try vinegar or lemon juice: Soak a cloth or cotton ball in vinegar or lemon juice and place it directly on the rusted screw. Let it sit for a few hours or overnight to allow the acidity to break down the rust. Then, try removing the screw again.
- Use a rotary tool: If all else fails, you can use a rotary tool with a cutting wheel attachment to carefully cut a groove into the head of the screw. This will allow you to use a flathead screwdriver to remove the screw.
Remember to always wear safety goggles and gloves when attempting to remove a rusted screw, as metal shavings and chemicals can be hazardous.
Prevent future rusting
Once you have successfully removed a rusted screw, it is important to take measures to prevent future rusting. Here are some simple steps you can take:
1. Keep your screws dry
Moisture is one of the main culprits behind rust formation. Make sure to keep your screws away from damp conditions and always store them in a dry place.
2. Apply a protective coating
Applying a protective coating can help prevent rust from forming on your screws. You can use a rust-resistant paint or a clear sealant to create a barrier between the screw and moisture.

3. Use stainless steel screws
Stainless steel screws are highly resistant to rust and corrosion. Consider using stainless steel screws for projects that are exposed to moisture or the elements.
4. Store screws properly
Proper storage is essential to prevent rusting. Keep your screws in airtight containers or storage boxes to protect them from moisture and humidity.
5. Use anti-rust products
There are various anti-rust products available on the market that can help prevent rust formation. These products usually come in spray form and can be applied directly to the screws.

6. Regularly inspect and maintain
Regularly inspect your screws for any signs of rust. If you notice any rust formation, remove it immediately and apply a rust-resistant coating. Additionally, perform regular maintenance on your projects to ensure they remain rust-free.
By following these simple steps, you can effectively prevent future rusting and increase the lifespan of your screws.
FAQ:
What are some simple steps to remove a rusted screw?
1. Apply penetrating oil: Spray some penetrating oil on the rusted screw and let it sit for a few minutes. This will help loosen the rust.
What is the best way to loosen a rusted screw?
The best way to loosen a rusted screw is to apply a penetrating oil. The oil will seep into the rust and help break the rust seal. Let the oil sit for a few minutes before trying to remove the screw.
Can I remove a rusted screw without damaging the surrounding material?
Yes, it is possible to remove a rusted screw without damaging the surrounding material. By using the right tools and techniques, such as applying penetrating oil and using the correct screwdriver, you can minimize the risk of causing any damage. It’s important to take your time and be gentle during the removal process.

What should I do if the screw is still stuck after using penetrating oil?
If the screw is still stuck after using penetrating oil, you can try applying heat to the rusted area. Use a hairdryer or a heat gun to heat the screw, which will cause it to expand and possibly break the rust seal. Be careful not to overheat the surrounding material, as it may be damaged.
What are some common mistakes to avoid when removing a rusted screw?
Avoid using excessive force when trying to remove a rusted screw, as this can strip the screw head or damage the surrounding material. Make sure you have the correct size and type of screwdriver for the screw. Using the wrong tool can cause slipping and further damage. Additionally, be careful not to overheat the surrounding material when using heat to loosen the screw. Take your time and be patient during the removal process to minimize the risk of mistakes.
Video:


Meet Harrison Clayton, a distinguished author and home remodeling enthusiast whose expertise in the realm of renovation is second to none. With a passion for transforming houses into inviting homes, Harrison's writing at https://thehuts-eastbourne.co.uk/ brings a breath of fresh inspiration to the world of home improvement. Whether you're looking to revamp a small corner of your abode or embark on a complete home transformation, Harrison's articles provide the essential expertise and creative flair to turn your visions into reality. So, dive into the captivating world of home remodeling with Harrison Clayton and unlock the full potential of your living space with every word he writes.


